Images can impact your website’s performance if they are not properly optimised. One of the ways to solve this issue is ensuring images are optimised by reducing their file size.
Properly optimized images load faster and also provide a better user experience. Building our own will also be a great exercise in learning JavaScript. So let’s build one!
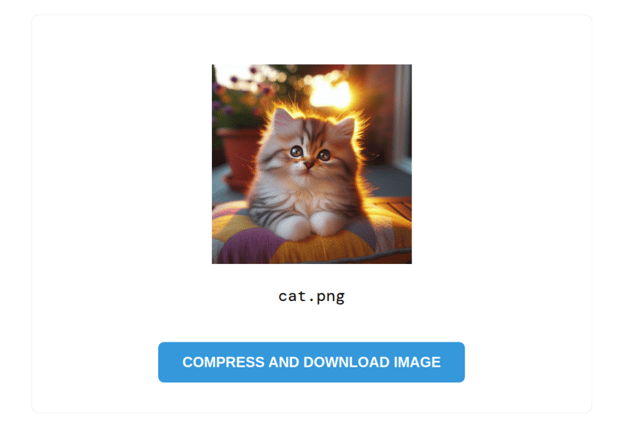
Final result
Here’s what we’re building:
Building the interface
We will have a simple HTML interface like this:
1 |
<div class="container"> |
2 |
<h1>Image Compressor</h1> |
3 |
<p>Resize images to a smaller size without losing quality.</p> |
4 |
|
5 |
<label for="file-input">Choose an image</label> |
6 |
<input
|
7 |
type="file" |
8 |
id="file-input" |
9 |
style="display: none" |
10 |
accept="image/*" |
11 |
/>
|
12 |
</div>
|
13 |
<div class="preview"> |
14 |
<img class="preview-image" src="" alt="" /> |
15 |
<p id="fileName"></p> |
16 |
<button class="compress-button">Compress and Download image</button> |
17 |
</div>
|
In our HTML, we have an <input/> field for uploading the image, a preview area to display the uploaded image and a Compress and Download button to compress and download the final image
Styling the image compressor tool
Time for some CSS. Let’s start by styling the body and the preview container:
1 |
@import url("https://fonts.googleapis.com/css2?family=DM+Mono:ital,wght@0,300;0,400;0,500;1,300;1,400;1,500&display=swap"); |
2 |
|
3 |
body { |
4 |
display: flex; |
5 |
justify-content: center; |
6 |
align-items: center; |
7 |
flex-direction: column; |
8 |
height: 100vh; |
9 |
margin: 0; |
10 |
background-color: #ffffff; |
11 |
text-align: center; |
12 |
font-family: "DM Mono", monospace; |
13 |
}
|
14 |
.container, .preview { |
15 |
width: 80%; |
16 |
max-width: 500px; |
17 |
margin: 0 auto; |
18 |
text-align: center; |
19 |
background-color: #ffffff; |
20 |
padding: 30px; |
21 |
border-radius: 8px; |
22 |
border: #f3ecec solid 1px; |
23 |
}
|
By default, we have hidden the preview container using display: none;. This will ensure it only becomes visible when a user uploads an image. Add the following styles to the preview elements.
1 |
.preview { |
2 |
display: none; |
3 |
}
|
4 |
|
5 |
.preview-image { |
6 |
max-width: 100%; |
7 |
max-height: 200px; |
8 |
margin-top: 20px; |
9 |
}
|
Finally let’s style the label and compress-button for better user interactivity.
1 |
label{ |
2 |
display: inline-block; |
3 |
}
|
4 |
|
5 |
label, |
6 |
.compress-button { |
7 |
padding: 12px 24px; |
8 |
background-color: #3498db; |
9 |
color: white; |
10 |
cursor: pointer; |
11 |
border-radius: 6px; |
12 |
transition: all 0.3s ease; |
13 |
font-weight: bold; |
14 |
text-transform: uppercase; |
15 |
font-size: 0.9rem; |
16 |
border: none; |
17 |
margin-top: 20px; |
18 |
}
|
Implementing image compression and download features
With the interface ready, it’s time to add the image compression and download features with JavaScript. First, let’s get all the elements that need manipulation.
1 |
const fileInput = document.getElementById("file-input"); |
2 |
const previewImage = document.querySelector(".preview-image"); |
3 |
const compressBtn = document.querySelector(".compress-button"); |
4 |
const container = document.querySelector(".container"); |
5 |
const fileName = document.getElementById("fileName"); |
6 |
const preview = document.querySelector(".preview"); |
Image upload
To handle image uploads, we’ll use the JavaScript FileReader API. This API enables us to read the contents of files selected by the user, making it perfect for our needs. The first step is to add an event listener to the file input element and listen for the change event.
1 |
fileInput.addEventListener("change", (e) => {
|
2 |
const file = e.target.files[0]; |
3 |
console.log(file); |
4 |
if (file) {
|
5 |
const reader = new FileReader(); |
6 |
reader.onload = (e) => {
|
7 |
// preview image code |
8 |
}; |
9 |
reader.readAsDataURL(file); |
10 |
} else {
|
11 |
alert("no file selected");
|
12 |
} |
13 |
}); |
When a file is selected, the change event will be triggered and the file retrieved using e.target.files[0]. The FileReader API provides several methods, but here we will use the onload event which is automatically fired when the file is successfully read.
The FileReader.readAsDataURL method reads the contents of the image file and outputs a URL representing the image data. This data URL is stored in the result attribute of the event object. From the result attribute, we can assign the image data URL to the src property of an image element for preview.
Update the code as follows.
1 |
fileInput.addEventListener("change", (e) => { |
2 |
const file = e.target.files[0]; |
3 |
console.log(file); |
4 |
if (file) { |
5 |
const reader = new FileReader(); |
6 |
reader.onload = (e) => { |
7 |
previewImage.src = e.target.result; |
8 |
previewImage.style.display = "inline-block"; |
9 |
fileName.textContent = file.name; |
10 |
preview.style.display = "block"; |
11 |
container.style.display = "none"; |
12 |
};
|
13 |
reader.readAsDataURL(file); |
14 |
} else { |
15 |
alert("no file selected"); |
16 |
}
|
17 |
});
|
Now when you upload an image, you can see a preview of the image before compression.


Compress and download Image
The last feature is the ability to compress and download the compressed image. To do that we will do the following:
- Create a new
Imageobject and load the image to be compressed - Use
<canvas>to resize the image - Convert the canvas contents into a blob .
- Download the new compressed image
Add a click event to the compress button.
1 |
compressBtn.addEventListener("click", () => { |
2 |
|
3 |
});
|
Next, create an Image object and set its src attribute to the source of the preview image; this ensures the uploaded image is the one being resized and compressed. Then define its onload event to ensure the image is fully loaded before performing any operations. Then, create a canvas element and set the dimensions to 50% of the images’s height and width .
Using the drawImage() method, draw the resized image on the canvas.
1 |
compressBtn.addEventListener("click", () => { |
2 |
const img = new Image(); |
3 |
img.src = previewImage.src; |
4 |
|
5 |
img.onload = () => { |
6 |
const canvas = document.createElement("canvas"); |
7 |
const ctx = canvas.getContext("2d"); |
8 |
const width = img.width * 0.5; |
9 |
const height = img.height * 0.5; |
10 |
canvas.width = width; |
11 |
canvas.height = height; |
12 |
ctx.drawImage(img, 0, 0, width, height); |
13 |
};
|
14 |
|
15 |
});
|
Our image has now been resized. The next step is to apply compression.
Compress the resized image
The last step is to export the canvas data as an image file in a JPEG format and perform compression. To do that, we will use the canvas.toBlob() method which generates a Blob representation of the canvas content. The .toBlob() accepts a callback function and two optional arguments: the MIME type (i.e. image/jpeg or image/png) and an optional quality parameter (0.7 here) to control the compression level.
In our case, the code will look like this.
1 |
compressBtn.addEventListener("click", () => { |
2 |
const img = new Image(); |
3 |
|
4 |
img.onload = () => { |
5 |
const canvas = document.createElement("canvas"); |
6 |
const ctx = canvas.getContext("2d"); |
7 |
const width = img.width * 0.5; |
8 |
const height = img.height * 0.5; |
9 |
canvas.width = width; |
10 |
canvas.height = height; |
11 |
ctx.drawImage(img, 0, 0, width, height); |
12 |
|
13 |
|
14 |
canvas.toBlob( |
15 |
(blob) => { |
16 |
|
17 |
const url = URL.createObjectURL(blob); |
18 |
const a = document.createElement("a"); |
19 |
a.href = url; |
20 |
a.download = "compressed_" + fileName.textContent; |
21 |
document.body.appendChild(a); |
22 |
a.click(); |
23 |
document.body.removeChild(a); |
24 |
URL.revokeObjectURL(url); |
25 |
},
|
26 |
"image/jpeg", |
27 |
0.7
|
28 |
);
|
29 |
};
|
30 |
img.src = previewImage.src; |
31 |
});
|
To download the image, we follow these steps:
-
const url = URL.createObjectURL(blob);creates a temporary URL for the compressed image. -
const a = document.createElement("a");creates an<a>element. The<a>element will trigger a download when clicked. -
a.hrefsets the href attribute to the temporary URL to ensure the link is associated with the compressed image. -
a.download = "compressed_" + fileName.textContent;assigns a name to the compressed image -
document.body.appendChild(a);adds the image link to the DOM -
a.click() ;this triggers the download process -
document.body.removeChild(a);andURL.revokeObjectURL(url);responsible for code clean up after the download process.
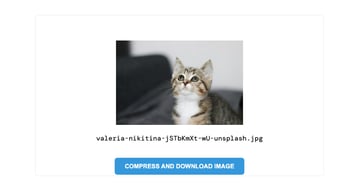
Here is the final demo as a reminder:
Conclusion
To demonstrate, I’ve grabbed an image from Unsplash and compressed it with our tool. With current settings, I upload the original (3.3Mb) and download a compressed version (314Kb). Granted, the resultant image is half the pixel dimensions (6,000 x 3,000px vs. 3,000 x 1,500px), but the two images are indistinguishable to the human eye.


Altering the quality parameter to just 0.2 gives us another indistinguishable image, but this time 76Kb. Clearly, there will be quality differences, so it’s a question of you finding the right balance. You could even make a control on the UI to specify the compression amount.
So there we go—by utilizing JavaScript and the canvas element, we have seen how we can easily compress images without compromising the quality. Hopefully, this will offer a reliable solution when you need to optimize images for the web.