
But First, Some History
Edge Reflow is a relatively new program from Adobe, having been announced in 2012 and released in February 2013, with the elevator pitch of enabling you to “Design the responsive web” and “Create beautiful responsive designs”. The tricky part is that right now you can’t actually use it directly to create responsive websites, only responsive designs.
This means you can open up Reflow and use its visual design interface to create fully functioning design prototypes, with color schemes, layouts, form elements, links and text content in place. You can preview your design both within the tool and in Chrome, and you can set breakpoints, make your design responsive then preview it for mobile through Adobe’s Edge Inspect tool.
However, at the moment that’s as far as you can get. You’re as yet unable to go ahead and export your design as an actual website. There is no direct control over the HTML and CSS that makes up the design, and Adobe make it very clear that the code output for previews should be considered just that; preview code and not of production quality. So, after going through the process of designing your site in Reflow, you have to put it together a second time in order to create code that a live site can use.
For some designers this is just fine; creating a functional prototype which clients can green light is an integral part of their process. For many designers, however, creating a site twice over makes Reflow a tool that is as yet too inefficient to adopt for the purpose of responsive website creation.
There is some talk of full export tools being added at an indefinite point in the future, but then other talk says Reflow will only ever be a design tool and will never incorporate a workflow for complete site creation. So while things may change in the future, for now we can only assume that for those who wish to have a functioning site at the end of their design process, Reflow may not be such a good fit.
That said, while Reflow is perhaps not a complete website creation tool, it does have some features that can make it a very useful website element design tool.
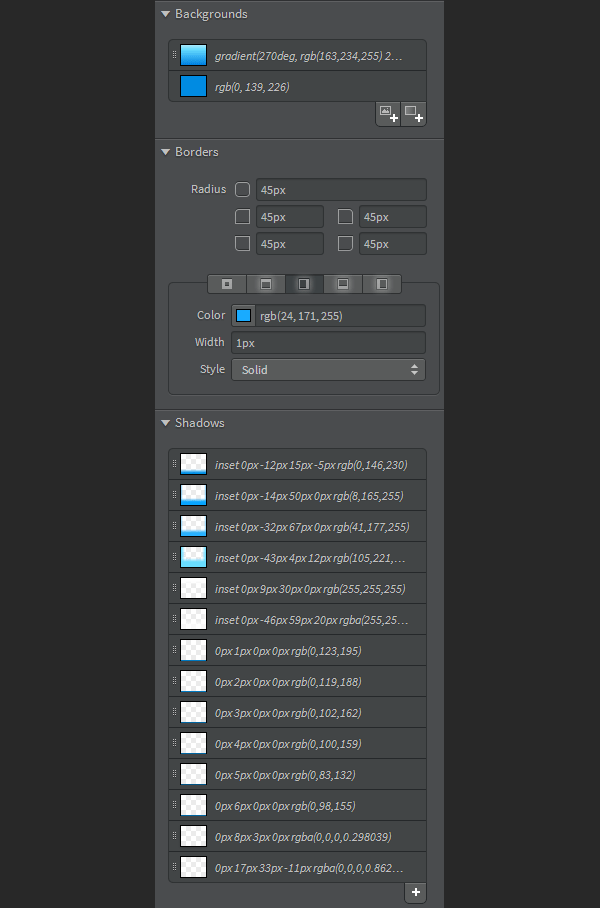
To me, the biggest perks it currently offers are its Photoshop-like CSS controls which allow you to see the effects of your choices in real time. You can control colors, backgrounds, borders, shadows, glows, curved corners, opacity settings, filters and more in a very familiar environment.
And while Reflow doesn’t give you code export tools for a full site, it does give you the ability to output copy and paste CSS for one element at a time. To do so you just click the element you’re working on to select it, then down the bottom of the screen click the <> icon at the end of the breadcrumb trail. This will give you a popup window with the element’s CSS for you to copy and paste:
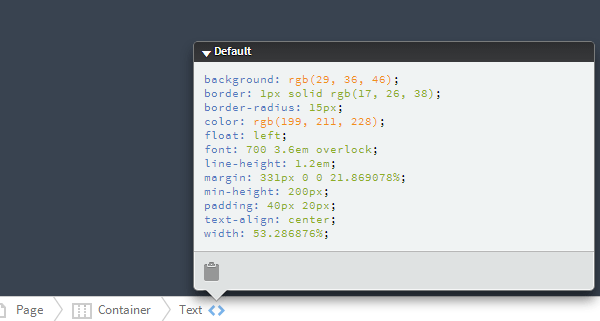
With this feature you can design individual elements to will be used in your site, then copy out their CSS for use in your production-ready site project. You might have to remove some unwanted layout code for things like margins or heights, but most of the styling code is good to be pasted straight into a CSS file. If you’re familiar with Photoshop, you could liken this to creating layer styles and saving them out for later use.
So whether or not Reflow ever becomes a fully functional website creation tool, there are some really useful things you can do with it right now, and we’re going to cover five of them.
1. Previewing and Selecting Adobe Edge Fonts
Adobe Edge Fonts is an impressive collection of free to use web fonts that can be loaded into any website. To do so, add a small JavaScript snippet to the <head> section of the page like so:
<script src="//use.edgefonts.net/abel.js"></script>
The font is then applied via CSS in the regular fashion, e.g.
p { font-family: abel, sans-serif; font-weight: 300; font-style: normal; }
Edge fonts do seem to have more of a problem with FOUT (flash of unstyled text) than Google fonts loaded via a <link> tag in the <head> section, however methods are provided to minimize the effect as described in Adobe’s documentation.
As every designer who’s ever worked with fonts knows, sometimes the way a font looks in a selection panel ends up being quite different to how it looks when your required text content, font size, colors and any other effects are brought into the picture. Through using Reflow to preview Edge Fonts with all these things in place you can avoid the arduous process of having to change your embed script tag and various CSS styles every time you want to try a new font. Here’s how:
Step 1
Add a “Text Box” to your canvas by first selecting the text box tool from the top left of the Reflow interface:

Then draw out a text box onto the canvas:
Step 2
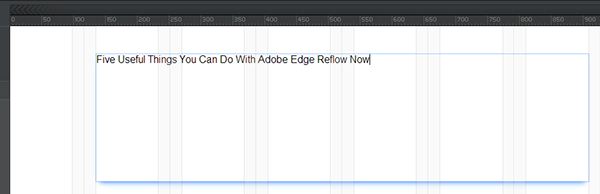
Enter the text you wish to preview fonts with by replacing the default word “Text” that is shown after you finish drawing your text box.
Step 3
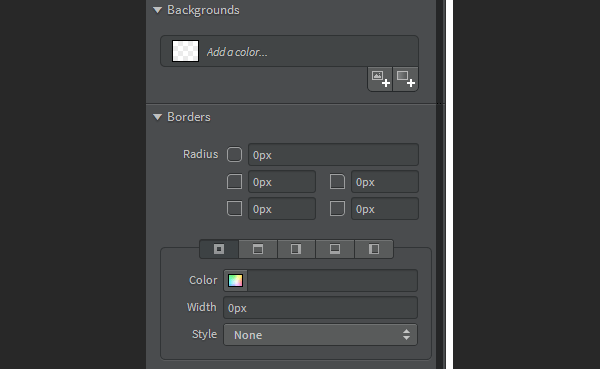
Set the styling properties you want to use by clicking the Styling tab at the left hand side of the interface:
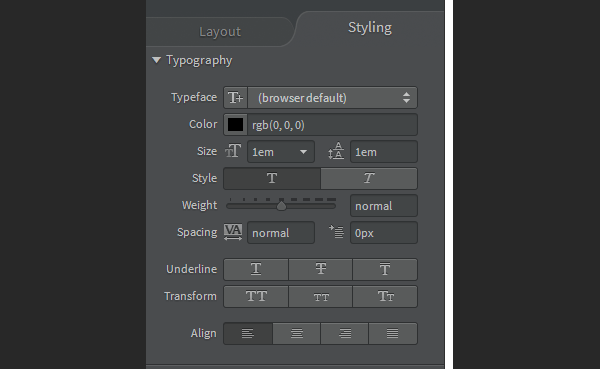
Here you can set your text color font size, font style, font weight and all the other properties you see in the Typography panel depicted above.
Under this panel you will also see the Background and Borders panel you can use to fully simulate the color scheme the text will be used in:
Tips:
- You can set the overall background color of your canvas by clicking anywhere outside your text box then using the same “Backgrounds” panel you see above under the “Styling” tab.
- If the grid in the background bothers you, turn it off under View > Grid > Show Grid.
- If you don’t want to see edges around your text box when it’s not selected uncheck View > Show Object Edges.
Below is our text with color, size, weight and background settings in place:

Note: I also centered the text and added some padding under the Layout tab.
Step 4
Now you’re ready to start previewing fonts to see which ones will work with your desired size, weight and color scheme. You might want to tweak the size and weight a little as you go along, to make up for the variations from one font to the next.
To choose new fonts, ensure your text box is selected then click the T+ icon to the right of the Typeface label:

This will make a window appear with a range of Edge Fonts to choose from:
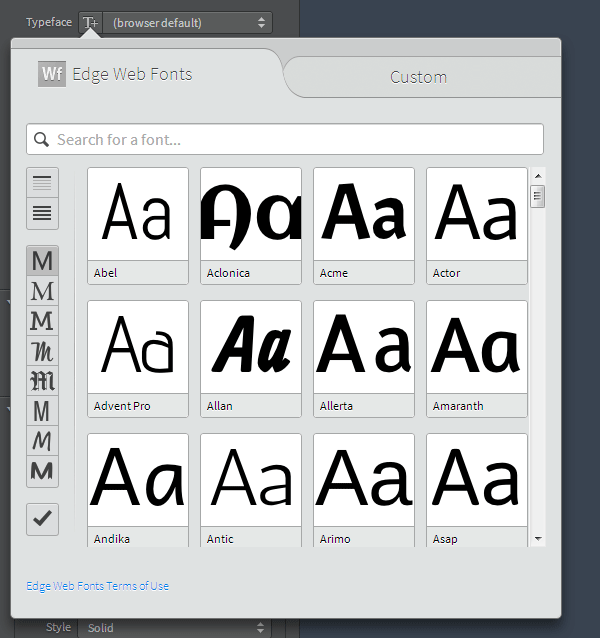
When you see one you like click on it and, after a short loading wait time, it will be applied to your text box. You can continue testing out the various fonts until you find one you like, e.g.

Once you’ve selected the font you want to use you can head over to the Edge Fonts site to grab the JavaScript embed code.
Just search for the name of the font you selected, click it, and the embed code will be displayed for you below.
2. Creating Text Effects
With Reflow’s CSS3 settings you can create some pretty awesome text effects, again in a similar way to creating text layer styles in Photoshop. All these styles could be created via hand coding, but the ability to see your tweaks in real time can be invaluable. Here are a few example pure CSS text effects and the settings used to create them.
3D Text
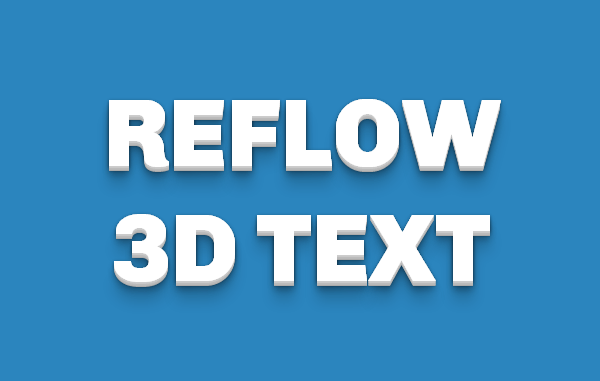
Settings used (credit: markdotto.com):
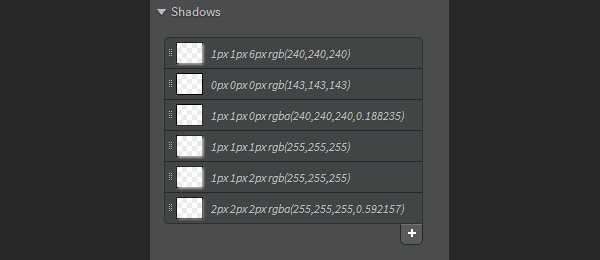
LetterPress
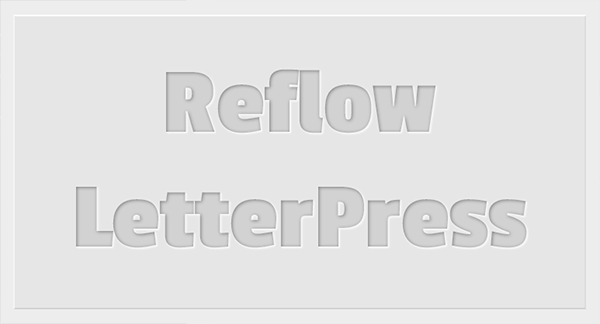
Settings used:
Glow Text

Settings used:
3. Designing CSS3 Buttons
One of the coolest things you can do with CSS3 is create spiffy buttons that previously would have required big clunky images. As with the text effects in the last section, Reflow’s real time CSS settings make this process quicker and more intuitive than hand coding. Here are a couple of CSS-only button examples made in Reflow.
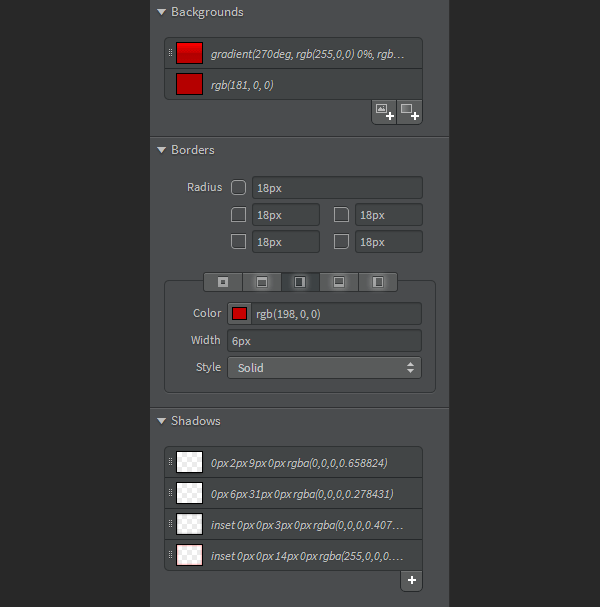
Metallic Red Button

Settings used:
Glossy Raised Button

Settings used:
4. Creating or Converting UI Kits
Along with the ability to create text effects and button styles Reflow also gives you tools to place images, text inputs, select boxes, check boxes and radio buttons onto the canvas for styling. Additionally, you can create generic “boxes” which are essentially equivalent to “divs”, so between all of these features you have the building blocks required to create classes for UI kit stylesheets.
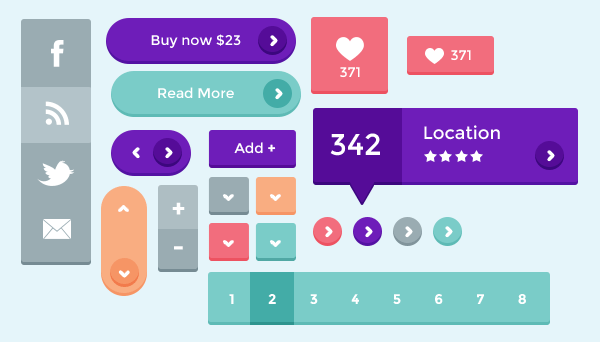
You can start from scratch with your own design, or you can set out to emulate existing PSD UI kits. If you do want to go from PSD to UI then Reflow has a feature that is almost awesome with out-of-the-box downloaded PSD kits, and that is Photoshop CC Connect.
Step 1
After downloading a PSD UI Kit, like this cool little free flat kit from Blaz Robar, go ahead and open it up in Photoshop. In the case of this kit you’ll see the following:
Step 2
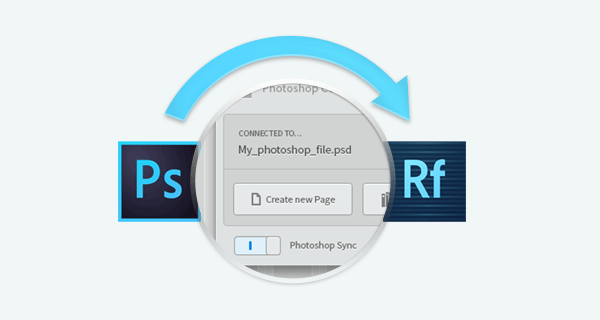
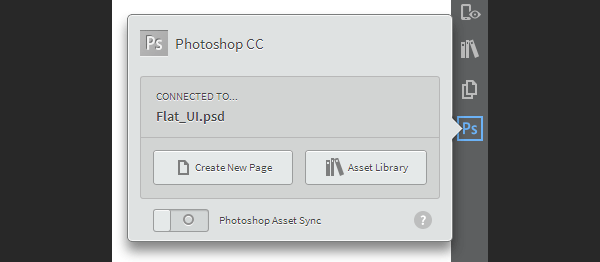
Then in Reflow, with a new document open, click the Photoshop CC Connect icon at the top right of the interface:
Step 3
In the popup window that appears, click the Create New Page button:
Reflow will attempt to create a duplicate of whatever is currently displaying in Photoshop. In the case of this UI Kit you’ll get the following:
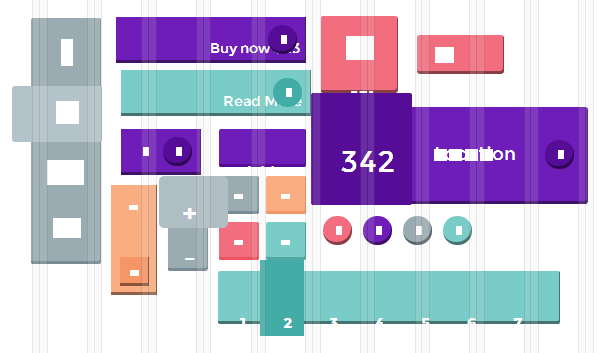
The result is perhaps not quite what we might have hoped for, as I’m sure there are preferential workflows for creating PSDs that import flawlessly into Reflow, however it is actually more useful than it might seem at first. The reason is that despite things not yet looking as we need them to, the essential items included in the kit are in place along with their colors. This saves you the trouble of creating elements and copying over color codes. You can move the generated elements around and tweak them until they look like the original.
Tips:
- Start by mass-selecting everything on the canvas by dragging your mouse to draw a box around all the elements. Then change the unit selector on the Layout tab‘s width setting to
pxinstead of%. This will prevent the elements from shrinking and stretching unpredictably if you change the width of your canvas or resize the Reflow window. - After changing the width setting unit also change the Layout tab‘s Position setting from
relativetoabsolute. This way you can drag items and position them where you want to prevent overlap and make them easier to see. - To move multiple items at once, select them all by holding down Shift as you click each one, then press CTRL + G to group them. You’ll then be able to click the group to select it and drag it along with its children as one.
- After creating a group, select it and then also change the Position setting of the whole group from
relativetoabsoluteso you can still place it where you choose on the canvas. - To ungroup items again press CTRL + SHIFT + G.
- If you need to align items, distribute their positions or match their height and width, select multiple elements then click the alignment panel icon at the bottom right hand of the Reflow interface to access the various alignment tools.
Extra
As you go along you may find there are elements which require images that can’t be done with Reflow CSS settings alone and as such need images, like the little arrows of this UI kit or the social icon images. This is where another cool feature of Photoshop CC Connect comes in.
To instantly import an image from the original PSD all you have to do is find its layer then rename it to your desired image file name. For example, in this PSD I want to access the little white downward pointing arrow you see on the orange elements. First, I find its layer in the PSD, which in this case is labelled “>” under the “Image Nav Copy” folder. I rename that layer to the file name I wish the exported arrow image to have, i.e. “downarrow.png”.
I then click the same Photoshop CC Connect icon we hit to import the PSD initially, only this time I click the Asset Library button. Reflow will show you a brief “importing” message as it pulls in any layer from your PSD that has an image file extension on the end of its name. Now I can click the Asset Library icon and I’ll see my “downarrow.png” image which I can drag and drop anywhere onto the design.
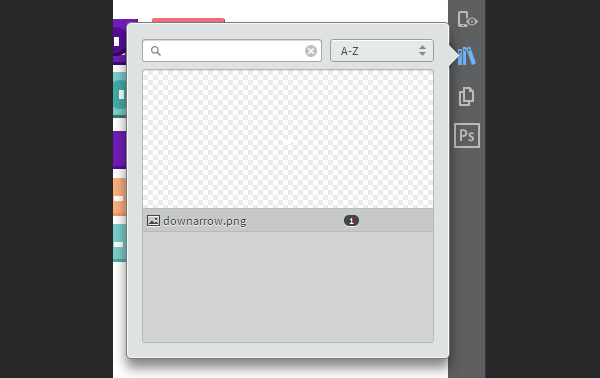
Note: there is a preview of the image in the window above the file name, however in this case it’s a little hard to see, being small and white.
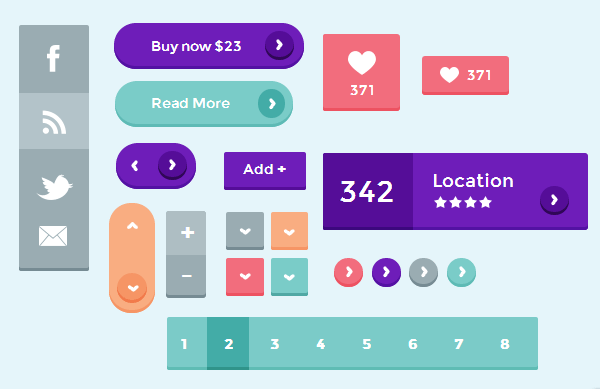
After some tweaking of Reflow settings it’s possible to make the initial imported jumble of shapes look quite comparable to the original image based UI kit:
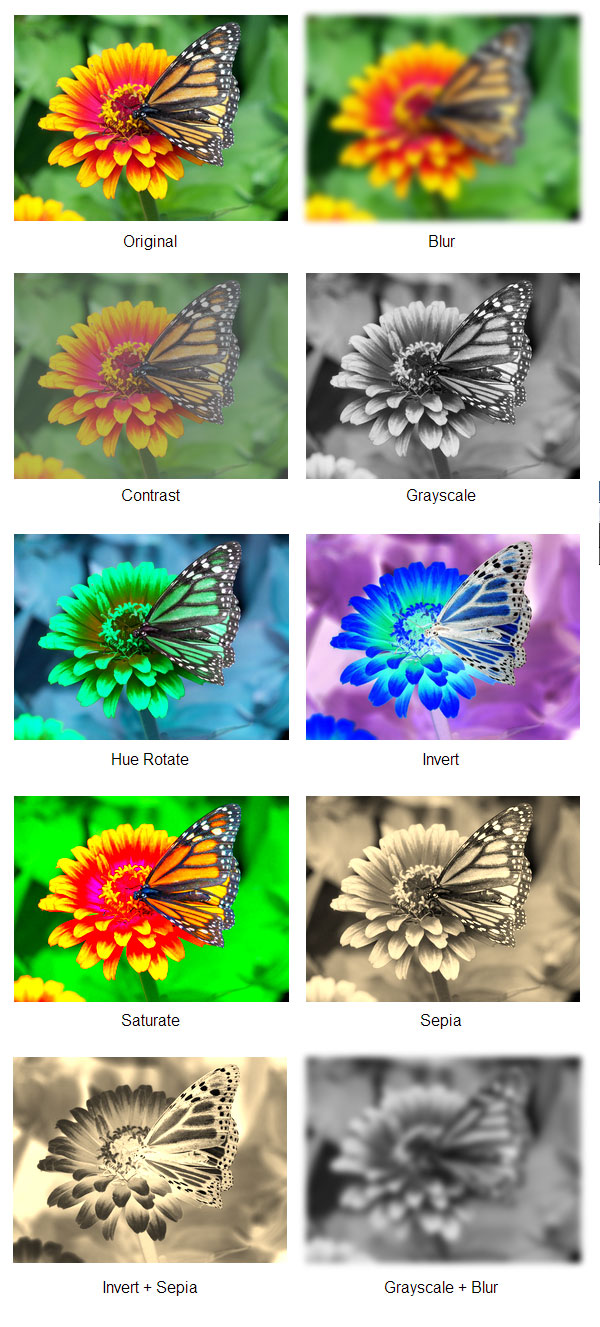
5. Applying CSS Filters
CSS Filters are fairly new on the scene and allow you to apply some very cool visual effects to any HTML or SVG element; from divs, to images, to buttons, however the most common application of these filters does tend to be on images. Bear in mind that support for CSS filters is still limited to Chrome, Opera and Safari, so the way you choose to use them should be just for extra eye candy that won’t leave IE and Firefox users with any reduced functionality.
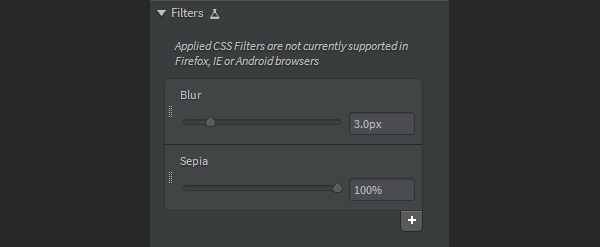
With Adobe being contributors to the CSS Filters spec it’s perhaps no surprise to see tools for using them included in Reflow, and they provide a very handy way to test out how your filter settings will look in real-time as you apply and tweak them. Unfortunately, Reflow only supports seven of the ten available filters, but those are still plenty to work with:
- Blur
- Contrast
- Greyscale
- Hue Rotate
- Invert
- Saturate
- Sepia
The effects are not visible by default in your Styles tab, so to activate them go to View > Shiny Web Feature then click the button to the left of the Filters option. Once activated you can click any element on your page and then click the + icon under the Filters settings panel to add new CSS filters:
As with other CSS effects you could actually hand code your CSS filters, but being able to see the results of your settings in real time helps to speed the process along. You can apply single filters to images, or combine filters to create a variety of different effects. Here are some examples of filters applied via Reflow:
Summary
If you haven’t yet taken a look at Reflow, or if you have, but decided not to use it as a website design tool, perhaps you might now be enticed to grab it and try it out as a website element design tool instead. It may not be exactly what you’re looking for in a complete site creation tool, but it might just do a great job at helping make segments of your overall design process faster and more intuitive.
You can grab the source files included with this article to get all the Reflow documents showcased above and get some ideas of what you can do.
Reflow is available as a free inclusion with any Creative Cloud membership, whether that membership is for a single app or multiple, and you can also use it without charge on a 30 day trial. Read more at the Reflow portal.