Rendering is where the magic happens in 3D art! It’s the step that turns your models and scenes into jaw-dropping, share-worthy visuals. If you’ve dabbled in Blender, you’ve probably come across two big names: Cycles and Eevee. But what’s the difference? And how do you know which one to pick?


In this article we’ll break it all down for you break it all down for you in a simple and way that’s easy for beginners. By the end of this guide, you’ll be ready to choose the perfect renderer for your project with confidence.
What is rendering?
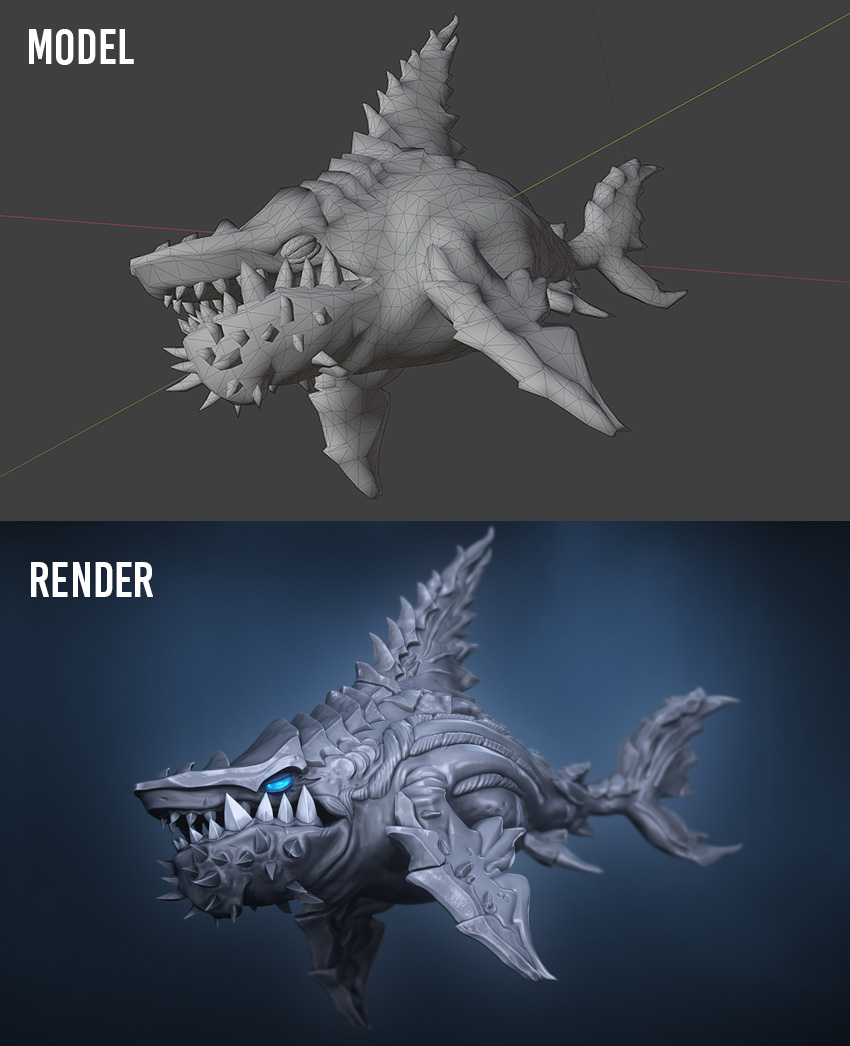
Rendering might sound like a fancy technical term, but it’s really just the process of turning your 3D models and scenes into an actual image or animation. When you build a 3D scene in Blender, you’re working with things like shapes, colors, lights, and textures. Rendering calculates how these elements interact to create the final image.
Why does rendering matter?


Rendering is what makes your project feel real and complete and is often the last stage for a project. If you’re sharing your work online, presenting to a client, or creating a portfolio, a good render is what makes your project shine.
How does rendering work?

The process of rendering uses algorithms to calculate how light interacts with the 3D objects and materials in your scene. The more detailed and realistic the calculations, the more time and computational power rendering requires.
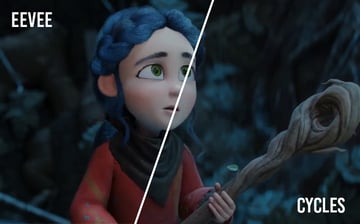
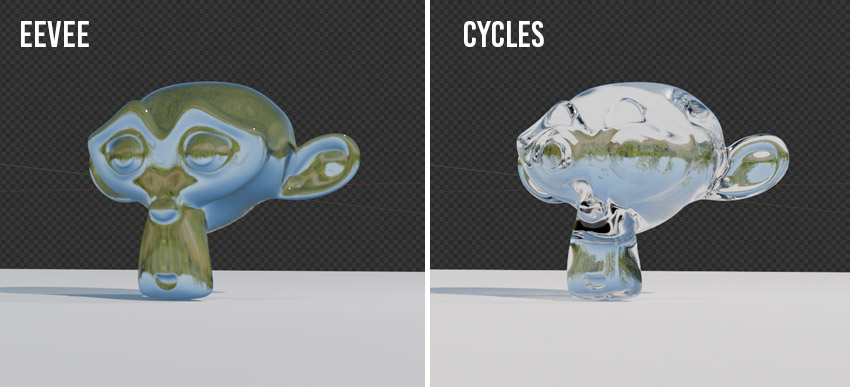
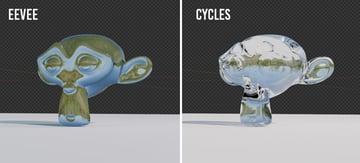
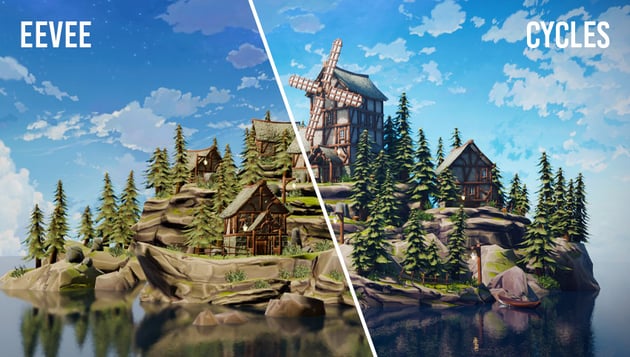
For example, Cycles renders glass with realistic light refraction, reflection, and caustics, making it ideal for photorealistic results. Eevee, on the other hand, uses approximations like Screen Space Reflections, which provide basic transparency and reflections but lack the realism of Cycles.
Here are the main points to consider when rendering your project:
- Lighting: How light sources illuminate your scene and create shadows.
- Materials: How surfaces reflect, absorb, or scatter light (e.g., shiny metal vs. rough wood).
- Camera perspective: How the scene looks from the point of view of your virtual camera.
Types of rendering: real-time vs. offline

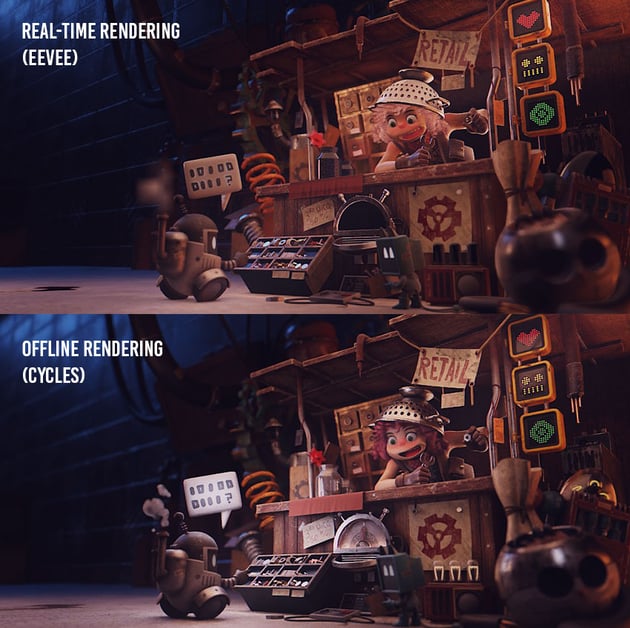

When it comes to rendering, there are two main approaches, each suited to different kinds of projects: real-time rendering and offline rendering. The choice between real-time and offline rendering depends on your project:
- Real-time rendering (Eevee): This happens quickly, allowing you to see results as you work. Eevee is an example of a real-time renderer, perfect for previews or fast results.
- Offline rendering (Cycles): This takes more time but produces higher-quality, realistic images. Cycles is an offline renderer, ideal for projects where realism is key.
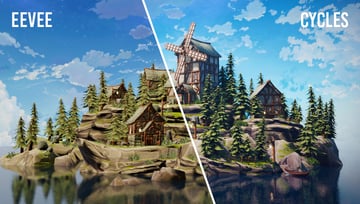
Meet the renderers: Cycles and Eevee
Now that we know what rendering is and why it matters, it’s time to meet the two main renderers in Blender: Cycles and Eevee. These two are the heavy hitters when it comes to turning your 3D creations into beautiful images and animations.
Cycles


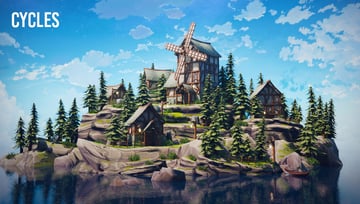
Cycles is Blender’s physically-based path tracer. This means that it simulates light the way it behaves in the real world. If you’re aiming for photorealism, then Cycles is the one you want to use. Here’s what makes Cycles stand out:
- Realism: It captures subtle lighting effects, accurate shadows, and lifelike reflections, perfect for photorealistic projects.
- Professional quality: This type of rendering is widely used in industries like film, architecture, and product design, where detail and realism are critical.
- Creative flexibility: Offline rendering can handle advanced features, like subsurface scattering (for skin), volumetrics (fog and smoke), and complex light interactions.
But there are some downsides:
- Time-consuming: Even a single image can take minutes or hours to render, depending on its complexity.
- High hardware demands: Offline rendering relies heavily on processing power, often requiring powerful GPUs or CPUs.
Eevee
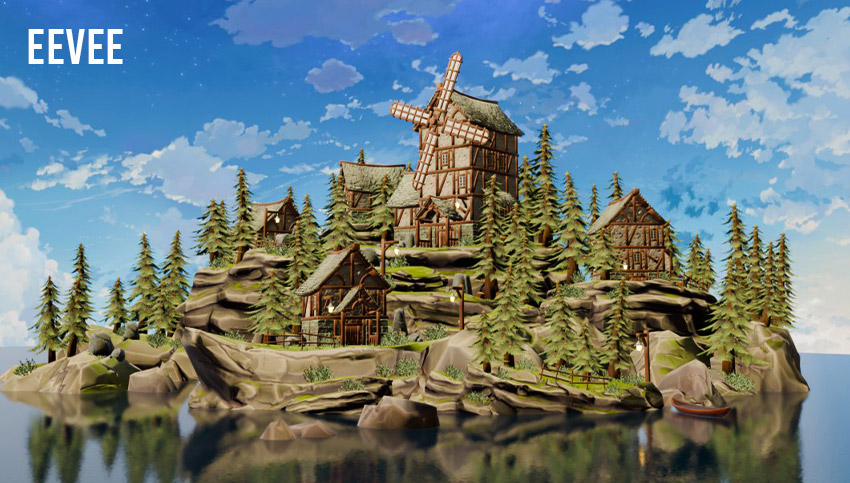

On the flip side, Eevee is Blender’s real-time renderer, designed to give you instant feedback and fast results. It’s optimized for speed, meaning you can see your changes live even whilst you are working! Here’s why real-time rendering is so useful:
- Speed: Changes in your scene (e.g. adjusting lighting or moving objects) are updated immediately, allowing you to see how things look without waiting.
- Best for previews: If you’re animating a scene or building game assets, real-time rendering helps you test your work quickly.
- Lower hardware demands: Since it skips complex calculations for light and shadow, it works well on less powerful computers.
However, real-time rendering can also have its trade-offs:
- Less realism: It uses shortcuts (like approximations for lighting and reflections), so the results aren’t as lifelike as offline renders.
- Limited fine detail: Things like soft shadows, caustics, or intricate reflections may not look as polished.
So, which one should you use?

- Cycles is the choice when you need realism and detail. It’s perfect for photorealistic renders, high-quality animations, and final projects where every little detail counts.
- Eevee is ideal when you need speed, instant feedback, and can live with a bit less realism. Great for game assets, stylized projects, or testing out your scenes quickly.
In some workflows, you can even combine both! Use Eevee for previews and scene setup, then switch to Cycles for final renders to get the best of both worlds.
How to switch and configure renderers
So that covers the definitions, but how do you actually use renderers in Blender?
How to switch renderers in Blender


Here’s how to choose a renderer for your final image:
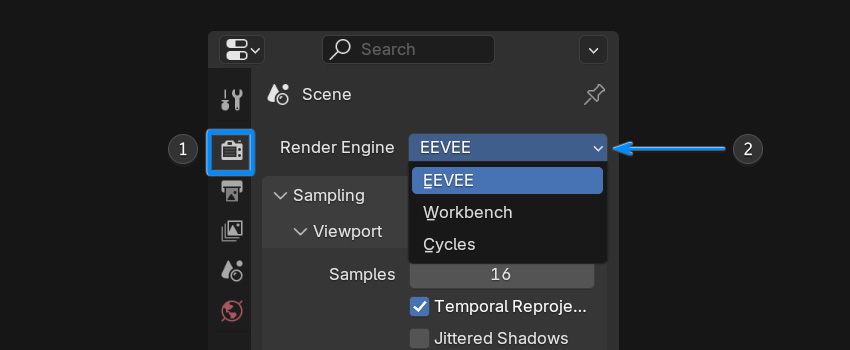
- Open the Render Properties panel
- At the very top of the render settings, you’ll see a dropdown menu labeled Render Engine. Click it, and you’ll have three options (Eevee, Cycles and Workbench (usually for basic previews, but we’ll stick to Eevee and Cycles for now).
Basic Eevee settings
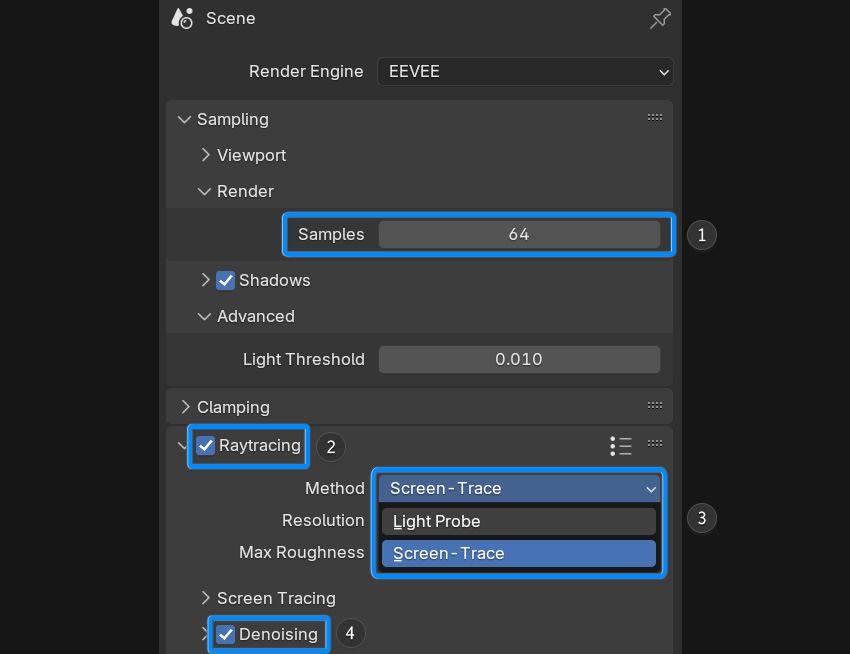


By fine tuning these settings you can achieve a balance between visual quality and performance. Here are a few basic settings to get you started:
Sampling: Adjust the number of samples for both viewport previews and final renders. Higher samples yield better quality but increase render times. Start with moderate values (e.g. 64 samples) and increase as needed.
Raytracing: Click the checkbox to enable Raytracing, which will increase the accuracy of the lighting in the scene.
- Use Screen Trace: When speed is critical, such as for real-time previews, animations, or game-ready projects.
- Use Light Probes: When you need high-quality, consistent lighting and reflections for static or semi-static scenes, such as architectural visualization or detailed renders.
Denoising: Click the checkbox to enable Denoising which will reduce noise during viewport navigation, providing a cleaner preview.
Basic Cycles settings


For Cycles, quality is key, and these settings will help you strike a balance between realism and render time:
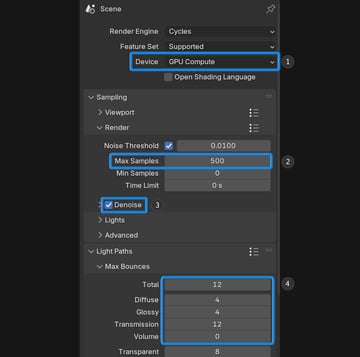
Device: In the render settings, under the Performance tab, select GPU if you have one. It’s much faster than CPU rendering.
Samples (Render): This controls how smooth your render looks. Start with around 64-128 samples for test renders and increase to 500+ for final renders.
Denoising (Render): Turn this on to reduce noise in your renders without needing extremely high sample counts. This is also available in the viewport if you are using the Rendered Preview.
Light Paths: Adjust these to control how many bounces light makes in your scene. Fewer bounces will give you faster render times, but too few can make your scene look flat.
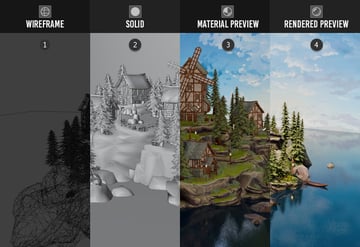
Viewport shading: a quick way to preview your render
Viewport shading in Blender lets you see how your scene looks in real-time, making it an essential tool for working with Cycles and Eevee. It’s like a sneak peek at your final render without waiting for a full export.
The four shading modes
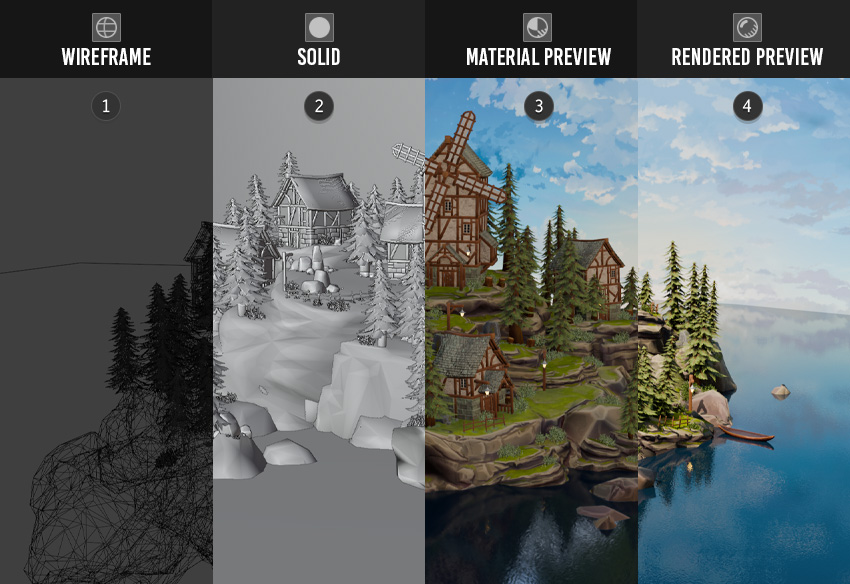

- Wireframe: Displays your scene as a simple wireframe of edges and vertices. Great for checking geometry, modeling, or quickly navigating complex scenes.
- Solid: Shows basic shading and solid colors for your objects without lighting or materials. Perfect for blocking out scenes or working on details without distractions.
- Material Preview (Eevee): Previews your materials and textures in real-time using Eevee’s lighting engine.
- Rendered (Cycles or Eevee): Displays a real-time preview of your scene using your selected render engine (Cycles or Eevee). This mode gives you the most accurate representation of your final render.
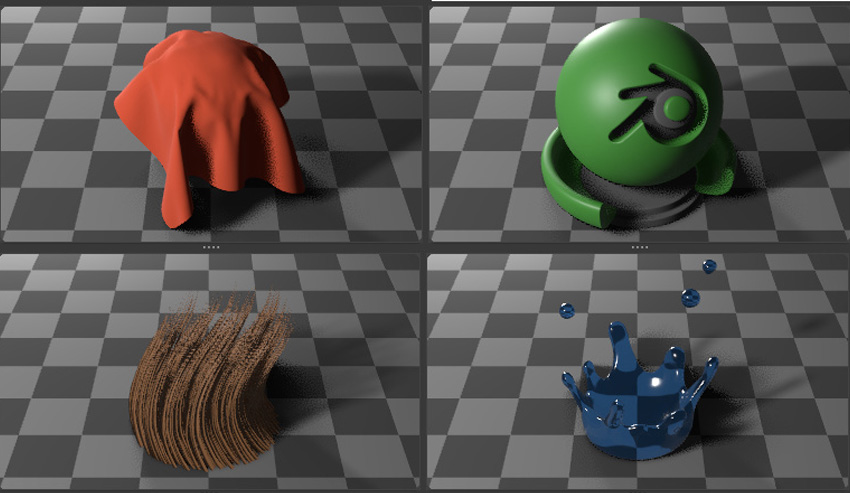
Common use cases and examples
Cycles: photorealism at its finest

- Product visualization: Perfect for showcasing items like watches, electronics, or furniture with lifelike materials and lighting.
- Architectural visualization: Bring interiors and exteriors to life with natural lighting, realistic textures, and atmospheric effects.
- Film and animation: Ideal for creating cinematic-quality visuals, particularly for close-ups and hero shots.
Eevee: speed and style

- Stylized art: Great for non-photorealistic, creative projects like 2D/3D hybrids or anime style renders.
- Animation previews: Render animations quickly to check motion, timing, and composition before committing to a final render.
- Virtual environments and VR: Create immersive spaces for VR or interactive applications with fast real-time feedback.
Conclusion


So there you have it! Now you know the difference between Cycles and Eevee. The beauty of Blender is that you don’t have to pick just one. You can experiment with both renderers, switching as your project evolves. Use Eevee for quick previews and fast animations, then finish with Cycles for that polished, professional look.
Remember, there’s no wrong choice. Just different tools for different goals. So, dive in, test them out, and let your creativity take the lead. Happy rendering!