What is a URL Shortener?
A URL shortener is a tool that converts Long URLs into shorter, more manageable links. Once the URL has been shortened, it redirects users to the original URL.
Short URLs are easier to share on social media, emails, or any other digital platform. Additionally, many URL shorteners offer advanced features such as tracking and analytics that can be useful in providing insights into user engagement.
In this tutorial, we will cover how to create your very own URL shortener tool using JavaScript!
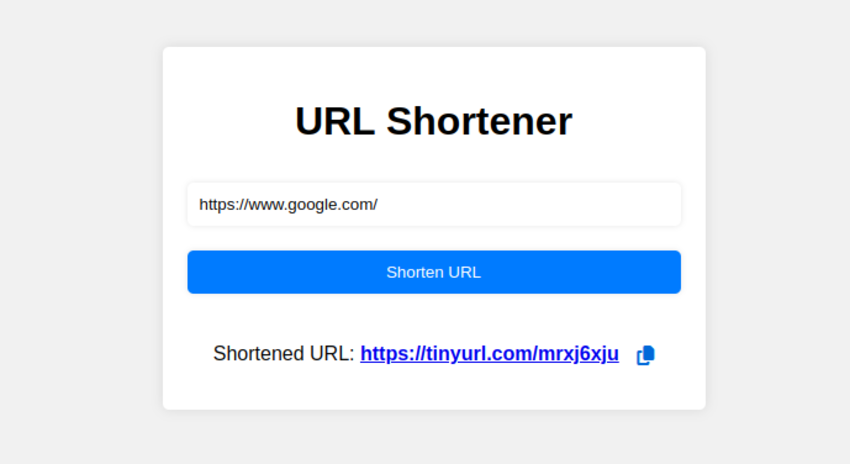
By the end of this tutorial, we will have something like this:
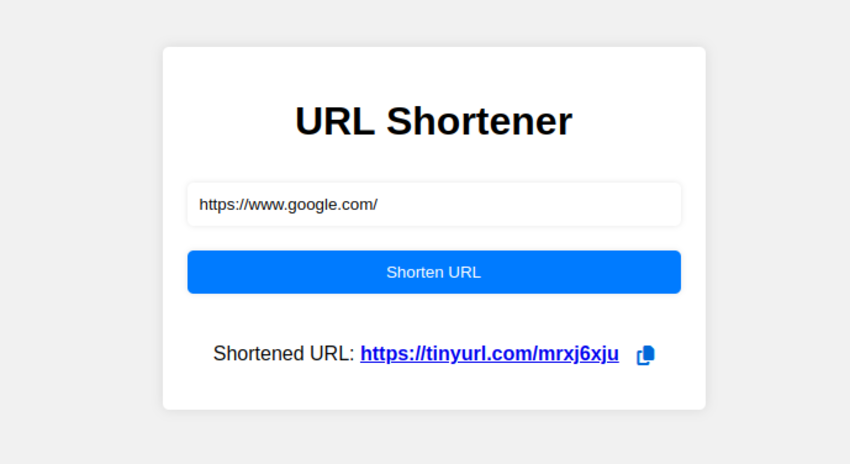
Let’s get started!
Create UI with HTML and CSS
We will be using HTML and CSS to build a simple user interface, featuring the following elements:
- A form element with a
<input type="url">and a button for submission. - A
<div/>element to display the results and a tag to copy the shortened URL. - A
<div/>element for displaying any error messages - A
<div/>element to display a copied message when the URL is copied.
Add this code in the body of the HTML file.
1 |
<div class="container"> |
2 |
<h1>URL Shortener</h1> |
3 |
<form id="form"> |
4 |
<input type="url" id="url" placeholder="Enter your long URL" required> |
5 |
<button type="submit" id="submit-btn">Shorten URL</button> |
6 |
</form>
|
7 |
<div id="result"> |
8 |
<p>Shortened URL: <a target="_blank" id="shortened-url"></a> |
9 |
<i id="icon" class="fa-solid fa-copy"></i> |
10 |
</p>
|
11 |
</div>
|
12 |
<div id="copy">Copied!</div> |
13 |
<div id="error"></div> |
14 |
</div>
|
Styling with CSS
Let’s rifle through some styles to get things looking the way we want.
To style the page, let’s start by setting the body to use display: flex; this will ensure everything is centered horizontally and vertically.
We’ll also add a background color.
1 |
body { |
2 |
display: flex; |
3 |
justify-content: center; |
4 |
align-items: center; |
5 |
height: 100vh; |
6 |
background-color: #f1f1f1; |
7 |
font-family: Arial, sans-serif; |
8 |
}
|
Now let’s add these styles to the container element.
1 |
.container { |
2 |
width: 400px; |
3 |
background-color: #fff; |
4 |
border-radius: 5px; |
5 |
box-shadow: 0 0 10px rgba(0, 0, 0, 0.1); |
6 |
padding: 20px; |
7 |
text-align: center; |
8 |
}
|
To ensure the elements in the form (<input/> and <button/>) are stacked vertically, we’ll apply display: flex and flex-direction: column styles to the form.
1 |
form { |
2 |
display: flex; |
3 |
flex-direction: column; |
4 |
}
|
Next we’ll add some margin, padding, and border-radius to the form elements for a more refined look.
1 |
input, button { |
2 |
padding: 10px; |
3 |
margin: 10px 0; |
4 |
border: none; |
5 |
border-radius: 5px; |
6 |
box-shadow: 0 0 5px rgba(0, 0, 0, 0.1); |
7 |
}
|
Then these styles to our submission button.
1 |
button { |
2 |
cursor: pointer; |
3 |
background-color: #007bff; |
4 |
color: #fff; |
5 |
}
|
6 |
button:hover { |
7 |
background-color: #0069d9; |
8 |
}
|
9 |
button:disabled { |
10 |
background-color: #cccccc; |
11 |
cursor: not-allowed; |
12 |
}
|
We’re getting there! Now set the result, error and copy elements to be hidden by default.
1 |
#result, #error, #copy { |
2 |
display: none; |
3 |
}
|
Apply a red color to the error element.
1 |
#error { |
2 |
color: #dc3545; |
3 |
margin-top: 10px; |
4 |
}
|
When a URL is shortened, we need to provide an option to copy the shortened link. So style the copy icon to appear next to the result, and position the “copied” message below the shortened URL.
1 |
#icon { |
2 |
cursor: pointer; |
3 |
margin-left: 10px; |
4 |
vertical-align: middle; |
5 |
color: #0069d9; |
6 |
}
|
7 |
#copy { |
8 |
position: absolute; |
9 |
left: 60%; |
10 |
}
|
With that done, our styling is finished!
Testing the API
We’re going to use the TinyURL API to generate shortened URLs, so head over to TinyURL and get a free API token.
The API provides several endpoints as shown below.
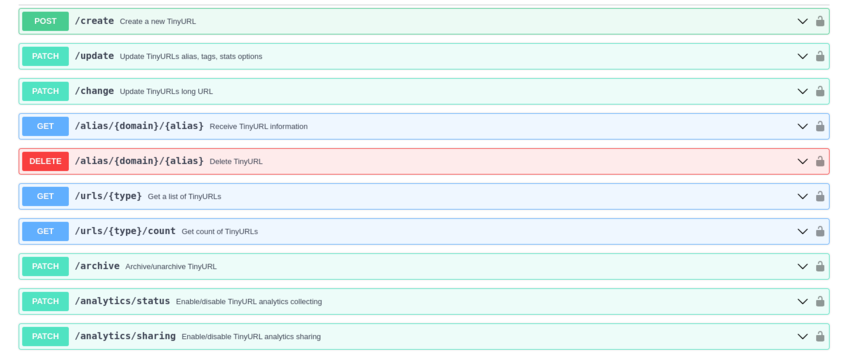
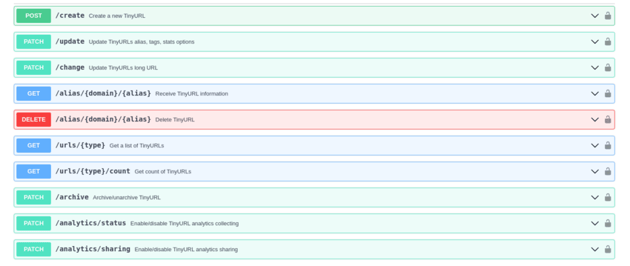
In our case, we’ll use the /create endpoint. To make a simple POST request, send a request to the API with your token in the headers and include the URL and domain(tinyurl.com) in the request body.
Get DOM Elements
Let’s now get all the DOM elements needed for manipulation
1 |
const form = document.getElementById("form"); |
2 |
const urlInput = document.getElementById("url"); |
3 |
const submitBtn = document.getElementById("submit-btn"); |
4 |
const result = document.getElementById("result"); |
5 |
const shortenedUrlLink = document.getElementById("shortened-url"); |
6 |
const errorMessage = document.getElementById("error"); |
7 |
const copyIcon = document.getElementById("icon"); |
8 |
const copyUrl = document.getElementById("copy"); |
Next, create an async function called shortenUrl that will take the URL as a parameter.
1 |
async function shortenUrl(url) { |
2 |
|
3 |
}
|
Inside this function, define the TinyUrl API and the secret token.
1 |
async function shortenUrl(url) { |
2 |
const apiUrl = "https://api.tinyurl.com/create"; |
3 |
const token = "your_tinuyurl_token"; |
4 |
|
5 |
}
|
Next, make a POST request and specify the required data.
1 |
async function shortenUrl(url) { |
2 |
const apiUrl = "https://api.tinyurl.com/create"; |
3 |
const token = "your_tinuyurl_token"; |
4 |
const response = await fetch(apiUrl, { |
5 |
method: "POST", |
6 |
headers: { |
7 |
"Content-Type": "application/json", |
8 |
Authorization: `Bearer ${token}` |
9 |
},
|
10 |
body: JSON.stringify({ |
11 |
domain: "tinyurl.com", |
12 |
url: url |
13 |
})
|
14 |
});
|
15 |
|
16 |
if (!response.ok) { |
17 |
throw new Error("An error occurred. Please try again."); |
18 |
}
|
19 |
const result = await response.json(); |
20 |
|
21 |
}
|
In the shortenUrl function, we use fetch to send a request to the apiUrl endpoint and await the response. As we saw earlier, the TinyURL API expects a token in the header, and the body should contain the domain and the URL to be shortened.
If an error occurs, the message An error occurred. Please try again will be displayed.
An example response looks like this:
1 |
{
|
2 |
"data": {
|
3 |
"domain": "tinyurl.com", |
4 |
"alias": "example-alias", |
5 |
"deleted": false, |
6 |
"archived": false, |
7 |
"tags": [ |
8 |
"tag1", |
9 |
"tag2" |
10 |
], |
11 |
"analytics": [ |
12 |
{
|
13 |
"enabled": true, |
14 |
"public": false |
15 |
} |
16 |
], |
17 |
"tiny_url": "https://tinyurl.com/example-alias", |
18 |
"created_at": "2022-11-24T19:41:23+00:00", |
19 |
"expires_at": null, |
20 |
"url": "https://google.com" |
21 |
}, |
22 |
"code": 0, |
23 |
"errors": [] |
24 |
} |
From this response, we need to extract the tiny_url value, so update the function as follows:
1 |
async function shortenUrl(url) { |
2 |
const apiUrl = "https://api.tinyurl.com/create"; |
3 |
const token = "your_token"; |
4 |
const response = await fetch(apiUrl, { |
5 |
method: "POST", |
6 |
headers: { |
7 |
"Content-Type": "application/json", |
8 |
Authorization: `Bearer ${token}` |
9 |
},
|
10 |
body: JSON.stringify({ |
11 |
domain: "tinyurl.com", |
12 |
url: url |
13 |
})
|
14 |
});
|
15 |
|
16 |
if (!response.ok) { |
17 |
throw new Error("An error occurred. Please try again."); |
18 |
}
|
19 |
const result = await response.json(); |
20 |
return result.data.tiny_url; |
21 |
}
|
Get Url from User
Alright. We have a function that generates a shortened URL, so now we need to add an event listener to the form to capture the URL from the user. Add an onSubmit event to the form.
1 |
form.addEventListener("submit", async (e) => { |
2 |
|
3 |
}
|
Inside the event listener, we want to get the URL from the user, invoke the shortenUrl function with the provided user value, and then display the shortened URL to the user.
Update the event listener as follows:
1 |
form.addEventListener("submit", async (e) => { |
2 |
e.preventDefault(); |
3 |
const url = urlInput.value; |
4 |
submitBtn.disabled = true; |
5 |
submitBtn.textContent = "Shortening..."; |
6 |
errorMessage.style.display = "none"; |
7 |
result.style.display = "none"; |
8 |
copyUrl.style.display = "none"; |
9 |
|
10 |
const shortUrl = await shortenUrl(url); |
11 |
shortenedUrlLink.href = shortUrl; |
12 |
shortenedUrlLink.textContent = shortUrl; |
13 |
|
14 |
result.style.display = "block"; |
15 |
|
16 |
});
|
Things are getting a little complex, so let’s break down the code above:
-
const url = urlInput.value;gets the URL entered by the user in the input field. -
submitBtn.disabled = true;disables the submit button during the URL generation process to prevent the user from initiating a new request. -
submitBtn.textContent = "Shortening...";displays the message Shortening… to inform the user that the process is underway. -
const shortUrl = await shortenUrl(url);invokes the shortenUrl function and returns the shortened URL. -
shortenedUrlLink.href = shortUrl;adds an href attribute to the shortenedUrlLink element. -
shortenedUrlLink.textContent = shortUrl;sets the shortened URL as the text to the shortenedUrlLink element. -
result.style.display = "block";makes the shortenedUrlLink element visible.
Error handling
Let’s update our code to handle errors. First, we need to verify whether a user has entered a valid URL in the input field. If not, we will display a message letting them provide a valid URL.
Update the event listener as follows.
1 |
form.addEventListener("submit", async (e) => { |
2 |
e.preventDefault(); |
3 |
const url = urlInput.value; |
4 |
|
5 |
if (!url) { |
6 |
displayMessage("Please enter a URL"); |
7 |
return; |
8 |
}
|
9 |
|
10 |
// the rest of the code
|
11 |
});
|
Next, wrap the logic in a try-block to handle any errors that might occur during the generation process.
1 |
try { |
2 |
submitBtn.disabled = true; |
3 |
submitBtn.disabled = true; |
4 |
submitBtn.textContent = "Shortening..."; |
5 |
errorMessage.style.display = "none"; |
6 |
result.style.display = "none"; |
7 |
copyUrl.style.display = "none"; |
8 |
|
9 |
const shortUrl = await shortenUrl(url); |
10 |
shortenedUrlLink.href = shortUrl; |
11 |
shortenedUrlLink.textContent = shortUrl; |
12 |
|
13 |
result.style.display = "block"; |
14 |
} catch (error) { |
15 |
displayMessage("An error occurred while shortening the URL. Please try again."); |
16 |
} finally { |
17 |
submitBtn.disabled = false; |
18 |
submitBtn.textContent = "Shorten URL"; |
19 |
}
|
If any error occurs, we will display a message to the user. In the finally block, we’ll clean up by resetting the submit button.
The displayMessage function looks like this:
1 |
function displayMessage(message) { |
2 |
errorMessage.textContent = message; |
3 |
errorMessage.style.display = "block"; |
4 |
}
|
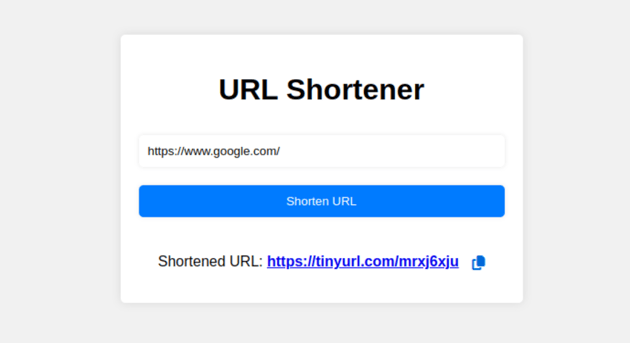
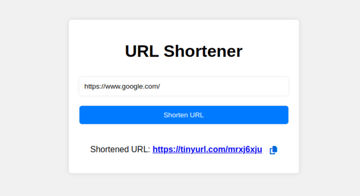
Now when a URL is shortend, the output should look like this:
Copy URL to ClipBoard
The last step is to enable the copy-to-clipboard functionality. Let’s add an event to listen for a click event on the submit button.
1 |
copyIcon.addEventListener("click", async () => { |
2 |
try { |
3 |
await navigator.clipboard.writeText(shortenedUrlLink.textContent); |
4 |
copyUrl.style.display = "block"; |
5 |
setTimeout(() => { |
6 |
copyUrl.style.display = "none"; |
7 |
}, 2000); |
8 |
} catch (err) { |
9 |
displayMessage("Failed to copy to clipboard. Please try again."); |
10 |
}
|
11 |
});
|
The clipboard API (navigator.clipboard.writeText) is an asynchronous function that returns a promise that resolves when the text is successfully copied.
If any error occurs during the copying, an error message will be displayed.
And we’re done!
Great job. Here is the demo you’ve just built:
We have come to the end of this tutorial, and now you have a fully functioning URL shortener. One of the ways you can improve this tool is by turning it into a Chrome extension. This will ensure shortening a URL is instant and convenient—why not give it a go?!