
In this tutorial, I will show you how to create a flat and modern, Gmail-inspired, iOS7 email app in Photoshop. We will begin by showing you how to sketch out your ideas, then we will show how to create your design in Photoshop, and finally, how to incorporate your design into an iPhone mockup. Let’s get started!
Additional Screens
In this tutorial, we will also be creating the following mobile app screens for our mobile email app.
Tutorial Assets
You will need the following assets in order to complete this tutorial. Please download them before you begin. If they are not available, you will need to find alternatives.
Before You Begin
Step 1
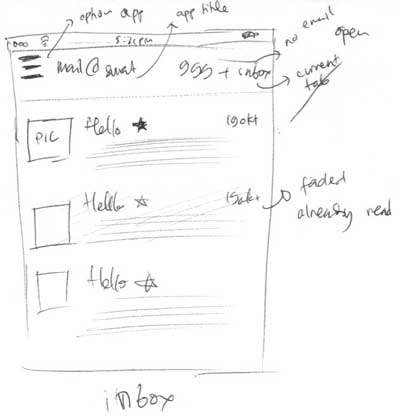
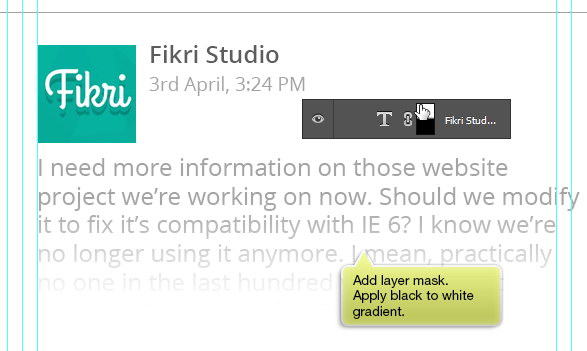
Before jumping in to Photoshop, it’s best to start sketching with pencil and paper. Start making outlines and rough images. No need to worry about small details. And don’t forget to search for references, lots of them. This initial idea – we’ll call it v1 – comes from a friend of mine, Bagus Fikri from Fikri Studio. Here’s the sketch. Click here to view its full version.
Step 2
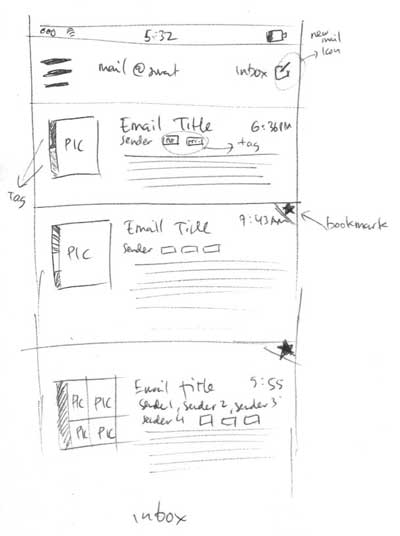
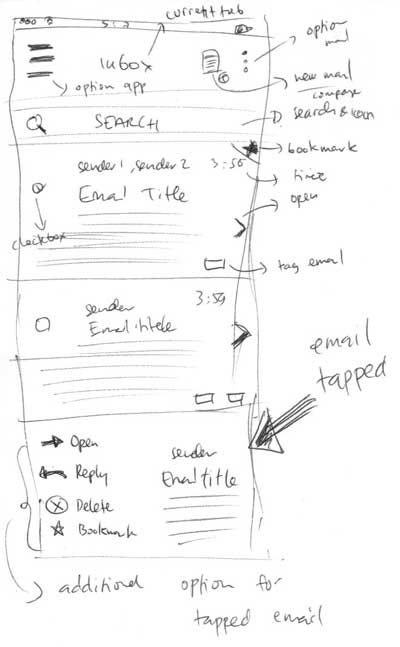
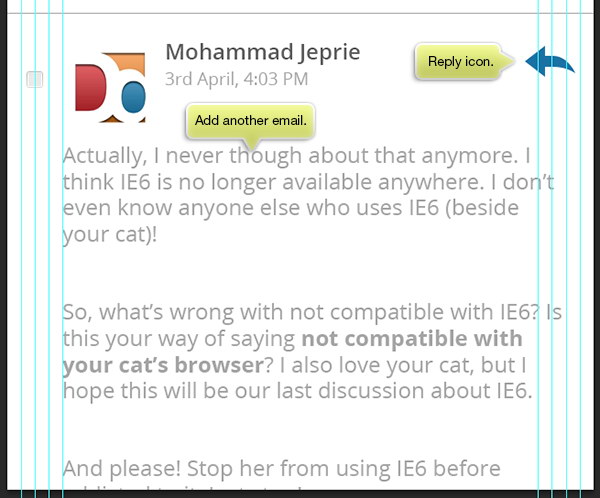
In this case, after seeing the sketch, the client asked for some changes. After a few emails, here are some new sketches. Let’s just call them v2, v3, and v4.

1. Making Label Icon
Now that we have finalized our sketch. We can now start working in Photoshop. Before we get started, however, it is important to note that interface designs often require quite a few icons. You can create them yourself or you can download them from the web. If you want to practice making them yourself, I will show you how to draw one of the icons used in this tutorial, the label icon. Basically, the other icons use the same techniques. You can download this icon, as well as all the other icons from the Free Icon Pack mentioned in the Tutorial Assets section above.
Step 1
Create new file (File > New…). In next dialog box, set Width and Height to 43 pixels. Click OK.
Step 2
Activate Rounded Rectangle Tool with Radius: 4 px. Set its Fill to blue #1a72a5 and Stroke to None. Draw a rounded rectangle shape with size 19×19 pixels.
Step 3
Add rounded rectangle path onto previous shape. This time with size 13×13. To help you see better, I temporarily hide the previous shape.
Step 4
Hit Command/Ctrl-T to transform the path. Rotate it 45°.
Step 5
In CS6, it will inform you that the shape is going to be converted into regular path. It means that you can no longer edit its parameters on the fly from the option bar. Just click OK.
Now, we have basic label shape.
Step 6
Take a look at the path’s point position closely. We want to make sure that our icon is crisp.
Step 7
Use Direct Selection Tool (A) to manually alter position of the path point.
Here is what we have after the adjustment. Left is the icon before adjustment and right is after adjustment. In this situation, it turns out that the result is not so significant. But, in other cases, these extra steps might be important and greatly improve the appearance of your icon.
Step 8
On top of the icon, add a circle path. Set its mode to Subtract from Option Bar.
Step 9
Hit Command/Ctrl-T and then rotate the icon 45°. Hold Shift to help you rotate shape at 15° increment.
Step 10
Again, we need to adjust all the point position using Direct Selection Tool.
Step 11
Below you can difference before and after the adjustment.
Step 12
Duplicate the big rounded rectangle shape by selecting it using Path Selection Tool. Hit Command/Ctrl-J. Rotate it –15°.
Step 13
Duplicate the original big rounded rectangle path. Paste it above last path. Set its mode to Subtract.
Step 14
Hit Command/Ctrl-T and then resize it. Don’t forget to reposition each point to get a crisp appearance.
Here’s the result in magnification 100%.
Step 15
The final step is export this as an icon. Hide Background by clicking on its eye icon. The icon background is now transparent.
Step 16
Save the icon for web (File > Save for Web and Devices…). Use below setting:
- File Type set to PNG-8
- Transparency selected
2. Preparing Canvas
Step 1
Make new file (File > New…). Set its size to 640×1136 pixels.
Step 2
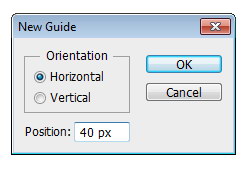
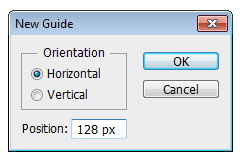
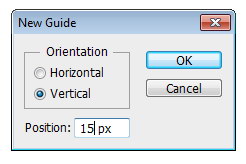
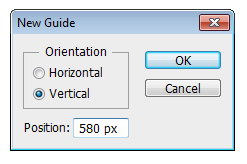
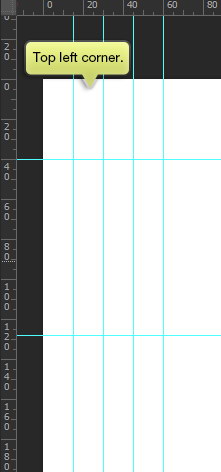
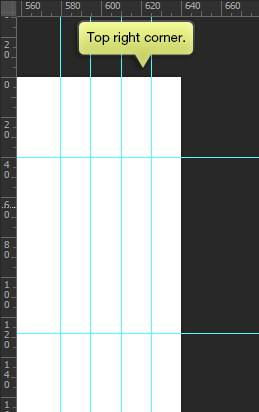
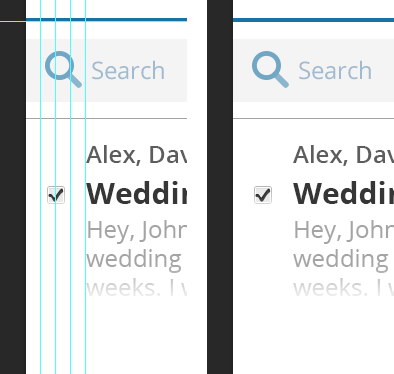
Make new guides to help us put the element in precise position. Click View > New Guide. We want horizontal guide at 15, 30, 45, 60, 580, 595. 610, and 625 px. For vertical guide, we want them at 40 and 128 px.
Here’s the guides we have on left and right corner.
Step 2
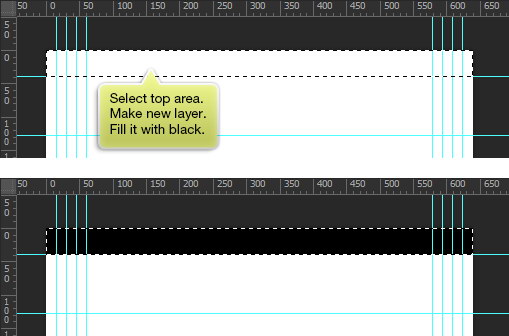
Select top area using Rectangular Marquee Tool (M). Make new layer and then fill it with black (Edit > Fill…).
Step 3
Grab iOS7 PSD mockup from Teehan+Lax. Shift-drag Status bar group layer into our design.
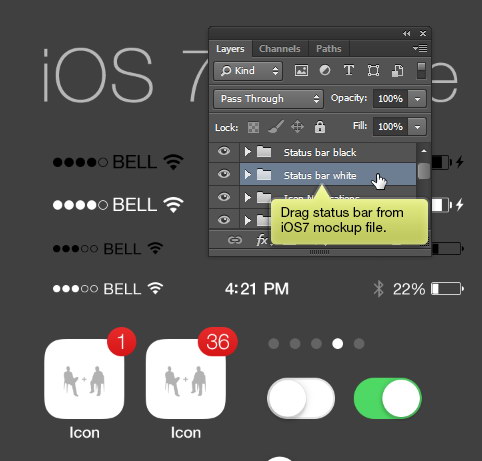
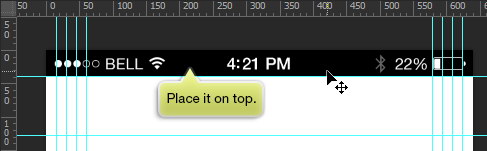
Step 4
Place it on top of the design.
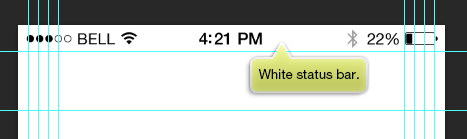
Here is the white one.
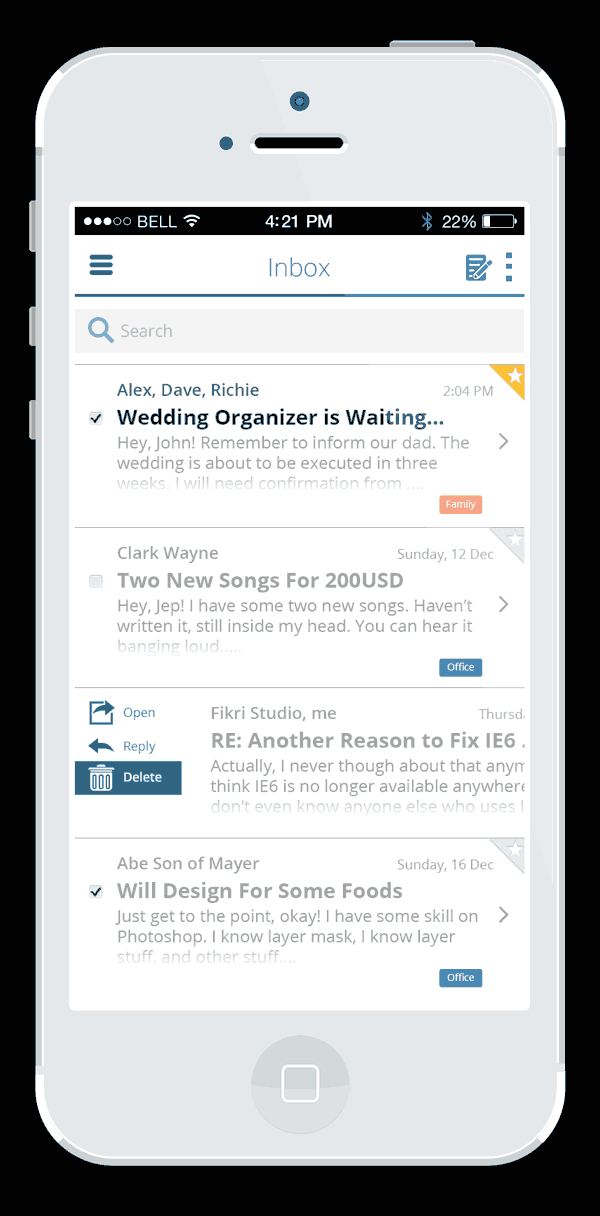
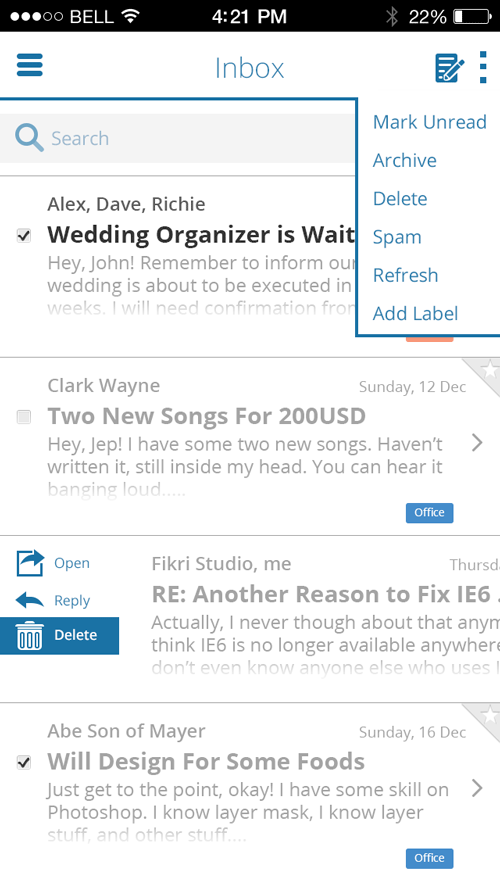
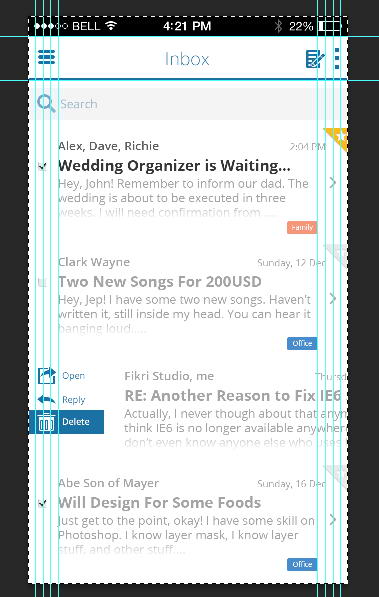
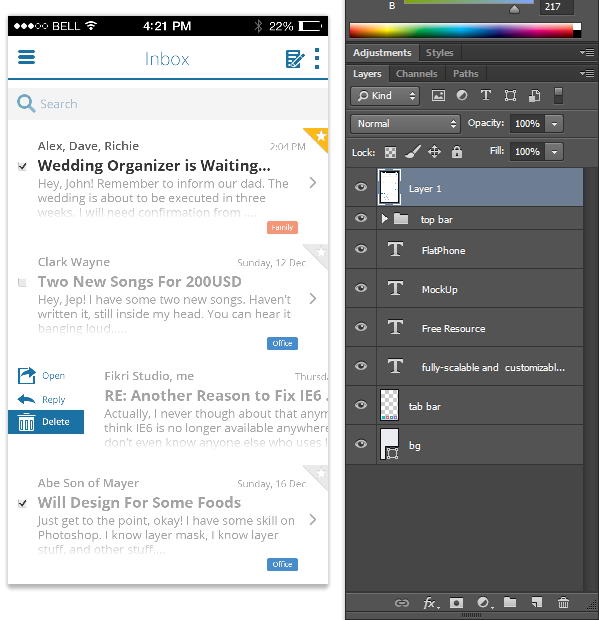
3. Design Inbox
Step 1
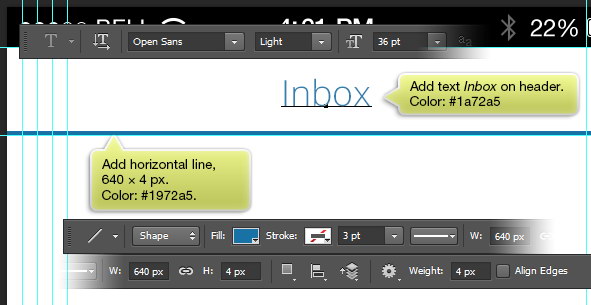
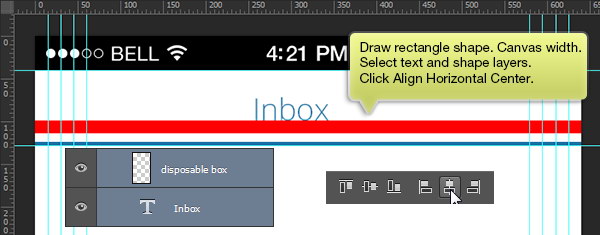
We’ll start working on the header. Use Line Tool to draw a 4 px line on bottom of the header. Activate type tool and then add Inbox on its center.
Step 2
To make sure the text is in placed centered on the canvas, draw a rectangle with same width as the canvas. Select both text layer and the last rectangle. From Option Bar, click icon Align Horizontal Center.
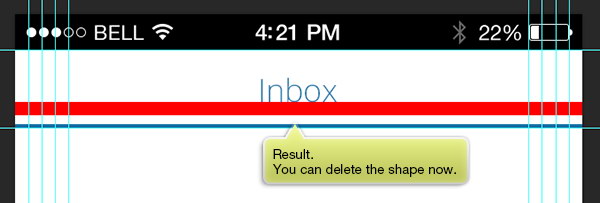
We can see that the text is now sits perfectly on center of the header. You won’t this rectangle anymore and can delete it.
Step 3
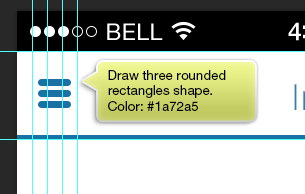
Drwa three rounded rectangle shapes. Place it on left side of the header, on center of the guides. We will use it as inbox options menu icon.
Step 4
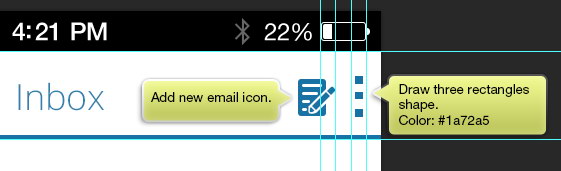
On right side, add new email icon and draw three squares. The squares is going to be used for individual mail option icon.
Step 5
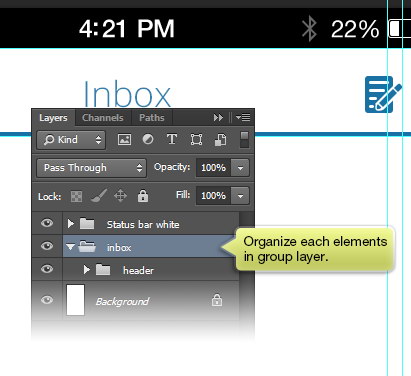
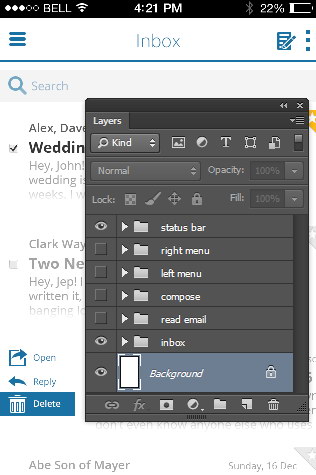
Place each layer logically on a group layer. Select the layer and then hit Command/Ctrl-G to put it inside a group layer. Make sure to give easily recognizable name.
Step 6
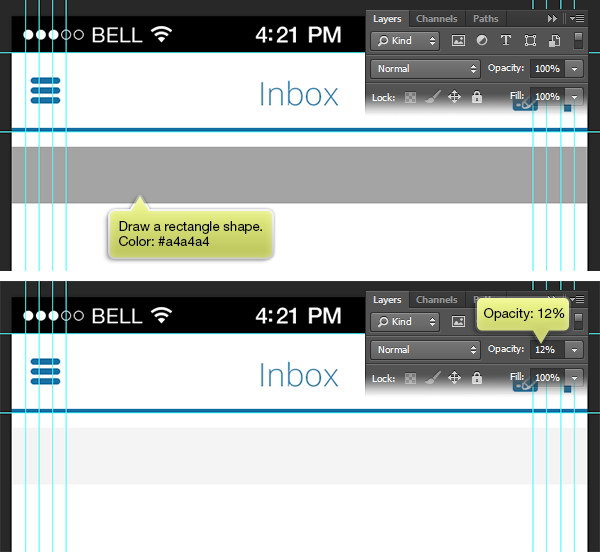
Let’s working on the search bar. Draw a large gray rectangle shape under the header. Reduce its Opacity.
Step 7
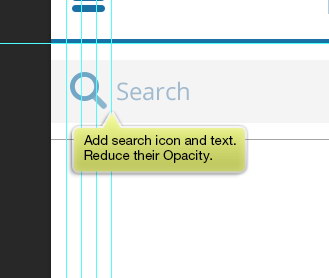
Add search icon and text next to it. Reduce its Opacity, we want it to be a bit more subtle.
Step 8
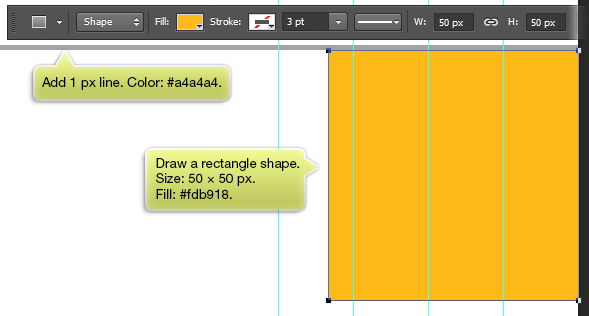
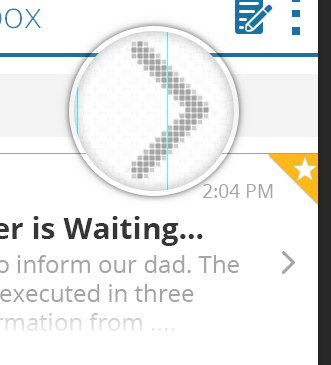
We start working on one email. Add 1 px gray line. On left side, draw a yellow rectangle shape, sized 50×50 px.
Step 9
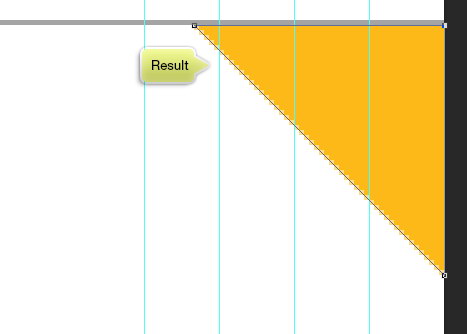
Activate Pen Tool (P). Click lower left corner of the rectangle to remove it.
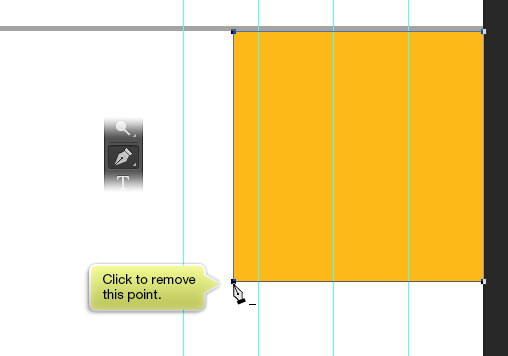
Now, we have a triangle shape.
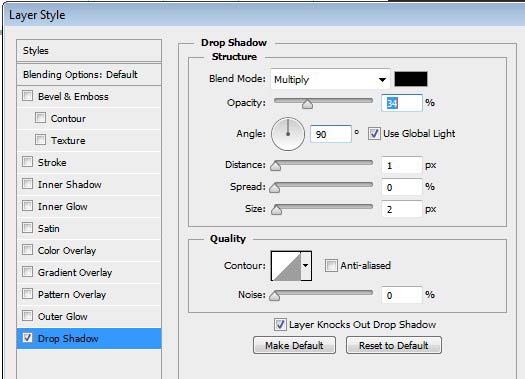
Step 10
Double the layer shape. Add Drop Shadow onto the layer.
Step 11
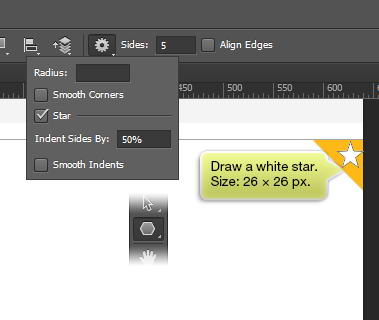
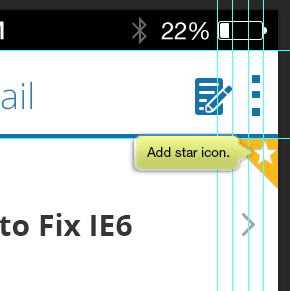
Use Polygon Tool to draw a star. From Option Bar, select Star and set its Sides to 5. Click and drag to draw a star with size 26×26 px.
Step 12
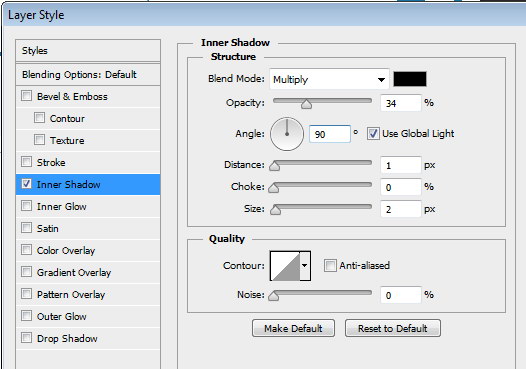
Double click layer and apply Inner Shadow.
Use following settings:
- Angle set to 90°
- Distance set to 1 px
- Size set to 2 px.
Here’s the result we have.

Step 13
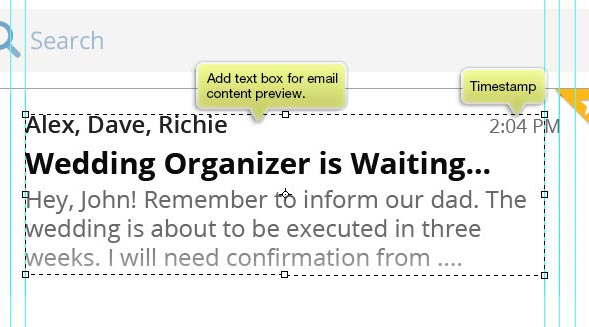
Activate Type Tool and then drag to draw a new Text Box. Add some text containing every important information of an email, such as sender, title, content. Add time information on right side of the email.
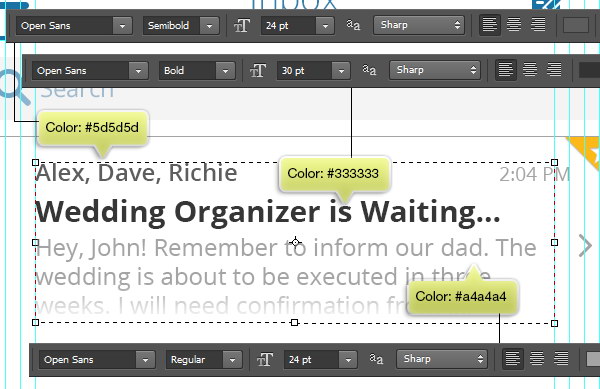
See pictures below for more details on font used in the email.
- Font set to Open Sans.
- Semibold for email sender, Bold for email title, and Reguler for email content.
Step 14
Add layer to the email content. Draw a gradient form white to black. Make sure the lower part is fading.
Step 15
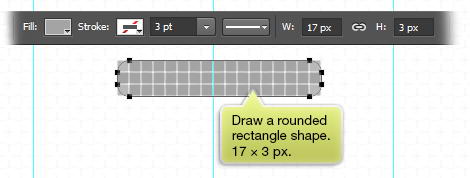
Draw a new rounded rectangle shape with size 17×3 px.
Step 16
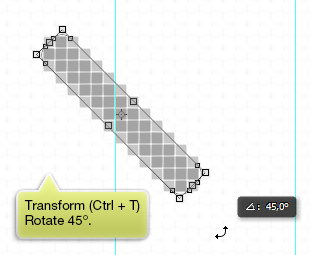
Hit Command/Ctrl-T to apply transformation. Rotate the shape 45°.
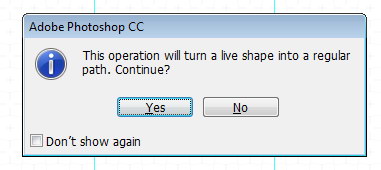
A warning dialog box will be shown. Just hit Yes to confirm it.
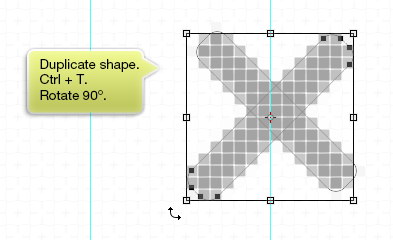
Step 17
Duplicate the shape by hitting Command/Ctrl-C and Command/Ctrl-V. Hit Command/Ctrl-T, rotate it 90°.
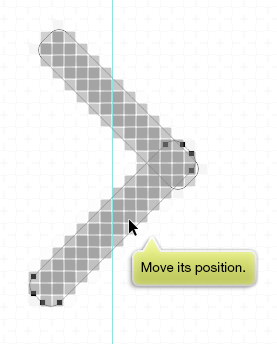
Step 18
Move its position downward. You can see closely that the vector points need some adjustments.
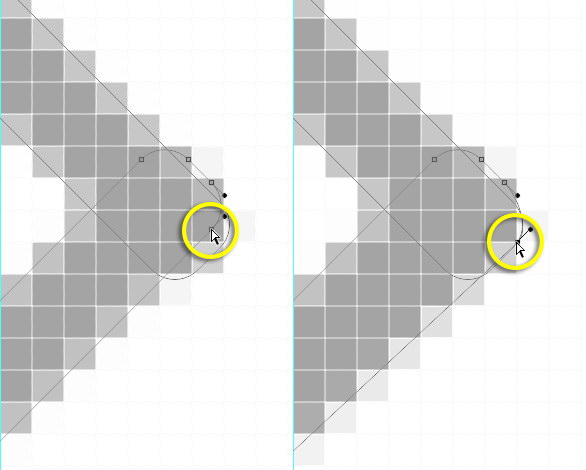
Step 19
Activate Direct Selection Tool and then reposition the point until it snap onto the pixel.
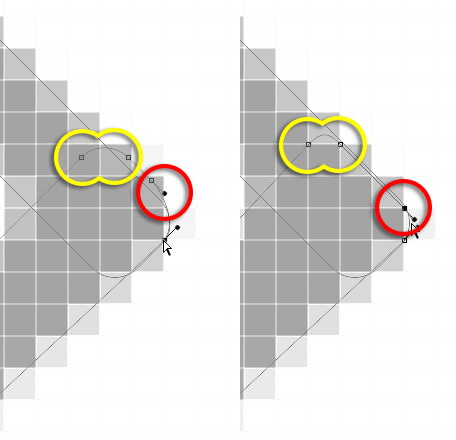
Here’s the arrow icon in 100% Magnification.
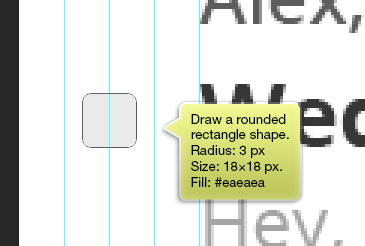
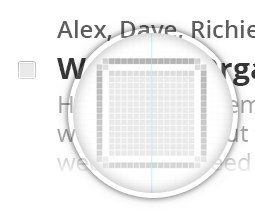
Step 20
Activate Rounded Rectangle Tool, set its radius to 3 px. Draw a rounded rectangle shape on left side of the email with size 18×18 px and fill color #eaeaea.
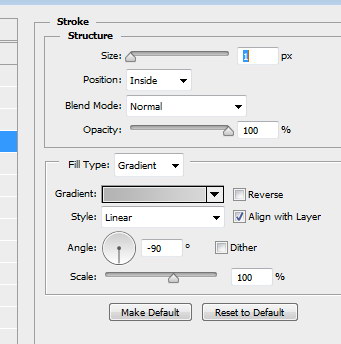
Step 21
Double click the layer shape and apply Stroke. Use following settings:
- Size set to 1
- Fill Type set to Gradient from
#b4b4b4to#d5d5d5. - Angle set to -90°.
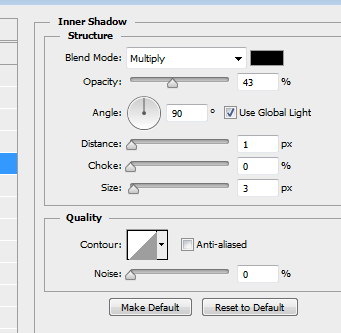
Step 22
Activate Inner Shadow and use following settings:
- Distance set to 1
- Choke set to 0
- Size set to 3
Step 23
Activate Inner Glow. Use following settings:
- Opacity set to 100%
- Color set to
#ffffff - Size set to 1
Step 24
Here is the check box appearance.
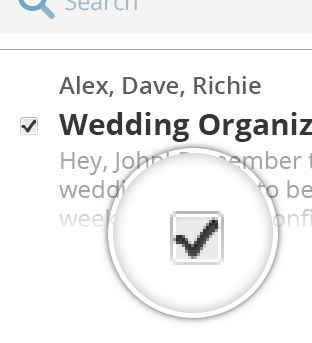
Step 25
Inside the box, draw a black check mark icon using Pen Tool.
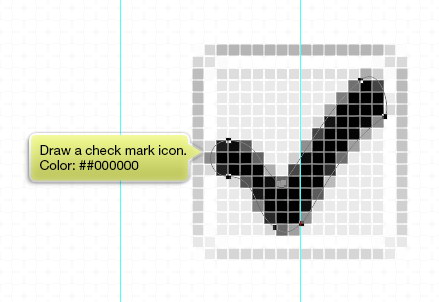
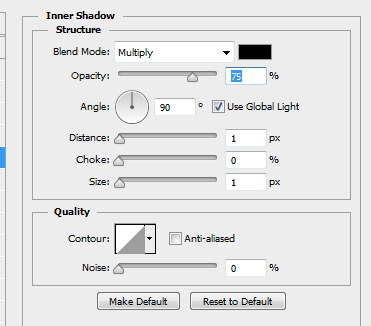
Step 26
Double click the layer and apply Inner Shadow using following settings:
- Distance set to 1
- Choke set to 0
- Size set to 1
Step 27
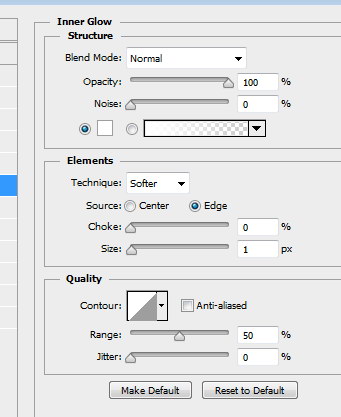
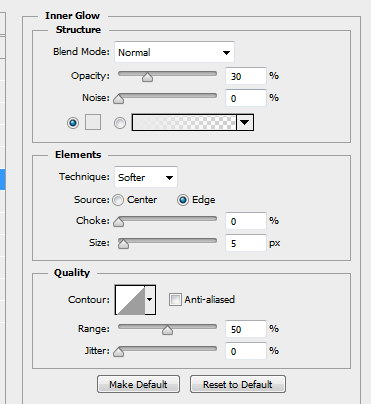
Add Inner Glow. Use following settings:
- Opacity set to 30%
- Color set to
#eaeaea - Size set to 5 px
Step 28
Here’s the result. You can temporarily hide the guides for better view by clicking Command/Ctrl-H. Hit Command/Ctrl-H again to bring the guides back.
Below is the result in 100% Magnification.
Step 29
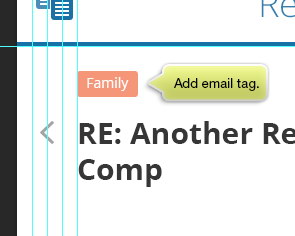
Draw a simple colored rounded rectangle and add tag on top of it. This will label or tag of the email.
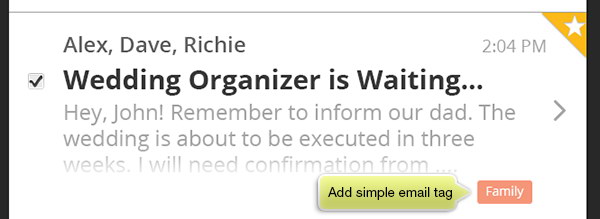
Step 30
Of course, we will need more email sample. Duplicate the previous email. Change title to subtler color, lighter gray. This indicates the email is already read. For unstarred or unbookmarked email, change star background to gray.

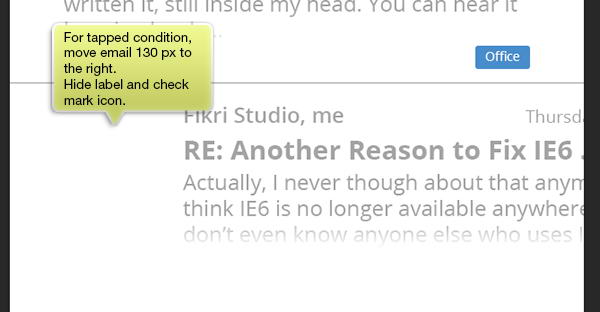
Step 30
We also want to add condition when email is in tapped. Move email 130 px to the right. You can do this easily by selecting the layers and then hit Shift-Right Arrow 13 times. Hide label and check mark icon.
Step 31
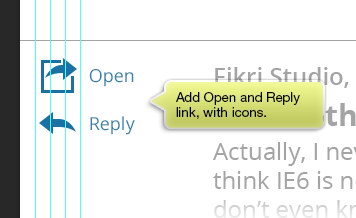
Add Open and Reply icon on left side of the email. Add icons next to the text. Make sure to keep it aligned with previous icon, the left menu icon we add at Step 3 above.
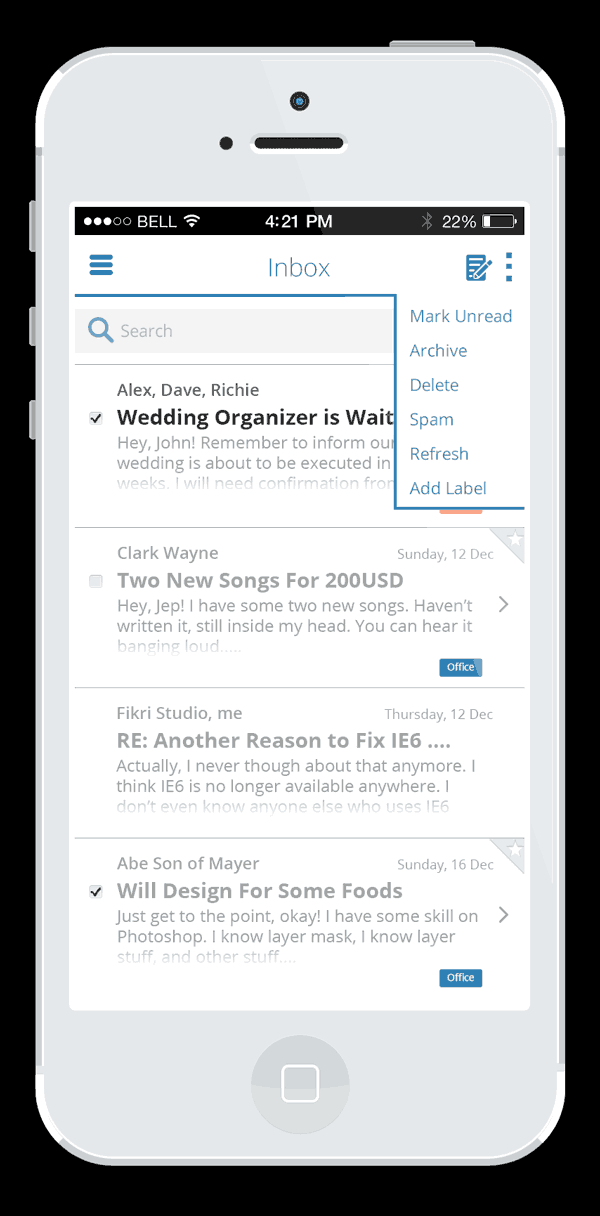
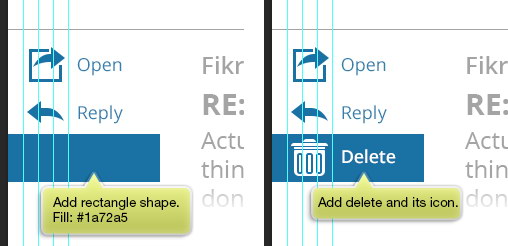
Step 32
Add a blue rectangle shape and then add white delete icon above it. This rectangle behind the icon marking it to be selected.
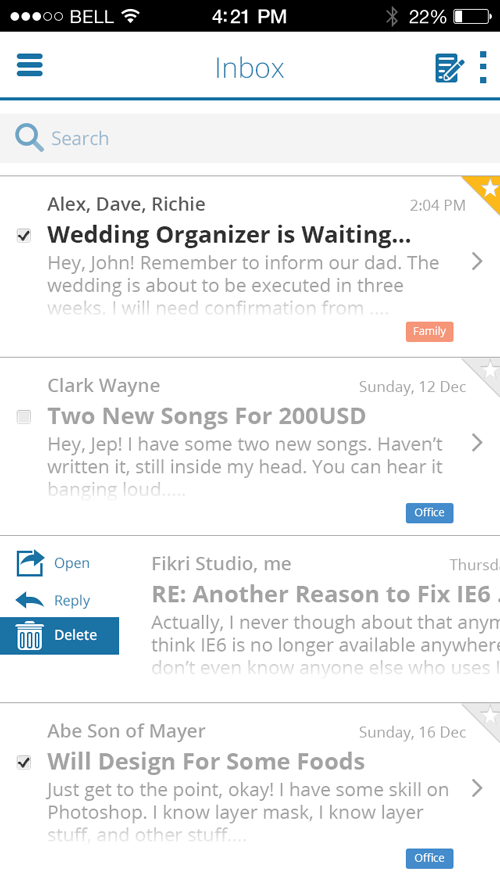
Step 33
Add another email in normal position.

Step 34
Here’s the result for inbox view.
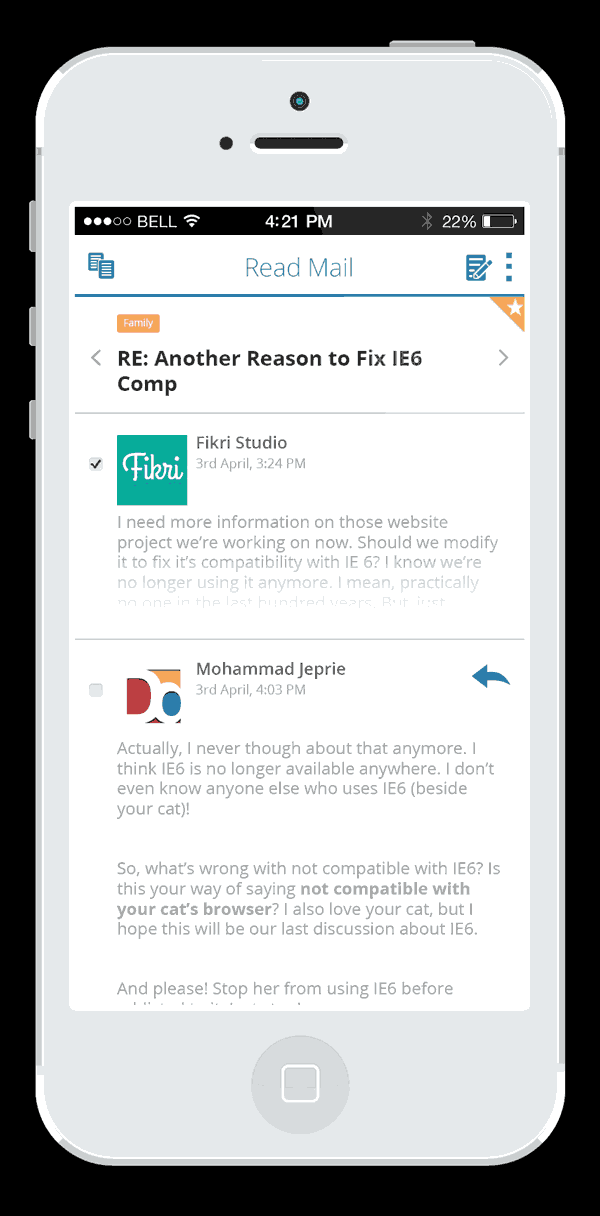
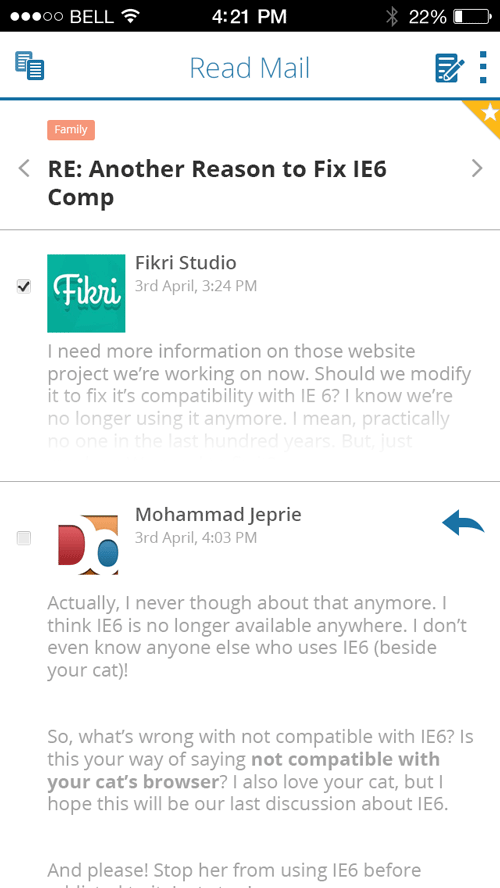
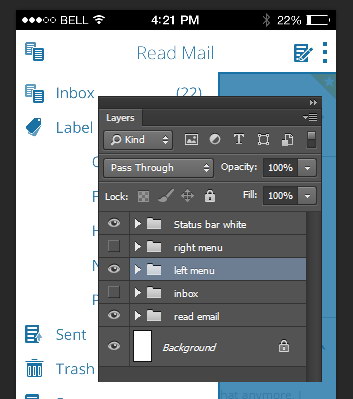
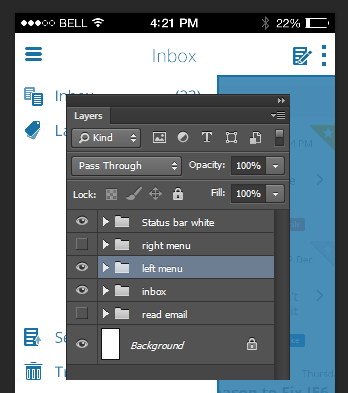
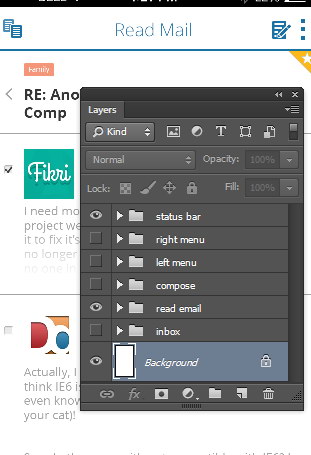
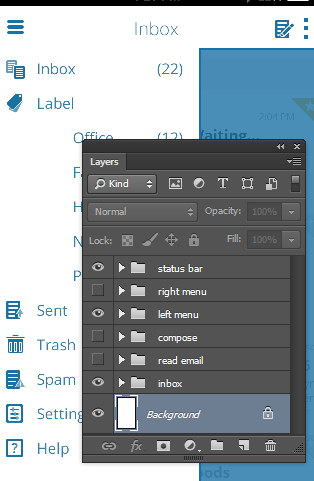
3. Design Read Mail
Step 1
We have finished with the inbox view. Next is designing the read mail view. But first, we need to organize all the layers. Make sure you have put all layers in group layers. For this design, we want to add new group layer specific for this design only. Name it read email.
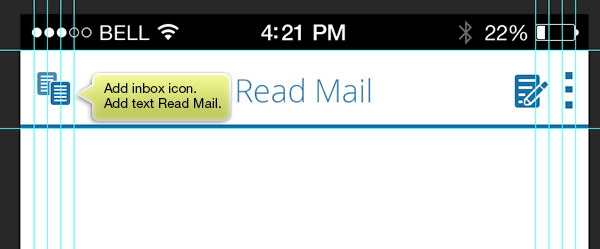
Step 1
The process is very similar to what we did earlier when designing inbox view. Add header with text Read Mail on center and inbox icon on left side.
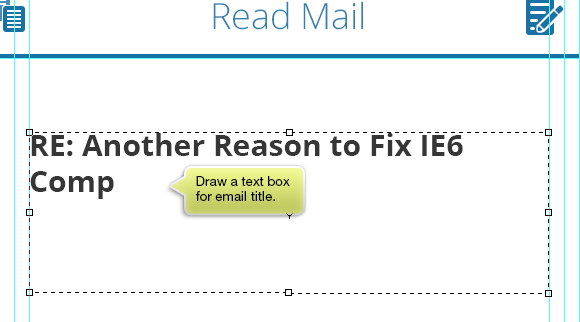
Step 2
Draw a text under app header. Add email title that is currently active. For its font, use Open Sans Bold with size 30 pt.
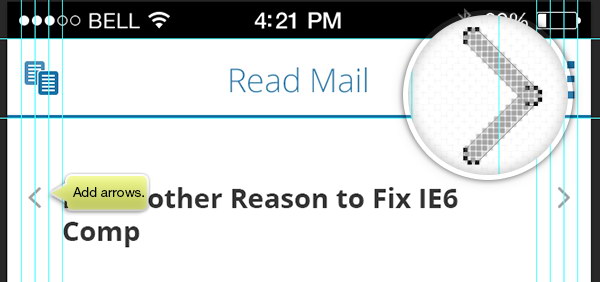
Step 3
Add left and right arrow icon on both sides. We have already design this icon on Section 2.18. You just need to rotate it 180° to get same icon which facing left. Using these icons, app user can scroll to next or earlier email.
Step 4
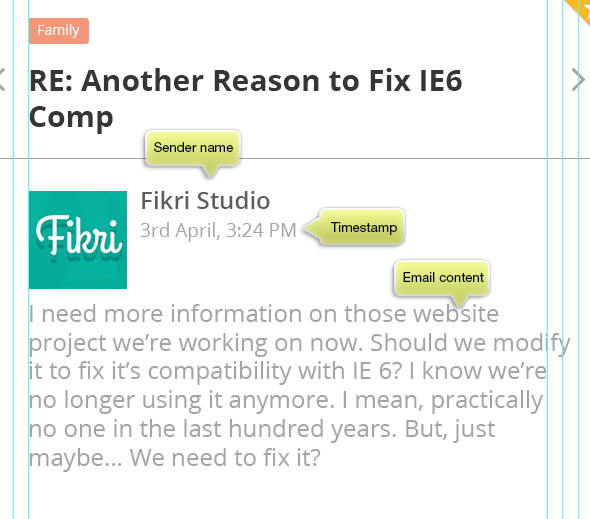
Add star icon on top right corner of the email.
Step 5
Add email tag above the email title.
Step 6
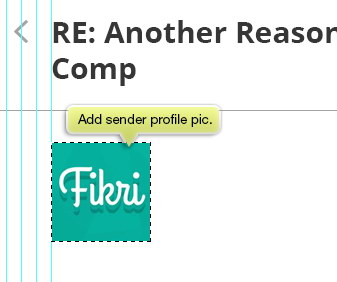
Add sender profile picture.
Step 7
Next to its face, add name, time, and email content.
Step 8
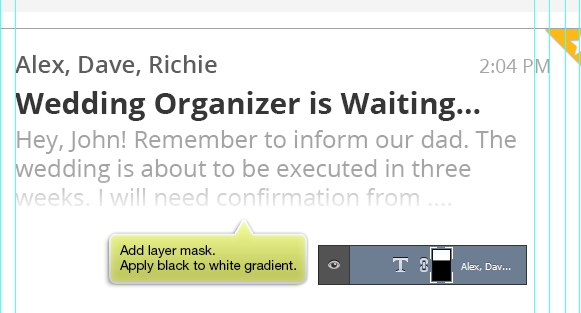
Add layer mask and then apply gradient from white to black. The lower part of the email should be fading.
Step 9
We will add reply to this email. You just simply need to duplicate the email and change its detail. On top right corner, add reply icon. User clicks this icon to reply this email.
Step 10
Here’s the result.
5. Design Right Menu
Step 1
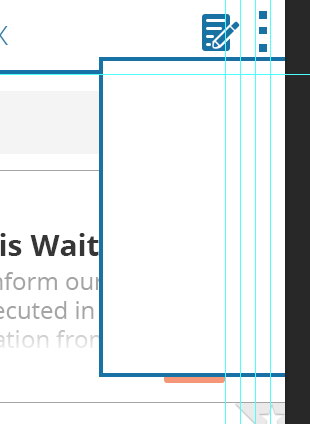
Now, we will design right menu, which control option for selected email. Make new group layer, we will put the right menu here. Draw a white rectangle shape and place it above the header.
Step 2
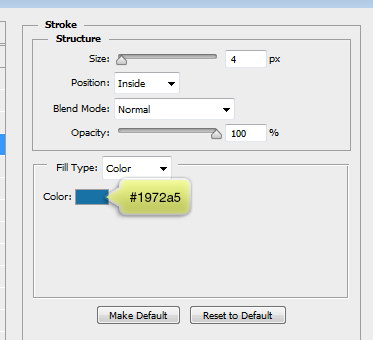
Double click the layer and then apply Stroke. For its color, use same color as the header bottom border, #1872a6.
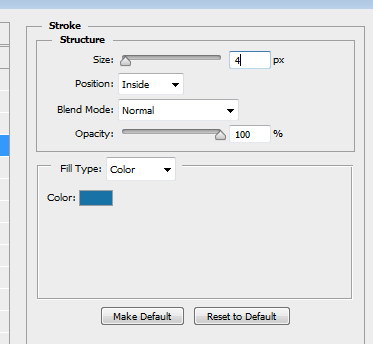
Here’s the result.
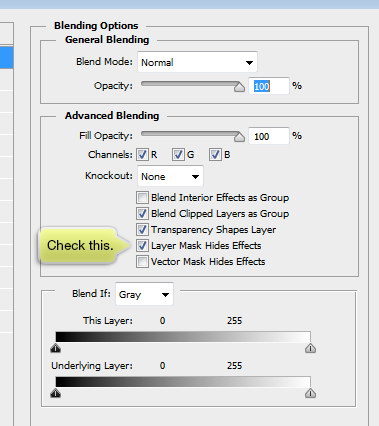
Step 3
Double click the layer. In Layer Style dialog box, activate Layer Mask Hides Effects.
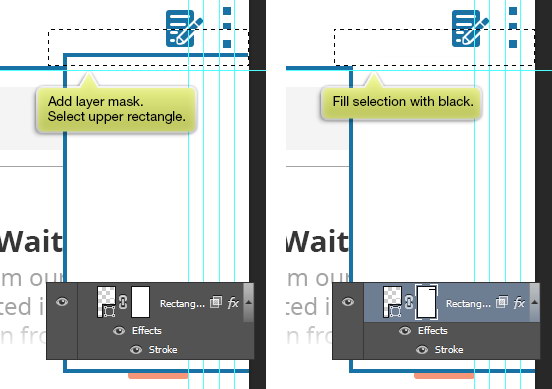
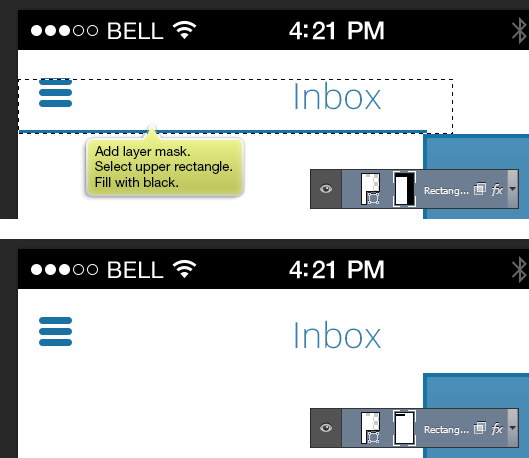
Step 4
Add layer mask onto the layer shape. Select upper rectangle, right above the header border, and then fill it with black.
Step 5
Use Type Tool to add menu inside the rectangle.
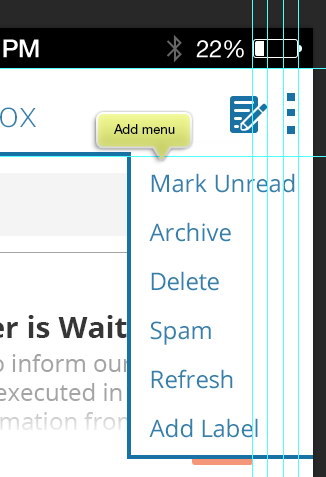
Step 6
Here’s the result we have.
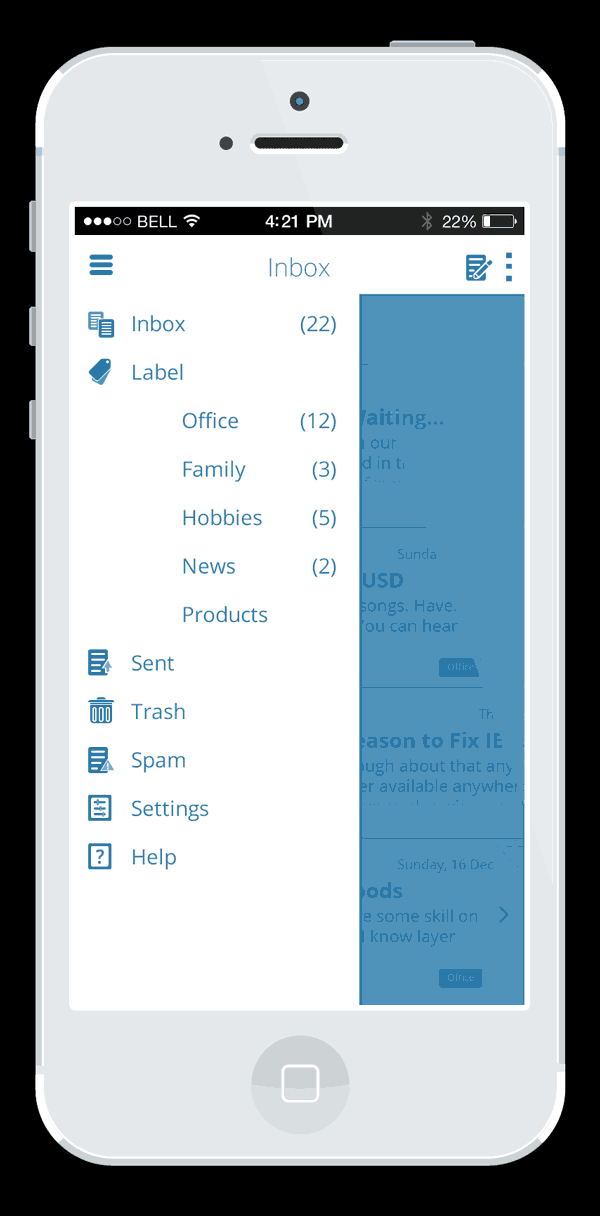
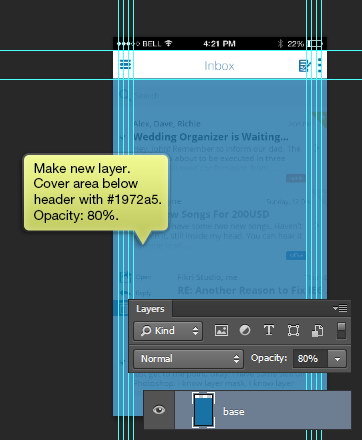
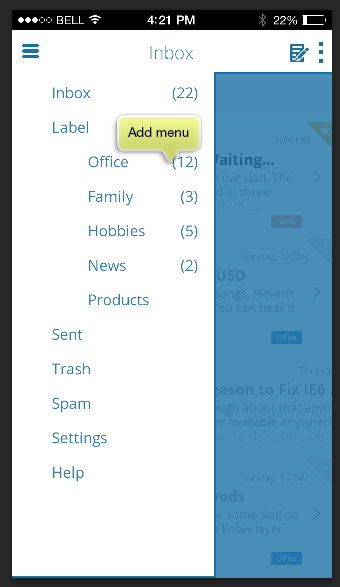
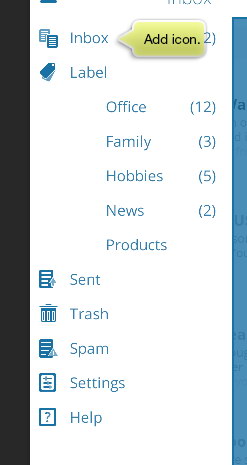
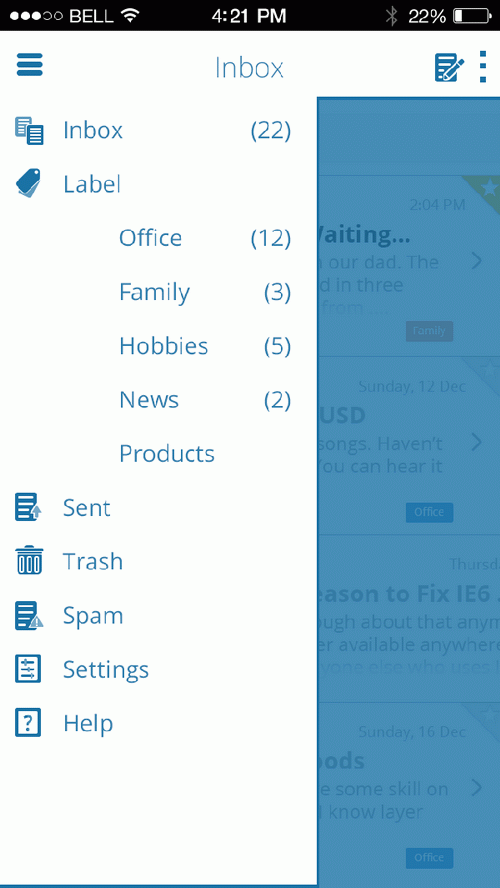
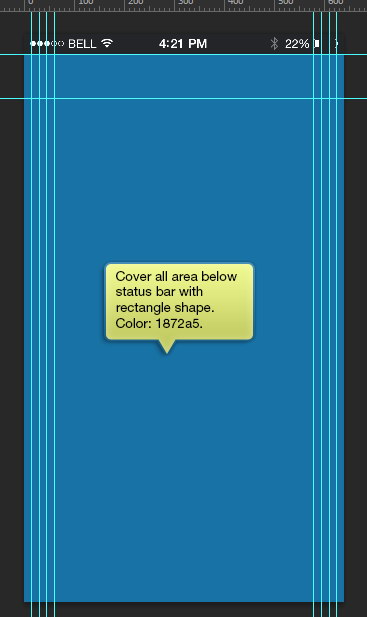
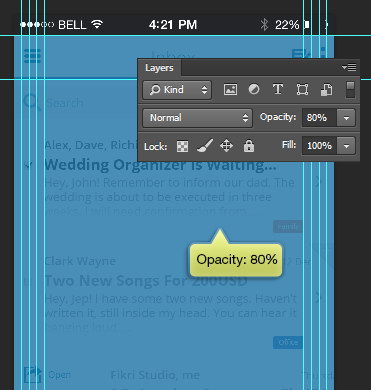
6. Design Left Menu
Step 1
We are now designing the left menu, which shows the app options. Make new layer, and then fill area below header with #1972a5 and then reduce its Opacity to 80%.
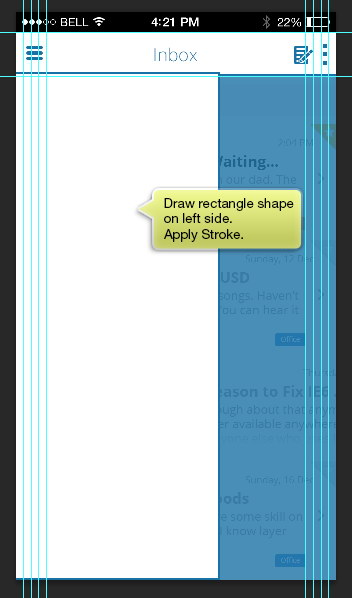
Step 2
Draw a white rectangle shape covering with width about 60% of the main canvas width. Double click the shape and apply Stroke with settings same as the right menu in Section 5.2.
Step 3
Add layer mask, select its upper area, right above header bottom border. Fill selection with black. Make sure you have activated Layer Mask Hides Effect in Layer Style dialog box. If haven’t, double click the shape to open it.
Step 4
Add menu inside the rectangle.
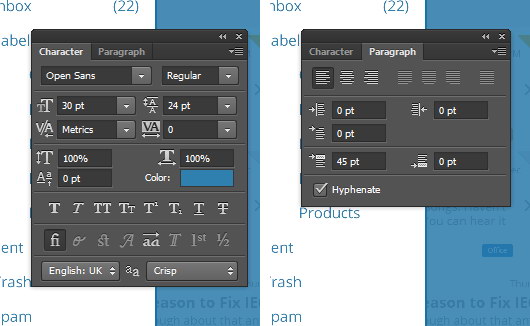
Step 5
Below is the setting I used in Character and Paragraph.
Step 6
Add an icon next to each menu item.
Step 7
This right menu can be opened when inbox is active or when you reading an individual email. Below left menu is opened while app user is reading mail. In Photoshop, we simply reveal read email group layer and hide inbox group layer.
And this is the result when inbox is active. In Photoshop, we just need to hide read email group layer and reveal inbox group layer.
This is the full result from right menu.
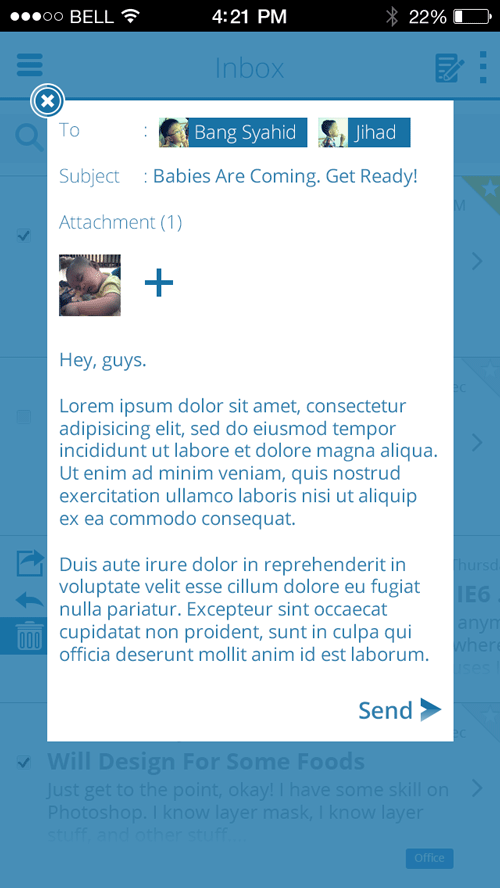
7. Design Compose Tab
Step 1
We are now entering the final design, the compose tab, where users will write new emails. Make new layer above all layers and then fill it with blue, #1872a5.
Step 2
Reduce layer’s Opacity to 80%.
Step 3
Draw a white rectangle shape on center.
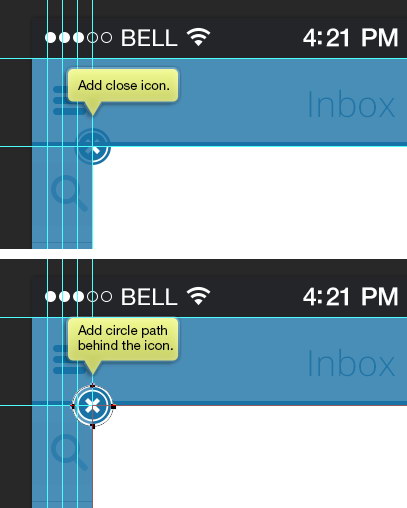
Step 4
Add close icon on its left corner. Add circle path into the rectangle shape, place it behind the icon. This will make the icon can be seen easily.
This is the result with guides hidden.
Step 5
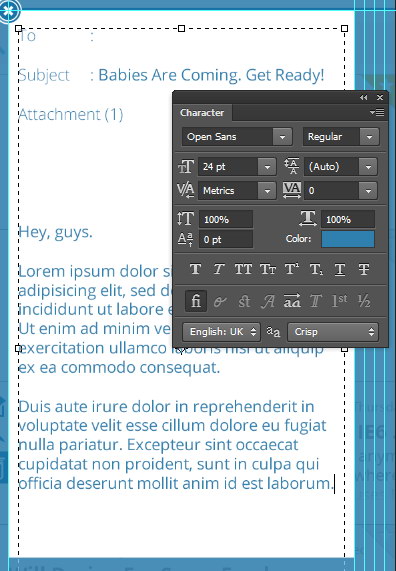
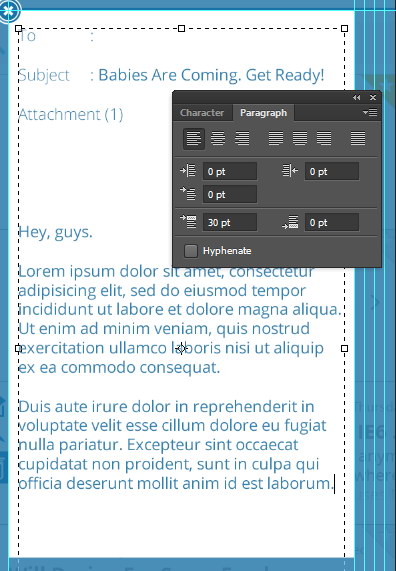
Add text inside the compose box. See following images for the settings used.
- Font type set to Open Sans Regular
- Font size set to 24
- Space Before Paragraph set to 30 pt
Step 6
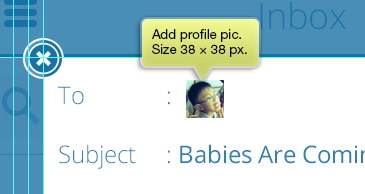
Add profile pic next to To.
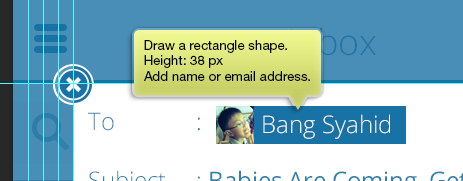
Step 7
Behind it, add a blue rectangle with same height as the profile picture. On top of it, add its name or email address.
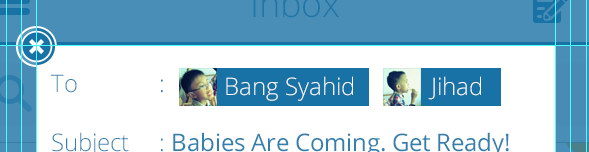
Step 8
Add another picture if you want to.
Step 9
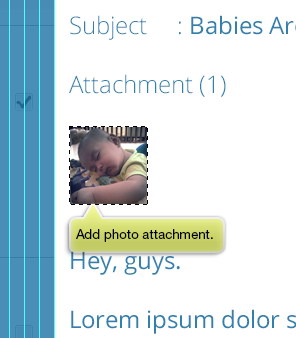
Under attachment, add small photo representing the image file attached to the email. If you attach other type of file, you may change this to file type thumbnail.
Step 10
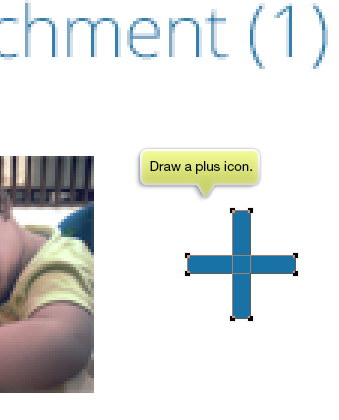
Draw a plus icon made from two overlapped rectangle shape.
Step 11
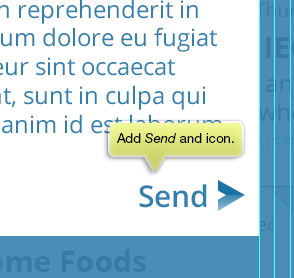
Add text Send and an icon next to it.
Step 12
This compose window can be opened when inbox or individual email is active. The key is just revealing and hiding appropriate layer.

Step 13
This is the result when white status bar is used.

This is the result for compose tab.
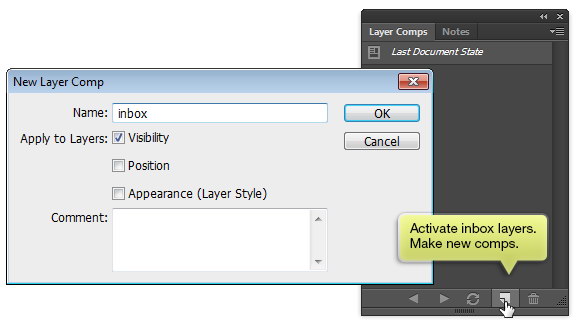
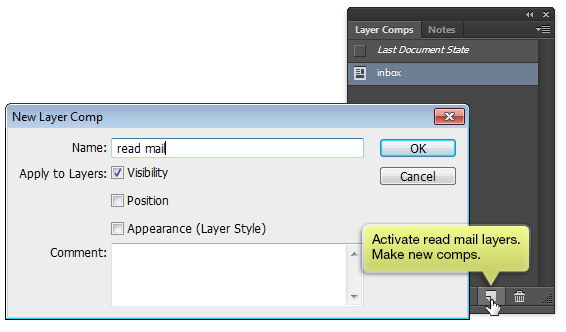
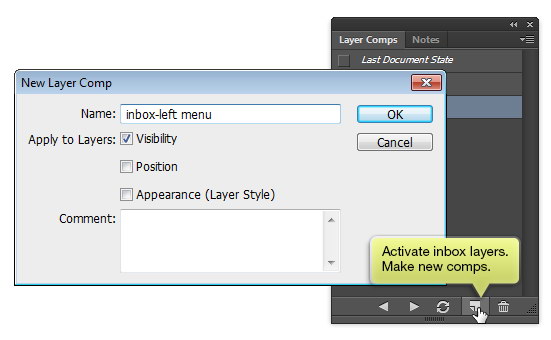
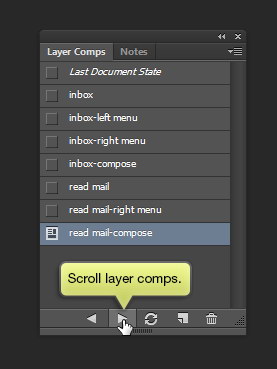
8. Organizing Layers with Layer Comps
Step 1
Currently, we put all our design in one file. This makes it effective because we can share one layer across all designs. To make things easier, we can use Layer Comps. This allows us to quickly hide and reveal layer for each design.
Make sure you have layer sets up for inbox. Open up Layer Comps panel. Click new comps layer. Name it inbox, activate Visibility, and then click OK.
Step 2
Set up layer for Read Mail.
Step 3
Make new Layer Comp again. This time name it read mail. Make sure you have activated Visibility.
Step 4
Set layers for right menu.
Step 5
As in previous steps, save this into Layer Comps.
Step 6
Keep working this, until we have Layer Comp for inbox with left menu, inbox with right menu, inbox with compose tab, read mail with right menu, and read mail with compose tab. Click triangle icon to scroll to next previous layer comp.
9. Presenting App Design in a Mockup
Step 1
Grab free flat iPhone mockup from PixEden. To edit screen, choose the phone color you want and double click smart layer YOUR SCREEN HERE inside the color’s phone group layer. The smart layer will be opened as a separate file.

Step 3
Return to our app design. Activate inbox design, select all (Command/Ctrl-A), and then copy all (Command/Ctrl-Shift-C).
Step 4
Paste the design (Command/Ctrl-V). Make sure it is placed above all layers..
Step 5
Save and close the smart layer file. In the mockup file, the black iPhone screen content is now automatically updated. You can now repeat this process for all your other screens.

Conclusion
In this tutorial, I showed you how to design a Gmail-style, iOS email app from beginning to end. In this process, I showed you how to sketch out your ideas, draw some icons, design your screens, as well as how to incorporate your designs into a realistic mockup. I hope this tutorial has helped you better understand the workflow involved in creating an app like this, and I look forward to see the designs you create, as a result.