Lucidchart is easy to use, but its diagrams look a bit stodgy… unless you think outside the textbox
![]()

I use Lucidchart to create the diagrams that accompany my articles. It’s pretty easy to use, and it’s cheap (in fact, it’s free for your first few charts, although if you’re like me, you’ll want to pony up the five bucks a month for the basic subscription).
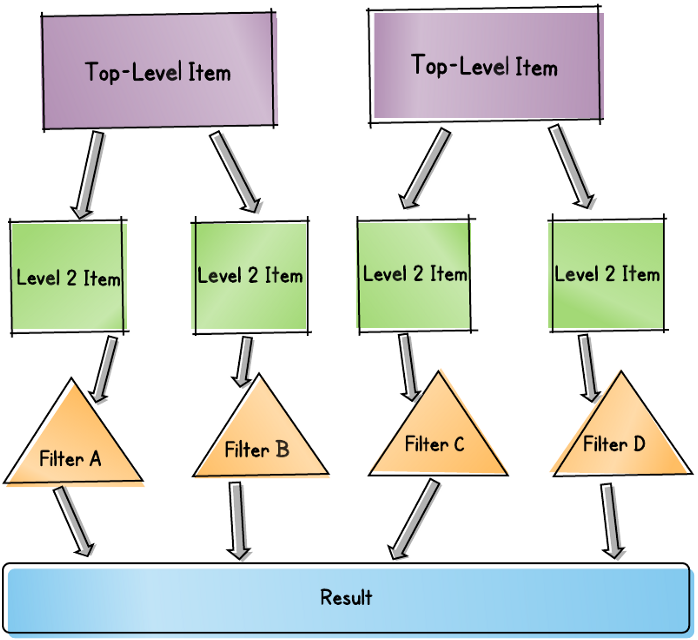
Yet despite all of the tools and shapes offered by Lucidchart, I’d found my diagrams looking a bit stodgy and boring, devoid of any personality. For example, here’s one diagram I’d created awhile back:

It gets the point across, but it’s kind of impersonal, no?
Lucidchart offers a lot of shapes and tools, but it is really oriented towards getting the job done. It’s not made for injecting personality — or any levity at all, really — into diagrams. Even the theme selector that it offers really just allows you to toggle between color combinations.
Hand sketching
What I was after was more of an organic, hand-sketched look. I’d seen such approaches in other articles, and — to me, at least — they really add something. So I tried that approach for my next article. Literally, I grabbed a piece of white paper and a bunch of colored pencils, and began sketching. It took awhile, but I finally wound up with… an absolute mess. I’m an okay artist, but I could not produce a decent-looking hand sketch of boxes and arrows at all.
And even if it had worked, it wouldn’t have seemed like a very scalable solution. For example, I tend to edit my diagrams nearly as often as I make edits to my articles. I also like to reuse diagrams, perhaps with minor modifications. And there have been times where I’d needed to pull up an old diagram from months back. Relying on myself to find an old paper copy of a drawing? Well, good luck with that!
Plus, I paid the sixty bucks up front for my Lucidchart subscription, dammit!
So I decided to head into Lucidchart to see what I could do there. I first thought about what makes something look hand-sketched; or, rather, what makes something look not hand-sketched.

The answer is perfection. In other words, when I create a box in Lucidchart, I define the origin and dimensions of the box, either by dragging with my mouse or by entering the values in a dialog. Lucidchart then draws a border around the box, and fills it. Perfectly.
That’s great if you want it to look perfect. But when we sketch things in real life, they don’t look perfect. Let’s say we’re drawing a box. We’ll typically draw the rectangular border (maybe with a black pen or pencil). Then we’ll shade in the background (with, say, a blue pencil). More often than not, the shading doesn’t perfectly fill the background. There may be gaps. Part of the background may overflow the border.
Perfect imperfection
So I thought, what if I simply created two boxes: a border box, and a background box? To do this, I did the following:
- Copied and pasted my first box. In Lucidchart, this is done using the your standard keyboard controls, or Lucidchart’s Edit menu.
- Offset the new box (which was now the topmost z-indexed item) up and to the left by about four pixels each. To do this, I selected the new box (which was offset down and to the right by default). I then hit the up-arrow key, then the left-arrow key, once each. With my new box directly atop my original box, I held down Shift while tapping the left-arrow and up-arrow, four times each.
- Added my text to the box. I simply double-clicked the box and, upon seeing a blinking cursor, started typing.
- Removed the background from that top-left box. This was done by keeping the box selected, clicking the paintbucket icon in Lucidchart’s toolbar, and choosing the blank color swatch (usually the top-left swatch, displaying a subtle checkboard panel).
- Removed the border from the bottom-right box. Selecting that box was tricky; my approach was to slowly begin dragging a selection box up from the below, just until the lower box was selected. Then I clicked the Lucidchart toolbar’s Line Color icon (which resembles a pen) and selected the blank color swatch.

Okay, I was on to something. But the font hardly looked hand-written. So I switched from Liberation Sans (Lucidchart’s default font) to SF Cartoonist Hand. While I was added, I slightly altered the font size, as well as the opacity, of some individual letters. And I found that bolding the font helped. Here’s what I wound up with:

Subtle? Maybe in this simple example. But here’s an example of an entire diagram that I created using this approach:

Grouping
Particularly when you’re creating a number of these boxes, you’ll want to treat the border and the background as an atomic unit, so that you can move them and resize them together. So you’ll group them. This is done by selecting both shapes, then using Lucidchart’s Arrange → Group menu item.

Note that you can always use the same approach to ungroup the shapes later on. You can also individually edit them (say, to adjust the background’s offset) by double-clicking on the grouped shape. You’ll notice that the rest of the canvas is partially obscured, focusing you on your grouped shapes. There, you can make edits to the individual parts of your group. You’ll then also notice a new, temporary “breadcrumb” toolbar that appears, indicating that you’ve moved from editing the Page to editing the Group. Click the Page label when you’re done to return to editing the entire page.
Getting a little cock-eyed
When we hand-draw, we rarely get our lines perfectly straight. So I decided to experiment with that. The line shape that Lucidchart offers by default is notoriously difficult to use for anything other than, well, straight lines and arrows. After a few minutes of seeing what I could do with lines, I gave up.

So I decided to explore other shape libraries. For this, I clicked the + Shapes button in the left-hand shapes panel. In the popup window of shape collections, I discovered the Data Flow collection. So I selected it and clicked the Use Selected Shapes button to add it to my left-hand shapes panel.

In particular, I was interested in the Data Store shape, which is essentially two parallel lines with a solid background in between. As a regular shape, I could adjust its attributes, such as its line width and color, background color, and — most important — its rotation.
I dragged one of those shapes to my canvas, and sized it to be a square. Then I removed the “Data Store” text, and removed the background (using the blank color swatch as described above).
After re-selecting the shape, I used the rotation handle (represented by a curved line with arrows at each end) to rotate it. Frustratingly, though, no matter what I did, I could not manually achieve a rotation of less than 4 degrees, which was too much. Fortunately, I was able to use the Shape Options toolbar item (which looks like a square with bisecting dotted lines), and manually enter a 1 degree rotation. That was just enough.
That covered two of my four lines. So I copied and pasted the shape, and used the Shape Options toolbar to give at a 271 degree rotation. I then placed the two atop each other.
Finally, I created a regular box of about the same size (but with no rotation). I gave it a background color, but removed its border. I then placed it on top of the two Data Store shapes, and used the Arrange → Send Item To Back toolbar item to allow the Borders to show properly. Viola!

(Maybe it’s somehow wrong to co-opt any semantic meaning of the Data Store shape simply for aesthetic purposes… but I haven’t come across any practical downside yet.)
Gradients
Lucidchart’s color chooser allows you create gradients. Done well, this can add an addition subtle effect to your “hand-drawn” chart. Here’s what I did.
I started with the “sketched” box from my first example. I’d grouped the border and background, so I double-clicked the group so that I could edit the individual components. Then I selected the background square, and clicked the background Fill Color toolbar item. I then expanded the color chooser by clicking the More button at the bottom. This revealed the gradient options.

I first tried creating a Radial gradient, but was never happy with the results. After some thought, I realized that any gradient effect produced by sketching would probably be more linear in nature anyhow.
So I switched to the Linear option. I played around a bit, but the name of the game was clearly subtlety. I choose two colors that were very similar, and repeated one of those colors (so that the pattern went darker-lighter-darker). Thus I had three vector points total (you can add a vector point by clicking in the long rectangular gradient preview image). Finally, I adjusted the Rotation to 225 degrees.

The result was yet another subtle addition to the imperfect, hand-drawn effect I was looking for.
With this approach there are a number of variations to experiment with. For example:
- What is the best offset between the border and background shapes? Should they be close together? Far apart?
- If you have multiple shapes with this effect in your diagram, should the border-background offset by uniform across all of the shapes? Or should they vary across your diagram?
- Should the background be rotated rather than the border? Should both be rotated?
- Do any particular colors or color combinations create more of a hand-drawn effect than others?
Since we’re working with Lucidchart, I thought I’d point out one more trick I discovered. It’s easy to create a diagram in Lucidchart, select the elements in your diagram (omitting certain elements from your selection if needed), copy, and paste into your Medium article. However, I’ve found that Lucidchart likes to apply some padding to the selection before copying. So the image you paste into your article is not as well-cropped as you might want.

The quick solution I discovered was to select the newly-pasted image from my Medium article and copy it, then go to my Mac’s Preview application and choose File → New from Clipboard. The image — complete with extra padding — will appear in a new window. I then just drag a box around the area I truly want included in my image, then use the Tools → Crop menu item. Finally, I use Edit → Select All (or simply command–A) and copy the image. Then it’s back over to my article to delete the previous image and replace it with the new copy.

Undoubtedly there are other similar techniques, including some that are not Mac-specific. In addition, if all else fails, Lucidchart does offer an export option (File → Export → PNG) that allows you to manually crop. However, this process is a bit more clunky, as it requires multiple dialogues, saving to your file system, and then uploading from your filesystem to get the image into your article.
If you create diagrams for your articles and haven’t tried Lucidchart, give it a whirl. And if you do use Lucidchart but are dissatisfied with the look and feel of your shapes, feel free to experiment with this technique. It will add some fun and personality to your articles, and will undoubtedly inspire you to develop other techniques. And when you do, come on back here and tell me; I’d love to hear about them!