Introduction
In this tutorial, the second installment of the SpriteKit From Scratch series, you learn about constraints and actions. These features are used to easily add movement and animations to your SpriteKit game while limiting the position and orientation of nodes in the game.
To follow along with me, you can either use the project you created in the first tutorial of this series or download a fresh copy from GitHub.
1. Custom Node and Scene Classes
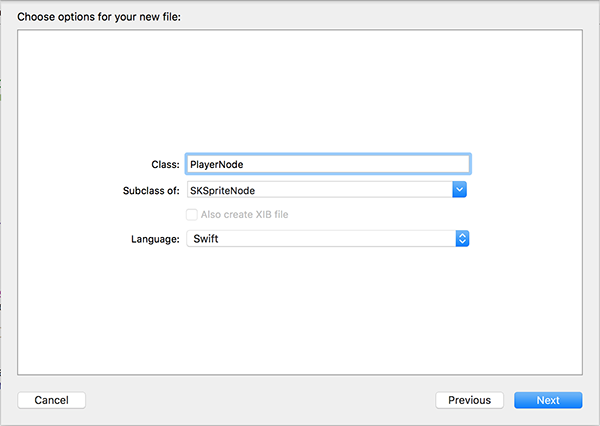
Before we can start adding constraints and actions to a scene, we first need to create a few classes so that we can work with our nodes in code. Create a new class, PlayerNode, based on the iOS > Source > Cocoa Touch Class template and make sure it is a subclass of SKSpriteNode.

If Xcode throws an error after creating the class, add an import statement for the SpriteKit framework below the import UIKit statement:
import UIKit
import SpriteKit
Next, declare the following three properties in the PlayerNode class. These properties will hold the constraints used to limit the car’s horizontal movement.
import UIKit
import SpriteKit

class PlayerNode: SKSpriteNode

    var leftConstraint: SKConstraint!
    var middleConstraint: SKConstraint!
    var rightConstraint: SKConstraint!
Create another Cocoa Touch Class and name it MainScene, making it a subclass of SKScene.
At the top, add an import statement for the SpriteKit framework.
import UIKit
import SpriteKit
With these classes created, open MainScene.sks, click the grey background to select the scene, open the the Custom Class Inspector on the right, and set Custom Class to MainScene.
Select the car and set its class to PlayerNode in the same way that you did for the scene. Lastly, with the car still selected, open the Attributes Inspector and change Name to Player.
Now that we have the basic classes set up, we can begin creating some constraints in code.
2. Constraints
Constraints in SpriteKit, represented by the SKConstraint class, are used to limit the position and orientation of particular nodes. A lot of variety can be achieved with constraints as they can be relative to the scene or relative to other nodes. Constraints also work with ranges of values in addition to constant values so sprites within your scene can be fixed to a specific location or allowed to move within a certain area.
The constraints we are going to be adding are the three that we declared in the PlayerNode class. These constraints will be used to lock the car to the three lanes in the game.
Open MainScene.swift and create a property for the player of type PlayerNode!. This property will store a reference to the player node.
import UIKit
import SpriteKit

class MainScene: SKScene

    var player: PlayerNode!
Next, we override the didMoveToView(_:) method of the MainScene class:
override func didMoveToView(view: SKView)
    super.didMoveToView(view)

    size = view.frame.size

    if let foundPlayer = childNodeWithName("Player") as? PlayerNode
        player = foundPlayer


    let center = size.width/2.0, difference = CGFloat(70.0)

    player.leftConstraint = SKConstraint.positionX(SKRange(constantValue: center - difference))
    player.middleConstraint = SKConstraint.positionX(SKRange(constantValue: center))
    player.rightConstraint = SKConstraint.positionX(SKRange(constantValue: center + difference))

    player.leftConstraint.enabled = false
    player.rightConstraint.enabled = false

    player.constraints = [player.leftConstraint, player.middleConstraint, player.rightConstraint]
Let’s go through the code step by step. The didMoveToView(_:) method is called whenever the scene is presented by a view. After calling the didMoveToView(_:) method of the superclass, we resize the scene to the same size as the current view. This ensures that the scene always fills up the size of the current device’s screen and scales properly.
We access the player sprite we added in the Xcode scene editor by searching for it by the name we gave it earlier. We then assign this value to the player property.
After calculating the center of the scene and specifying a constant difference of 70.0, we create the sprite’s constraints. By using the positionX(_:) class method of the SKConstraint class, we create the left, middle, and right constraints for the player sprite. This method requires an SKRange instance as a parameter, which, in our case, is a range with a constant value. If you want to look at the possible constraints and ranges in SpriteKit, I recommend taking a look at the SKConstraint and SKRange class references.
We disable the left and right constraints, because we don’t want these to be acting on the player node when the game starts. Lastly, we assign these constraints to the constraints property of the player node. This property is defined in the SKNode class.
Build and run your game on any simulator or physical device. You should now see that your scene is scaled correctly with the car centered at the bottom.
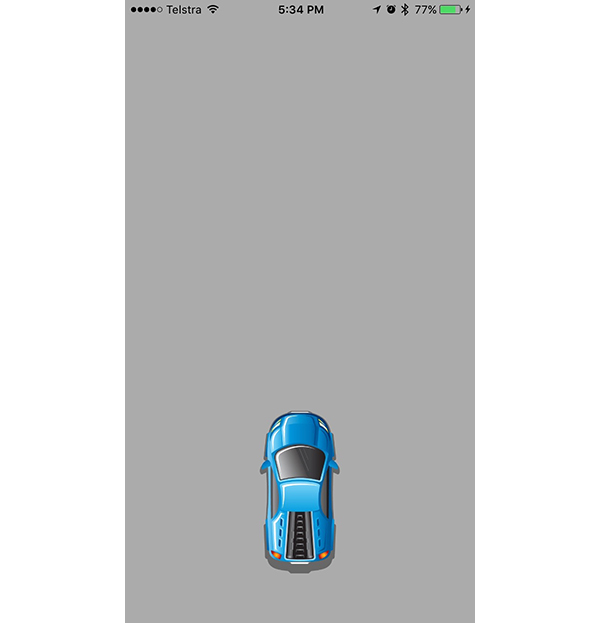
You can see that the car is now constrained to the horizontal centre of the scene and is able to be constrained to the left and right lanes once we add some movement to the game.
2. Actions
Actions in SpriteKit are represented by the powerful SKAction class. Actions allow us to easily animate and move sprites in a scene. They are executed by nodes and are evaluated by the SpriteKit APIs and function alongside constraints and physics simulations.
In addition to specifying what an action does, you can also program how the action works by configuring it. You can, for example, pause and resume actions or configure an action’s easing behavior. This gives you a greater degree of control as you can easily speed up or slow down certain actions to produce some interesting gameplay elements.
Similarly to how nodes can have child nodes, there are three types of actions that can have child actions:
- sequence actions, which execute an array of actions one after the other
- group actions, which execute an array of actions all at the same time
- repeating actions, which repeat a single action for a given number of times or indefinitely
You can create actions programmatically or in Xcode’s scene editor, which we used in the previous tutorial. We are going to use both techniques in this tutorial.
Open MainScene.sks and click the icon next to the Animate button in the bottom left of the scene to bring up the Action Editor View.
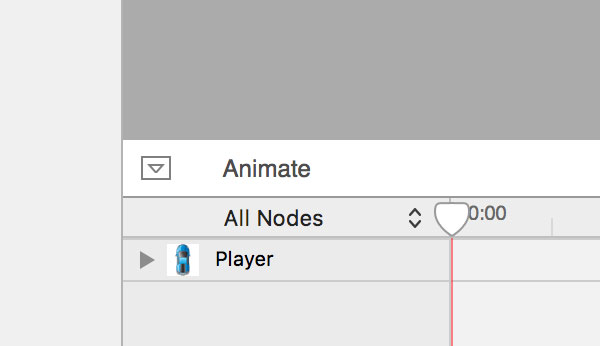
Next, scroll down in the Object Library of the right and find the Move Action item. Click and drag this into the timeline of the Action Editor View and place it at the left edge as shown below:
This causes the action to begin executing at 0:00, that is, as soon as the scene is presented. If placed somewhere else, the action would begin executing after the time interval shown at the top of the timeline.
Hover your mouse over the action and click the small arrow icon in the bottom left. In the popup that appears, click on the infinity button on the left. This causes the action to repeat forever.
With the action still selected, open the Attributes Inspector on the right and change the Y Offset value to 100.
The other values specify that the car starts will animating immediately (Start Time) and every 1 second (Duration) will move 0 points in the X direction and 100 in the Y direction (Offset). The Timing Function property can be used to gradually start and/or stop an action. In this case, we are using Linear, which means the car always moves at the same speed.
Finally, to test out the action, click the Animate button in the bottom left of the scene editor. The bottom toolbar should turn blue and the car should start moving up.
With the move action implemented, it is time to create the horizontal actions programmatically. Before we do so, we need to add some logic so that the buttons in the game can control the car.
Create a new file by choosing the iOS > Source > Swift File template and name it LaneStateMachine.
Add the following code to the new file:
import GameplayKit

class LaneStateMachine: GKStateMachine


class LaneState: GKState
    var playerNode: PlayerNode

    init(player: PlayerNode)
        playerNode = player


class LeftLane: LaneState
    override func isValidNextState(stateClass: AnyClass) -> Bool
        if stateClass == MiddleLane.self
            return true


        return false


    override func didEnterWithPreviousState(previousState: GKState?)
        playerNode.moveInDirection(.Left, toLane: self)


class MiddleLane: LaneState
    override func isValidNextState(stateClass: AnyClass) -> Bool

    override func didEnterWithPreviousState(previousState: GKState?)
        if previousState is LeftLane
            playerNode.moveInDirection(.Right, toLane: self)
         else if previousState is RightLane
            playerNode.moveInDirection(.Left, toLane: self)


class RightLane: LaneState
    override func isValidNextState(stateClass: AnyClass) -> Bool
        if stateClass == MiddleLane.self
            return true


        return false


    override func didEnterWithPreviousState(previousState: GKState?)
        playerNode.moveInDirection(.Right, toLane: self)
All this code does, is utilize the new GameplayKit framework to create a state machine that represents the three lanes and movement between them in the game. If you want to better understand what this code is doing, check out my tutorial covering GameplayKit.
Next, open PlayerNode.swift and add the following two methods to the PlayerNode class:
func disableAllConstraints()
    leftConstraint.enabled = false
    middleConstraint.enabled = false
    rightConstraint.enabled = false


func moveInDirection(direction: ButtonDirection, toLane lane: LaneState)
    disableAllConstraints()

    let changeInX = (direction == .Left) ? -70.0 : 70.0
    let rotation = (direction == .Left) ? M_PI/4 : -M_PI/4

    let duration = 0.5
    let moveAction = SKAction.moveByX(CGFloat(changeInX), y: 0.0, duration: duration)
    let rotateAction = SKAction.rotateByAngle(CGFloat(rotation), duration: duration/2)
    rotateAction.timingMode = .EaseInEaseOut
    let rotateSequence = SKAction.sequence([rotateAction, rotateAction.reversedAction()])
    let moveGroup = SKAction.group([moveAction, rotateSequence])

    let completion = SKAction.runBlock  () -> Void in
        switch lane
        case is LeftLane:
            self.leftConstraint.enabled = true
        case is MiddleLane:
            self.middleConstraint.enabled = true
        case is RightLane:
            self.rightConstraint.enabled = true
        default:
            break


    let sequenceAction = SKAction.sequence([moveGroup, completion])
    runAction(sequenceAction)
The disableAllConstraints() method is a convenience method to disable the constraints of the player node.
In moveInDirection(_:toLane:), we determine which direction the car should move in horizontally, -70.0 when moving left and +70.0 when moving right. We then calculate the correct angle (in radians) to rotate the car by when moving. Note that positive numbers represent a counterclockwise rotation.
After specifying a constant duration, we create the move and rotate actions by using the moveByX(_:y:duration:) and rotateByAngle(_:duration:) class methods respectively. We create a rotation sequence to rotate the car back to how it was before the movement. The reversedAction() method automatically creates the reverse of an action for you.
Next, we create a movement group action to execute the horizontal move and rotation at the same time. Finally, we create a completion action to execute a closure when executed. In this closure, we find out which lane the car is currently in and enable the correct constraint for that lane.
Open ViewController.swift and add a property, stateMachine, of type LaneStateMachine! to the ViewController class.
class ViewController: UIViewController

    var stateMachine: LaneStateMachine!

    ...
Replace the implementations of viewDidLoad() and didPressButton(_:) in the ViewController class with the following:
override func viewDidLoad()
    super.viewDidLoad()

    let skView = SKView(frame: view.frame)
    let scene = MainScene(fileNamed: "MainScene")!
    skView.presentScene(scene)
    view.insertSubview(skView, atIndex: 0)

    let left = LeftLane(player: scene.player)
    let middle = MiddleLane(player: scene.player)
    let right = RightLane(player: scene.player)

    stateMachine = LaneStateMachine(states: [left, middle, right])
    stateMachine.enterState(MiddleLane)


@IBAction func didPressButton(sender: UIButton)
    switch sender.tag
    case ButtonDirection.Left.rawValue:
        switch stateMachine.currentState
        case is RightLane:
            stateMachine.enterState(MiddleLane)
        case is MiddleLane:
            stateMachine.enterState(LeftLane)
        default:
            break

    case ButtonDirection.Right.rawValue:
        switch stateMachine.currentState
        case is LeftLane:
            stateMachine.enterState(MiddleLane)
        case is MiddleLane:
            stateMachine.enterState(RightLane)
        default:
            break

    default:
        break
In viewDidLoad(), we insert the SKView object at index 0 so that the control buttons are visible and we also initialize the state machine.
In didPressButton(_:), we find out which button the user pressed, based on the tags of the buttons, and enter the correct lane from where the car currently is.
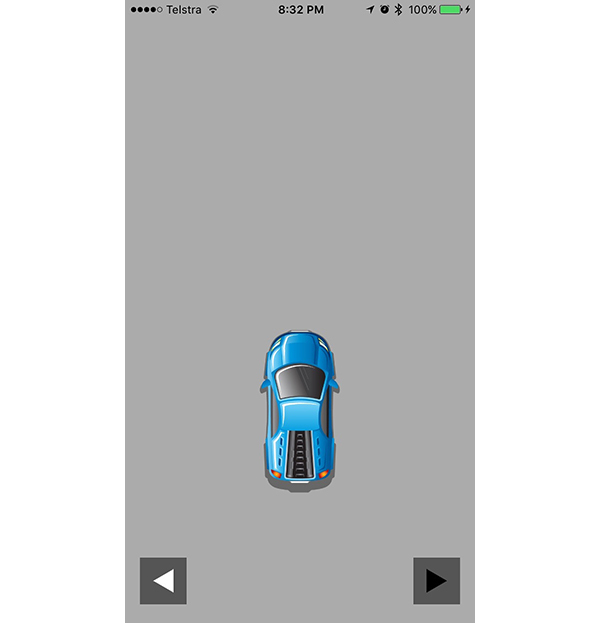
Build and run the game. Press either the left or the right button at the bottom of the screen to make the car move. You should see the car turn and move in the direction of the button that you pressed.
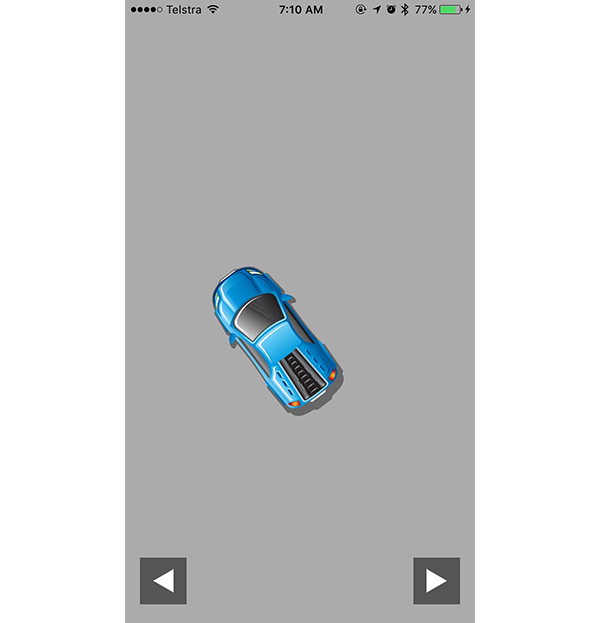
Note that the button icons may be mismatched as shown below.
To fix this, open the assets catalog (Image.xcassets) and for each image (Left Arrow and Right Arrow) set Rendering Mode to Original Image.
Conclusion
You should now be confident using constraints and actions in SpriteKit. As you can see, these features of the framework make it very easy to add animations and movements to a SpriteKit game.
In the next tutorial of this series, we are going to look at camera nodes in SpriteKit so that our car doesn’t always move off the top of the screen. After this, we will look in depth at the physics simulation system in SpriteKit with a focus on physics bodies and collision detection.
As always, be sure to leave your comments and feedback in the comments below.