
Sass is a great way to speed up front-end development in general, I use it in every one of my projects. Sass (as with all other preprocessors) allows for nested styles, functions and prewritten code in what are called mixins. Foundation has a few different versions, currently we’ve covered the most common HTML/CSS variants, but now let’s talk about a version built on Sass.
The team behind Foundation have not only used Sass to allow more friendly and dynamic styling, but they also offer greater customisation in the Sass version than in the HTML/CSS version.
Sass is great for those of you who, like me, are designers first and coders second. HTML and CSS are easy enough to learn and get the job done, but it’s a big jump to go from those simplistic languages to jQuery and JavaScript. Using Sass allows you to flirt with the idea of functions, variables, and reusable code which really helps in the transition toward more complex languages.
Getting Started: OS X
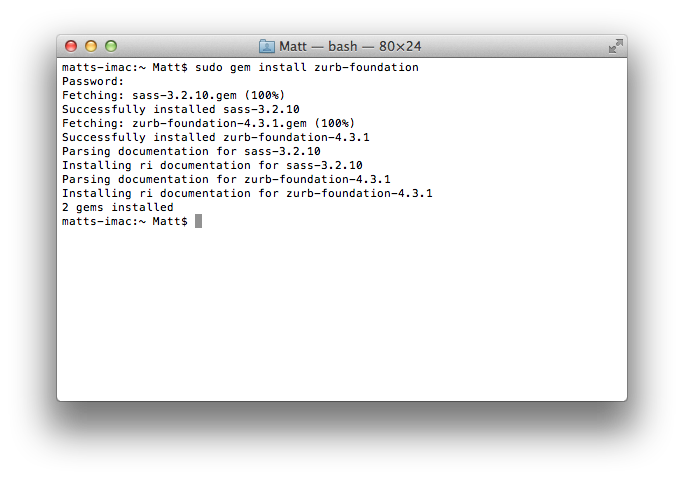
We’re going to dive right in here, and we’ll need to use terminal/command prompt to do so, but don’t be put off as it’s easier than it looks. To get going open up Terminal (OS X) and paste in the following:
sudo gem install zurb-foundation
It may take some time to process, but should result in a screen like this:
Once you have completed this step, you’ll have essentially added the Foundation core to your system, allowing you to reuse it as you please without having to go to the Foundation site. What’s cool about taking this approach is that with another simple command you can update this core reusable framework to either the latest public build or release candidate. To do this simply paste one of the following into terminal:
sudo gem update zurb-foundation
sudo gem install zurb-foundation --pre
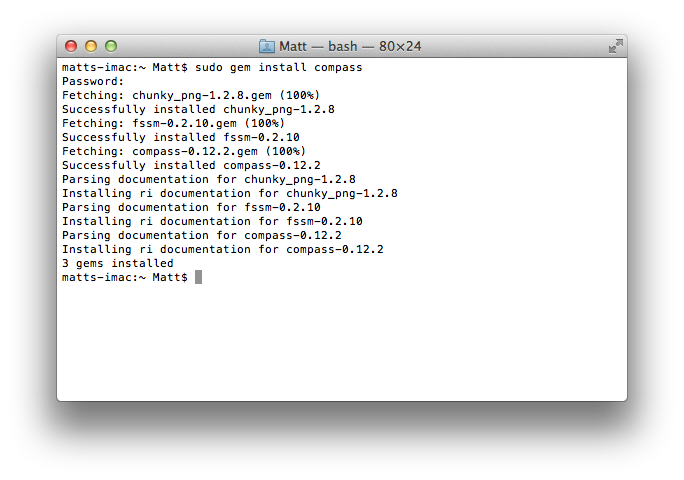
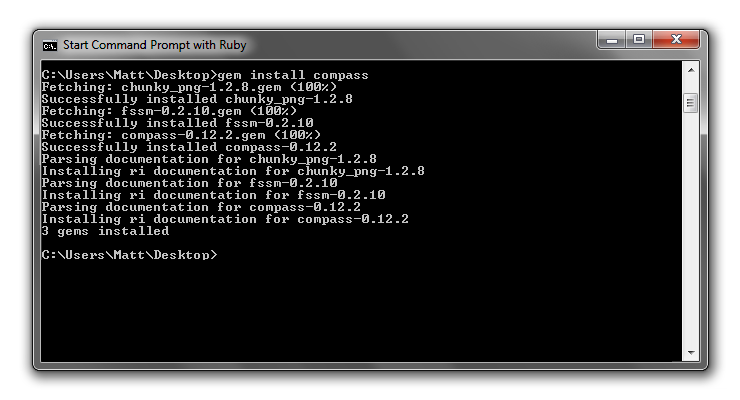
There’s one final step of setup and that’s to install Compass, which will allow us to create builds of Foundation for use in our projects. Again, this may take some time so be patient. Paste in the following:
sudo gem install compass
After installing you should have a Terminal output that looks like this:
Now that we have traversed the twists and turns of installing a ruby gem and keeping it up-to-date, let’s setup a project so we can begin to analyse this route of developing with Foundation.
Project Setup: OS X
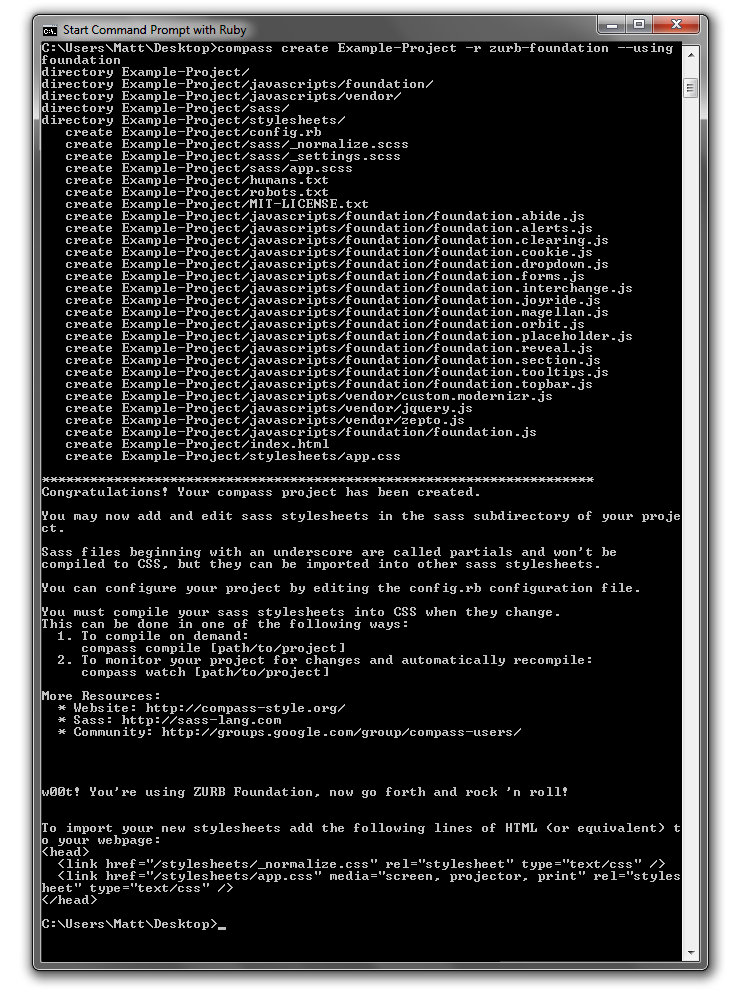
Whenever you want to start a new project simply open up terminal and type “cd” (change directory), without the speech marks, then you’ll need to either type in a path, or create a folder for your project and drag it in to terminal. Make sure there’s a space between “cd” and your path, though. Follow this with a command that will actually create your project:
compass create YOUR-PROJECT-NAME -r zurb-foundation --using foundation
Ensure you change the “YOUR-PROJECT-NAME” text for your actual project name and hit return. You’ll then see many many lines of information resulting in a choice. This choice dictates whether your Sass files will be converted to CSS files whenever you save them, or manually when you choose to convert them. I always use the second choice, which automatically creates CSS files whenever I save my Sass files. You should see something like this:
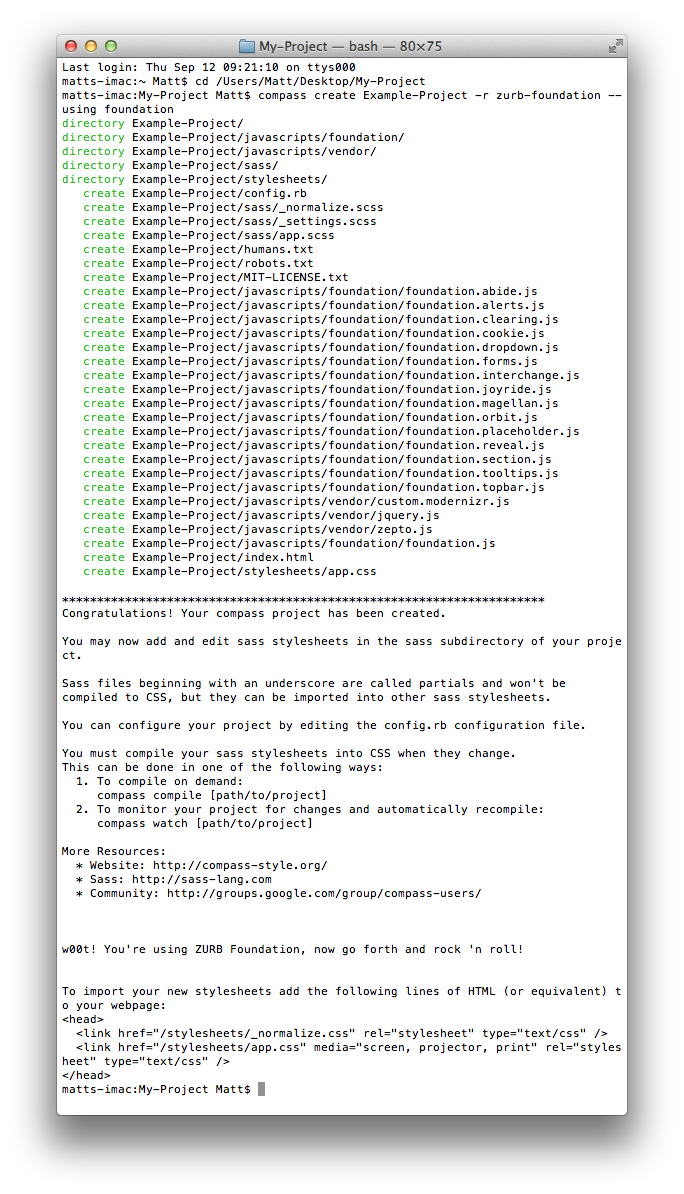
You can see from this that a lot has happened and your Foundation-based project is born. Once you’ve chosen your compile method by using the “compass compile” or “compass watch” method, you may want to grab the code that you can see at the bottom of the image. This will just save you some time as it adds your output stylesheet and normalize.
From here you can start actually building your project using Sass.
Getting Started: Windows
If you’re using Windows you can still use the Sass version of Foundation, it just takes a few more steps to get going. First off, let’s go grab Ruby. Ruby is what will allow us to install this Sass-based version of Foundation. Unlike OS X, Windows does not have this installed by default, so we’ll need to go get it.
Now you’ll want the latest version (2.0.0 at time of writing) and depending on what architecture you are using, pick either the standard for 32-bit machines or x64 for 64-bit machines. If you are unsure which, you have to simply right-click “My Computer” and click “Properties” to find out. Failing that, go with 32-bit.
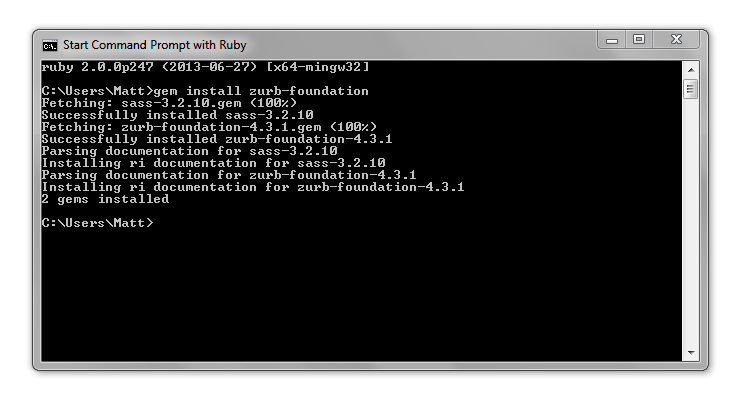
Once downloaded, run through the install. Don’t tick/change anything unless you know what you are doing. After installation is complete go to programs, then Ruby and click “Start Command Prompt with Ruby”. Once that has loaded up copy the following code and paste into the command prompt, you can do this by right clicking on the top bar and going to edit > paste.
gem install zurb-foundation
You’ll see something similair to this:
You can also keep Foundation up-to-date using either the general public build command or the release candidate command:
gem update zurb-foundation
gem install zurb-foundation --pre
Now that we have the basics setup, let’s go ahead and install the final piece, Compass. Just like before, we can install Compass using a command:
gem install compass
Be patient, this will result in a screen like this:
Project Setup: Windows
To actually create your project you’ll need to switch to a directory such as “Desktop” and run a command. You can do this by typing “cd” without the speech marks, followed by a space, followed by a path. To add the path itself you can either type one in, or simply drag and drop the folder into the command prompt.
Once you have changed directory, run this command, and be sure to change YOUR-PROJECT-NAME for your actual project name.
compass create YOUR-PROJECT-NAME -r zurb-foundation --using foundation
And that’s it! Following this there aren’t any differences between Windows and OS X.
Useful Tool
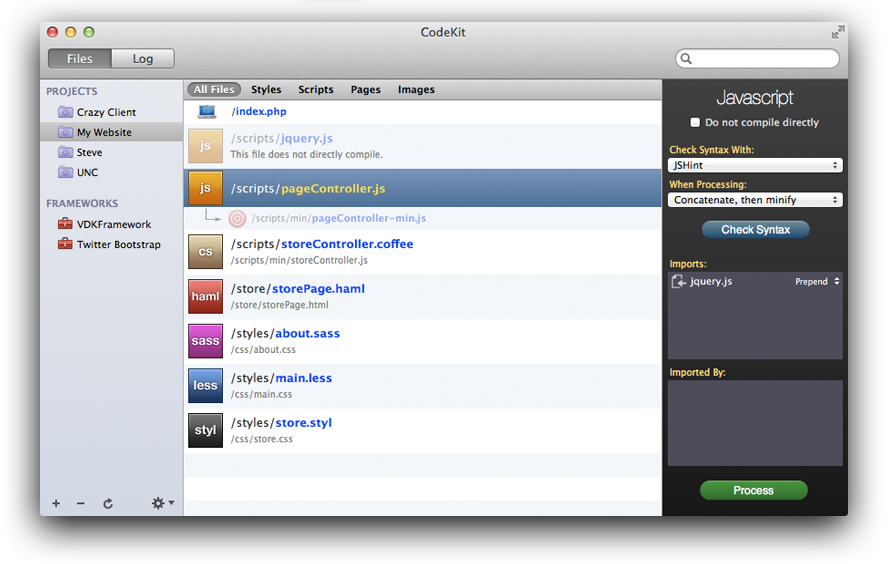
If you do use OS X there’s a great development tool called CodeKit. This application automatically minifies JS, CSS, SCSS- and converts SCSS to CSS, meaning you can kill terminal and use CodeKit instead. It also offers error highlighting for both JS and SCSS, including libraries such as jQuery.
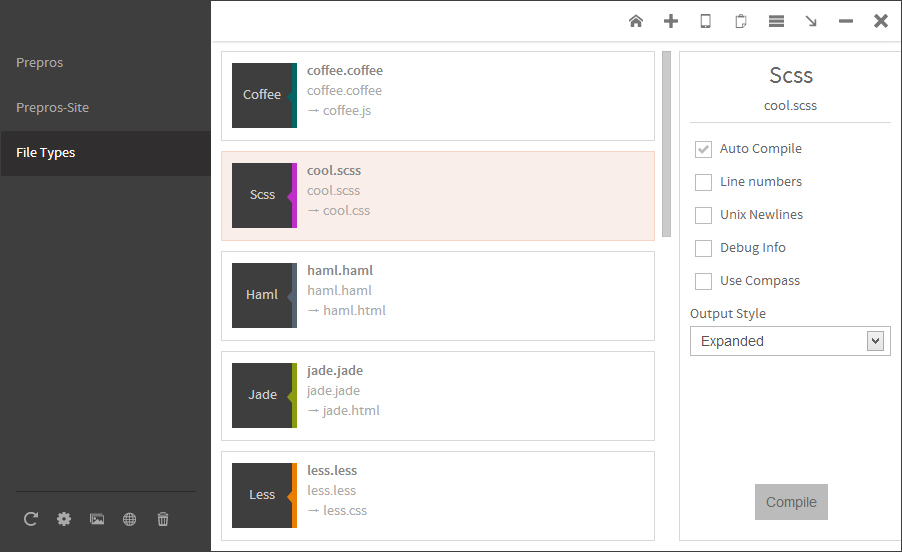
I know what you’re thinking; “I don’t have OS X”. No worries, I haven’t forgotten about you Windows people- you can grab the closest equivalent application called Prepros.
Coming Up..
In the next part we’ll be looking at what you can do with this more dynamic Sass-based version of Foundation, including customising the build, changing default styles and much more.