One of my favorite new tools with Adobe Illustrator CS6 is the Pattern Tool. It’s great for creating complex seamless patterns in real time and gives you so many options. However it’s not so easy to create a Pattern Brush. Today’s Quick Tip tutorial is a bit of an experimental one, showing you how you can use the Pattern Tool to help in the creation of a Pattern Brush.
Step 1
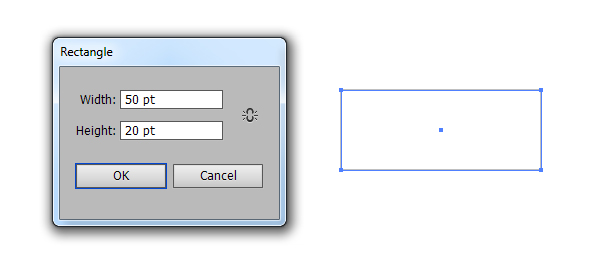
Using the Rectangle Tool (M) click on the artboard once and create a 50 by 20pt rectangle. This is going to be the boundary of your Pattern Brush segment.
Step 2
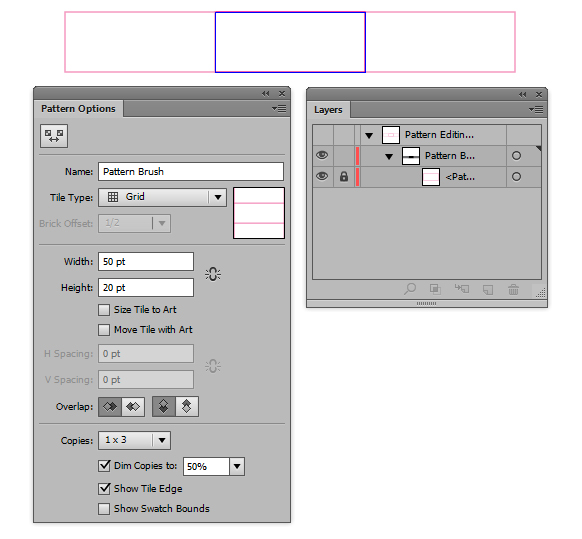
While the rectangle is selected, go to Object > Pattern > Make and it will open up the Pattern Options dialog box. Lock your rectangle into place as we don’t wish to alter that right now. At this stage, set the Copies to 1 x 3 as this will show you what your Pattern Brush will look like and Dim Copies to around 50%. This is so you can see which shapes and strokes are the original ones compared to the automatically generated elements.
Step 3
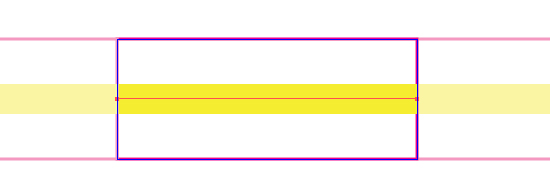
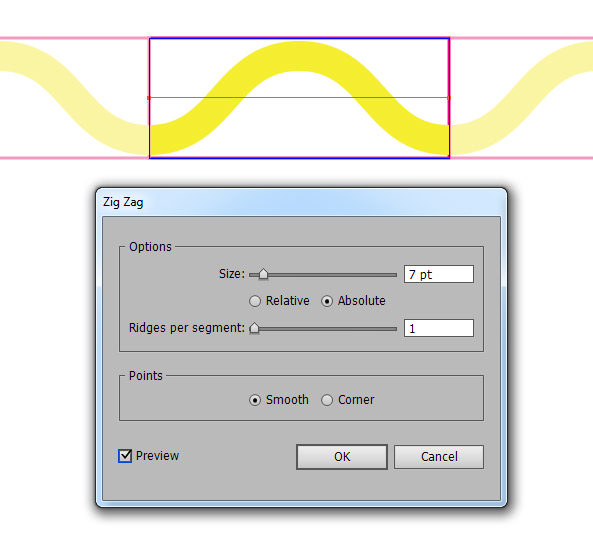
Enable Smart Guides (Ctrl + U) and then use the Line Segment Tool (\) to draw a horizontal line from side to side of the boundary rectangle. Give it a Stroke Weight of 5pt.
While selected, go to Effects > Distort & Transform > Zig Zag and use the options below to create a simple wave.
Step 4
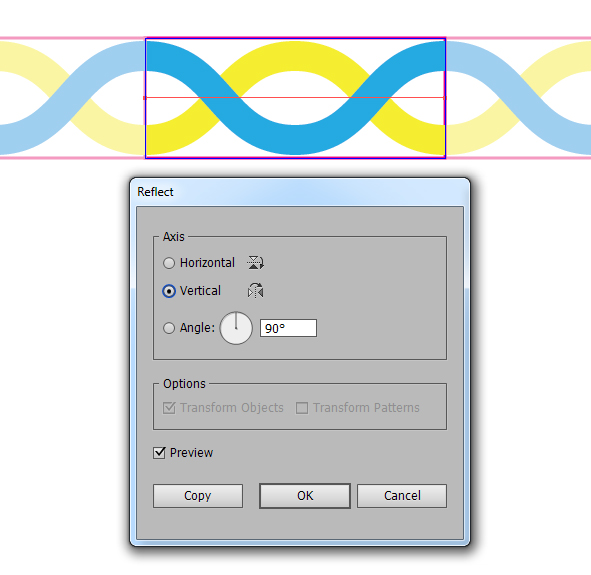
We’re going to aim for a basic knot/wave style Pattern Brush, so duplicate the original wave and then go to Object > Transform > Reflect. Reflect the wave vertically to create a wave on either side.
Step 5
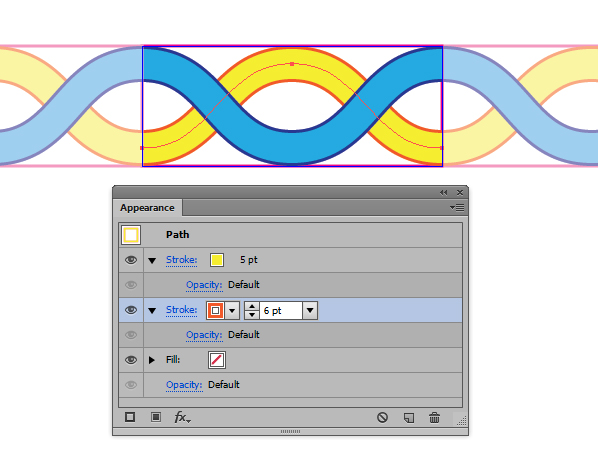
Go to Object > Expand to remove the Zig Zag effect from the lines so you’re left with two curved lines. Then use the Appearance panel to add a stroke behind the original with a 6pt Stroke Weight. This will give your strokes a slight outline.
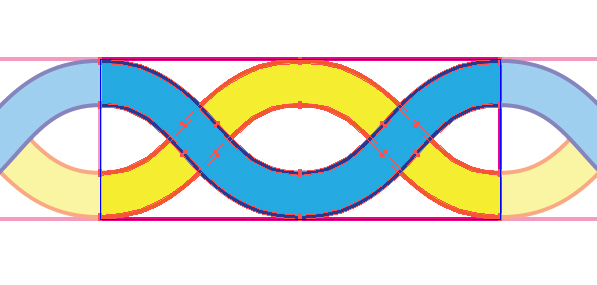
Then go to Object > Expand Appearance and click on OK with everything ticked. This will give you four shapes in total, plus your locked boundary. Unlock the boundary shape and Select All (Ctrl + A) and Copy (Ctrl + C) the shapes. Come out of the Pattern Option dialog by pressing cancel.
Step 6
Paste (Ctrl + V) your shapes onto the artboard and then Object > Ungroup all of the shapes. You can discard the boundary box now as you can see your waves fit within the shape. You’ll see in the second example why it’s good to keep a hold of the boundary box after creating the initial pattern.
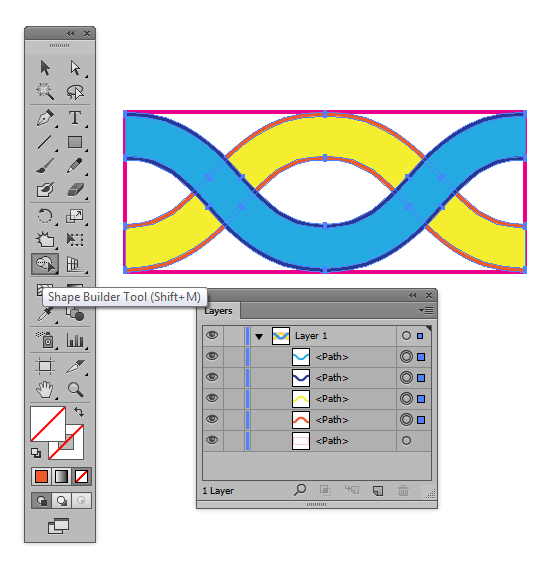
Change all of the fills to the four remaining shapes and then use the Shape Builder Tool (Shift + M) to combine the relevant links in the wave.
Hold down Alt and use the Shape Builder Tool (Shift + M) to remove sections of the wave.
Step 7
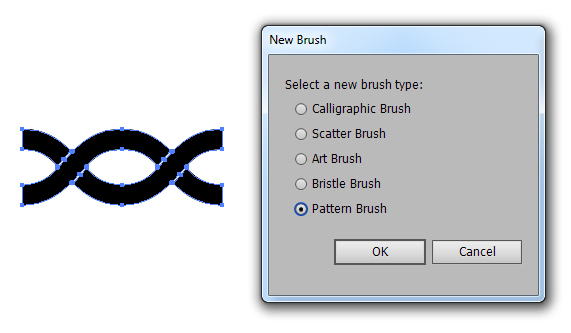
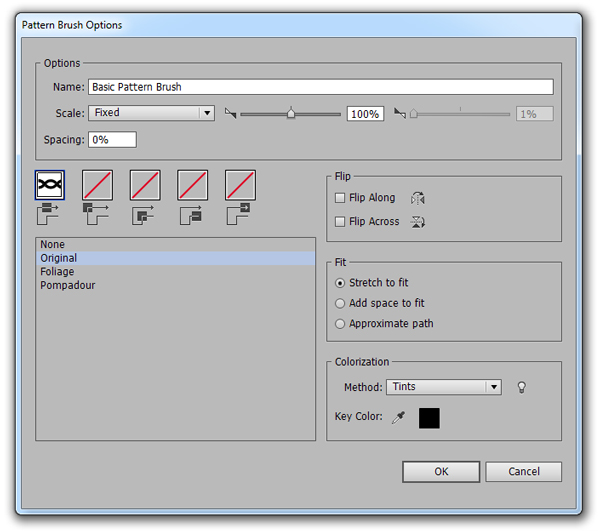
Now I’m left with the segment of my brush, I’m going to change the fill color to black and then Group them all together (Ctrl + G). While selected, go into the Brushes panel and click on the New Brush icon. Select the Pattern Brush option and click OK.
Use the Options below to create the long length section of the brush. I’ve changed the Colorization Method to Tints so the wave brush will take on the color of the selected stroke color. Click on OK once done.
Finished Brush
OK, so it may not be that impressive to create a brush which the initial design doesn’t overlap the boundary, but I’ve shown you the basics of the Pattern Options, what you can change to utilize it to your advantage. Sure, you could create the segment here without the Pattern Options, but what about the more complex designs?

Beyond the Boundary
Step 1
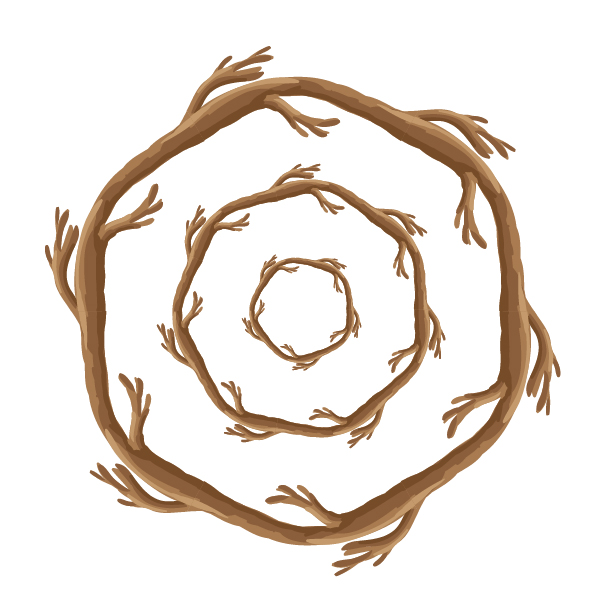
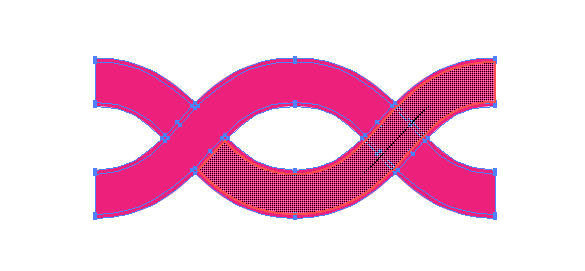
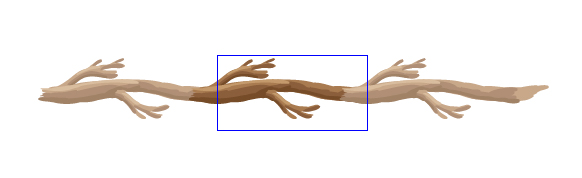
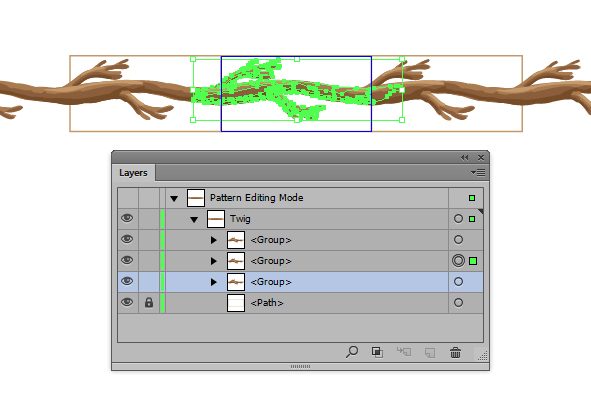
What I absolutely adore doing with the Pattern Options is using a boundary shape and then using the Blob Brush Tool (Shift + B) to effectively paint a design. You can do this exact same thing to create a Pattern Brush. In the below example, I’ve drawn a rough design of a twig brush. As you can see, it overlaps beyond the boundary. In the Pattern Options, the Overlap is set to Right in Front. This is so the design which comes out of the left hand side, overlaps onto the right hand side of the adjoining segment duplicate.
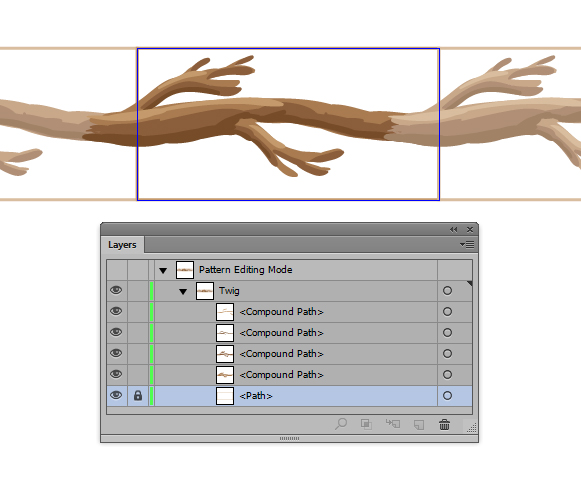
Once you’ve drawn each element and seen it come together, select one piece and go to Select > Same > Appearance and then create a Compound Path (Ctrl + 8). Do this for each of the colors you’ve used, so it then gives you a Compound Path for each shape.
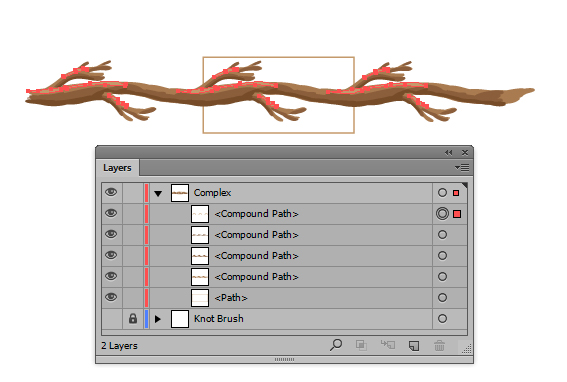
Step 9
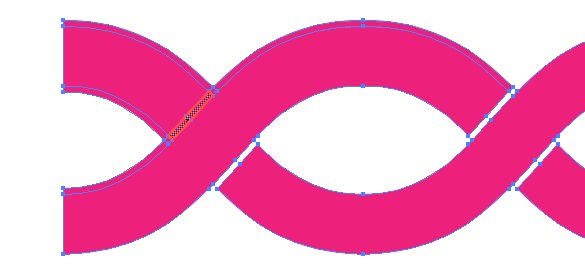
Group the shapes together (Ctrl + 8) and then duplicate it and move it to the left. Line it up over the already generated pattern you have.
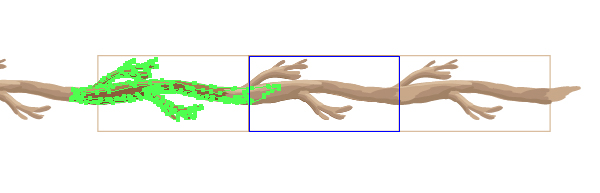
Repeat the same for the right hand side. Make sure you’ve got your overlaps correct. Then Select All (Ctrl + A) the elements, including the boundary shape and Copy them (Ctrl + C). Then cancel the Pattern Options dialog.
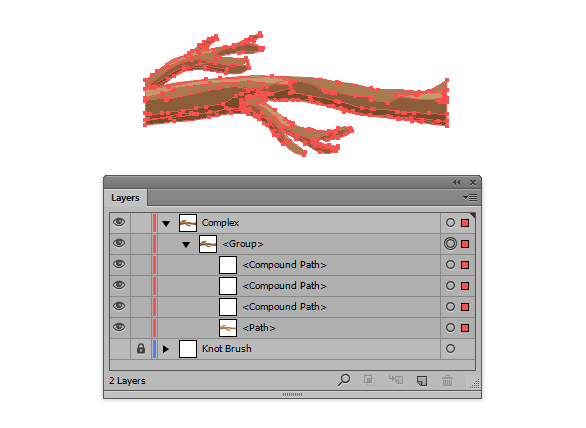
Step 10
Paste (Ctrl + V) the three groups and boundary shape onto the artboard. Object > Ungroup everything and then repeat the process of Select > Same > Appearance to each of the present colors to create four Compound Paths (Ctrl + 8).
Step 11
Duplicate the boundary shape for each color you have, so in this case, I’m left with four boundary shapes. Use these to then select each color and use Pathfinder > Intersect to trim the edges off the three segment design you have. Once you’ve done this for all four colors, you can then Group them (Ctrl + G) and create your new Pattern Brush!
Conclusion
I’m sure you could come up with plenty of complex designs and until Adobe give us a Pattern Brush Tool, you can utilize the Pattern Tool of CS6 to help you create seamless Pattern Brushes.