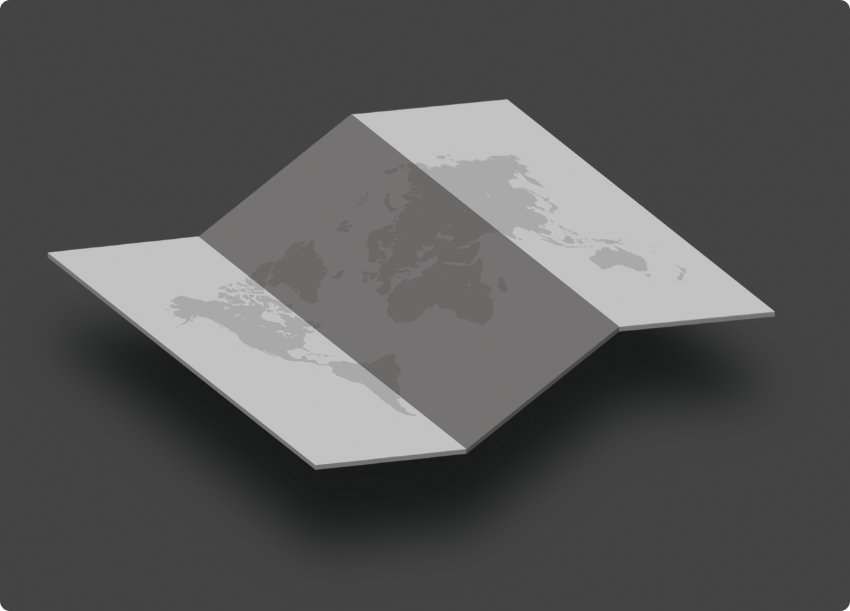
From this tutorial, you’ll learn some new techniques and tricks. We’ll be using the Isometric Map Mockup product as an example and seeing in detail how it was created. At the end, you’ll have a fully workable action and confidence in building “transformation actions”.
Got no time and need this action as soon as possible? You can purchase this Isometric Map Mockup over on GraphicRiver.

1. How to Prepare Your Workspace
Open up the test.psd file attached to this tutorial. I’ve created it for your convenience so that you don’t have to follow any long-winded steps about document creation.
Make sure you have set up your workspace properly. For this tutorial, we need some panels to be visible: the Actions, Layers, and Styles panels. If you don’t have these panels visible, then go to Window and enable the panels one by one by their names.
Then you need to make sure the Ruler Measures are pixels. If you don’t see the rulers, press Command-R to activate them, and then right click on the ruler itself and select Pixels.

2. How to Get Ready for the Recording
For now, since we’ve set up our work space as needed, we can start recording our action.
Step 1
Go to the Actions panel and create a new Action Set. You can call it whatever you like.

Step 2
Inside the Action Set, create a New Action. Give it any name—for example, “Isometric Map Action“.

After that, press the Stop Recording button. That’s because, by default, after creating an action it automatically starts recording. We don’t want that to happen just yet.

Select the “main” layer, because we don’t want this step to be recorded. For us, it will be the step performed by a user. The user decides which layer to select.

Step 3
Now it’s time to click the Record button on our Actions panel. From this moment on, almost everything we’ll be doing within Photoshop will be recorded. After we are finished recording our action, we can run this action once again, to apply exactly the same working process on other images.

3. How to Prepare for the Transforms
Step 1
Here we have a task. We need to slice the “main” layer into three parts vertically, and also we need to record these steps.
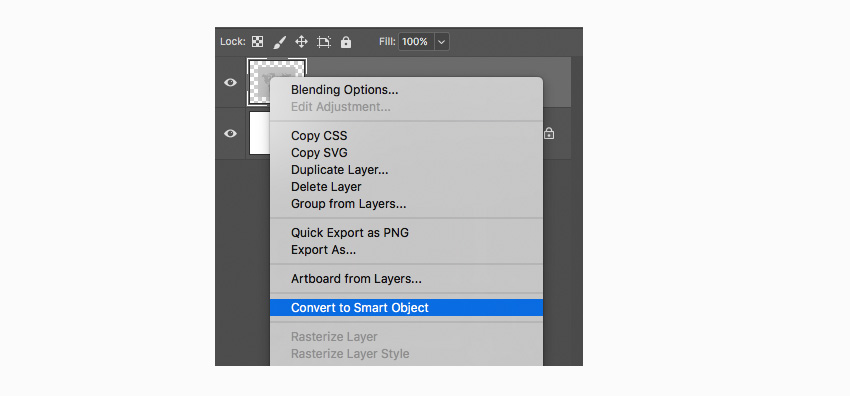
Create a Smart Object from the “main” layer. To do this, right click on it, and choose Convert to Smart Object. We are doing this because we need a brand new space for our further steps.
After that, double-click on the Smart Object layer to Edit the content. You’ll be switched to a new document. Here is the place where we’ll be working with our image.
Step 2
Now we want to make more free space around our image by increasing the canvas size. Go to Image > Canvas Size, and in the dialog window, instead of “Pixels”, choose “Percent” and input 200% for both sides. It will increase the canvas size proportionally.

Step 3
Here we’ll quickly go over and create an alignment template. This layer will help us later to align some of our map parts to the center of the canvas.
Create a new layer. To do this, click on the little “sheet of paper” icon at the very bottom of the Layers panel. After creating it, the layer will stick up above the “main” layer.
Hold Command-[ to move our newly created layer under the “main” layer. Rename the layer “template”.

Fill this layer with any color you want by pressing Command-Backspace. For us, the color really doesn’t matter because the “template” layer is a temporary layer, and it will be deleted later.
Finally, we need to switch to the “main” layer, so that it will be selected. Press Option-] to switch to the “main” layer. When making actions, we need to make everything flexible, so that we can apply the process again in the future.

4. How to Slice and Transform the Map Parts
Step 1
To cut the “main” layer into three equal parts, we actually need to make two cuts. We’ll be splitting the “main” layer using the Selection Tool. Make a selection around our layer by holding Command and clicking on the layer’s thumbnail. Then go to Select > Transform Selection.

Now for a little bit of math. If we take 100% of our actual image size and divide it by 3, we get approximately 33.34%. So this is exactly the value we want to see in the Width input field. Put in the value you see in the picture below. It’s important not to forget about the Reference point location. This is a snap point for the transforms. Choose the center-left snap point.

After you have input everything correctly, press the Enter key.

Step 2
We are almost finished with this. Now we need to expand the current selection to the left a little bit, so that we’ll be 100% sure that we won’t cut any unexpected pixels around the cutting area. We do this because lurking pixels can cause problems in the future while transforming, and it is hard to identify them.
Go to Select > Transform Selection. The reference point must be center-right, and then enter these dimensions in the fields: W:110%; H:110%;
Press Enter.

Step 3
Before moving on, we need to do a little trick that I call “Clear Cut”. The whole idea of this trick is to cut the layer without transparent pixels on the edge of the cut. How do we do this? Go to Selection > Select and Mask. Then navigate to the right menu and enter the following values:
- Radius: 0 px
- Smooth: 0
- Feather: 0.0 px
- Contrast: 100%
- Shift Edge: 0%
- Output To: Selection
Then click OK.

Right-click on the selection and from the drop-down menu choose Layer Via Cut.

Rename our newly cut layer and give it the name “1”. Press Option-[ to select the backward layer. Now the “main” layer is selected.
Step 4
Here we have two separate layers. Basically, in this step, we’ll be doing all the same things as we did previously. The only difference is that we’ll be shrinking down the selection by half.
Make sure the “main” layer is selected. Once again, make a selection around the current layer by holding Command and clicking on the layer’s thumbnail. Alright, now we’ve got the selection around the layer.

Next, go to Select > Transform Selection. Let’s shrink down the selection by half. Type in the value of 50% in the Width input field. Don’t forget about the Reference point location, which must be center-left.

Press the Enter key.
Step 5
As I promised, the steps are pretty similar. And for this instance, we also need to expand a selection around the left side. Take a look at how we did it previously.
Go and grab Select > Transform Selection (the Reference point must be center-right), and then enter these values in the fields: W:110% H:110%.
Press the Enter key.

For this part, also repeat the “Clear Cut” method as we did in Step 3 of the current section.
Right click on the selection and from the drop-down menu, choose Layer Via Cut. Rename our newly cut layer and give it the name “2”. Press Option-[ to switch to the layer below. Rename it “3”.

Step 6
We’ve now got three equal cut parts. Now, we are ready to transform two of them, namely “1” and “2”. What to do with the third one, you will know later. For now, let’s get into transforming.
Select layer “1”. Go to Edit > Transform and select Scale. Enter the following values:
- W: 53.9%;
- H: 74.2%;
- <: 0.00;
- H: 0.00°;
- V: 45.5°;
The Reference point is bottom-right. Press Enter.

Step 7
Select layer “2”. Go to Edit > Transform and select Scale. Enter the following values:
- W: 96.00%
- H: 74.1%
- <: 0.00°
- H: 0.00°
- V: 12.8
The Reference point is bottom-left. Press Enter.

5. How to Use the Align Tool
Step 1
As you might have noticed, now we have a problem. We can see the gap between the third untransformed layer and the rest of the layers. If we now transform the third layer, it won’t work for us.
In an ordinary situation, we would have transformed the third layer and then moved it to the left. But since we are recording the action, this method doesn’t work for us. So we need to make something more universal. This is to make sure that it will work for all kinds of image sizes.
Okay, now we need to make a multi-select. We are standing on layer “2”. We want to select both layers: layer “2” and layer “1”. Hold down the Command key and click on layer “1” to add it to the selection. Now you should see both layers selected.

Then we need to convert the selected layers into a Smart Object. Right-click on one of two layers—it really doesn’t matter on which one—and from the drop-down menu select Convert to Smart Object.

Step 2
We can’t align objects easily one after another when recording an action. Maybe you’ll say that it’s simple, considering the current example, but it’s not exactly. You can succeed in aligning for the current image, but it won’t work for another. Hence, we need a very flexible method that would work for all kinds of images.
Here’s a little trick. We need to align our smart object layer to the bottom left corner.

As we are continuing, we have our smart object layer already selected, and we need to add the “template” layer to this selection. Hold the Command key and click on the “template” layer.
Go and grab the Move Tool. Aligning in Photoshop goes about a layer that is bigger. Choose Align left edges—it will stick the Smart Object to the left side.
Next, click Align bottom edges. We placed it at the bottom of the canvas.

Step 3
It’s time to align the third part of our map.
Select the layer “3”. Then select the Marquee Selection Tool. Hold down the Command key and click on the Smart Object thumbnail to make the selection.

Select the Move Tool. Align layer “3” to the bottom side. Then align the layer to the left side. Lastly, align the layer to the right.

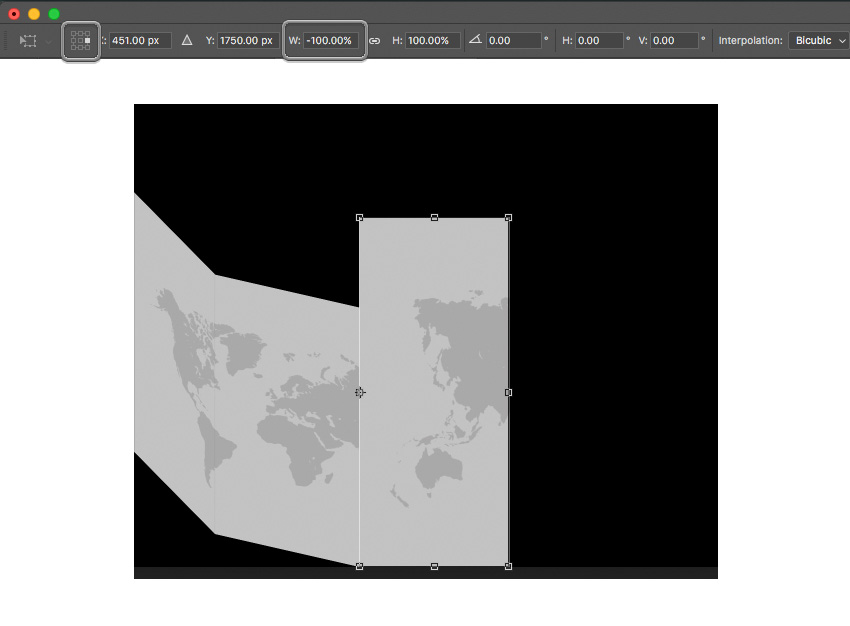
Press Command-D to deselect the current selection.
Go to Edit > Transform and choose Scale. Set the Reference point to Right. Then Go to Edit > Transform and choose Flip Horizontal or in the Width input field enter the value of -100%.
The last step will be mirroring the layer back. Go to Edit > Transform and choose Flip Horizontal.

Step 4
Select layer “3”. Go to Edit > Transform and select Scale. Enter the following values:
- W: 55.2%
- H: 74.1%
- <: 0.00°
- H: 0.00°
- V: 46.00
Set the Reference point to bottom-left. Press Enter.

Step 5
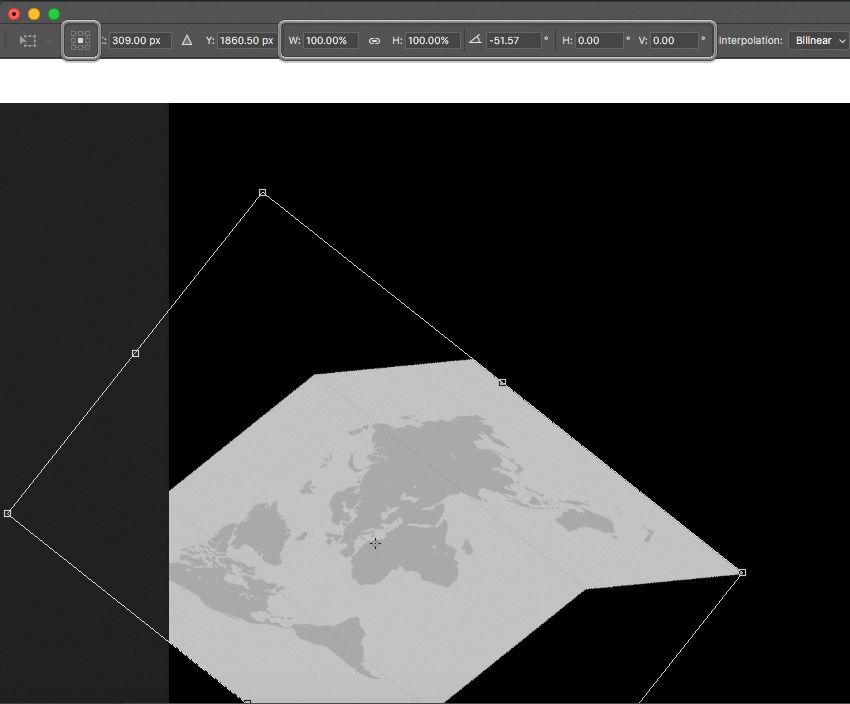
For now, we have our map in a weird position. We need to rotate it to the position we actually need.
Select layer “1”. Hold down the Command key and click on layer “2” so that both layers will be selected. Go to Edit > Transform and select Rotate.
Enter the following values:
- W: 100%
- H: 100%
- <: 51.6%
- H: 0.00°
- V: 0.00°
Press Enter.
6. How to Release Parts Out of the Smart Object
Now we need to free up parts out of the smart object. We perform this step because we want to apply some shading styles to the middle part layer. So we want our parts to be separated.
Step 1
Select layer “1”. Right-click on the layer and from the drop-down menu, select New Smart Object via Copy.

Double click on the newly created layer to Edit the content

In the opened document, select layer “2”.

Press Delete (Backspace) to delete the layer “2”.
Close the current document and, while closing it, click the Save button.

Step 2
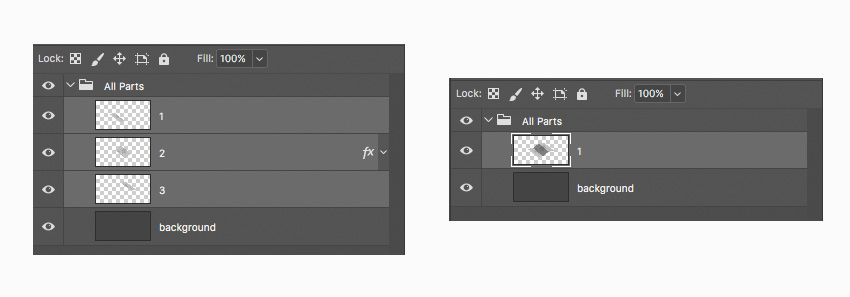
Next, rasterize the current layer we have just closed. Right-click on the layer and choose Rasterize layer. Rename it “1”. Press Option-[ to switch to the layer below.
For another Smart Object, the steps are pretty the same. Double-click on the current layer to Edit the contents.
In a newly opened document, select layer “1”. Press Backspace to delete layer “1”. Close the document and, while closing, click Save.
Rasterize the layer. Right-click on the layer and choose Rasterize layer. Rename it “2”.

7. Final Steps on the Map Surface
Step 1
In this short section, we are applying styles to the middle part of layer “2”. We want our map to look more realistic. So, we’ll add some shading to it.
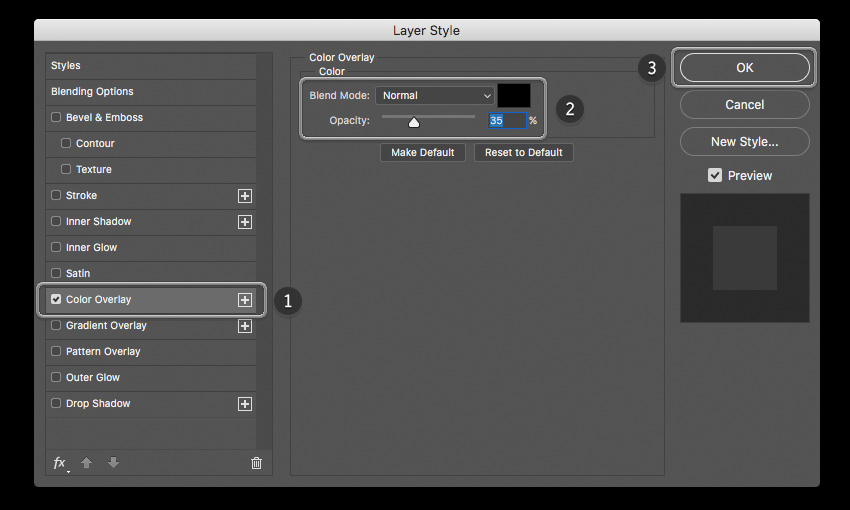
Select layer “2”. Double click on it to call up the Layer Styles window. Select the Color Overlay section. In this section, bring down the Opacity to 35%. Choose the color #000000 (pure black).
Click OK.
Step 2
It’s time to center the map parts in the middle of our canvas.
Select layer “1”. Add to the selection layers “2” and “3”. Do this by holding the Command key and clicking on layer “2” and then on layer “3”. We need all three layers to be selected.
Press Command-G to put all the selected layers into a group. Rename the group. Give it the name “All Parts”.
Notice that expanding groups is not a recordable feature in Photoshop.
Expand the group by clicking on the little triangle on the left side of the group. After that, select layer “1”.
This trick is particularly relevant in the automated mode because once we’ve done the group, we won’t be able to see layers anymore. But we still want to be able to pick up layers and to continue recording the action. So, when we click on layer “1”, we expand the group automatically, and Photoshop can see the layers again.

Select the “All Parts” group. By holding the Command key, add to the layer selection the “template” layer.
Select the Move Tool.
Step 3
In the menu, choose Align Vertical centers and then choose Align Horizontal Centers. Pay no attention if the “template” layer moves a little bit.

Select the “template” layer and delete it by pressing the Backspace key on your keyboard.
Go to Image > Trim. In the dialog, choose Based On > Transparent pixels, and in the Trim Away options, go with all directions: Top, Right, Left, Bottom.

Expand the canvas a little bit. Go to Image > Canvas Size. In the dialog window, instead of pixels, choose percentages and input 200% for both sides. It will increase the canvas size proportionally.

Step 4
We’ve got rid of the “template” layer. Now we need to create the background instead. Select layer “3”. Create a new layer. Click on the new layer icon at the very bottom of the Layers panel. Rename the layer “Background”.
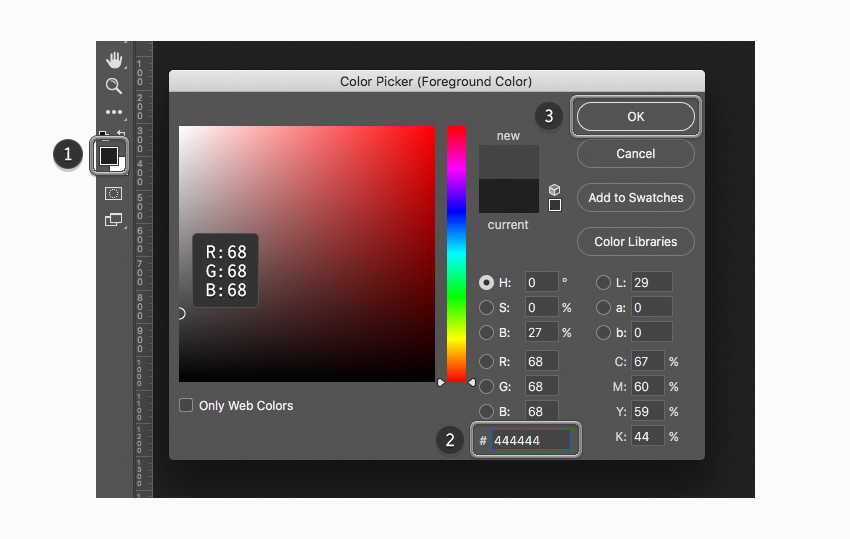
Move the layer backward by pressing Command-[. Set the foreground color to gray #444444. Use the keyboard shortcut Option-Delete (Backspace) to fill in the layer with the gray color.
8. How to Create a 3D Volume for the Map Surface
Step 1
This will be a starting point for creating the volume for the map.
Hold the Command key and select multiple layers: “1”, “2”, and “3”. Press Command-E to merge the selected layers.
Now we need to copy the merged layer twice. To do this, press Command-J twice. You should now see three copies.

Step 2
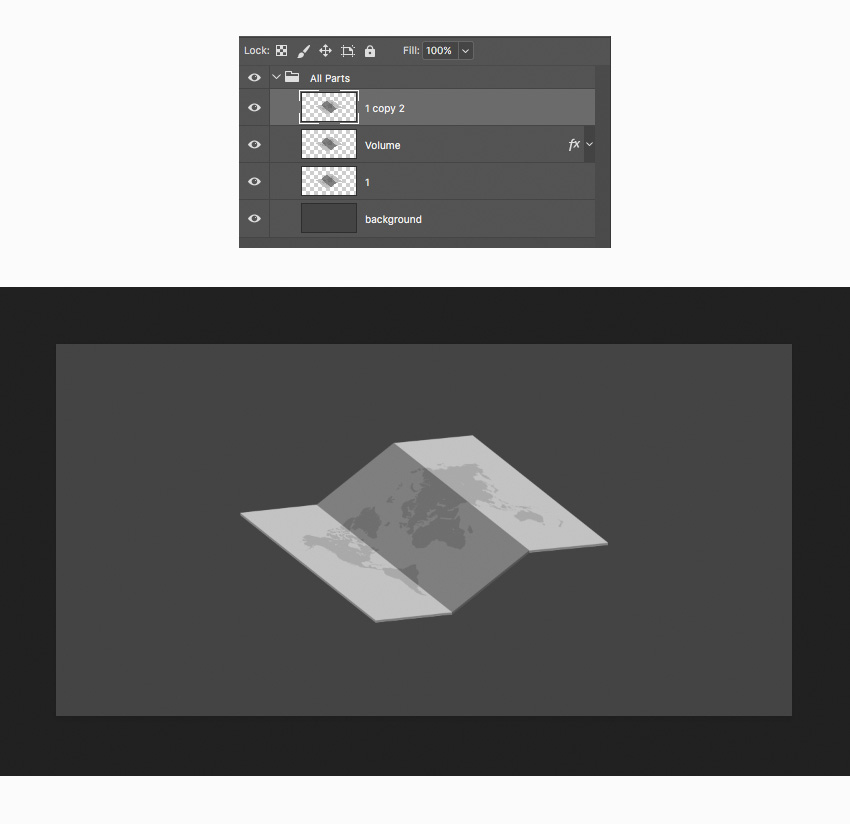
In these steps, we’ll be creating a 3D surface for our map.
Switch to the layer below by pressing Option-[. The layer below will be selected. Group the current layer (Command-G). Rename the group “Volume”. Switch to the layer below (Option-[).
Now we need to add the 3D volume effect. Select the Move tool first. Hold down the Option-Command keys and at the same time press the Up Arrow key six times.

Then click and select the group “Volume”, and merge it (Command-E).
Set Layer styles for this layer. Select the Color Overlay section. Next, bring down the Opacity to 35%. Choose the color #000000 (pure black).
We need to move the face layer a little bit. Switch to the layer above: Option-]. Select the Move Tool and press the Up Arrow key seven times.
Rename the layer and call it “Face”.
Step 3
The last step will be creating the “Shadow” layer for our map. Select the “background” layer. Press Option-] to move it to the layer above.
Apply styles to it. Select Color Overlay. Set Opacity to 100%. Choose the color #000000. Click OK.

Rasterize this layer.

Take the Move Tool and, using your mouse, move the current shadow layer down a bit.

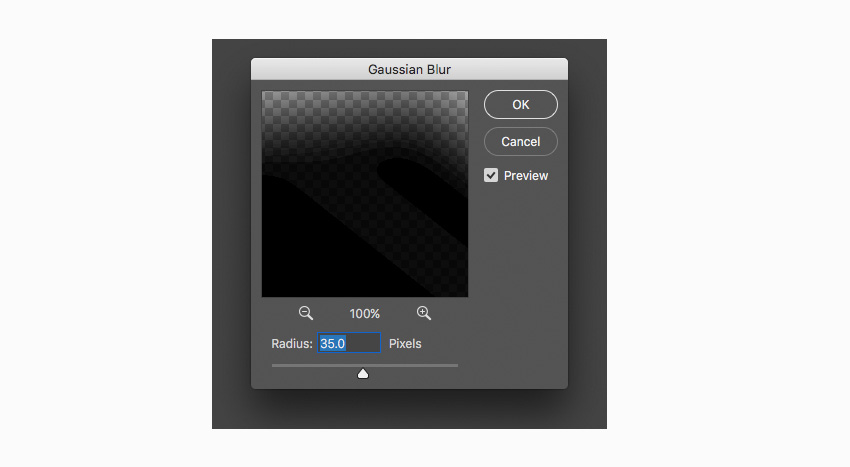
Go to the filter Blur > Gaussian Blur. Set the Radius to 35.0 Pixels.
Step 4
Congratulations! We are finished! Now we can click the Stop Recording button.

Awesome Work, You’re Done!
This was a demonstration of the workflow on how to work with transformation actions. It isn’t one of the hardest things to do, but it’s not easy either. If you did everything correctly, now you have a fully working action, and you can apply it to any other images.
The action building area is not as limited as you might think, so it’s definitely worth learning about if you have already started learning Photoshop. If you learn it, you’ll see how it will help you to save time in performing everyday tasks.
Feel free to ask me any questions down in the comments below. I wish you good luck with your experiments!
Remember you can purchase this Isometric Map Mockup over on GraphicRiver.