Pixelmator is an easy-to-use, fast, and powerful image editing app for the Mac. In this tutorial, we will give you a brief introduction to Pixelmator. We will begin by taking a look at the Pixelmator workspace, show you how to create a new document, adjust Pixelmator’s preferences, and how to do some work in Pixelmator by placing guides and aligning objects. Let’s get started!
1. Launching and Creating New Documents
The first time we launch Pixelmator we are presented with the “Welcome to Pixelmator” window, from where we can choose to create a new image, open an existing image or if we have launched Pixelmator before, open an image we’ve worked on recently.
Step 1
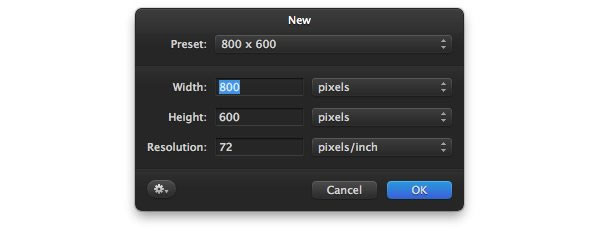
Create a new image by choosing Create new image…. The window below appears where we can set the size and resolution for our new document. Use the settings as shown in the image and click on OK.
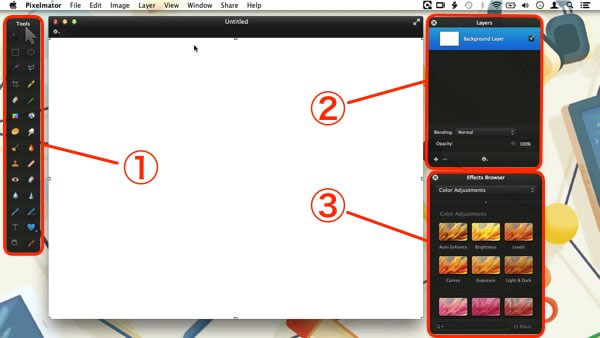
The Pixelmator workspace that consist of our newly created image, shown inside the document window in the middle of our desktop. Around the document window we see a set of floating palettes similar to that shown in the image below.
- The tools palette
- The layers palette
- The effects browser
2. Adjusting the Tools Palette
The Tools Palette in Pixelmator can be adjusted by going to the Pixelmator preferences.
Step 1
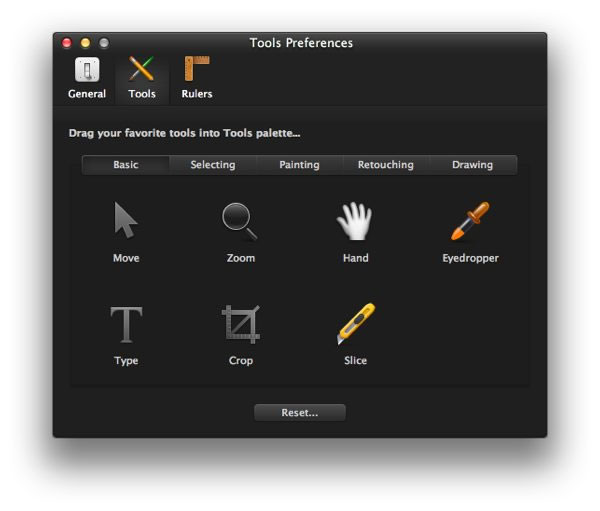
Open the Pixelmator preferences. (Pixelmator > Preferences…) and click on the Tools icon. The Tools Palette can now be adjusted by clicking and dragging its borders and corners.
Step 2
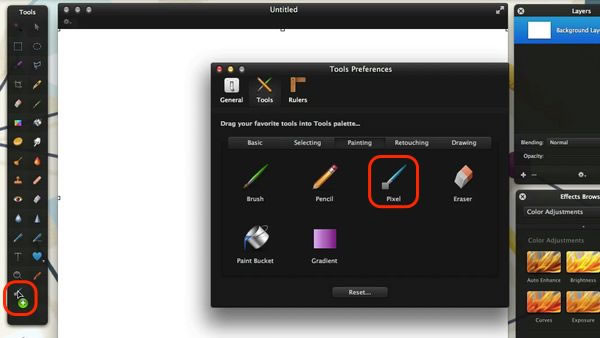
Go to the Painting section in the Tools preferences and drag and drop the Pixel Tool onto the Tools Palette.
You can also drop tools from the preference window on top of other tools in the Tools Palette to group them. In order to open a group of tools click on the tool in the Tools Palette and hold the mouse button for a few seconds.
To bring the Tools Palette back to its factory default state, press the Reset… button in the preference window.
3. More Palettes
Layers Palette
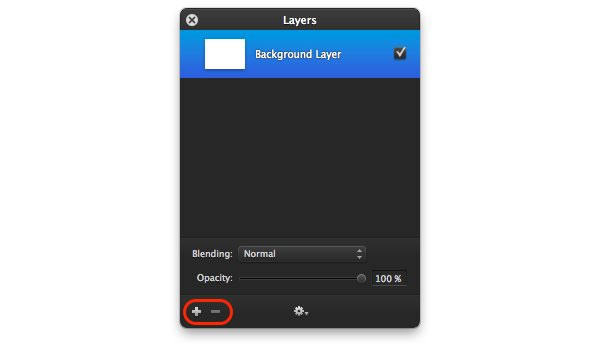
The Layers Palette shows the layers that the image in the document window consists off. You can add layers by clicking on the + button at the bottom of the palette, and remove layers by clicking on the – button.
Using some tools will create new layers automatically. The Type Tool for example will add a Type Layer to the Layers Palette the moment you click inside the document window.
The Effects Browser
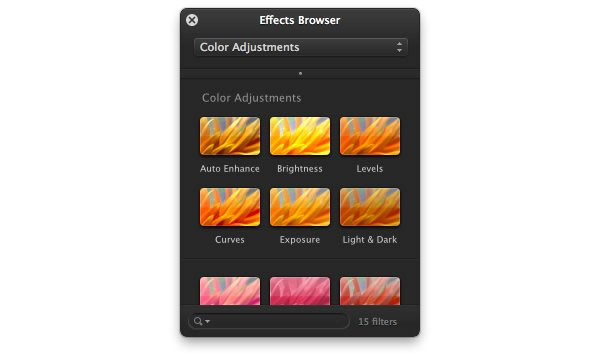
The Effects Browser lets you choose between all the effects and filters that come with Pixelmator. Note, that also image adjustment tools like Brightness and Contrast, and desaturate can only be accessed from the Effects Browser.
Pixelmator has more palettes that can be accessed from the View menu. Here you’ll find the Brushes Palette, Gradients Palette, the Shapes Palette and the Photo browser.
4. Working in Pixelmator
Lets do some work in Pixelmator by opening the example document, which you can download from the link at the top of this tutorial.
Step 1
Open the example document (File > Open…)
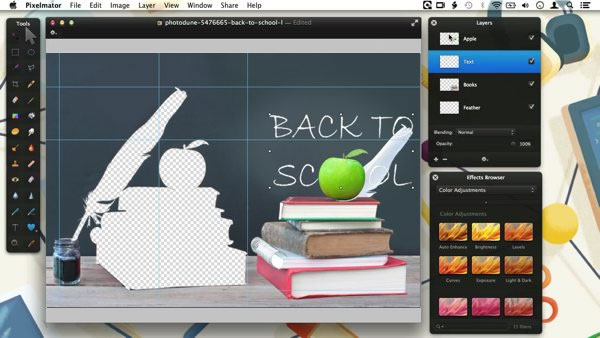
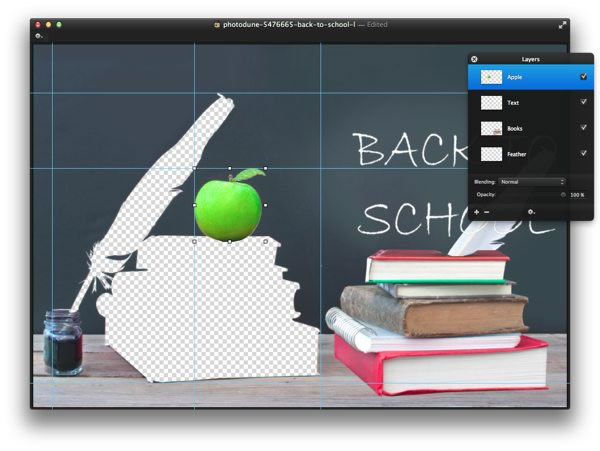
The example document consists of several layers with each layer having an object from the scene on it. The blue lines you see are guides that are already placed in such a way, that when we move the objects around, they will snap in place alongside the guides.
Step 2
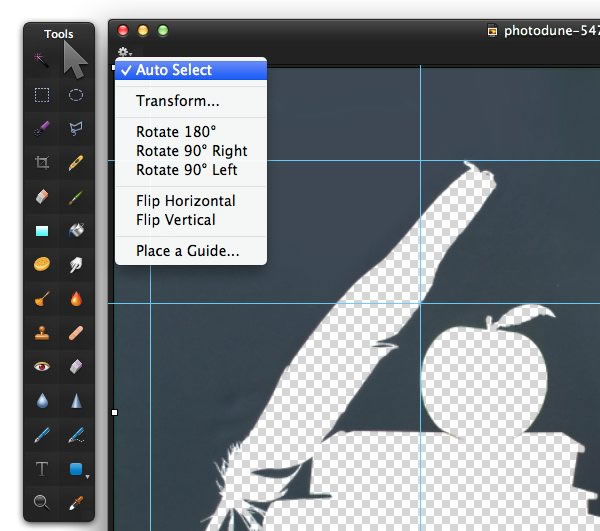
Select the Move Tool from the Tools Palette. Click on the little gear icon on the Tool Options Bar. The Tool Options bar can be found at the top of the document window. In the menu that appears you’ll have to check if Auto Select is activated as shown in the image below.
Step 3
Now click on the Apple and notice that the layer with the name Apple gets automatically selected in the layers palette. Click and move the Apple in place in the document window. You’ll notice that when you move the Apple close enough to the guides, the Apple will snap in place.
To temporarily deactivate snapping, you can hold the Command-key while dragging. Try to move the other objects in place as well.
Step 4
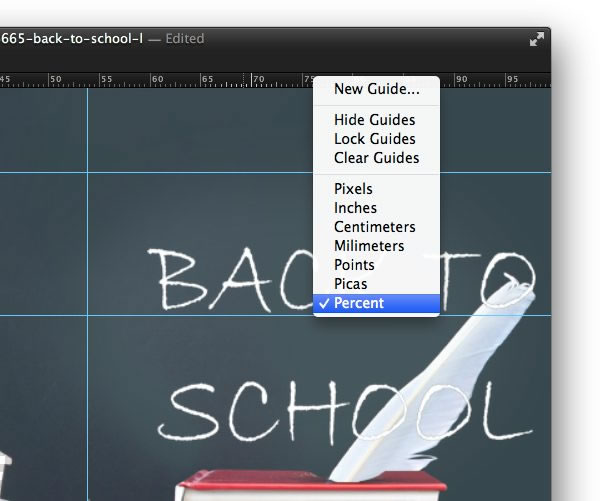
Activate the ruler bars by pressing Command-R. Then Control + click on one of the ruler bars and choose percent as the measuring unit from the menu that appears.
Step 5
Add a new vertical guide by clicking on the left ruler bar and dragging towards the centre of the document window. Place the guide that appears on the 75% mark of the top ruler bar. Note that also guides snap to other objects when positioning them so you might need to hold the Command-key to position the guide on the 75% mark.
Step 6
Use the Move Tool again to move the text “Back To School” in such away that it is centered on the newly placed guide.
5. Changing Ruler and Guide Preferences
It is also possible to change the preferences for the guides and the ruler bars.
Step 1
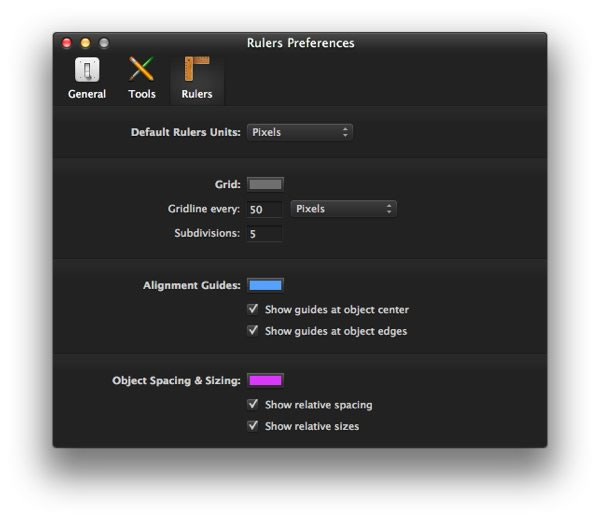
Open the Pixelmator Preferences (Pixelmator > Preferences…) and choose the Rulers section.
In the Rulers section we find all the preferences that have to do with measuring and aligning objects.
Step 2
Make sure Show Guides at object center and Show guides at object edges are activated. This will make sure that guides will pop up whenever we move an object relative to the edge or the center of another object.
Step 3
Change the color of the Alignment Guides by clicking on the color button. This will not have any effect on the existing guides but if we move one of our objects around with the Move tool, you’ll see that the auto-alignment guides we just talked about will appear in the new color.
6. Finishing Up
Step 1
Move all objects in place so you’ll end up with an image like the one shown below. Close the Pixelmator preferences and Control + click on one of the ruler bars. Choose either Hide Guides or Clear Guides to remove the visible guides.

Conclusion
In this tutorial, you’ve become more familiar with the Pixelmator Workspace and have learned how to adjust some of Pixelamtor’s Preferences. You also learned how to work in Pixelmator by rearranging layers with the help of Pixelmator’s alignment tools. In the second part of this series, we will take Pixelmator a bit further and show you how to make and work with selections. Stay tuned!
