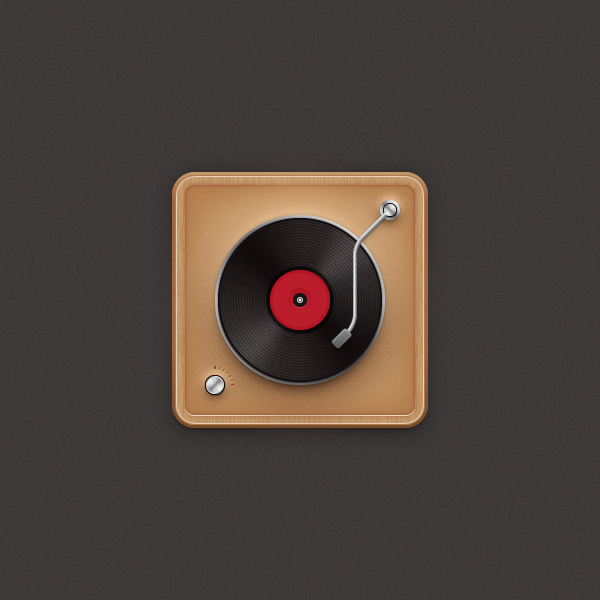
In the following steps you will learn how to create a vinyl player icon in Adobe Illustrator. For starters, using a simple grid and the snap to grid feature along with basic tools you will create the main shapes. Next, you will learn how to create a conical gradient using a somewhat complex mesh. Using a simple blend along with some basic blending and vector shape building techniques you will learn how to create the vinyl. Moving on, using the existing meshes and a bunch of simple effects you will create the arm and a small knob. Finally, taking full advantage of the Appearance panel you will learn how to add shading, highlights and depth for the shapes made in the beginning of the tutorial.
1. Create a New Document & Setup a Grid
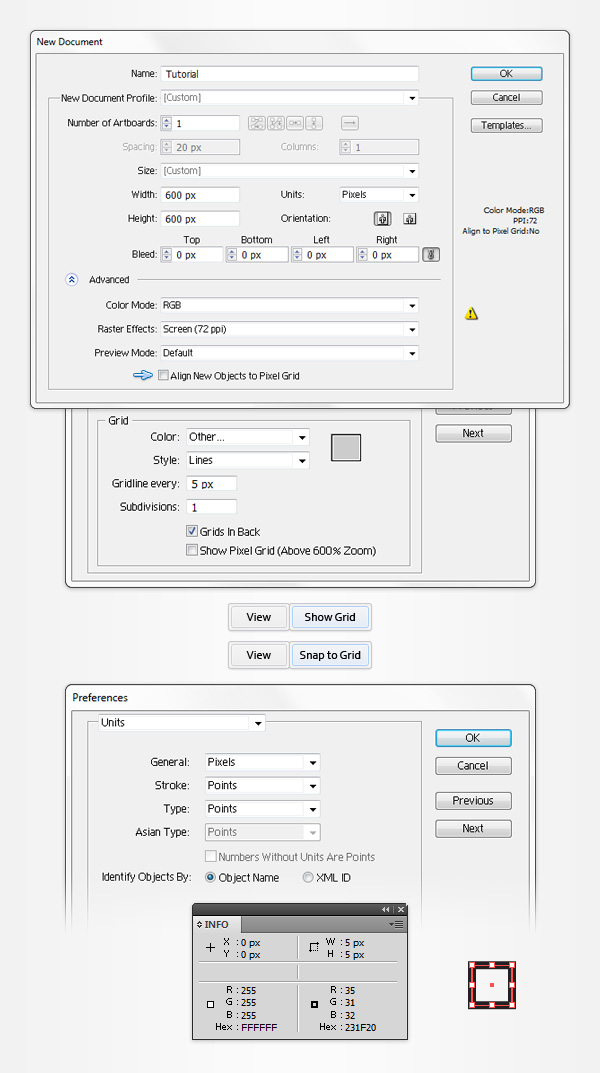
Hit Control-N to create a new document. Select Pixels from the Units drop-down menu, enter 600 in the width and height boxes then click on the Advanced button. Select RGB, Screen (72ppi) and make sure that the Align New Objects to Pixel Grid box is unchecked before you click OK.
Enable the Grid (View > Show Grid) and the Snap to Grid (View > Snap to Grid). For starters you will need a grid every 5px, so simply go to Edit > Preferences > Guides > Grid, enter 5 in the Gridline every box and 1 in the Subdivisions box. You should also open the Info panel (Window > Info) for a live preview with the size and position of your shapes. Do not forget to set the unit of measurement to pixels from Edit > Preferences > Units > General. All these options will significantly increase your work speed.
2. Create the Main Shapes
Step 1
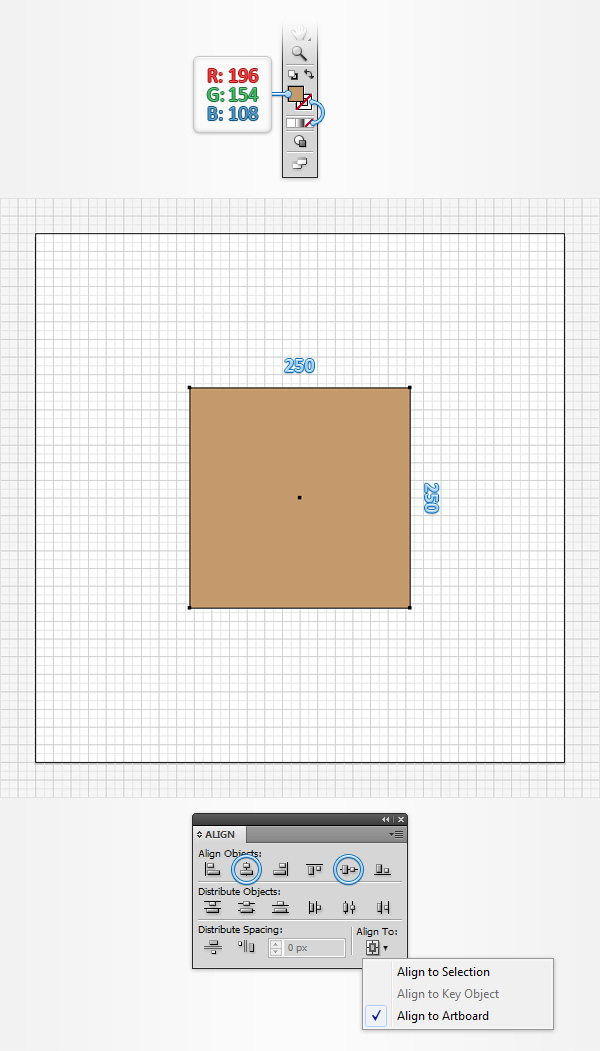
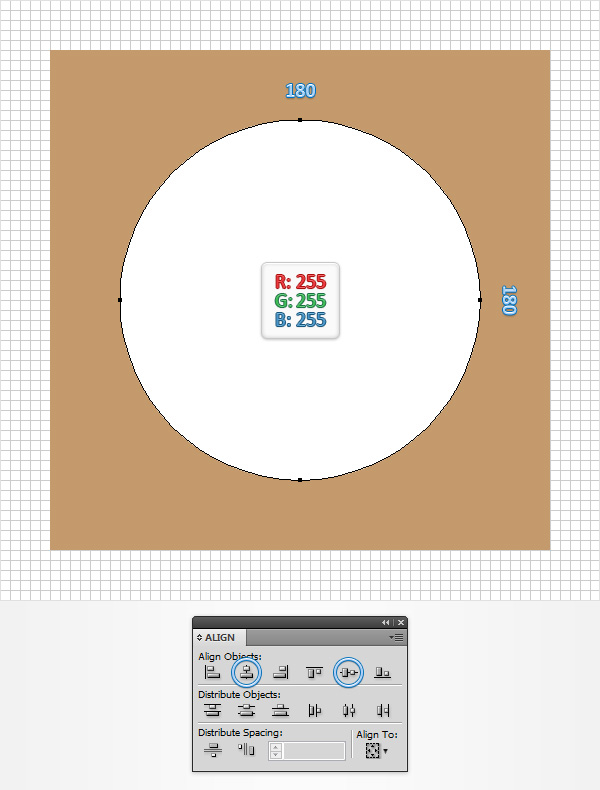
Pick the Rectangle Tool (M) and focus on your Toolbar. Remove the color from the stroke then select the fill and set its color at R=196 G=154 B=108. Move to your artboard and simply create a 250px square, the Snap to Grid should ease your work.
Next, you need to center this shape, so open the Align panel (Window > Align). Set the aligning to artboard (open the fly out menu and go to Show Options if you can’t see the Align To section as shown in the following image). Make sure that your square is still selected and simply click the Horizontal Align Center and Vertical Align Center buttons from the Align panel. In the end your shape should be placed in the center of the artboard. Move to the Layers panel (Window > Layers) and double-click on this brown shape. Name it “main” then lock it to make sure that you won’t accidentally select/move it.
Step 2
Set the fill color at white and pick the Ellipse Tool (L). Create a 180px circle and center it using the Horizontal Align Center and Vertical Align Center buttons from the Align panel. Move to the Layers panel, double-click on this new shape, name it “vinylShadow” then lock it.
Step 3
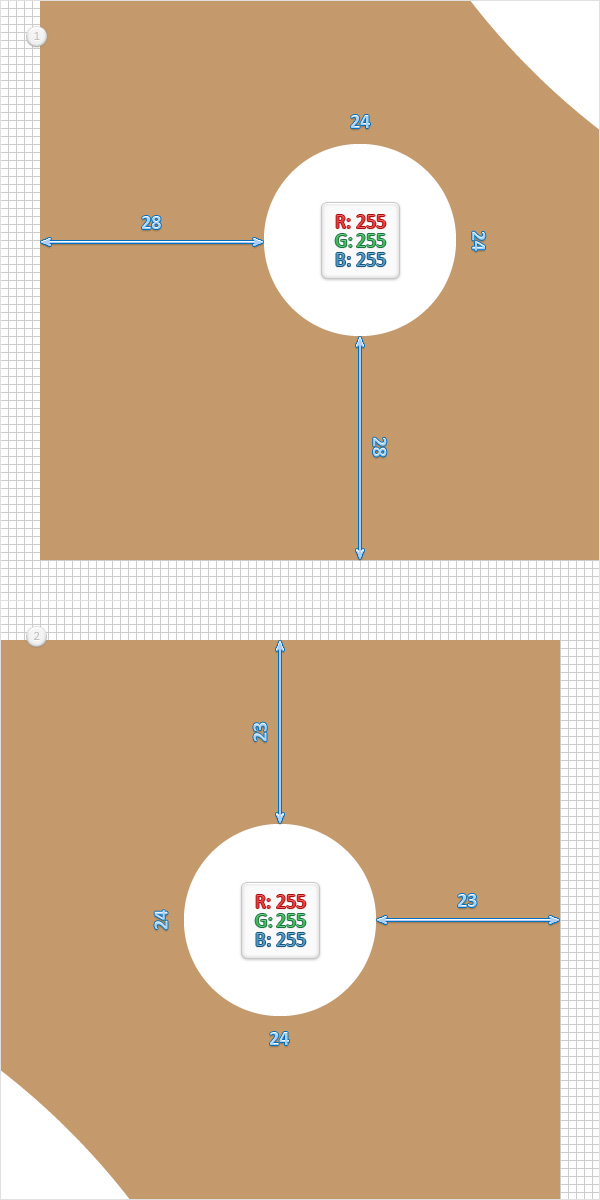
For this step you will need a grid every 1px, so go to Edit > Preferences > Guides & Grid and enter 1 in the Gridline every box. Focus on the bottom, left corner of your brown square and make sure that Ellipse Tool (L) is still active. Create a 24px circle and place it as shown in the first image.
Move to the Layers panel, double-click on this new circle, name it “knobShadow” then lock it. Focus on the top, right corner of your square, create a second 24px circle and place it as shown in the second image. Move to the Layers panel, double-click on this new circle, name it “armShadow” then lock it.
3. Create the Vinyl
Step 1
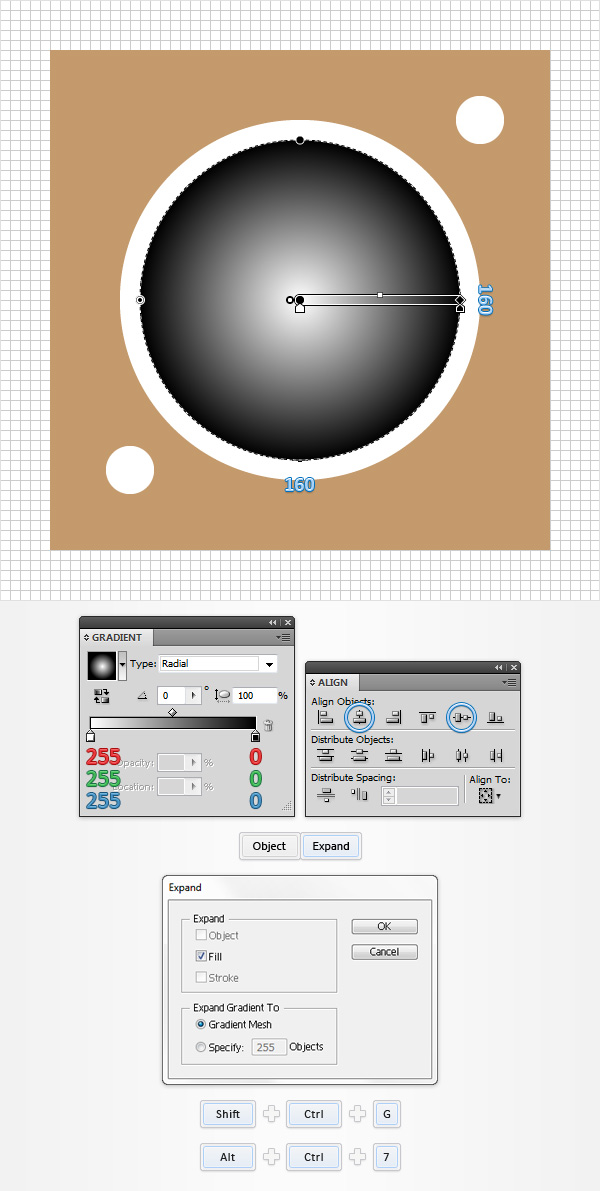
Return to “gridline every 5px “, so simply go to Edit > Preferences > Guides & Grid and enter 5 in the Gridline every box. Make sure that the Ellipse Tool (L) is still active, create a 160px circle and center it using the Horizontal Align Center and Vertical Align Center buttons from the Align panel. Make sure that this new shape stays selected, open the Gradient panel (Window > Gradient) and simply click on the gradient thumbnail to add the default linear gradient for your circle.
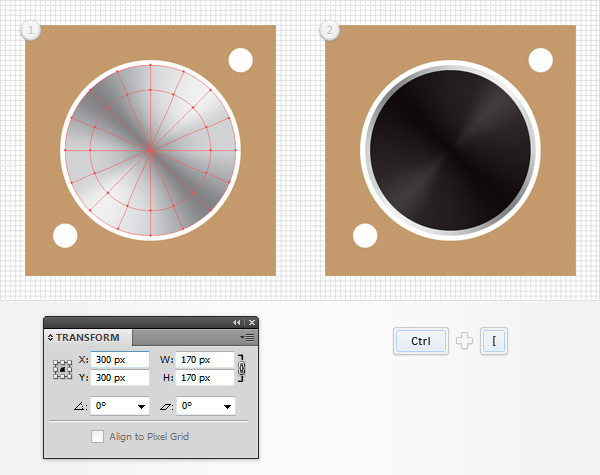
Keep focusing on your Gradient panel, open the Type drop down menu, select Radial then move to the gradient colors. Select the right slider and set the color at black (R=0 G=0 B=0) then select the left slider and make sure that the color is set at white (R=255 G=255 B=255). Make sure that the circle made in this step is still selected and go to Object > Expand. Check the Gradient Mesh button from the Expand window and click OK.
Move to the Layers panel and you will find a new group. Select it, hit Shift-Control-G to Ungroup it and Alt-Control-7 (or go to Object > Clipping Mask > Release) to release the existing clipping mask.
Step 2
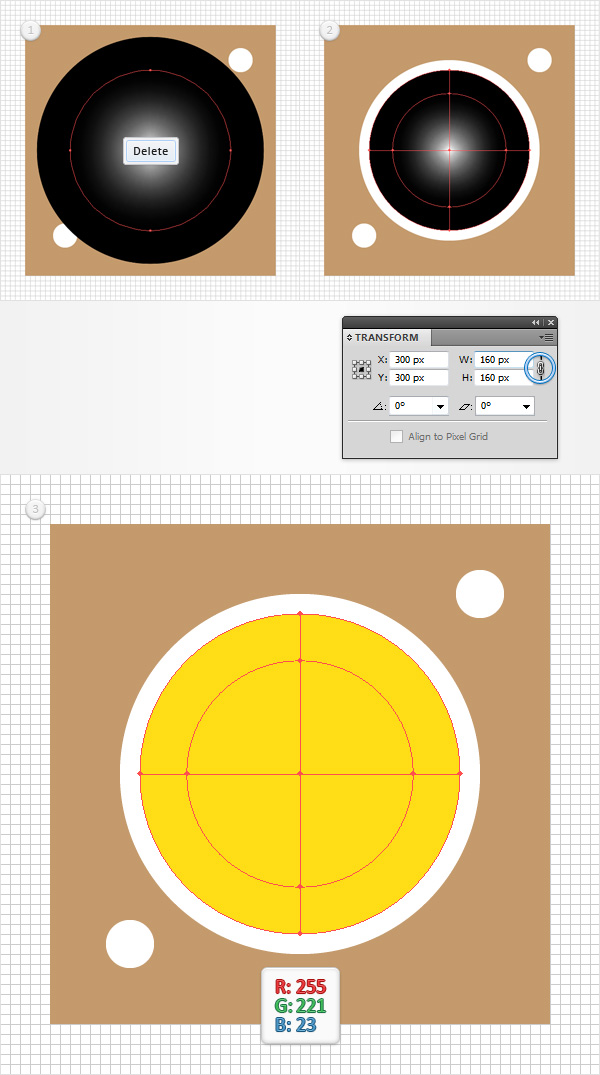
Focus on the Layers panel and you will find a 160px circle with no color set for the fill or the stroke. Select it and simply remove it using the Delete key from your keyboard. Still focusing on the Layers panel, you should also find a simple mesh. Select it and open the Transform panel (Window > Transform). Make sure that the Constrain Width and Height Proportions button is checked then simply enter 160 in the width (or height) box. Make sure that your entire mesh is selected and make it yellow (R=255 G=221 B=23).
Step 3
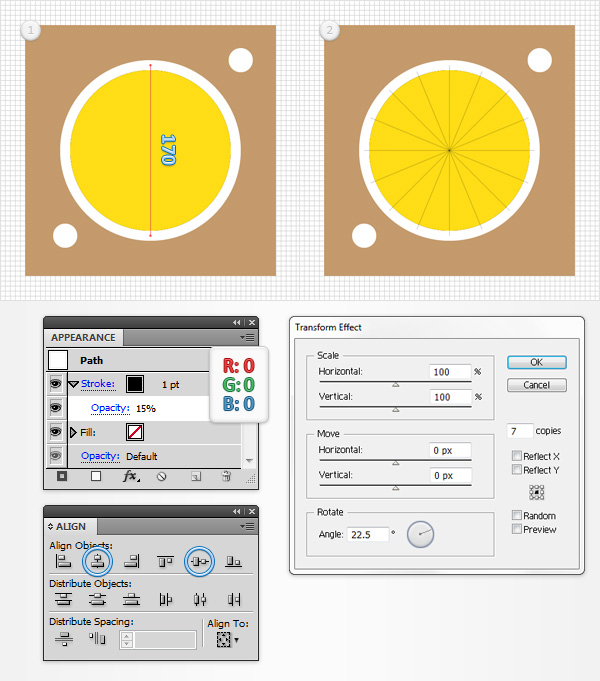
Using the Pen Tool (P), create a 170px, vertical path and center it using the Horizontal Align Center and Vertical Align Center buttons from the Align panel. Make sure that this simple path stays selected and focus on the Appearance panel (Window > Appearance).
Remove the color from the fill (if you have one) and select the stroke. Set its color at black, lower the Opacity to 15% and go to Effect > Distort & Transform > Transform. Enter the properties shown in the following image and click OK. Move to the Layers panel and simply lock the vertical path made in this step. You will only need it as a guideline.
Step 4
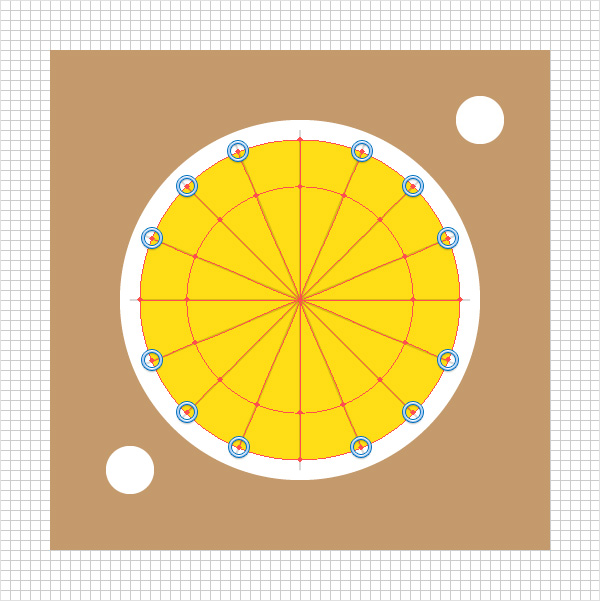
Disable the Snap to Grid (View > Snap to Grid). Reselect your yellow mesh, pick the Mesh Tool (U) and simply add a twelve mesh points as shown in the following image. Use the vertical path made in the previous step as a guideline. Once you’re done you can remove it.
Step 5
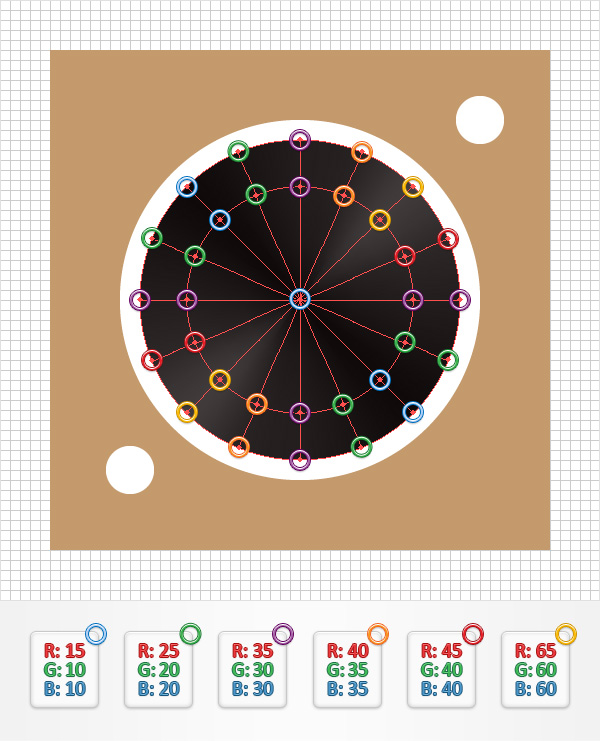
Keep focusing on your mesh and grab the Direct Selection Tool (A). Select those mesh points and replace the yellow with the colors shown in the following image. Once you’re done, move to the Layers panel, double-click on your mesh and simply name it “vinyl“.
Step 6
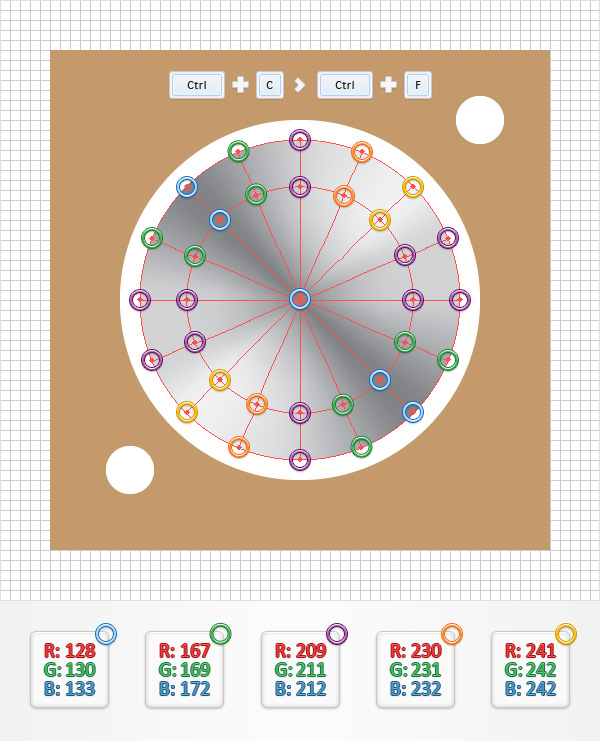
Make sure that your “vinyl” mesh is still selected and make a copy in front (Control-C > Control-F). Focus on the Layers panel, double-click on this new mesh and simply name “vinylSupport“. Lock the “vinyl” mesh and return to your artboard. Focus on the “vinylSupport” mesh and grab the Direct Selection Tool (A). Select those mesh points and replace the existing colors with the ones shown in the following image.
Step 7
Make sure that your “vinylSupport” mesh is still selected, go to the Transform panel and simply enter 170 in the width (or height) box. Move to the Layers panel and simply drag your “vinylSupport” mesh below the “vinyl” mesh.
Step 8
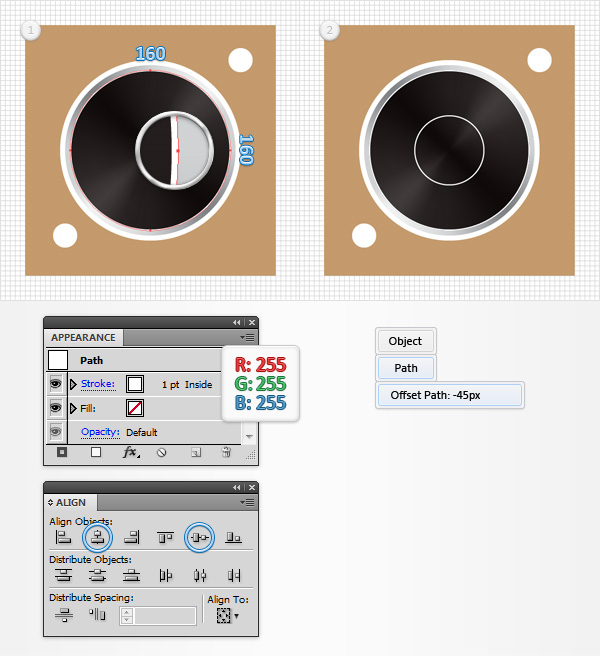
Enable the Snap to Grid (View > Snap to Grid). Using the Ellipse Tool (L), create a 160px circle and center it using the Horizontal Align Center and Vertical Align Center buttons from the Align panel. Fill it with none but, add a 1pt, white stroke and align it to inside. Make sure that the shape made in this step is still selected and go to Object > Path > Offset Path. Enter a -45px Offset and click OK.