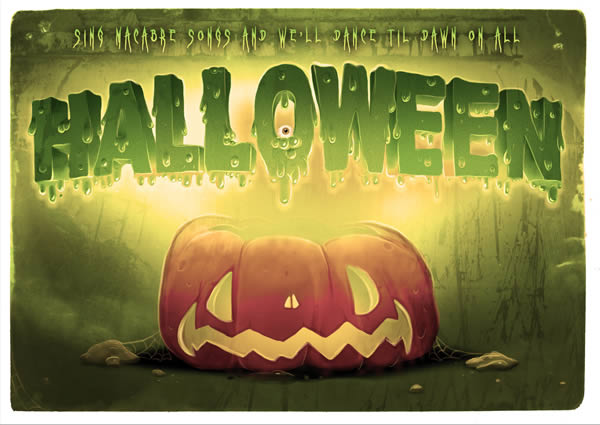
As autumn approaches in much of the world, we know that many artists are beginning to think about Halloween, especially artists that live in the U.S. In this tutorial, we will explain how to create slimy, gooey, and drippy Halloween typography in Photoshop. We will then incorporate that typography into a poster design. Let’s get started!
Speed Painting Video
Tutorial Assets
You will need the following assets to complete this tutorial. Please download them before you begin. If they are not available, you will need to find alternatives.
1. Create the Document
Step 1
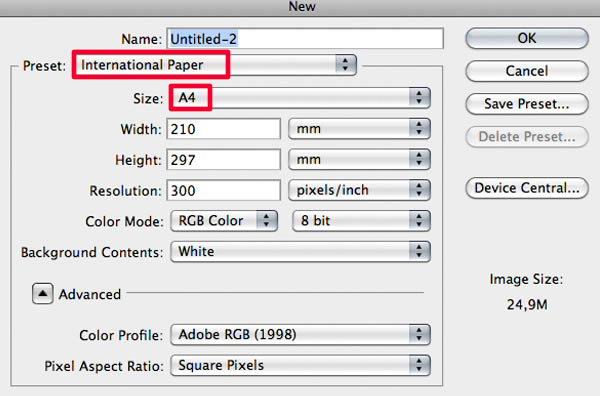
Create a New File by going to File > New (CMD/CTRL + N). In Preset select International paper and set the size as in the image below.
Step 2
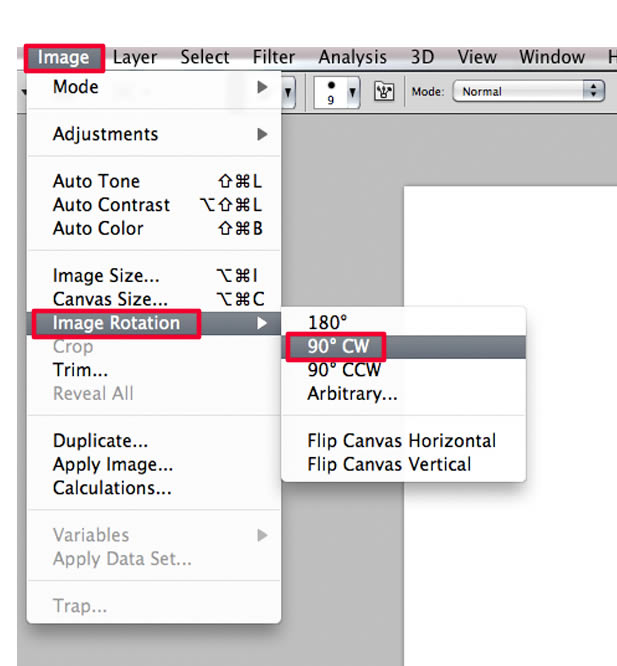
Go to Image > Image rotation > 90 CW to to make the canvas horizontally.
2.Painting the Letters
Step 1
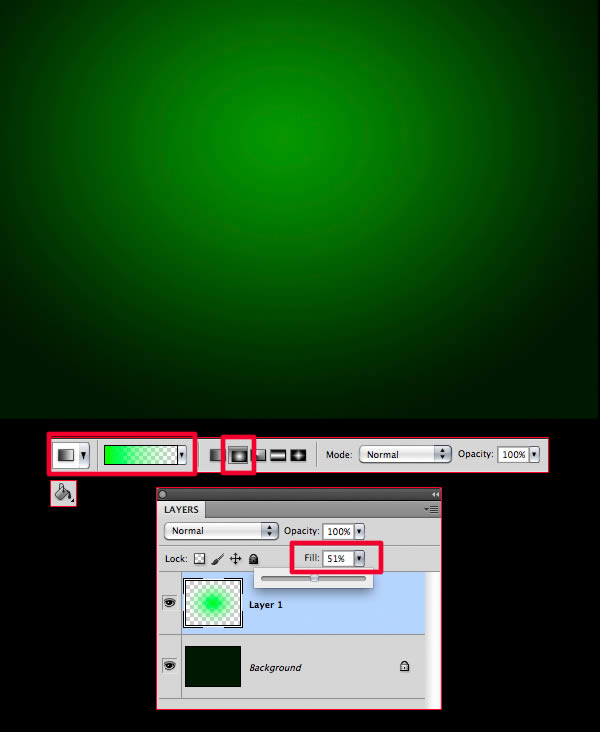
Paint the Background layer with a very dark green using the Paint Bucket (G).
Add a new layer (Shift + CMD/CTRL + N) and make a green Circular Gradient using the Gradient Tool (G).
Move it slightly upward and lower the Opacity a bit.
Step 2
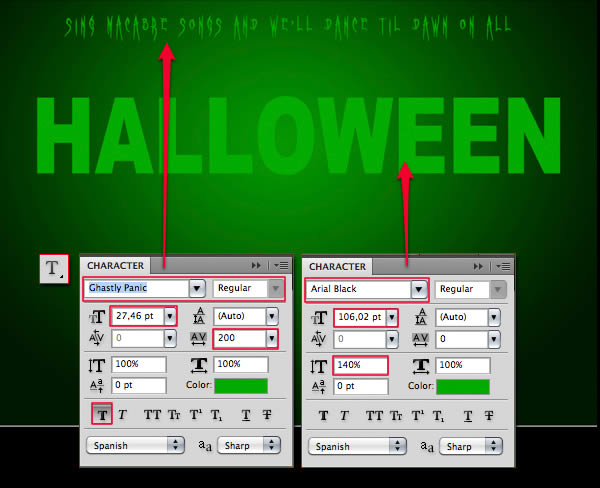
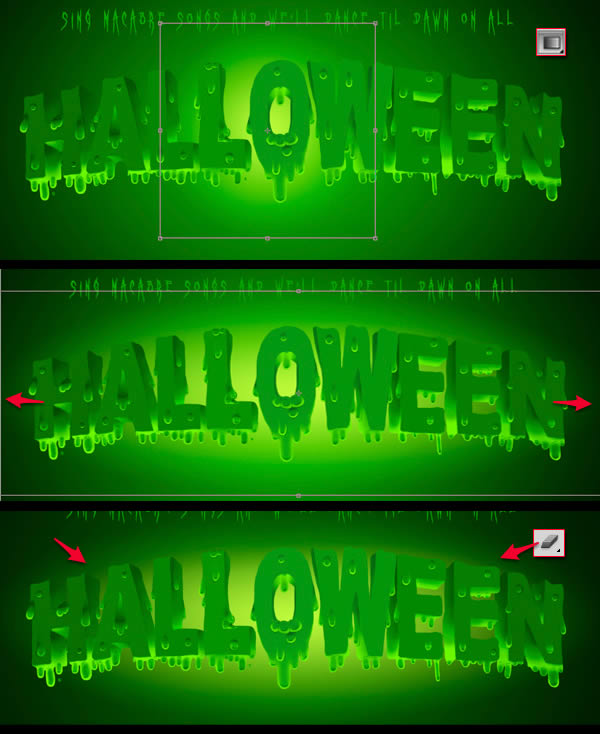
Use the Horizontal Type Tool (T) to write the phrase you see in the picture (or the one you prefer) and on a different layer, the word “HALLOWEEN”. Set the text as shown in the image. For the phrase you can use the font “Ghastly Panic” or pick any “horror” style font that you like. For the word “HALLOWEEN” uses Arial Black or other similar, as will be only the guide we use to create our own letters.
Step 3
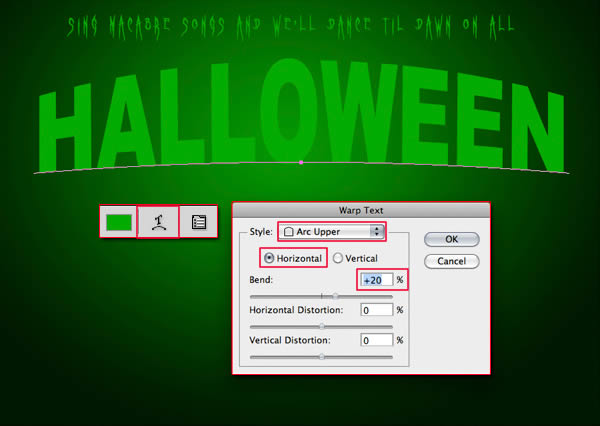
Click on the word “HALLOWEEN” WITH THE Horizontal Type Tool (T) and click on Create Warped Text.
Set as seen on the image.
Step 4
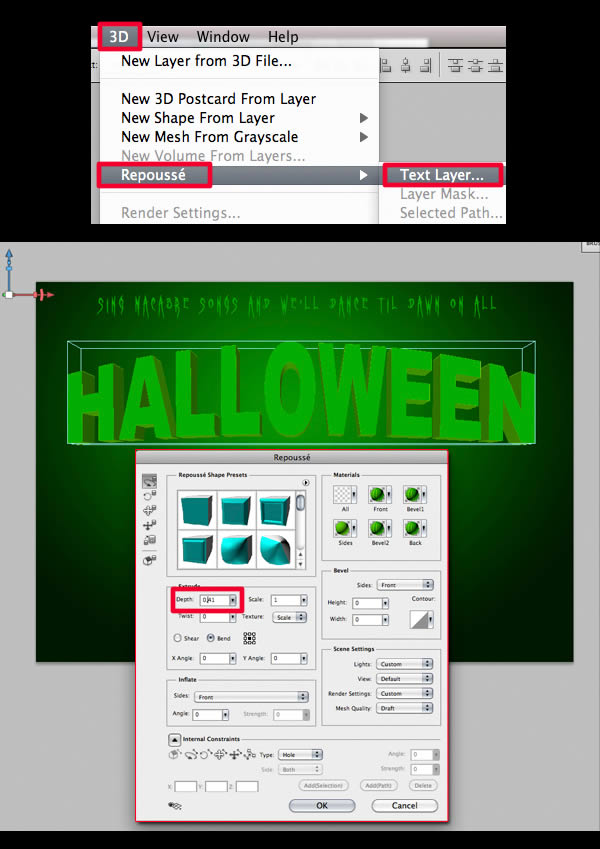
Select the text layer. Go to 3D > Repousse > text layer. Set as seen on the image.
Step 5
Lower the opacity of the text a bit. Add a new layer, choose a small, hard brush and draw each letter using the original text as reference.
Step 6
Paint each letter in block, each on a different layer. Order the layers in such way, that the ones that are in front are above the others.
Select each letter and use Hue/Saturation (CMD/CTRL + U) > Saturation and Lightness to create a gradient where the light is in the center.

Step 7
Add a Clipping Mask to the first letter (add a new layer and click in between both pressing Alt).
Paint yellowish green highlights where the light will hit. In this illustration, the light will come from the bottom center.
Use the Eraser Tool (E) with a soft, low opacity brush, to clean the lights as seen in the image. Repeat with all the letters.
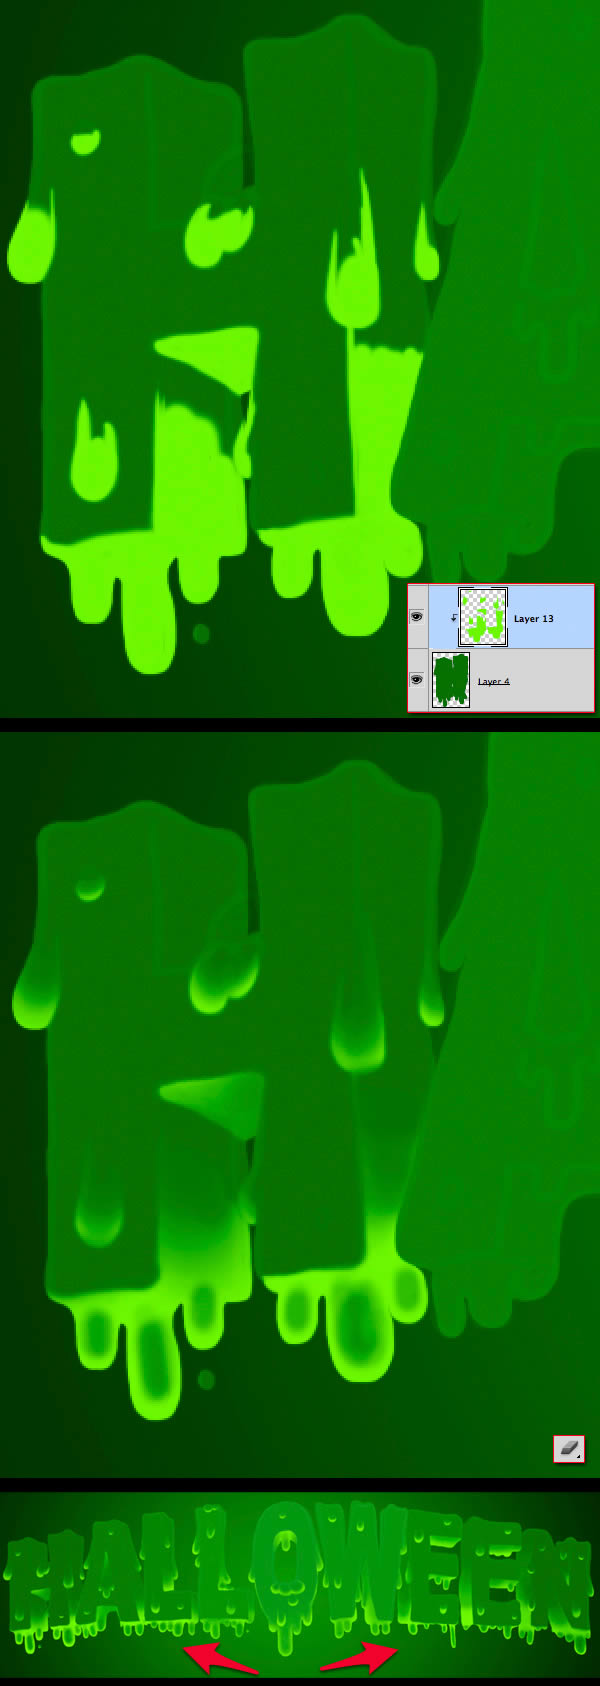
Step 8
Repeat the last step for the shadows, but this time using light blue in a Multiply Mode Layer.
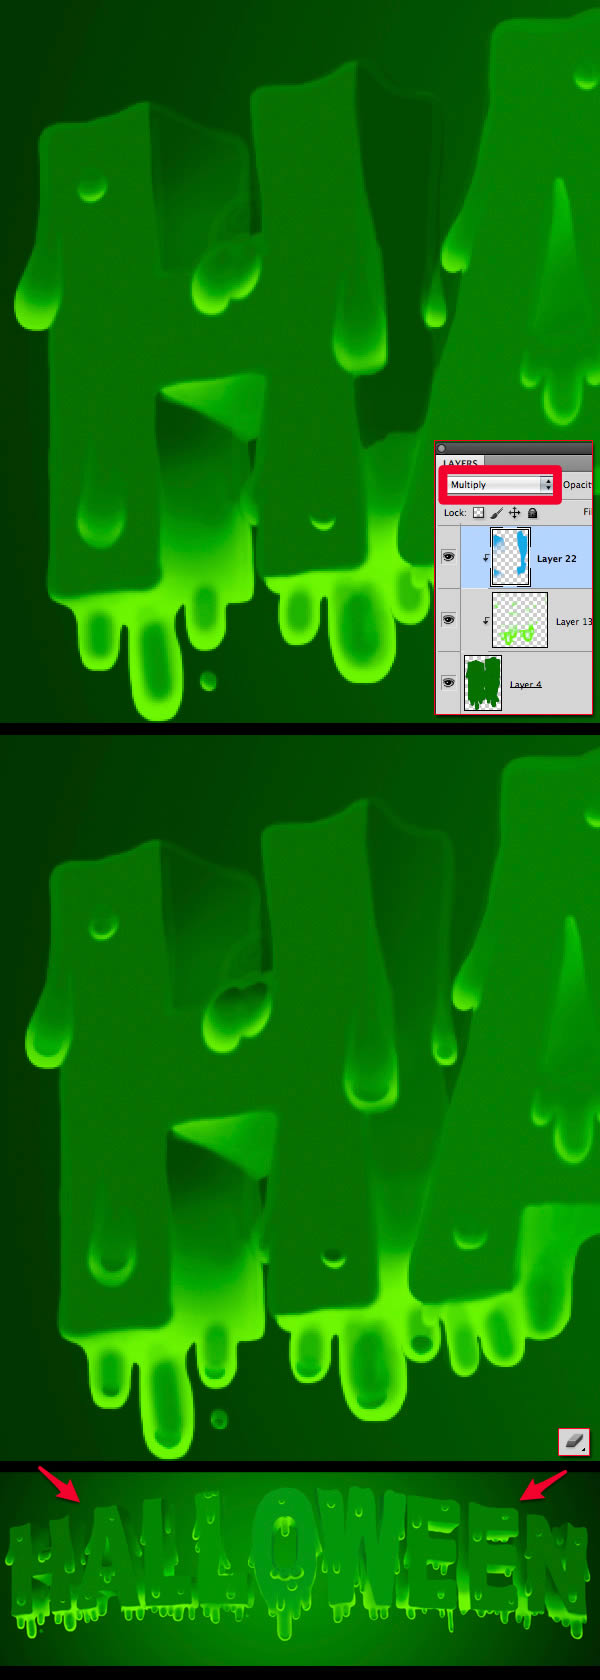
Step 9
Add a new Multiply Mode layer and paint hard shadows to the shapes as seen in the image.
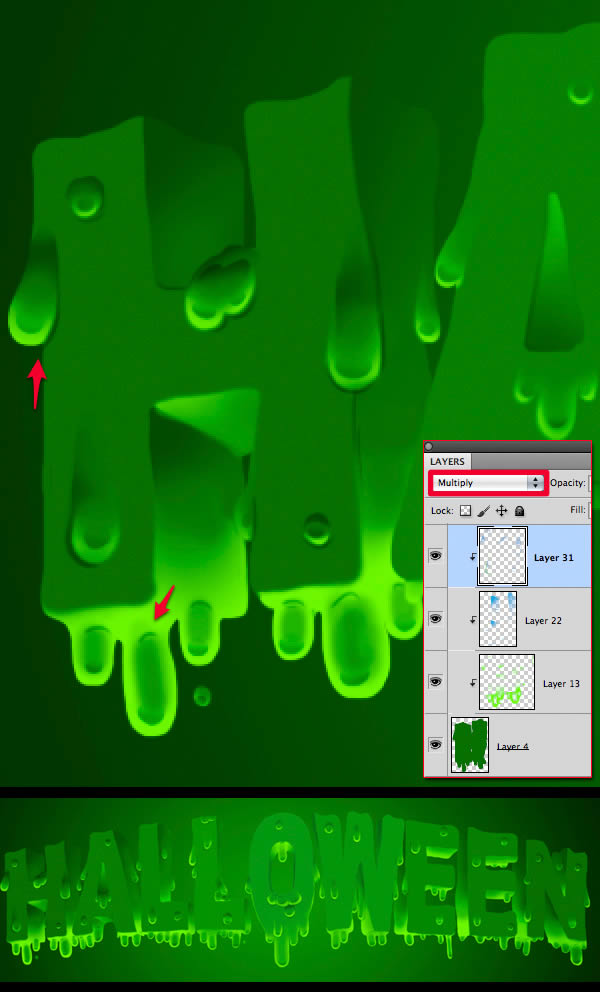
Step 10
Add a new layer below and create a small yellowish green circular gradient. Press CMD/CTRL + T to stretch horizontally.
Softly erase the top.
Step 11
Duplicate all the letters layers and Merge them (CMD/CTRL + E). Then select a dark and a yellowish green as front and background color.
Go to Filter > Sketch > Reticulation and set as the image.
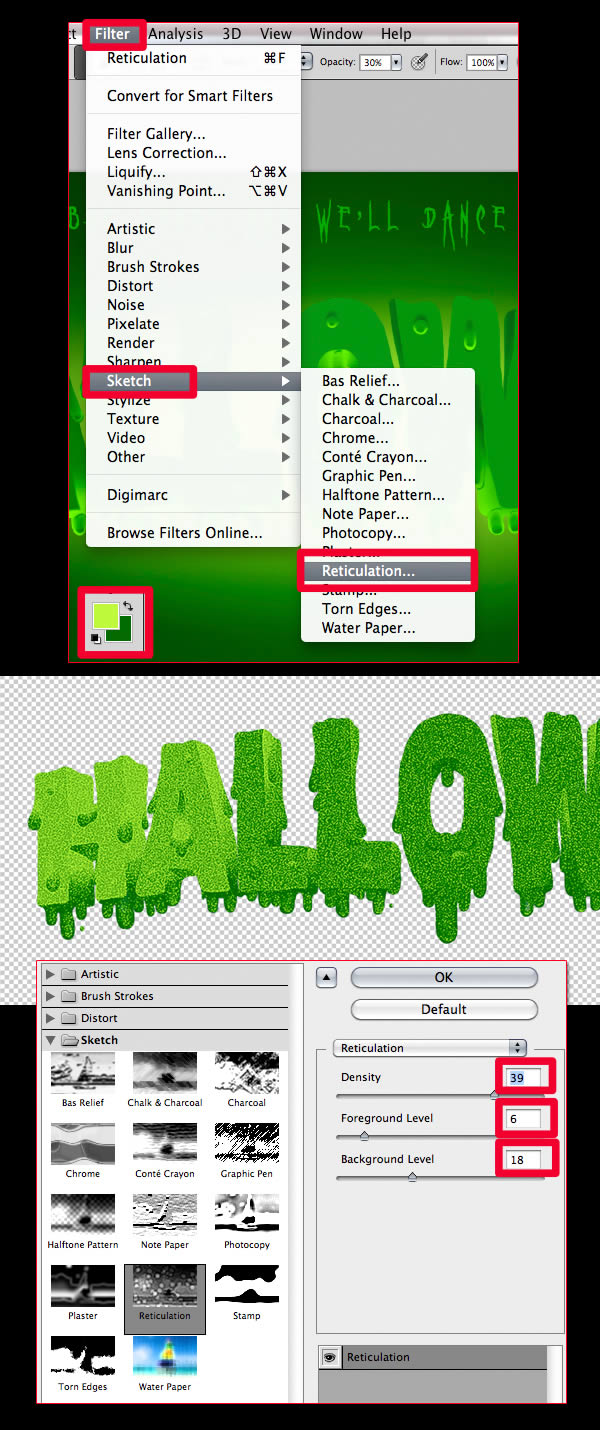
Step 12
Set this Reticulation Layer to Soft Light and 40% Opacity.

Step 13
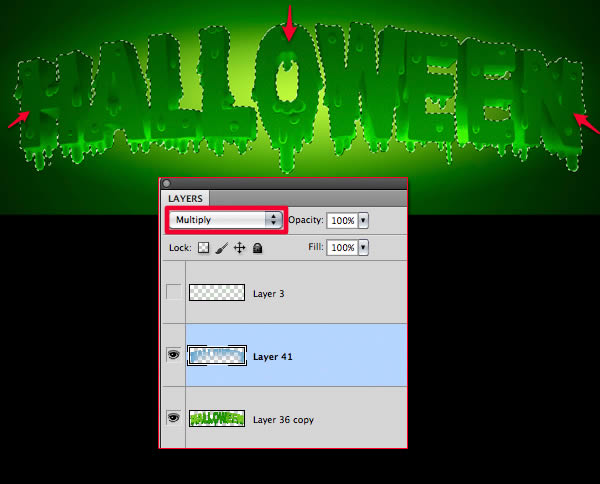
Select the text layer, add a Multiply mode layer and make a soft gradient with light blue on top and sides. Use the Eraser to soften.
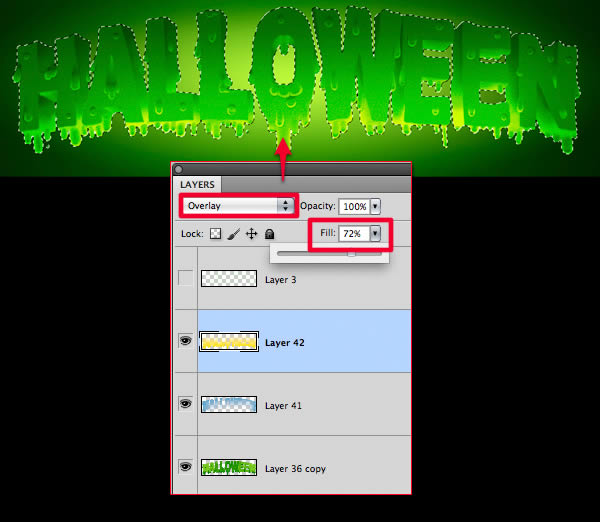
Add another layer in Overlay mode and make a yellow gradient from below.
Step 14
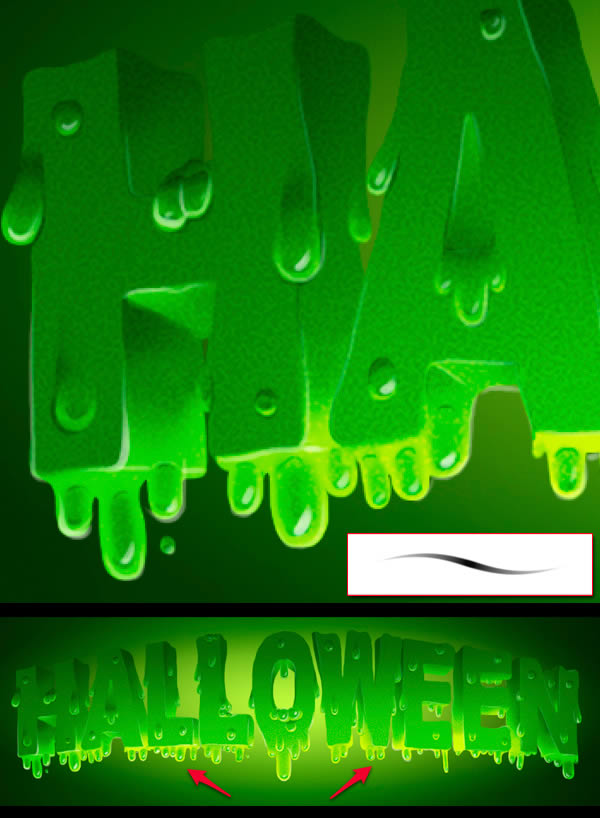
Use white to paint some highlights to give the feeling of “liquid”.
3.Painting the Pumpkin
Step 1
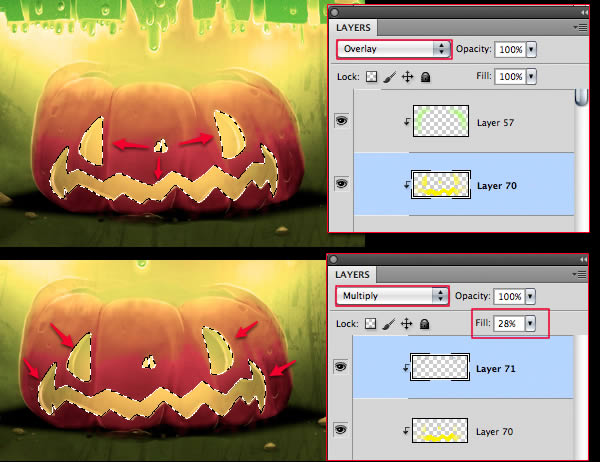
Let’s make the pumpkin. For this stage you will need only orange and green. Paint using different layers, use orange in Multiply Mode layers for shadows and green in Overlay mode layers for the lights.
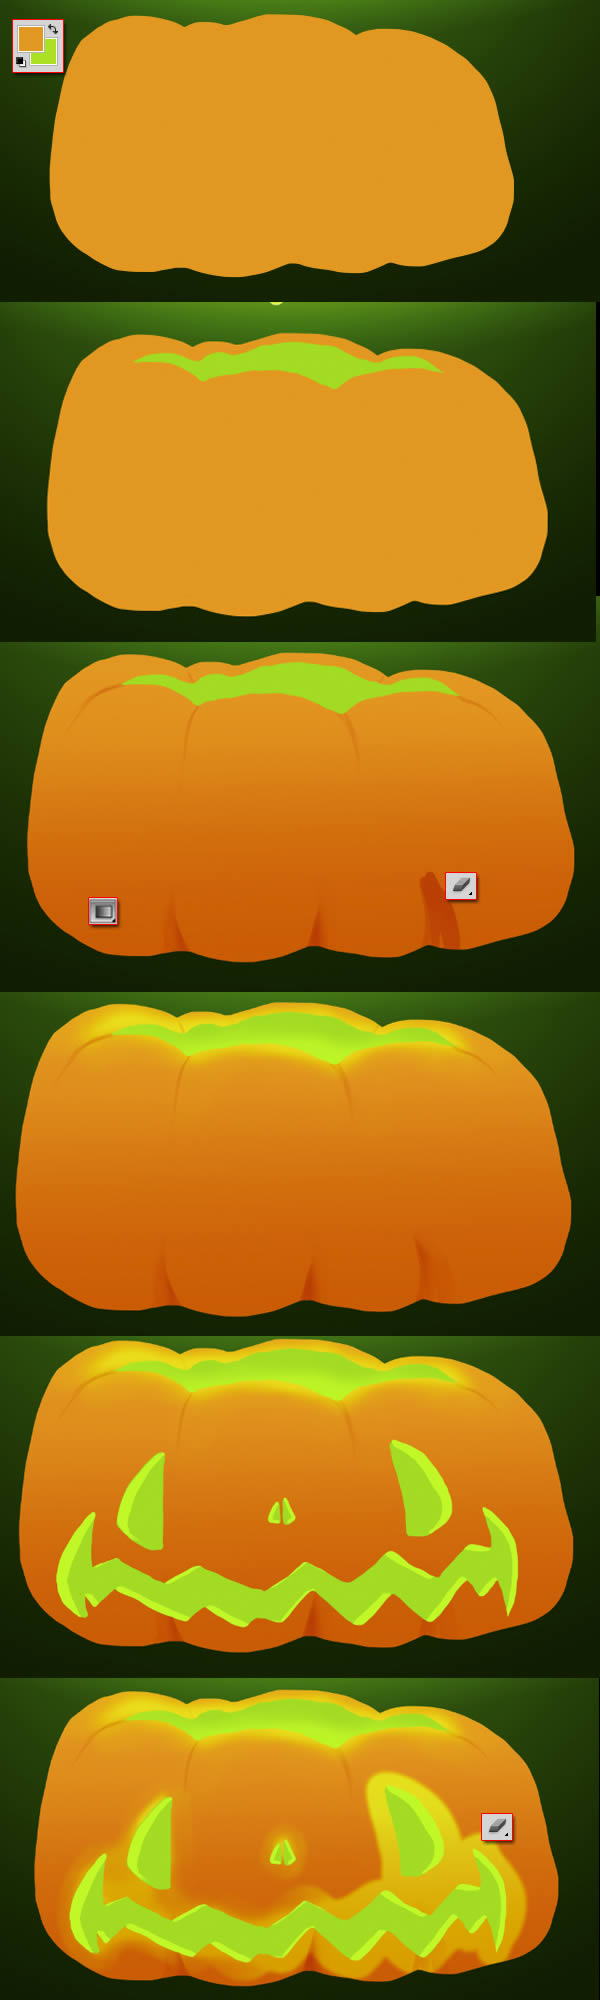
Step 2
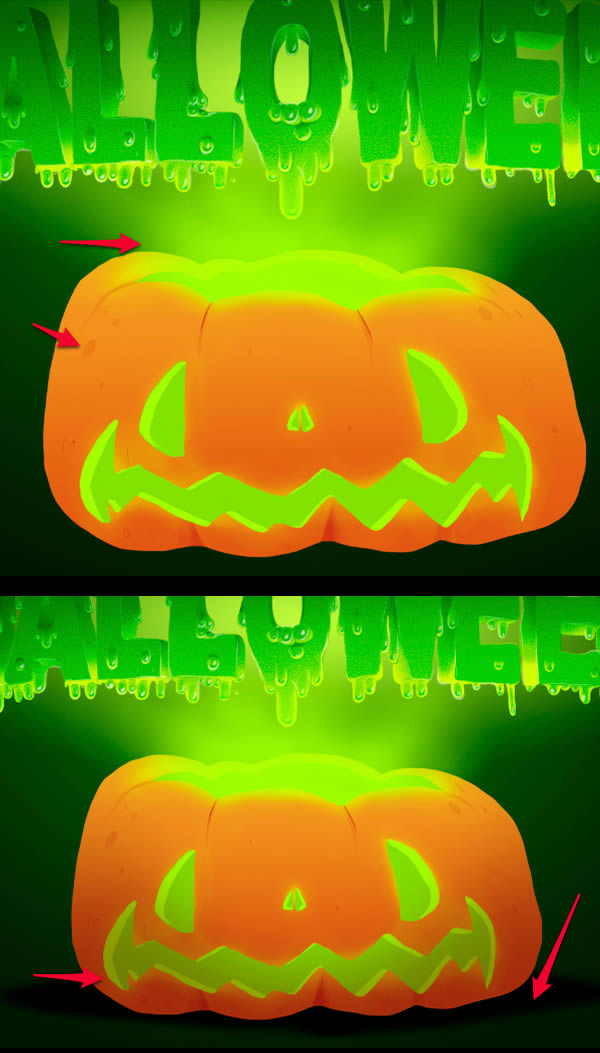
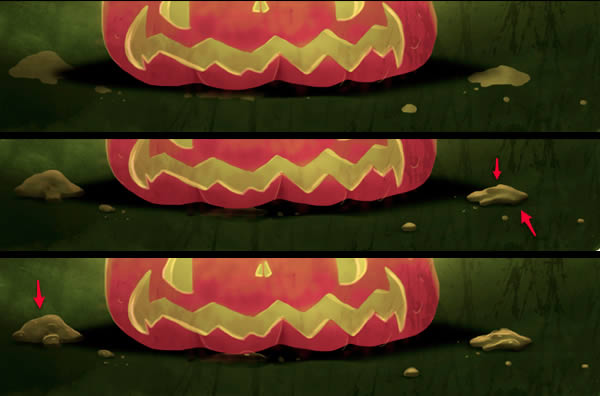
Paint a “vapor-light” out of the pumpkin. Make some pumpkin stains and a brownish shadow below.
Paint the shadow on the ground.
4.Background and Final Rendering
Step 1
Place the first texture (File > Place) below the pumpkin and text and press CMD/CTRL + T to fit in the canvas.
Set the layer to Divide Mode.
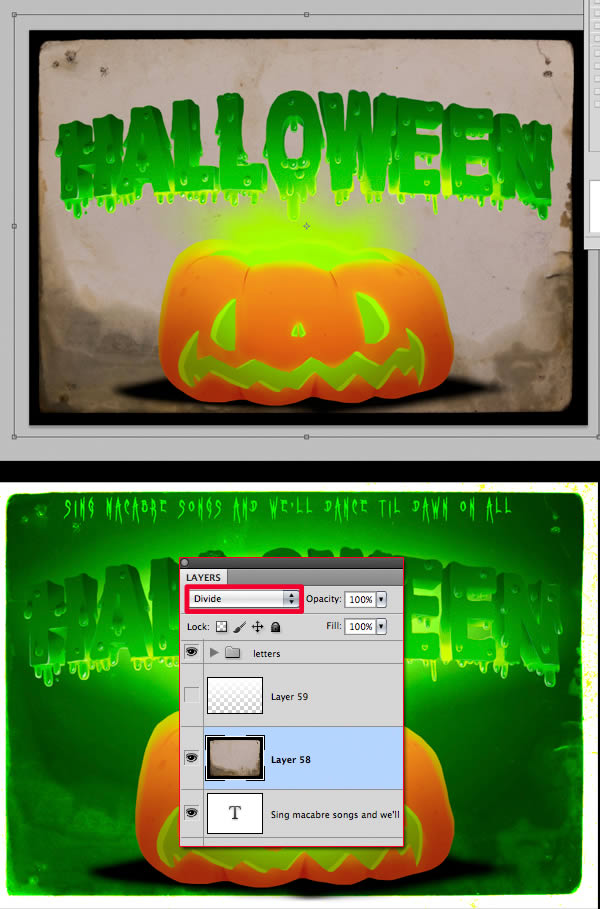
Step 2
Duplicate the texture, set to Multiply Mode and erase with a soft brush as seen in the image.
Use the Magic Wand Tool (W) to select the edges and delete them.
Step 3
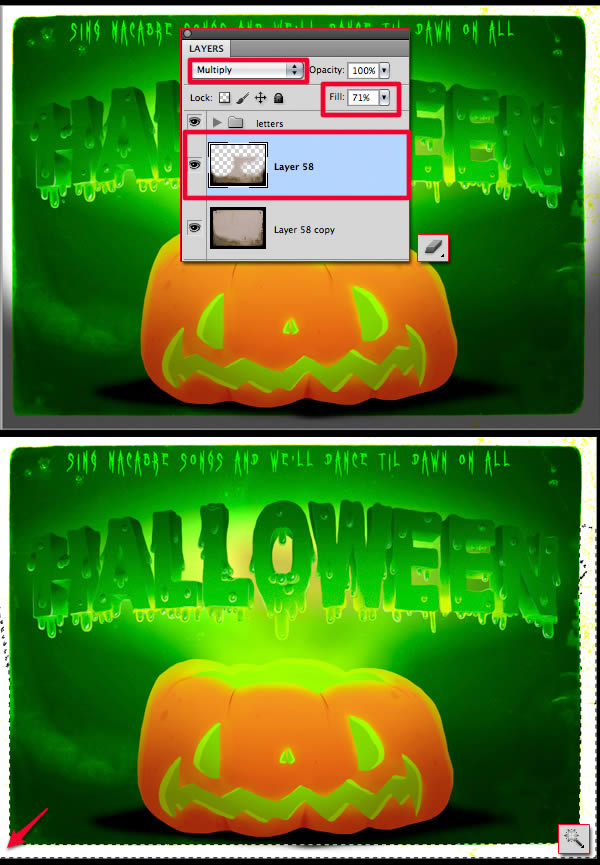
Place the second layer on top, set to Overlay Mode and 73% opacity and erase slightly on the pumpkin and text as seen in the image.

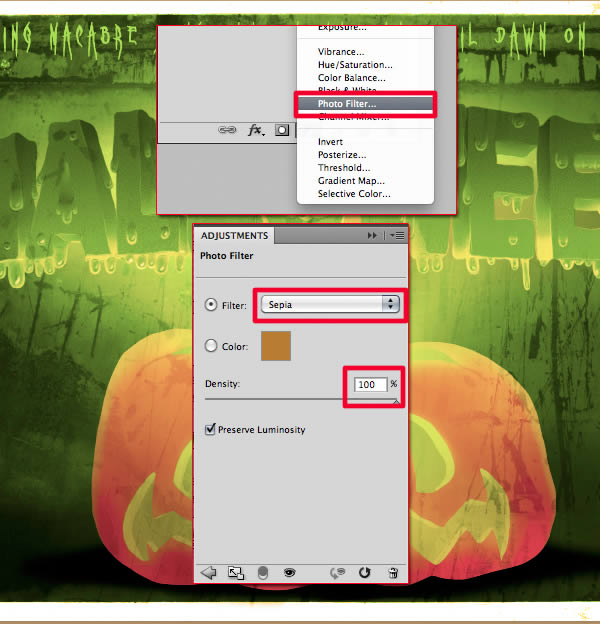
Step 4
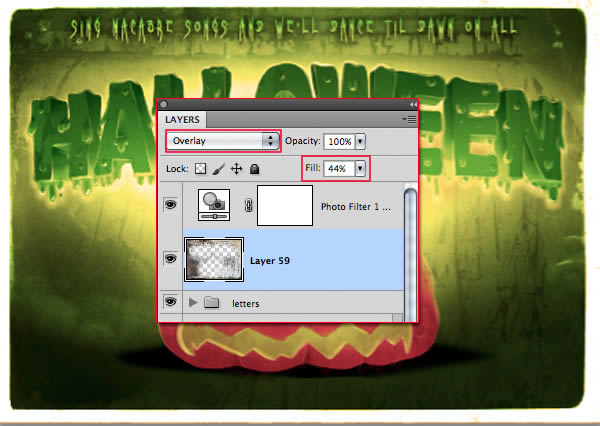
Add a New Fill or Adjustment Layer > Photo Filter and set as in the image and place it behind the text.
Step 5
Duplicate the yellow gradient below the text, stretch it horizontally and vertically downward and erase by the lower sides.
Step 6
Make the pumpkin smaller and duplicate, if needed, the orange’s multiply mode layers as you did before.
Step 7
Double click on the phrase layer and set the Layer Styles as shown in the image.
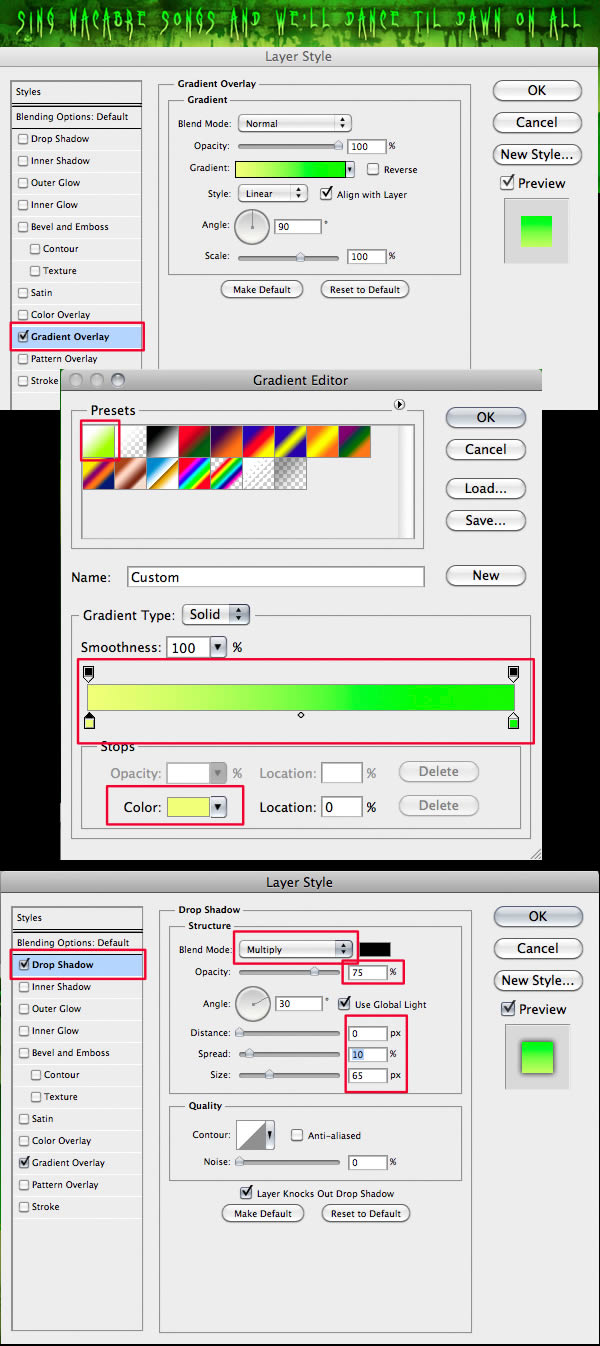
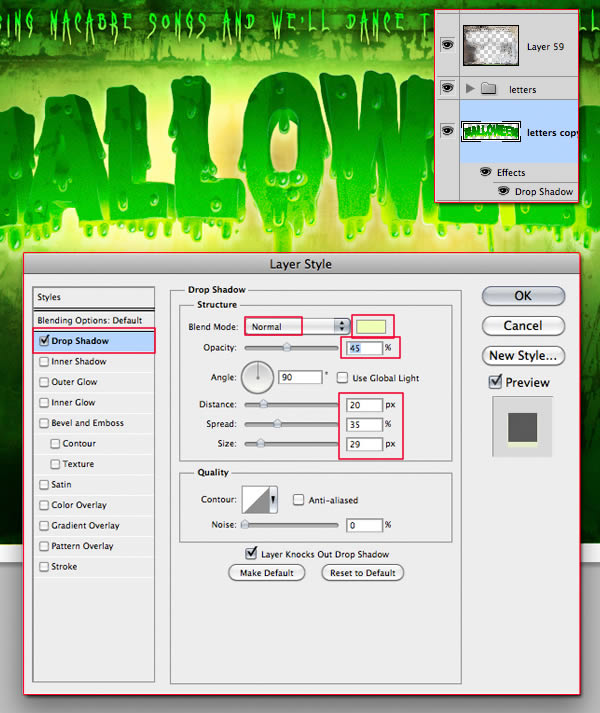
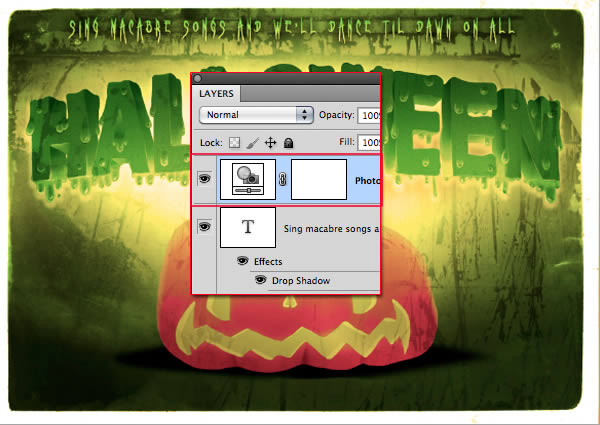
Step 8
Duplicate the “HALLOWEEN” text, place it below, and set the Drop shadow as seen in the image.
Step 9
Duplicate the sepia Photo filter layer and place it on top.
Step 10
Add a new layer and paint with fine lines light around the word and the pumpkin, as well as the eyes, nose and mouth.
Step 11
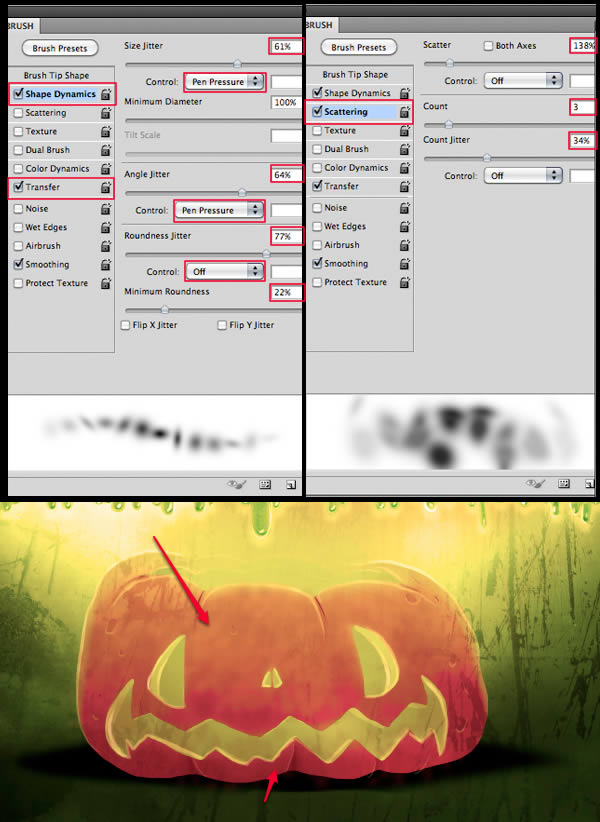
Choose the Basic soft round brush, give it a bit of Spacing and set as in the image.
Then paint with yellow and dark orange on the pumpkin, to make it “dirtier”
Step 12
Change the second texture as seen on the image.
Step 13
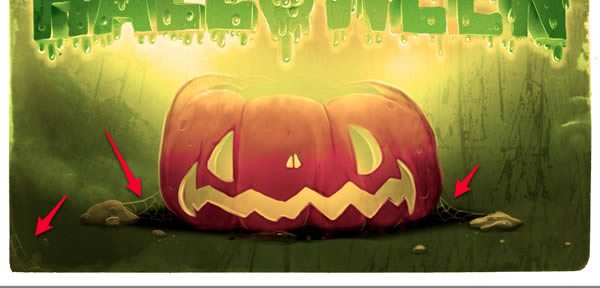
Paint a little pumpkin filling on the floor. Do not forget to make the shadow on the ground and add soft highlights.
Step 14
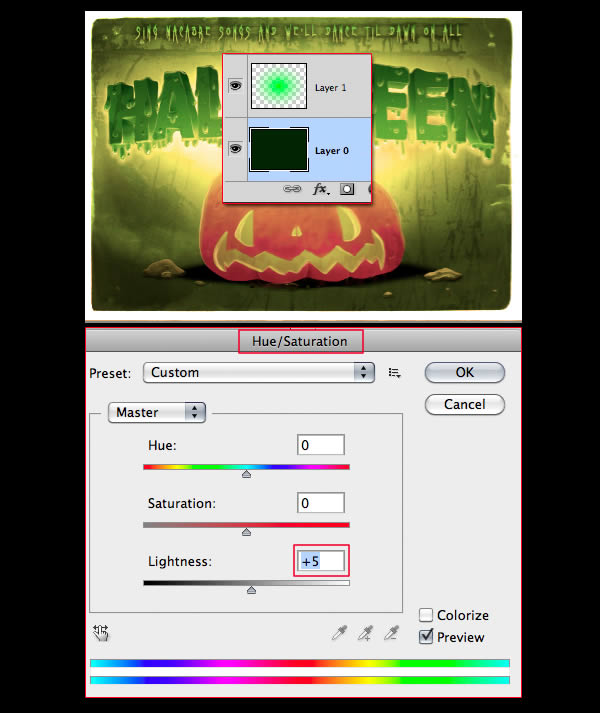
Select the Background layer, double click on it to release it, and press CMD/CTRL + U (Hue/Saturation) and add a little lightness
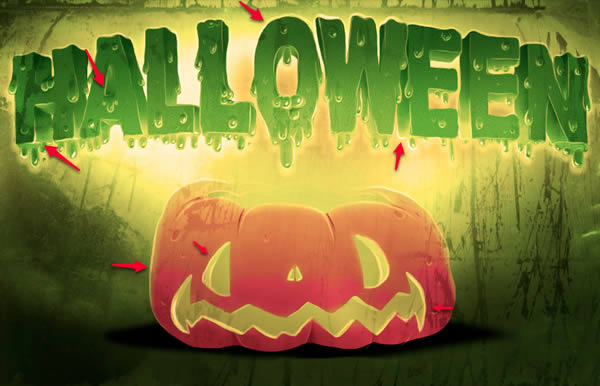
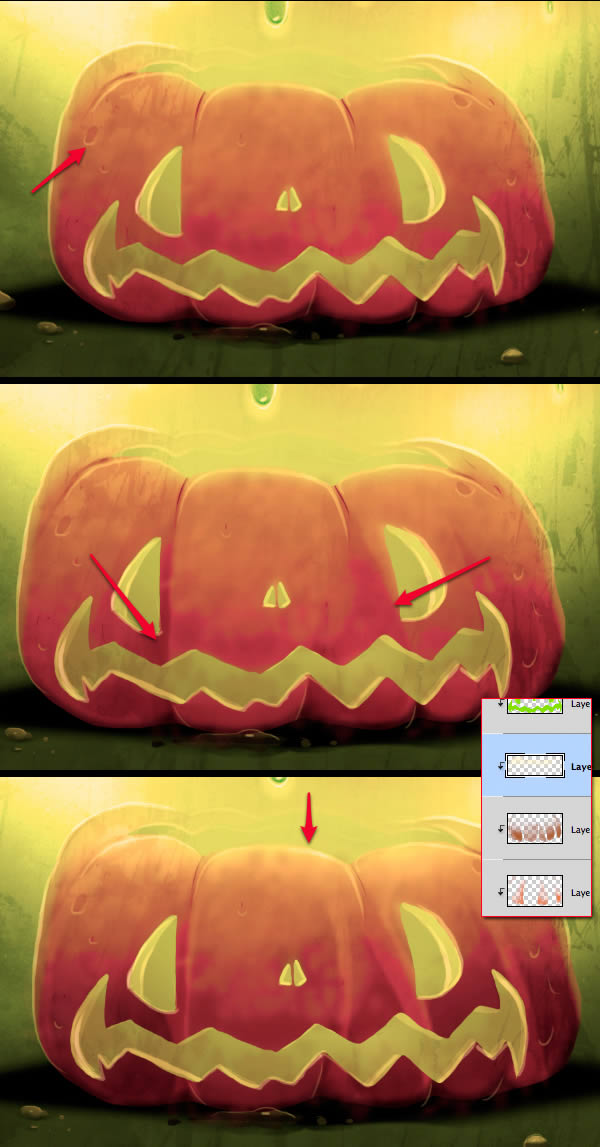
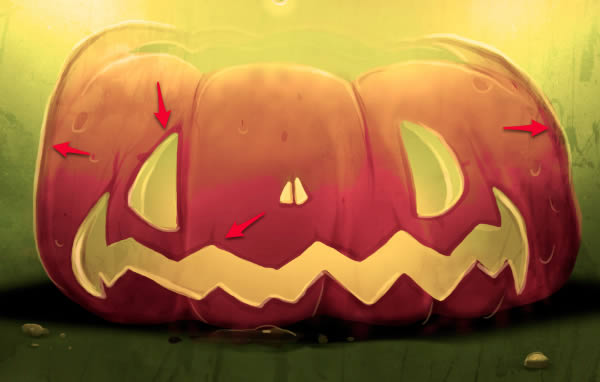
Step 15
Let’s go back to the pumpkin: Add some highlights and reinforce the shadows.
Step 16
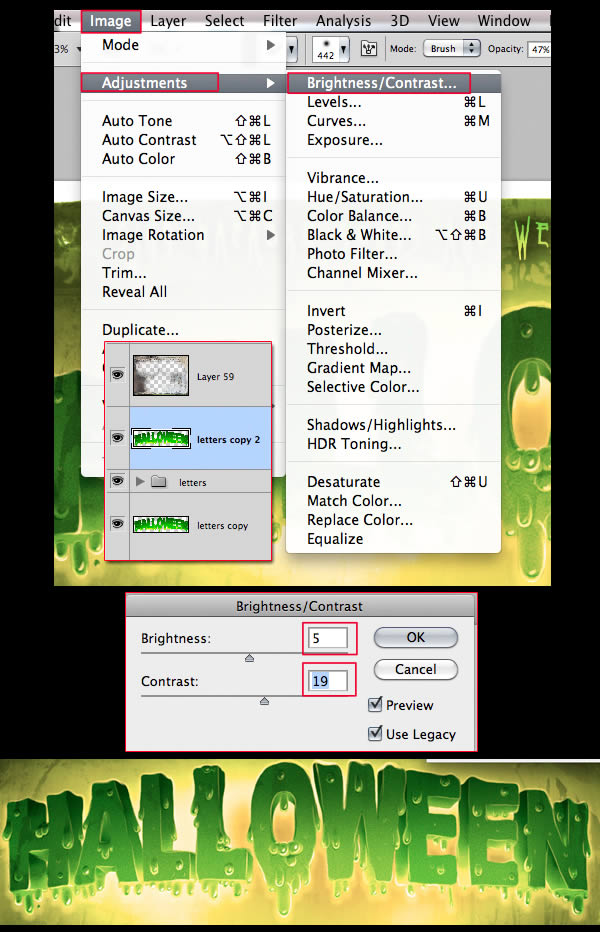
Select the text layer, go to Image > Adjustments > Brightness/Contrast and set as the image.
Step 17
Select the face of the pumpkin and add yellow light in the middle and blue shadows by the sides.
Step 18
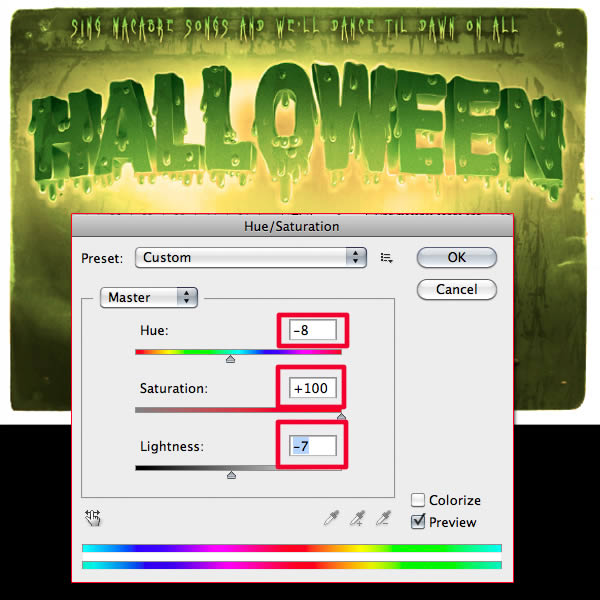
Select the text layer, press CMD/CTRL + U (Hue/Saturation) and set as the image.
Step 19
Darken the edges of the face and pumpkin itself and make some cracks.
Step 20
Paint some spider webs with a small, hard brush.
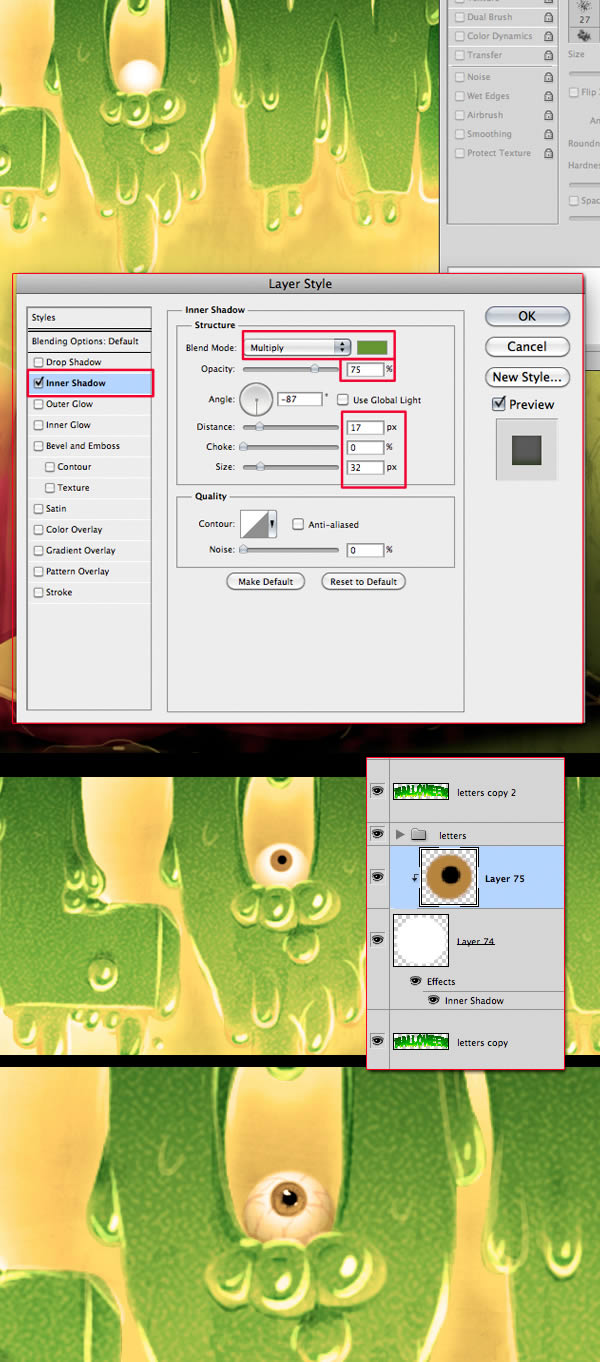
Step 21
Finally, the eye in the letter O. Paint a white circle in between the letters and the shadow layer. Add some Inner Shadow.
Use a Clipping Mask to paint the eye pupil and then add a new layer to make the details like the veins and highlights.
Conclusion
That’s it! You are now finished. This technique is a quick and easy way to create spooky Halloween typography and can be used on just about any word or font. Hopefully, you learned something and can use this technique to create your own Halloween text effects in Photoshop.