
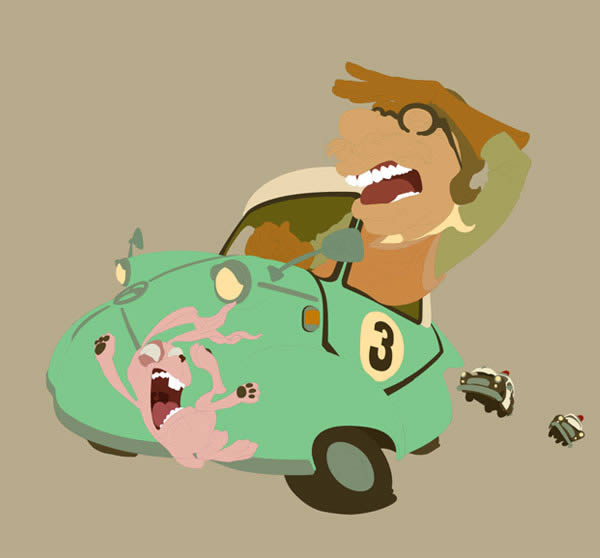
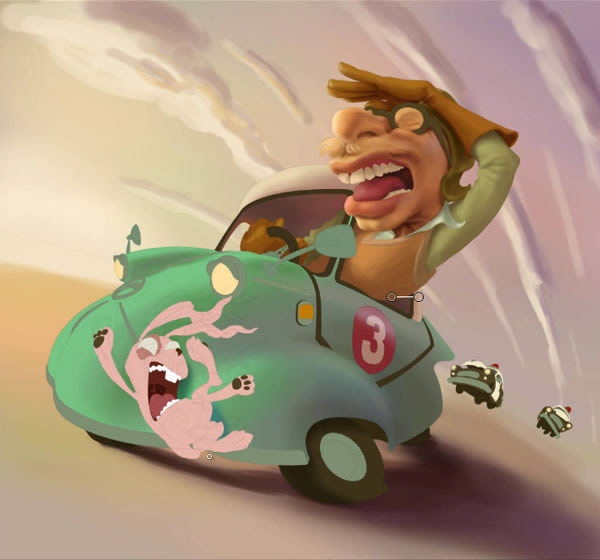
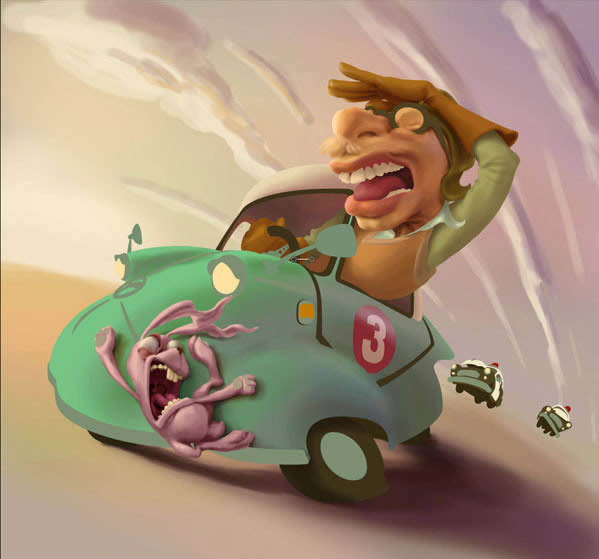
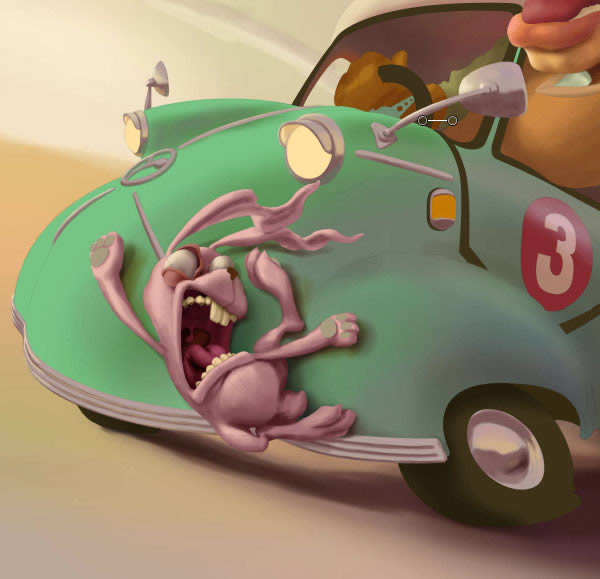
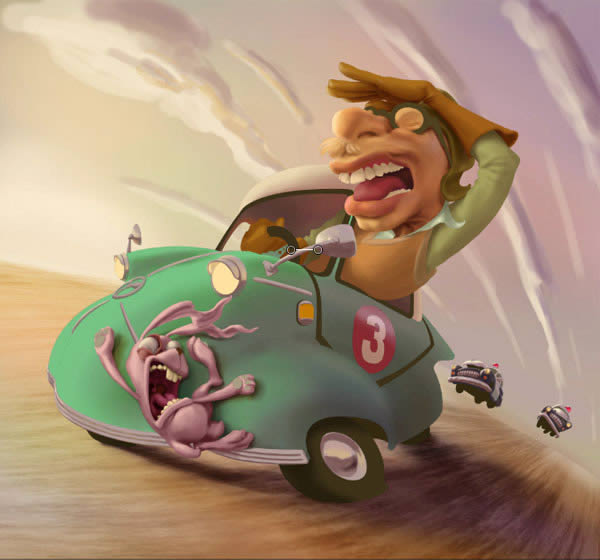
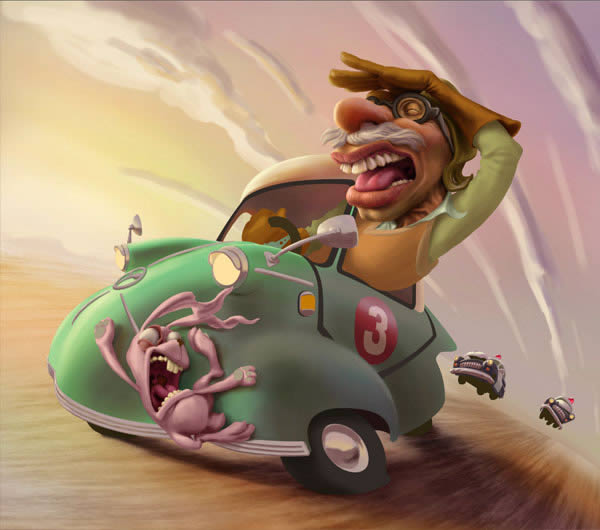
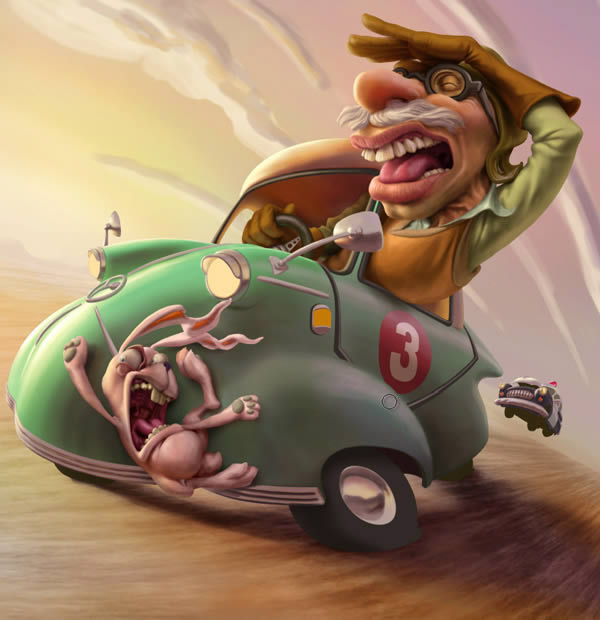
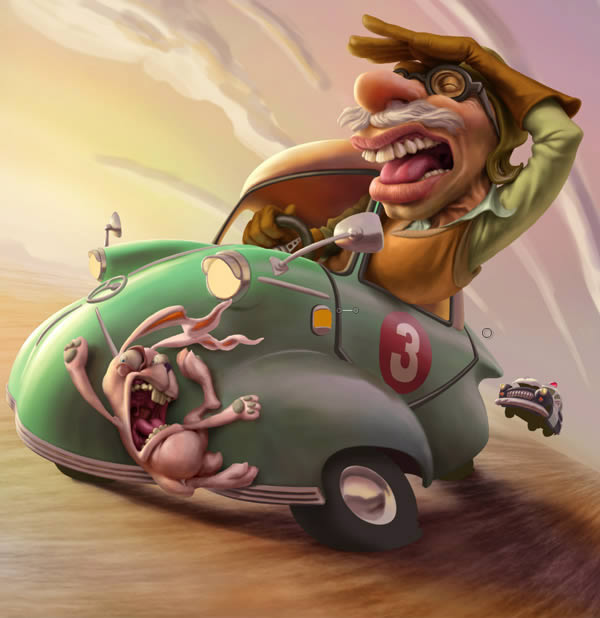
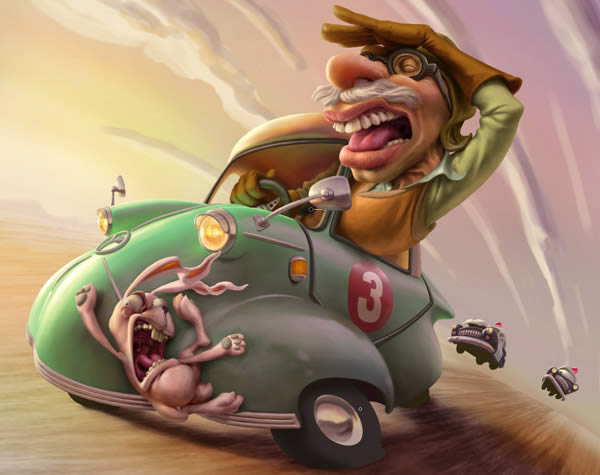
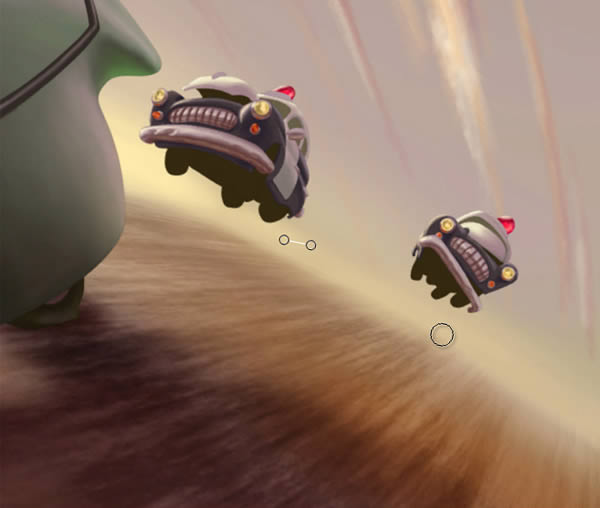
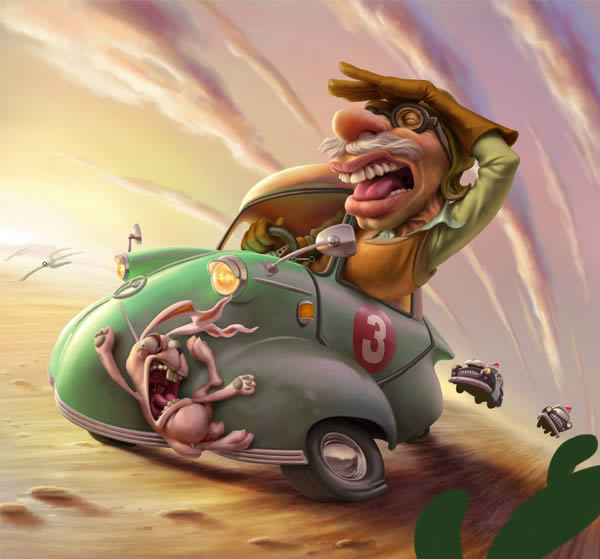
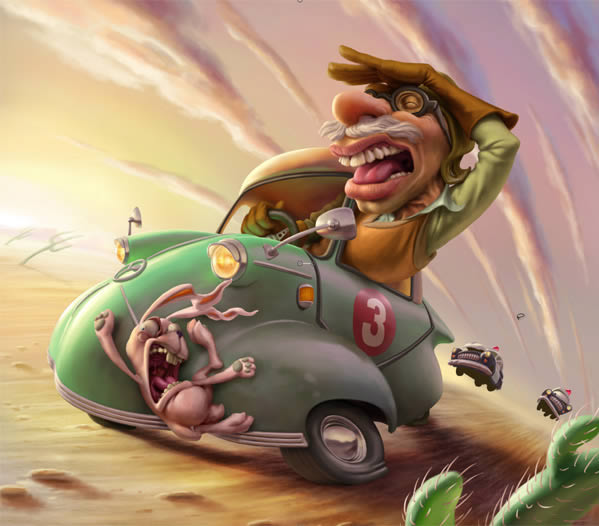
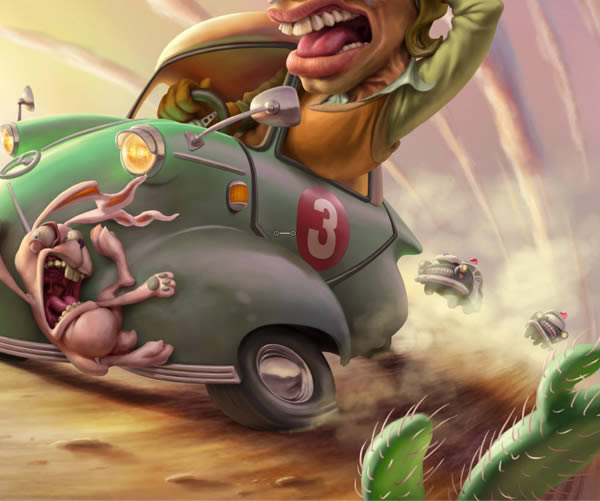
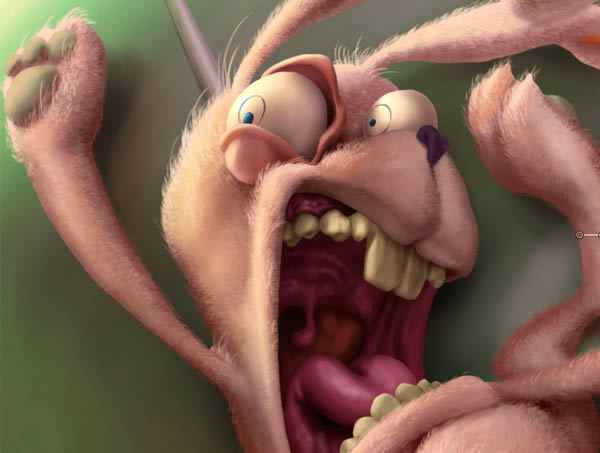
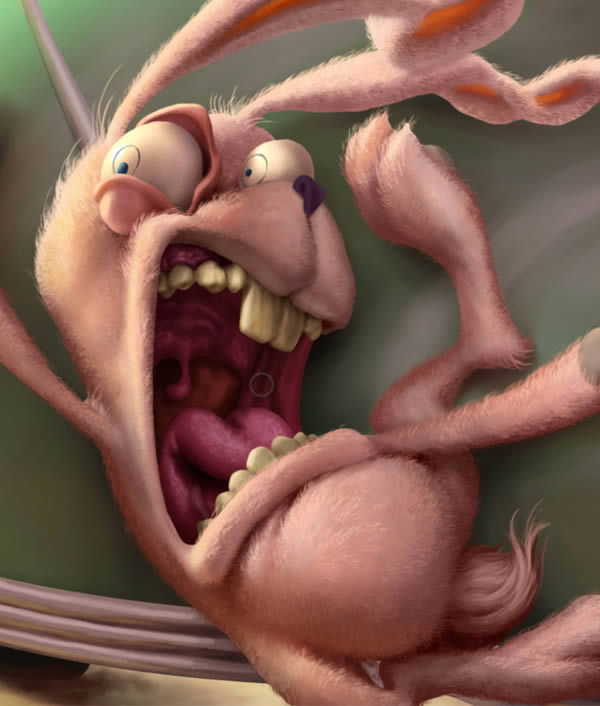
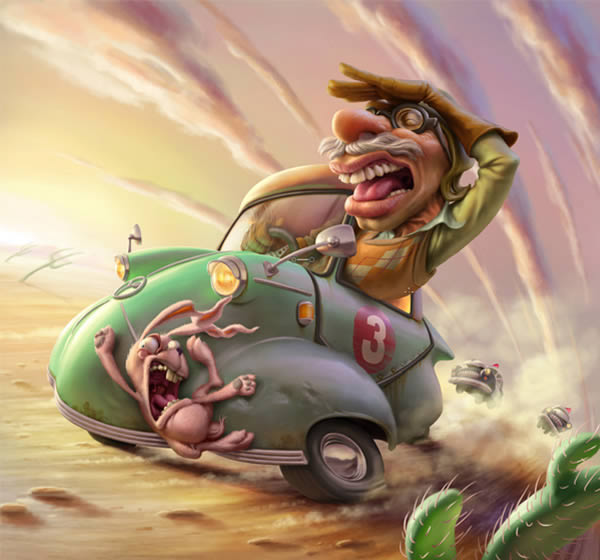
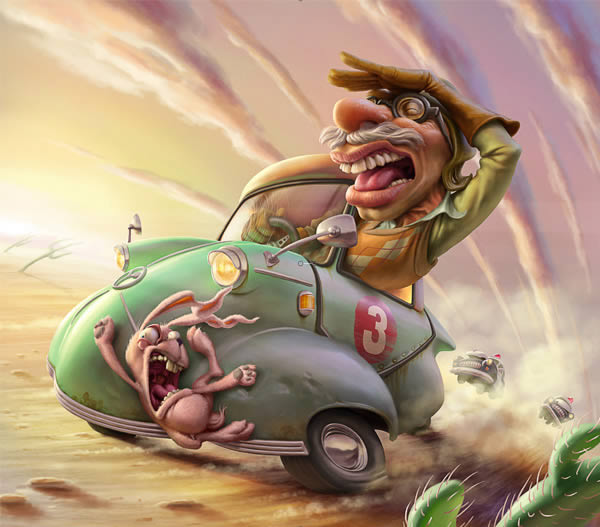
Creating a high-impact and realistic caricature illustration can be a fun but extremely challenging task. In this tutorial, we will explain how to properly control all the elements of a composition including color balance, contrast, textures, and more, as well as all of the tools and techniques that you will need to know in Photoshop to build a highly entertaining and detailed caricature illustration. Let’s get started!
Speed Painting Video
This tutorial includes a stunning speed painting video. You can watch it below.
1. Sketch
Step 1
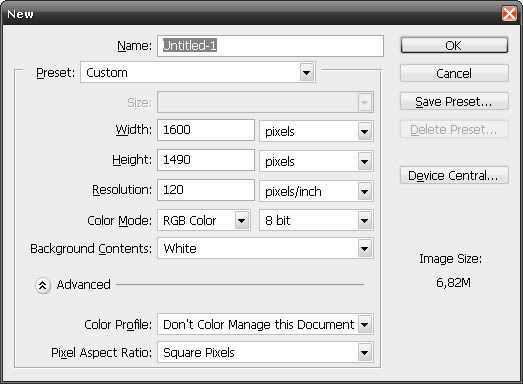
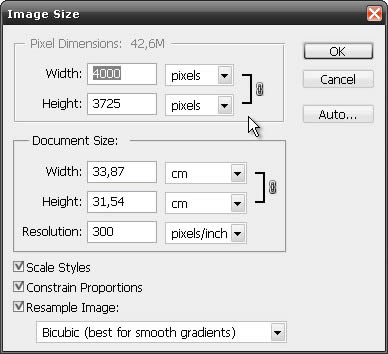
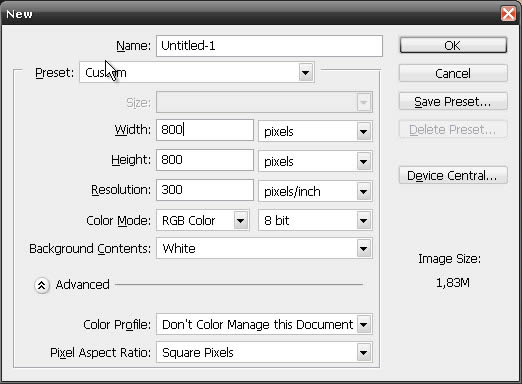
Create a new document (File > New…). Define an arbitrary size and start with a resolution of 120dpi.
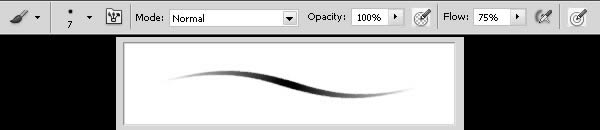
Create a new layer (Layer > New … > Layer) and using a moderately fine brush. The first lines will define our idea of the composition. We are looking for a very sharp perspective with a subtle fisheye effect.

Step 2
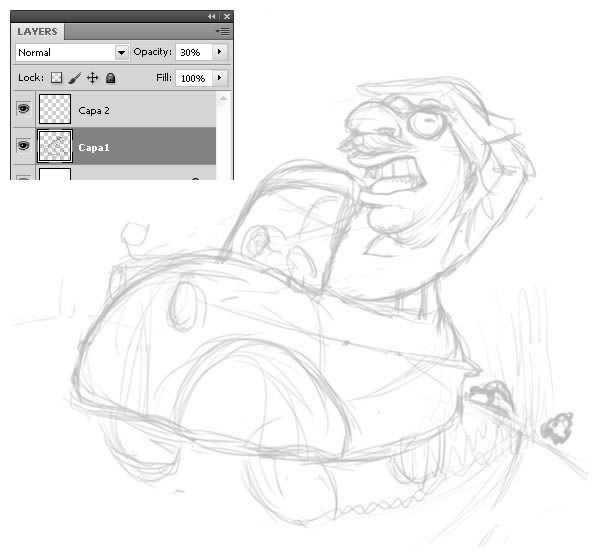
Then create a second layer (Layer > New … > Layer), lower the opacity of the below layer to see our first sketch and re-define the elements a bit more. The driver is taking the shape of an older man.

Step 3
Repeat the previous step, create another layer (Layer > New … > Layer), lowering the opacity of the below layer, and now we make a more clean and detailed drawing. The rabbit doesn’t have the proper expression, we need a more fun and extreme gesture.
Step 4
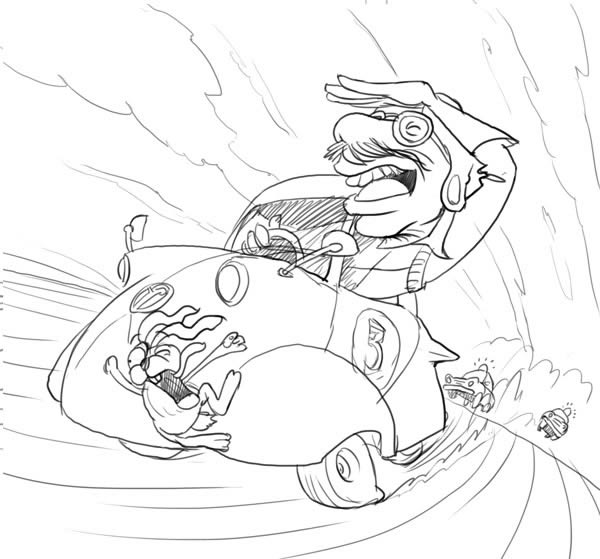
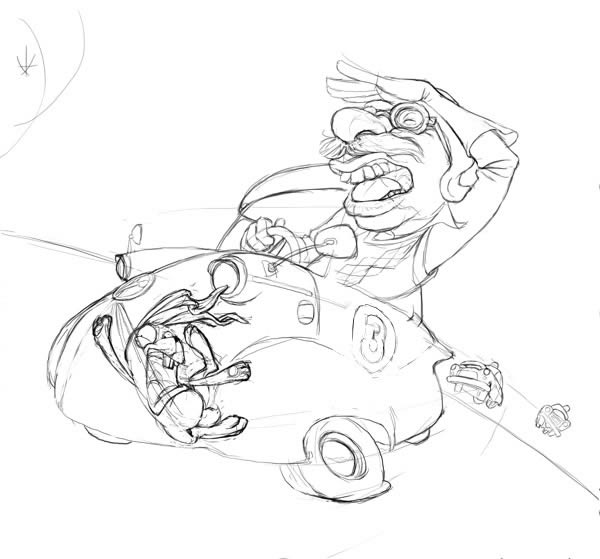
Now that we are more in line with the elements, we will make the last step before the final outline. Here we re-define the layout quickly. The characters take appropriate features and expressions and design of police cars will look more proportional. Clouds and other shapes are defined less clearly but we can add more detail in a later step.
2. Set-Up Document
Step 1
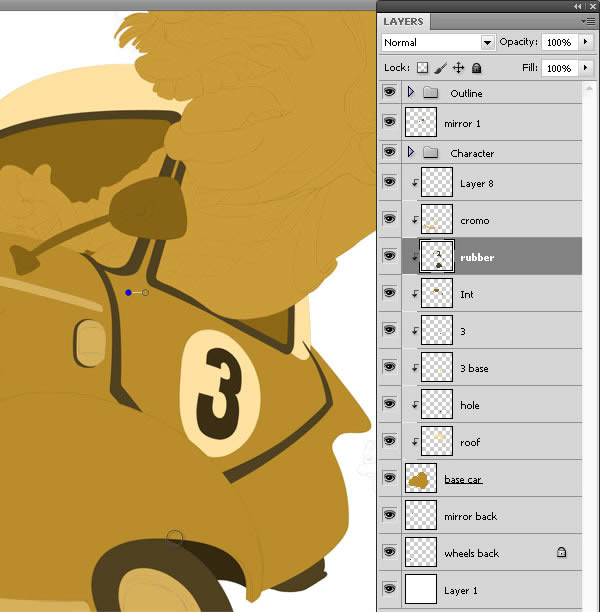
Increase the final resolution to make an image that can be printed, at 300dpi. Clean up the drawing and make more accurate, and give all the elements the correct shape and appropriate thicknesses. Try to give credibility to each of the shapes from the drawing. The most relevant components (car with driver, rabbit and police cars) will make them in separate layered just in case we need to change their position later.

Step 2
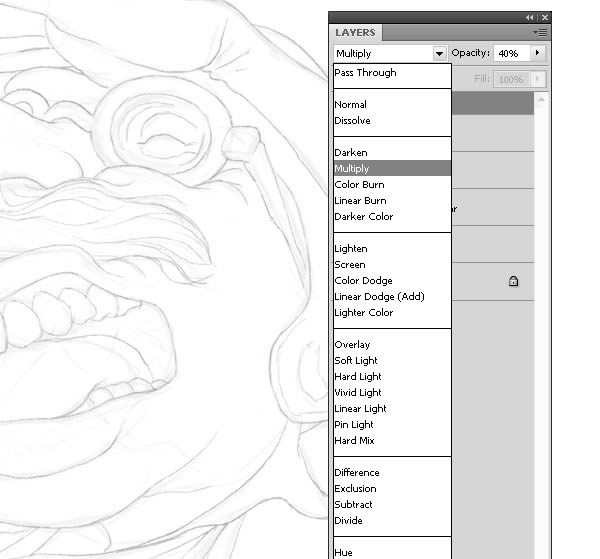
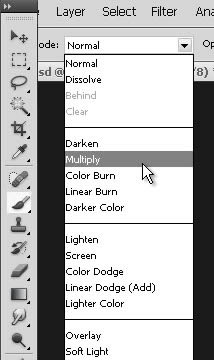
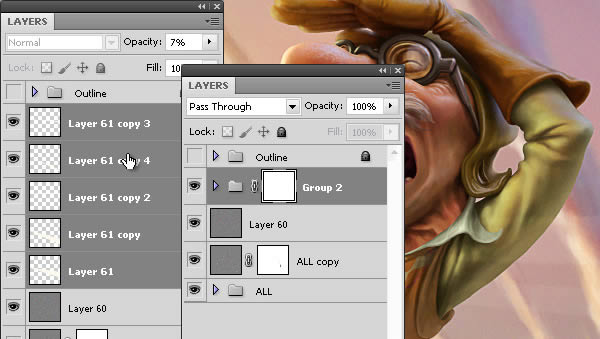
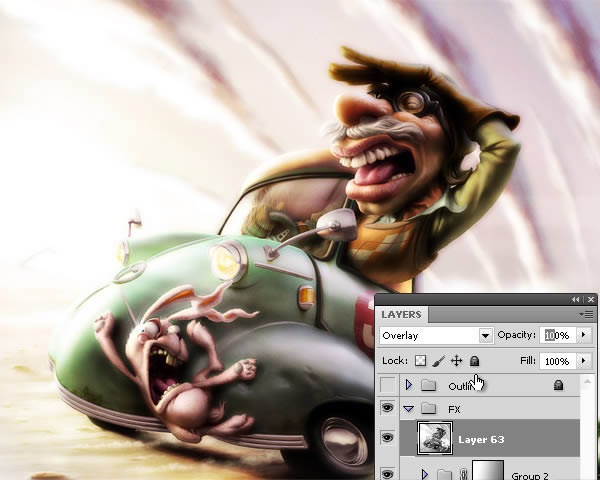
Once we are satisfied with the layout, group them into a layer we call “Outline”, lower the opacity and change the Layer Blend Mode to Multiply. Then lock the layer.
3. Prepare Color Bases for Painting
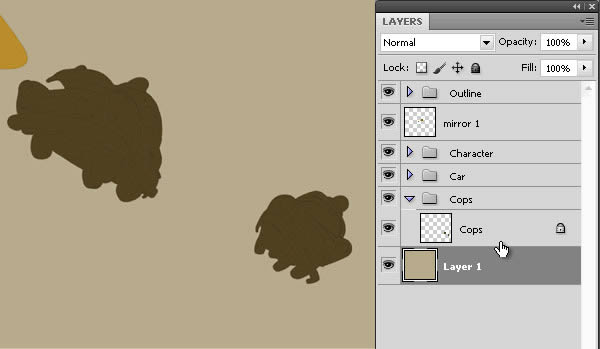
Step 1
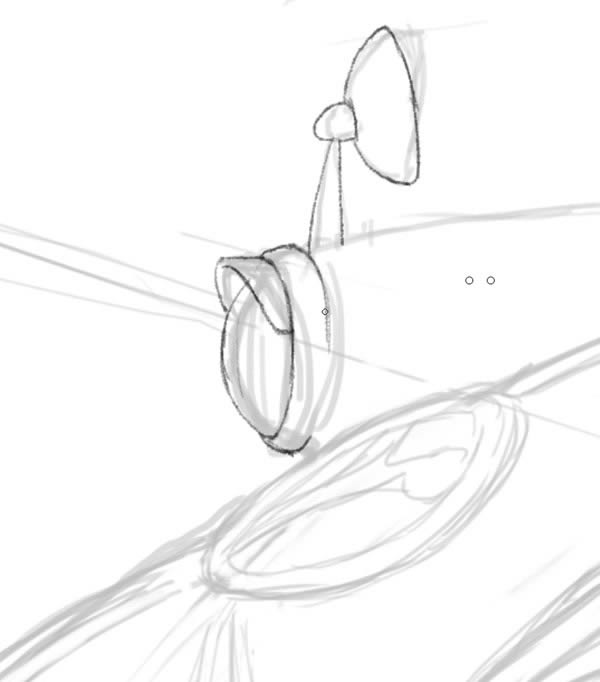
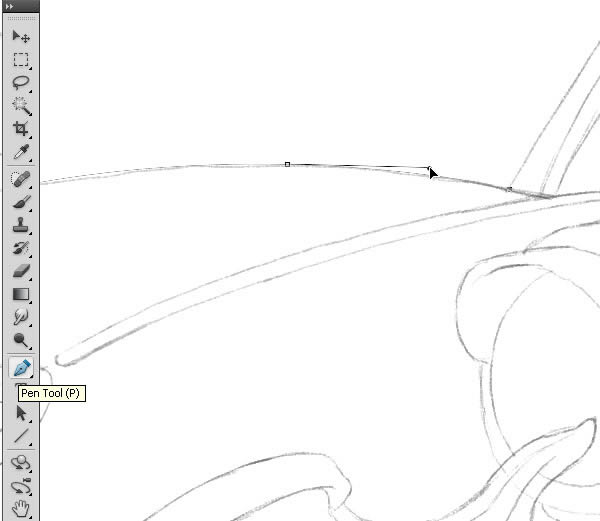
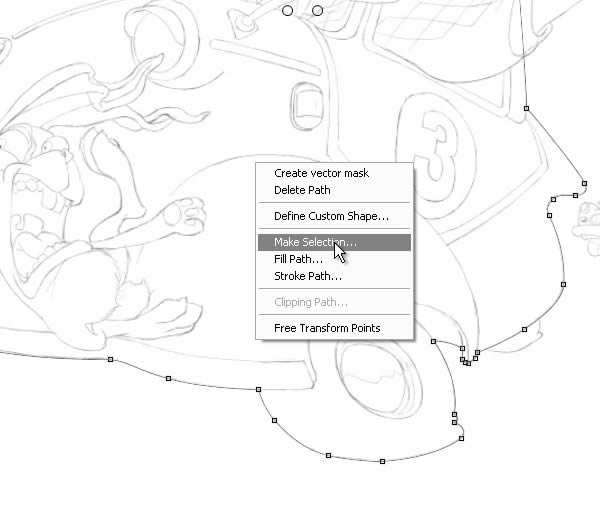
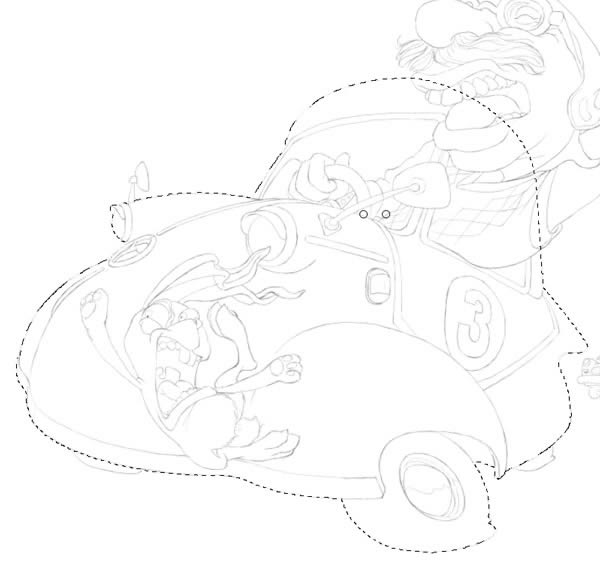
Create a new layer (Layer > New Layer…) to start the bases of color. With the Pen Tool define the whole contour of the car, which has a well-defined shape. Close the path doing Right click over the path and select Make selection > …, then Ok to make a selection from this path, as shown below.
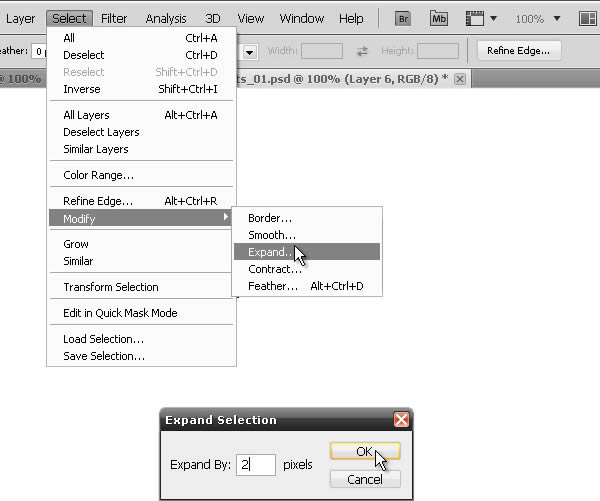
To speed up the process of filling, we define an action. When we have a selection, in the actions palette create a New Action, define its name and a shortcut, then press record and then go to Select > Modify > Expand … define expansion 2px, and ended up deselecting action (CMD/CTRL + D). Now stop recording the action.
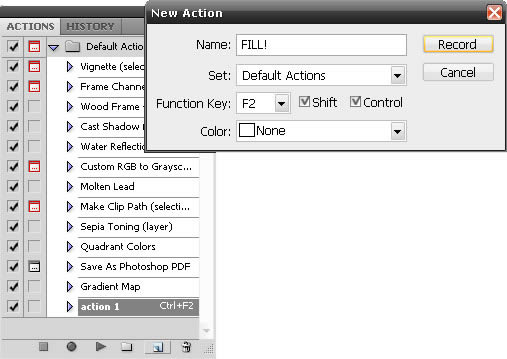
Now every time we need to fill a selection, just use our defined shorcut.

Step 2
In a new layer (Layer > New Layer…) and a basic brush (hard) fill the character than is more organic and does not require a precise contour. In this layer we only paint the part of the character that gets out from the car.

Step 3
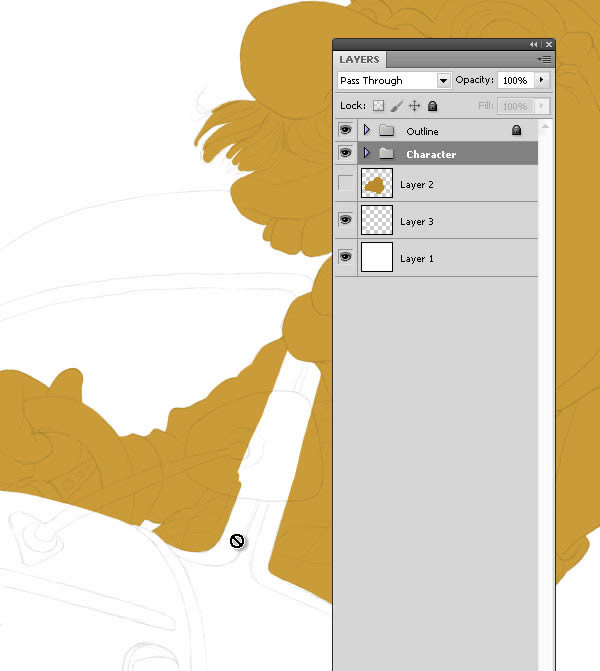
In a new layer, paint the part of the character do you see inside the car. Then we make a folder to group every part of the character. The same thing we do with the main car, the police cars, etc.
Step 4
Now make all the elements that correspond to each item in new layers, but we convert these layers in a clipping masks by this way: Create a new layer (Layer > New … > Layer) above our base layer (“Character” or “Car)” and go to Layer > Create Clipping Mask or (CMD/CTRL + Alt + G). Then fill and create all the necessary layers.
Step 5
Select the background and change the color with a warm tone. Then continue with the layers of police cars.
Step 6
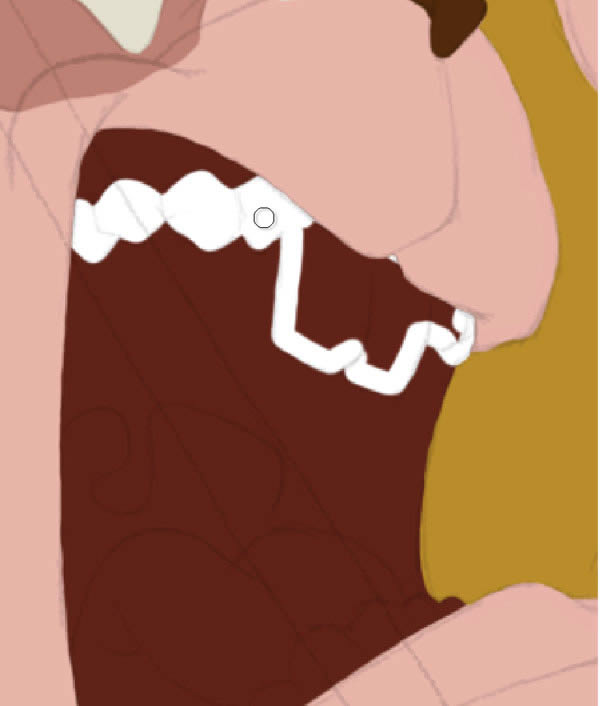
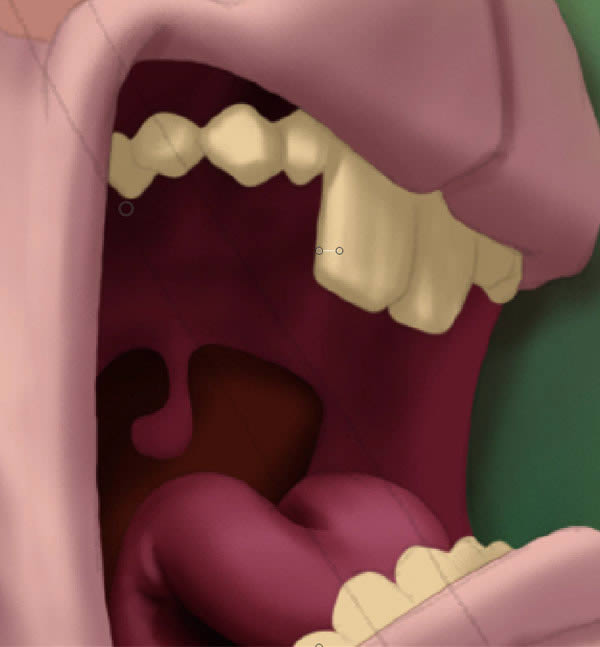
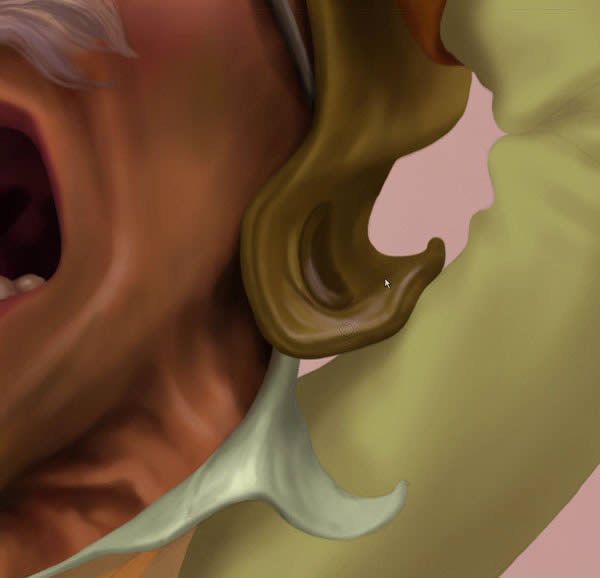
To make the inside of the rabbit’s mouth, use a mask to paint the teeth. Select the layer by pressing CMD/CTRL over the thumbnail of the corresponding layer, create a new layer and then make a Layer mask by pressing the button in the Layers palette, or menu Layer > Layer Mask > Reveal Selection. Fill the teeth with the brush.
Step 7
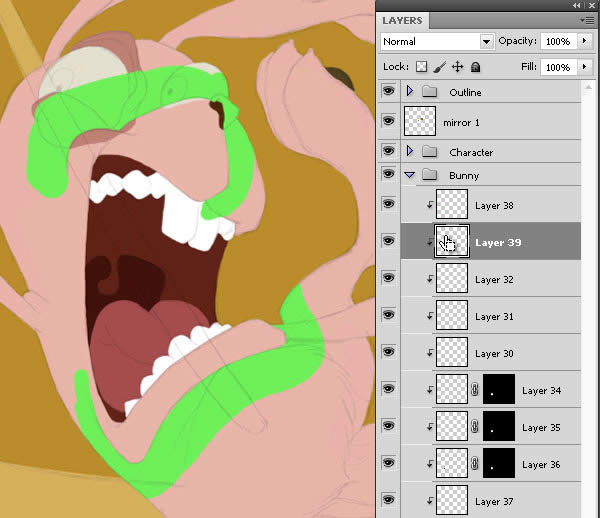
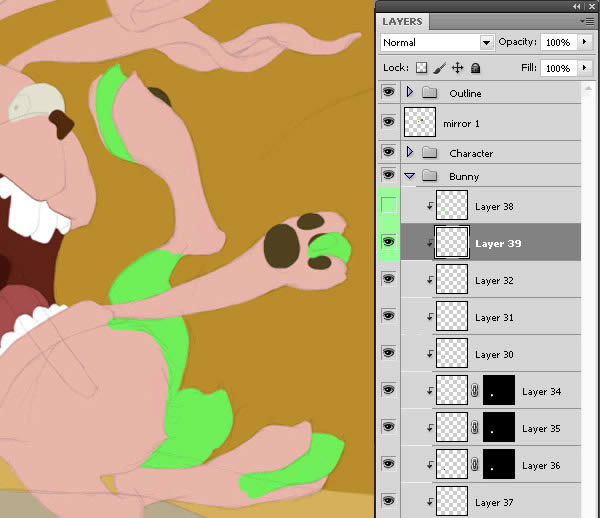
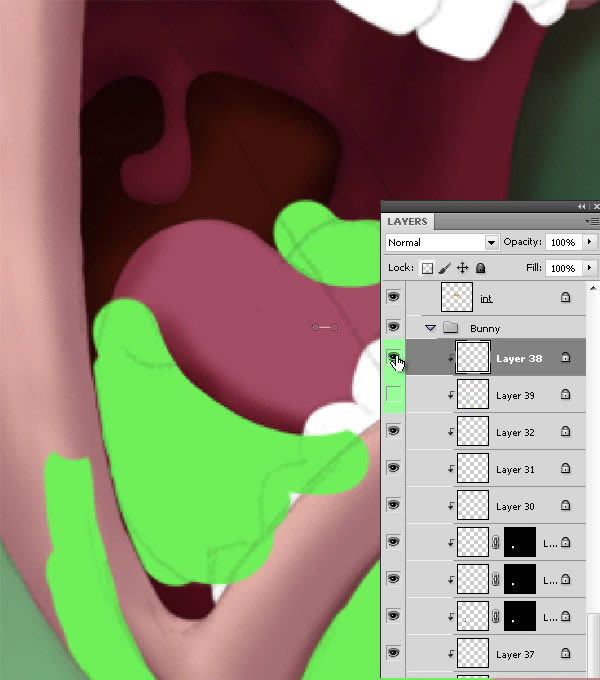
We will do a couple of layers as masks, that we will use later to help us to define certain rabbit planes when we paint the volume effect. We’ll paint these areas on a new layer with a highlight color and we mark the layers in the palette with a similar color to identify them quickly. Then hide the layers.
Step 8
With all the bases ready to all the elements and before starting the painting process, we will block the transparency of all layers.
Step 9
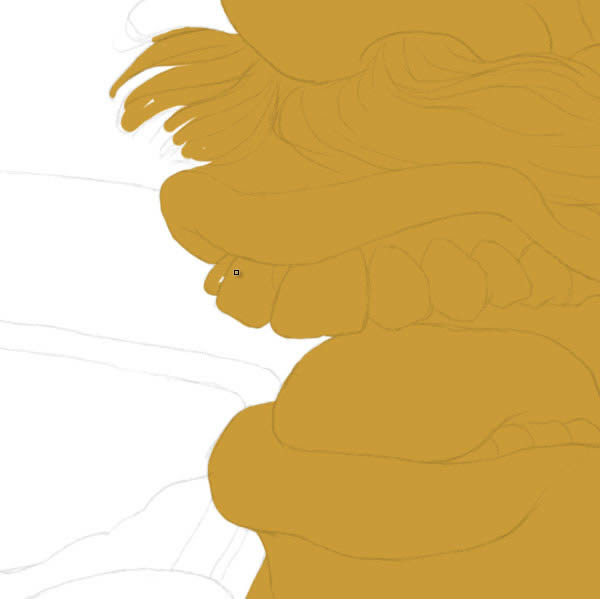
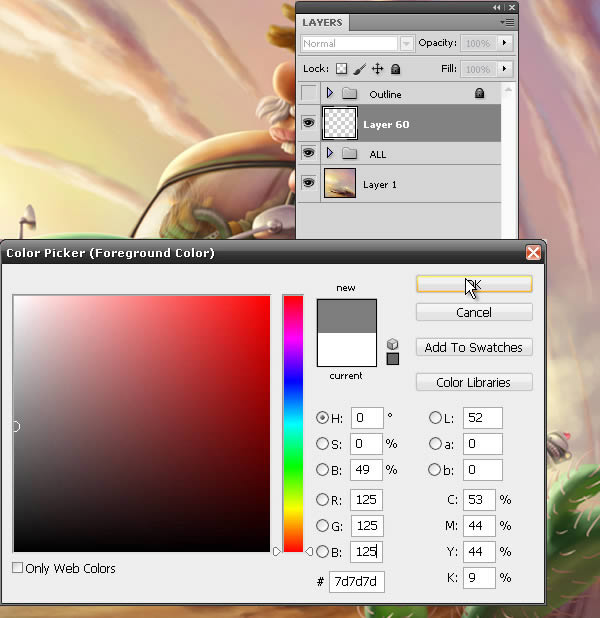
Fill each layer with a color more approached with the finish we want to achieve, in this case all be dominated by ocher because we want to give to our image a look a bit retro and of adventure. I select a layer at a time, select a color and apply it by pressing Alt + Backspace.
4. Painting
Step 1
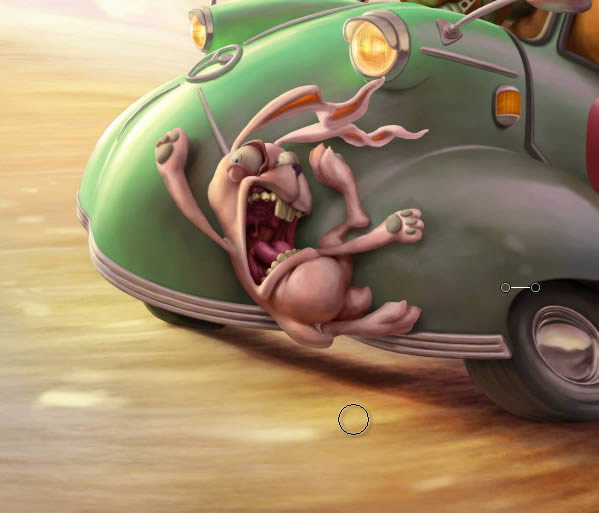
Using a brush that you find comfortable, a basic brush, diffuse, make the first pass of color in the background, very indefinite and rapidly at first, exploring the sources of light and color to find an interesting effect, with some realism. Here we have defined a yellow-orange light like a sunset, with sunlight from the left with long shadows projecting some a more purple color as the sky, which is less affected by the sun when going to the right side.
Step 2
After the first pass of color in the background, from where the light sources (sun, sky) comes, continue with the next relevant element, the car, following the same process of exploration, we block the volume, very loosely, without details, understanding and modeling the way and always looking for more consistency with the light sources. The shadows of the car should be influenced by the color of the desert but mainly from the light of the sky, so for the chassis we used a darker green color but with some purple. I always pick colors from background to integrate the image, the background luminates all of the objects in the scene.
Step 3
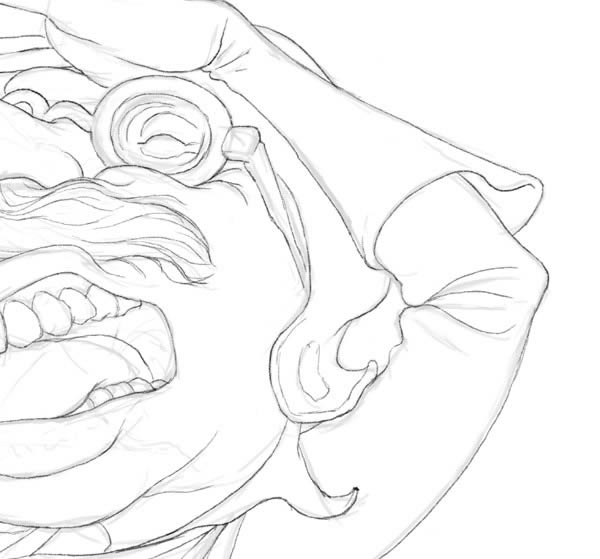
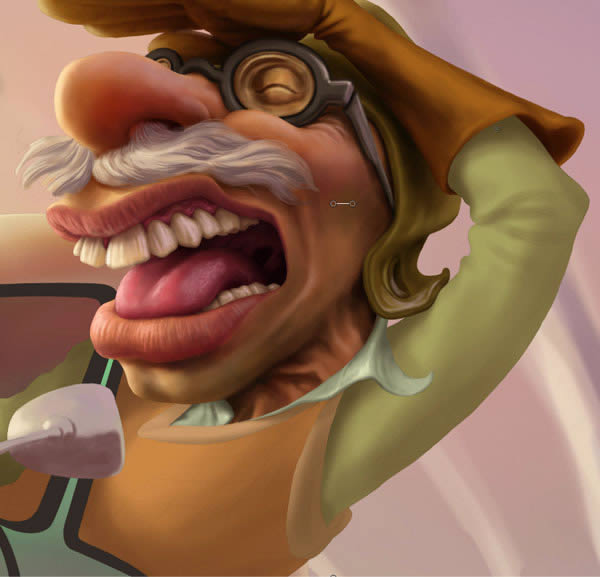
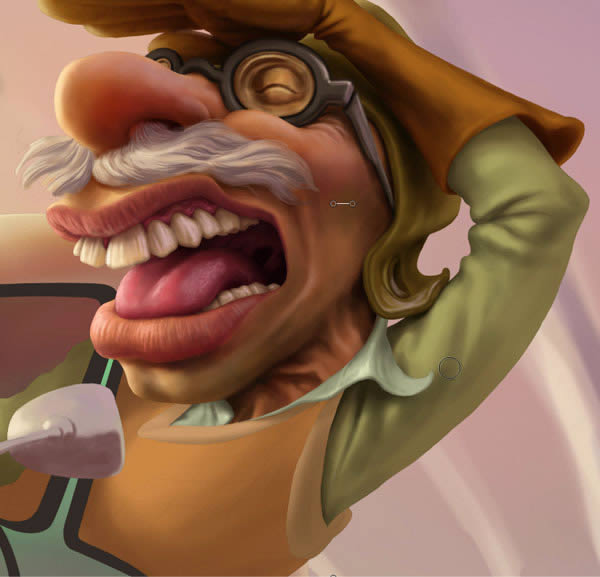
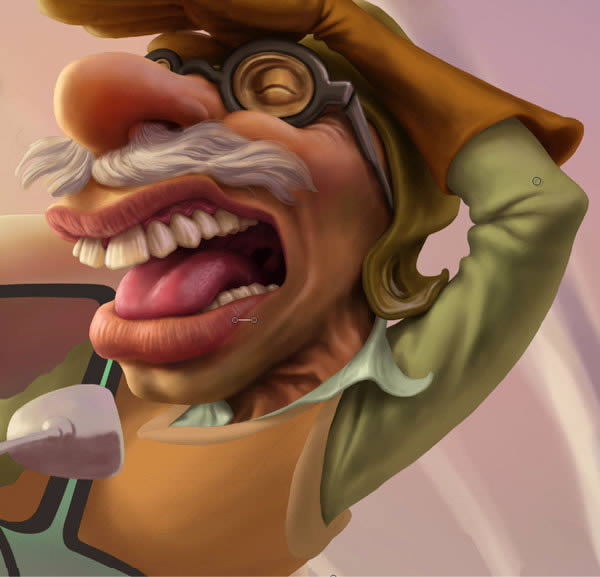
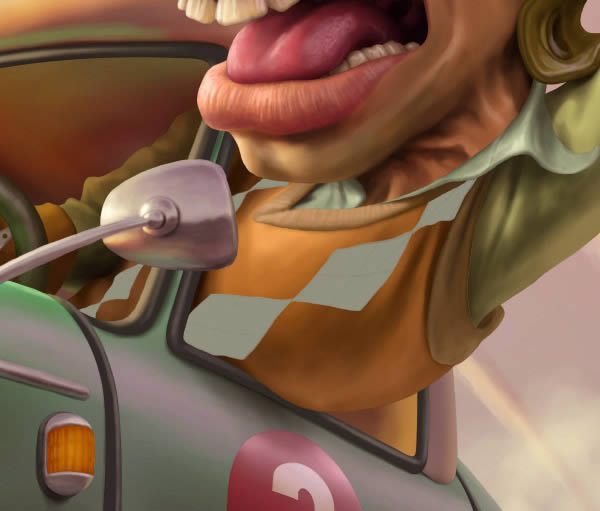
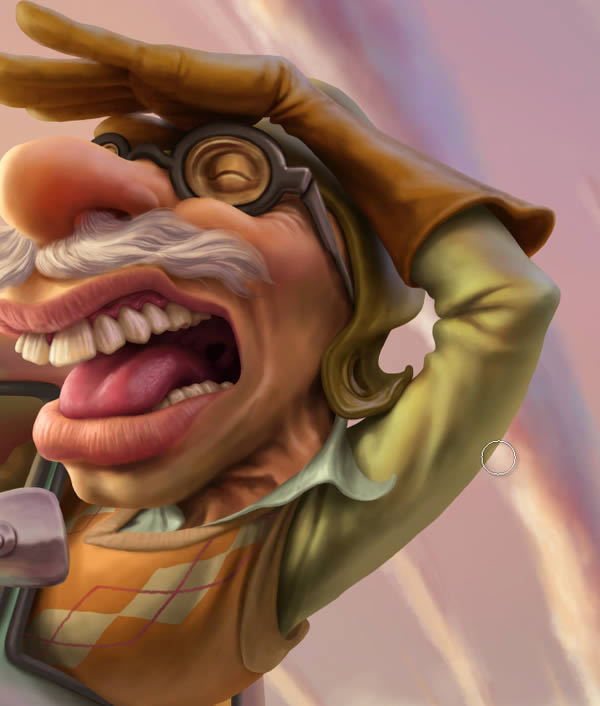
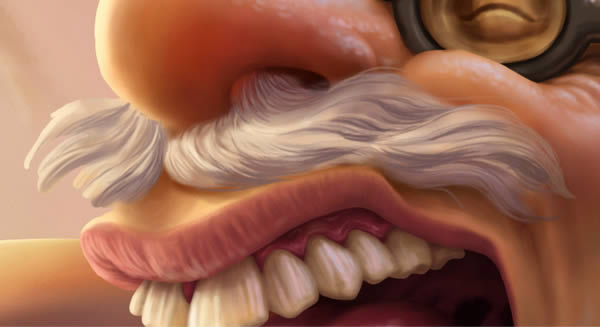
The next important element is our character, but the bigger visual weight is on the face, is what we call our attention immediately, so it is good to spend more care in its construction.
First use a base color to model, capturing the main volumes and gradually integrating by color elements such the teeth, giving to lips more red tones, more pink on the tongue. The nose is often pierced by light and that creates more orange lights on top and inside, etc.
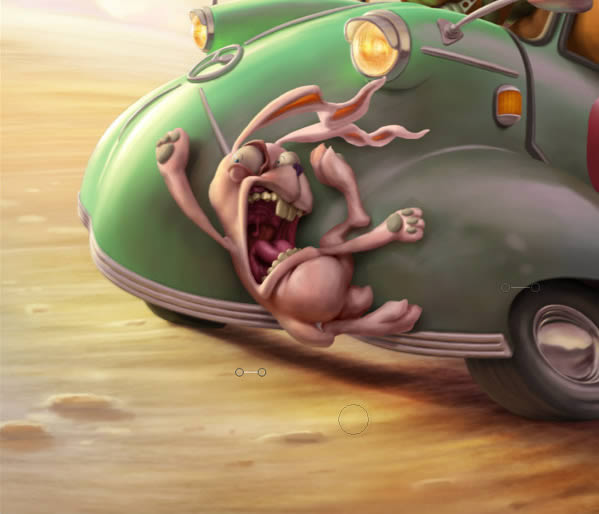
Step 4
Continue with the first pass of color in clothing, in rabbit, and hint some clouds too, which help us to give more spaciousness, more perspective and interest to the image.
Step 5
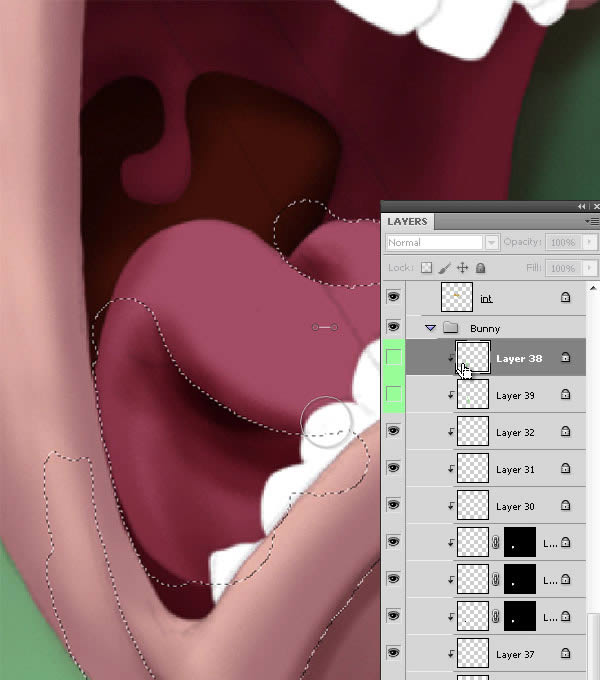
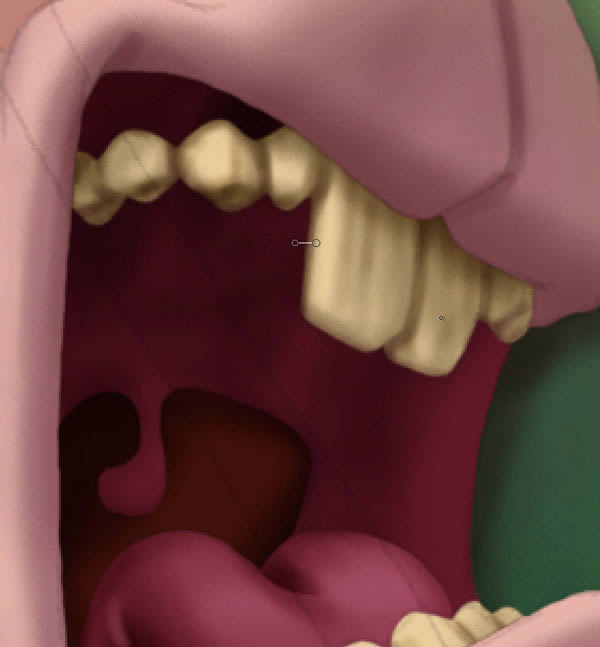
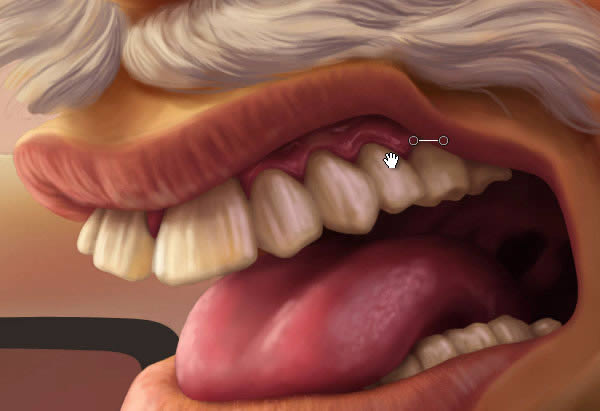
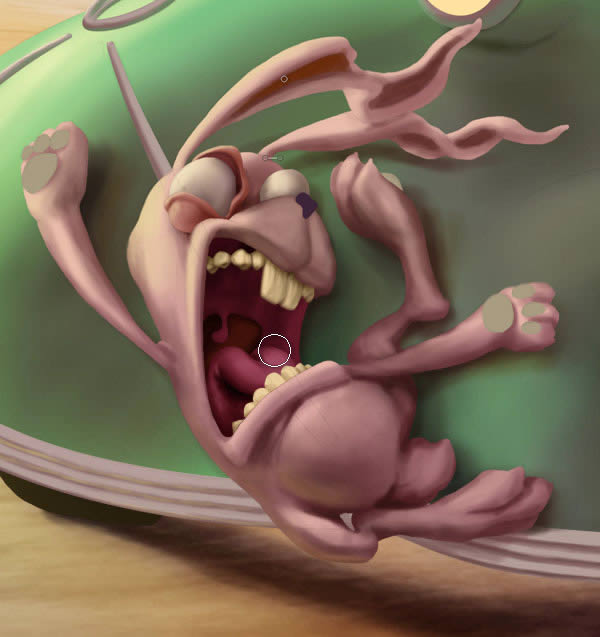
In the rabbit’s mouth, again use a layer as a mask, which I use often because I find it very simple and faster access. It’s inherited from my past as an airbrush artist. On a new layer, paint the forms we need, with a very defined brush, then hide the layer, and go to layer properties in context menu, assign a color to identify them quickly. To use this mask, simply selected by placing the cursor on it and pressing CMD/CTRL + click. Then paint which require more definition, deselect and continue painting forms trying to integrate well.

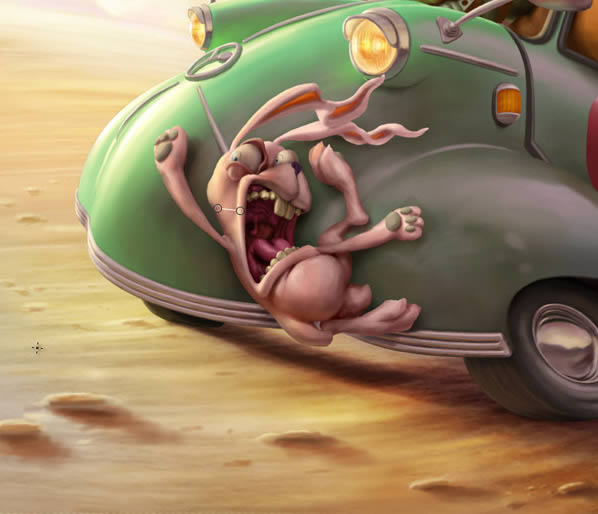
Step 6
Apply a soft yellow color to the teeth, later apply the other pass in a darker color to define the volume, then a darker tone to define and add more volume and some texture. Do the same with the eyes and eyelids. Some smaller and defined elements as the teeth are easier to define from the outset, but still need a lot of attention in which forms are appropriate, we should study well if we are not familiar with their shapes.
Step 7
Make a general evaluation. In this case add a little more sky light color and contrast to the shadows of the car. If you are satisfied, you can start with the details.
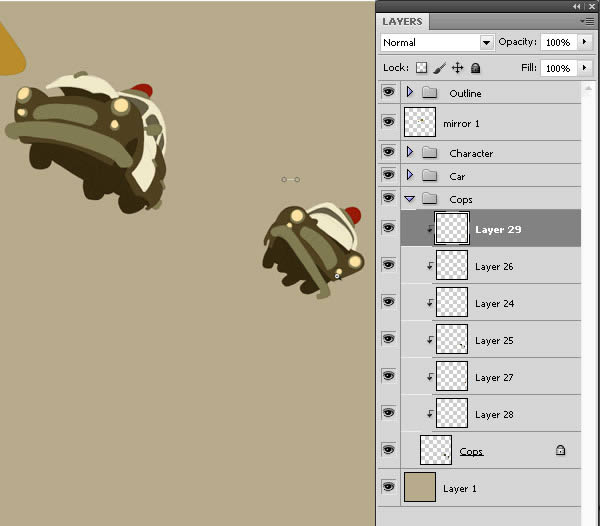
5. Cop Cars
Step 1
We start with the chrome parts. We use a dark color for the overall volume. Then we painted details. We add interest to the volumes generating imperfections and a little irregular shape, some dents bring “flavor and story” to the subject. We added ochres from soil that are reflected. Insinuate some light on the chassis.
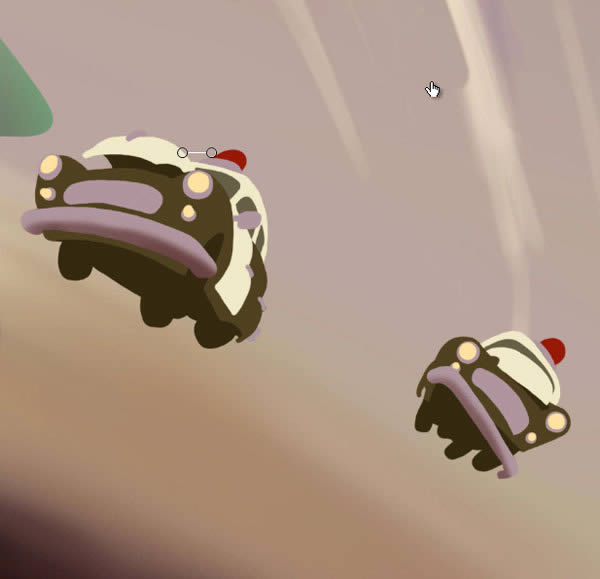
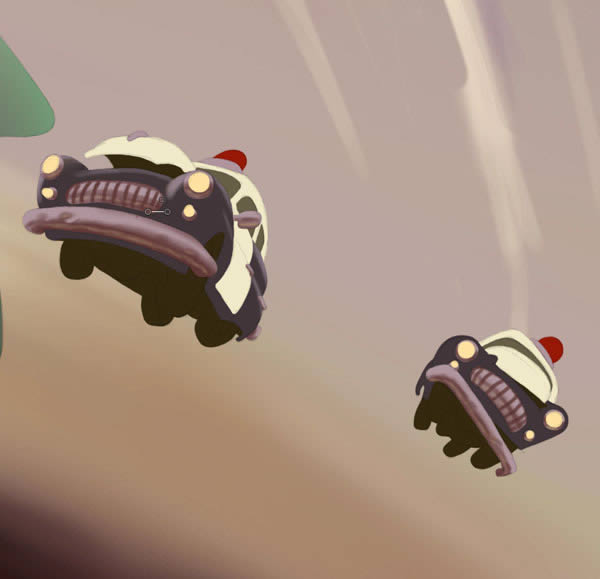
Step 2
We add volume to the chassis, paint all the car lights: lights, siren, flashing.
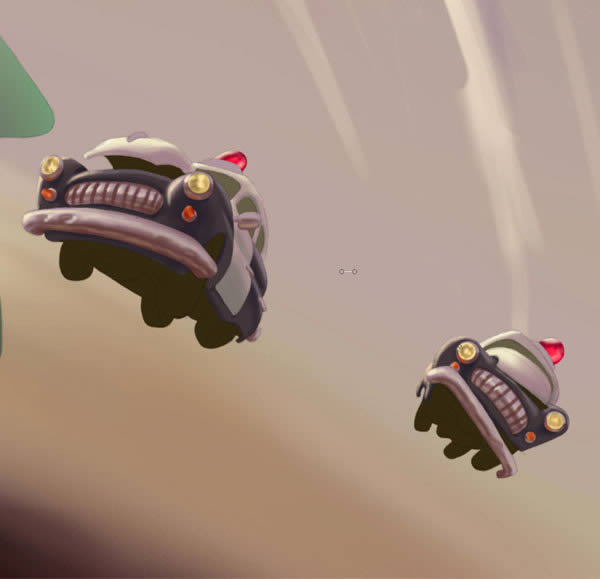
Step 3
The chrome of the car receives a first pass of color to block the volume. We take the background color and apply light reflections corresponding to the environment, in this case, the horizon.

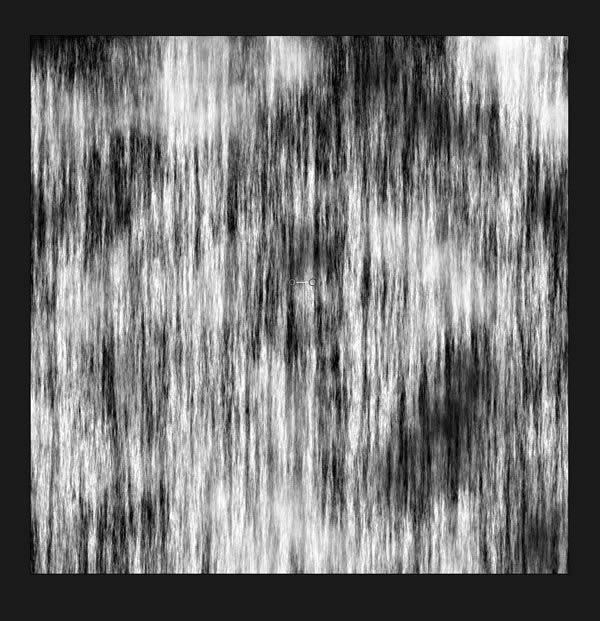
6. Ground
To speed the painting of the ground we’ll use a textured effect generated from basic filters.
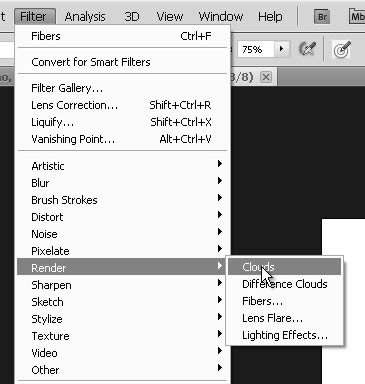
Step 1
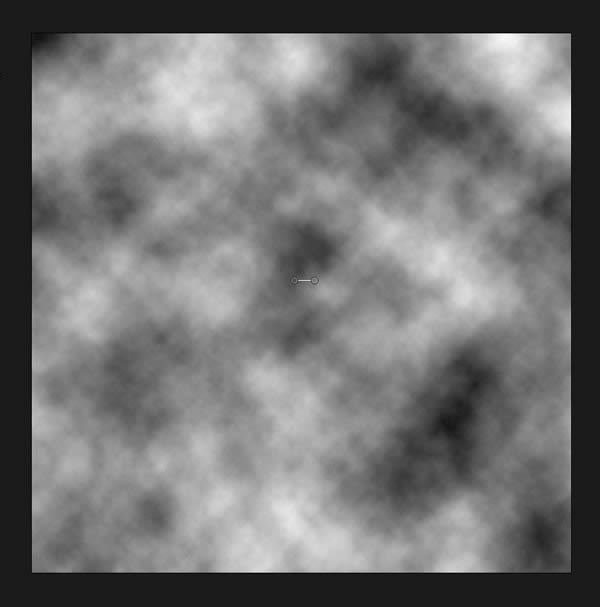
Create a new file, define a size that is not too big. Then go to Filter > Render > Clouds.
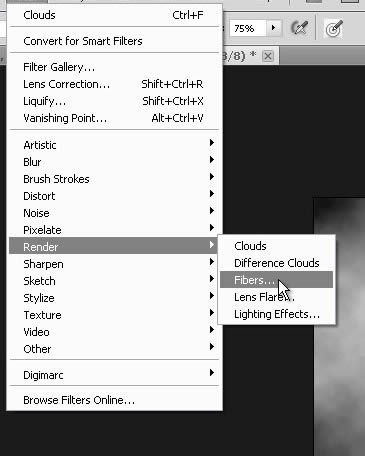
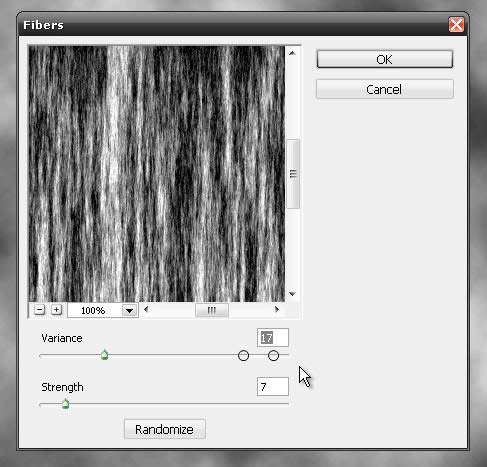
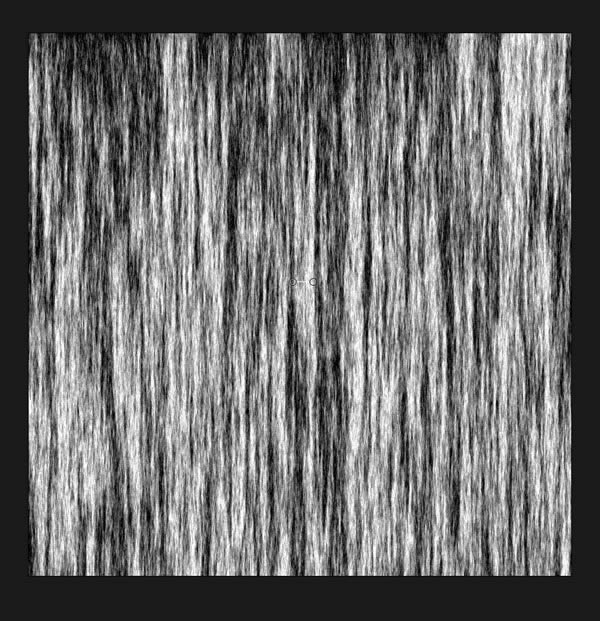
Step 2
Then apply Filter > Render> Fibers…, adjust the variables.
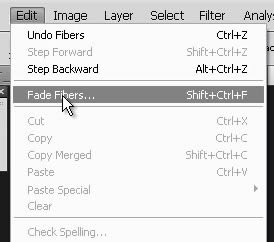
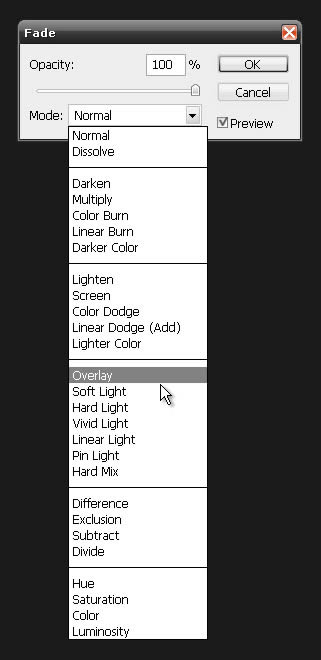
Step 3
Then go to Edit > Fade Fibers … or Shift + CMD/CTRL + F. Select the Layer blend Mode in Overlay.
Step 4
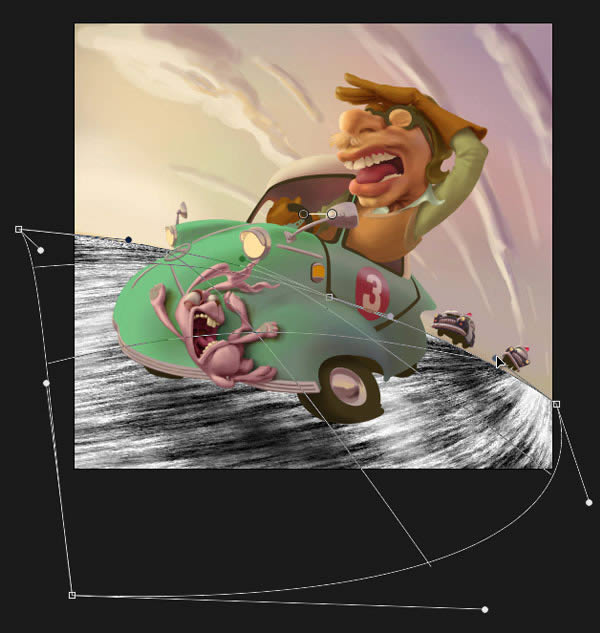
To send this texture to our file we can select all with CMD/CTRL + A, CMD/CTRL + C to copy and paste into the other file. To fit to the necessary form, transform it with CMD/CTRL + T, we enlarge and then use the Warp, go to Edit > Transform > Warp or press the button “Switch to warp mode” on the tool panel. Deform following the perspective. Then Ok.
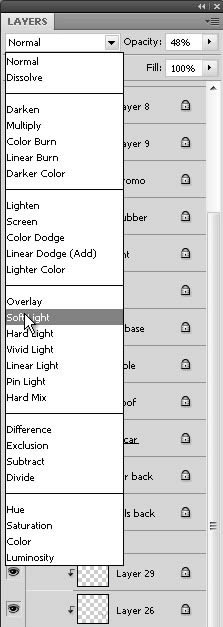
Low the opacity and change the Blend Mode of layer to Soft Light, obtaining an irregular texture integrated. But if we are not satisfied with the shape we can transform again in the same way. If you want you can merge now this layer with the bottom layer, I prefer to leave it at that for now if there is something to edit later.
Step 5
The ground still looks very pale, then we’ll add more color, and contrast. Select the brush tool in Multiply Blend mode to, pick a color from purple sky, a bright color. Painting in that way we’ll get more tones and intense colors. The same thing we do with the car, so we took advantage of integrating more. Try to be fast and without defining much.
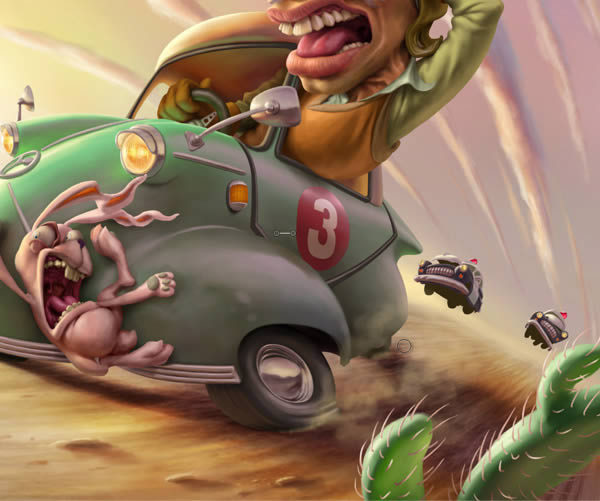
7. General Details
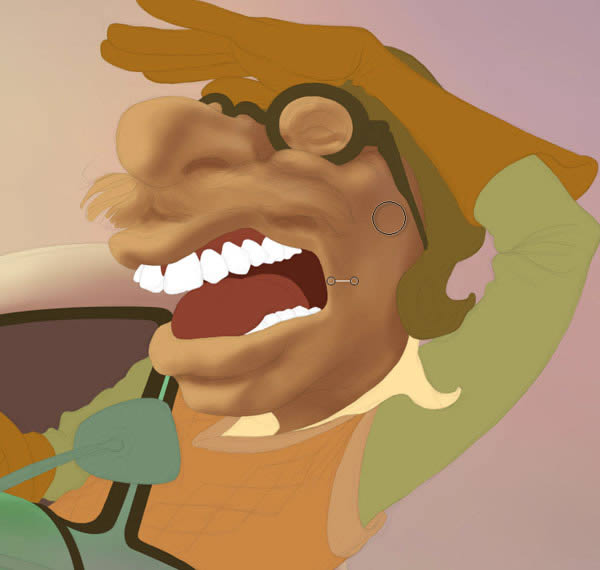
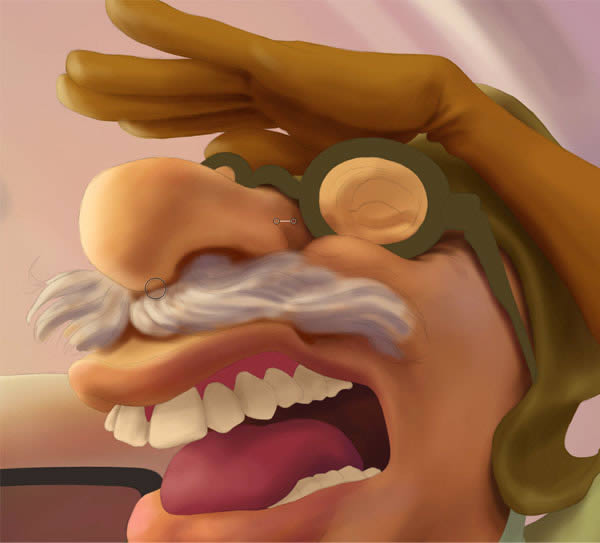
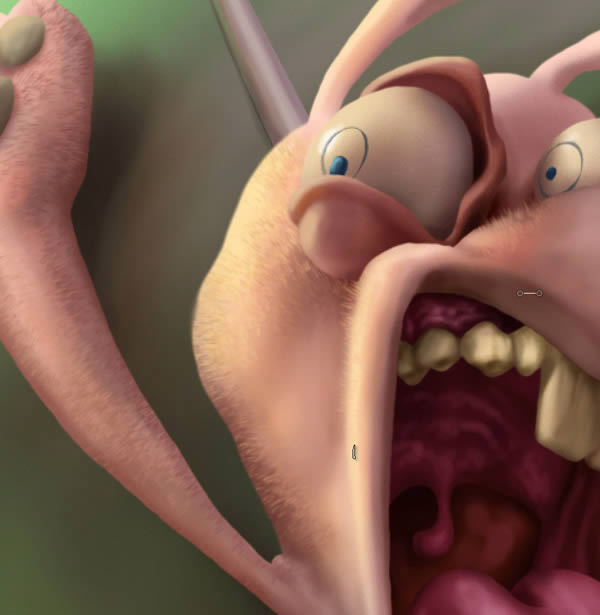
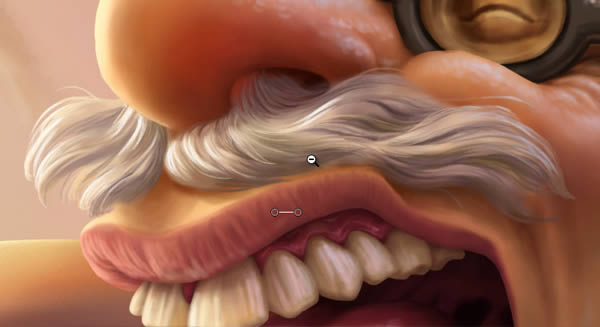
Step 1
We return to the face again. Make a new layer, rapidly accentuating mustache in 2 tones. In the face layer begin to emphasize the volume by darkening the parts where there are obviously darker shadows (and it sounds obvious to say) where the light doesn’t reach. And always modeling the shape. Also emphasize the light on the left edge. Hint some traits, such as the neck and wrinkles around the eyes and incorporate orange tones in the nose, but red on the cheeks and other more desaturated green in chin. Also define darker tones in teeth and tongue. Also using the sky color (purple), beginning to tinge the volumes that would be to affected by that light source, that mean from above and right.
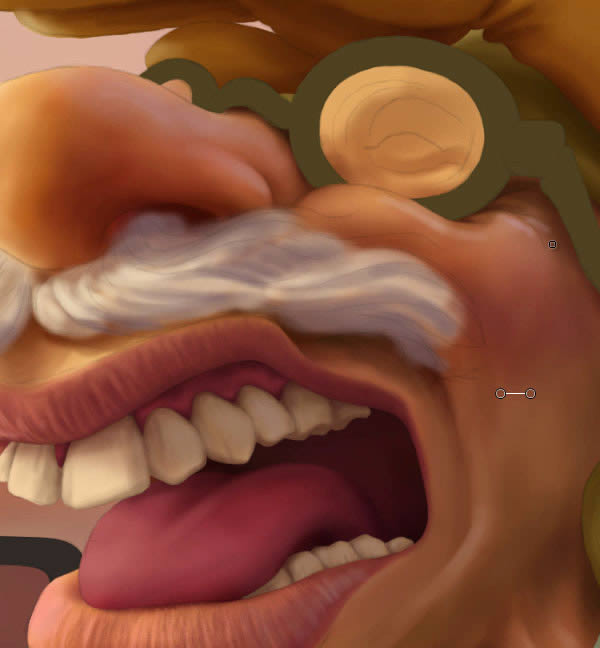
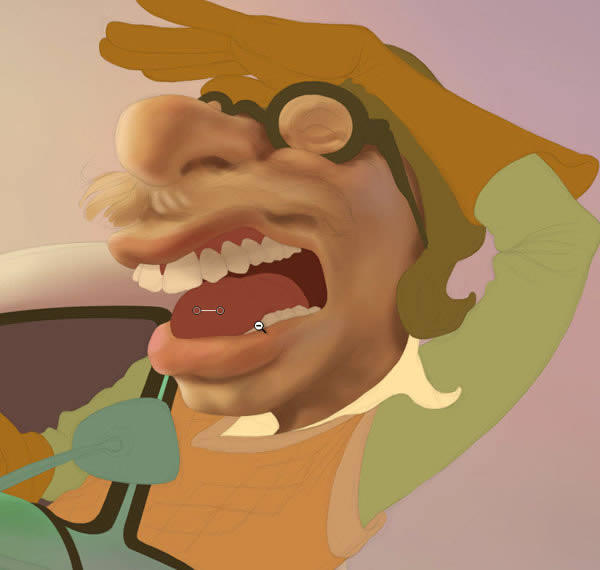
Step 2
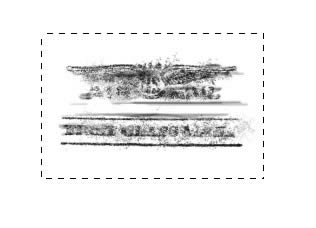
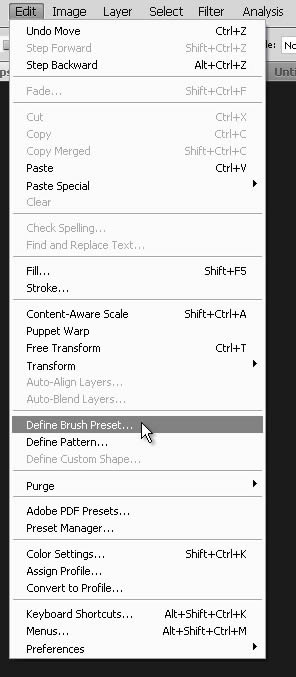
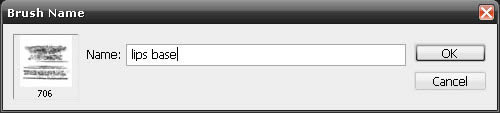
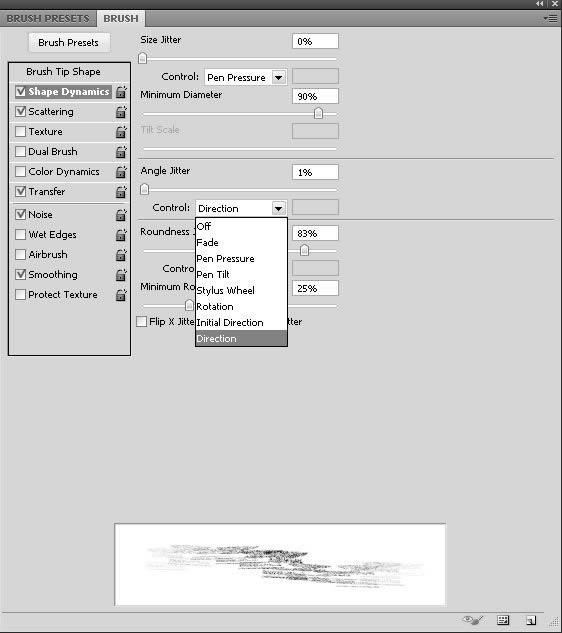
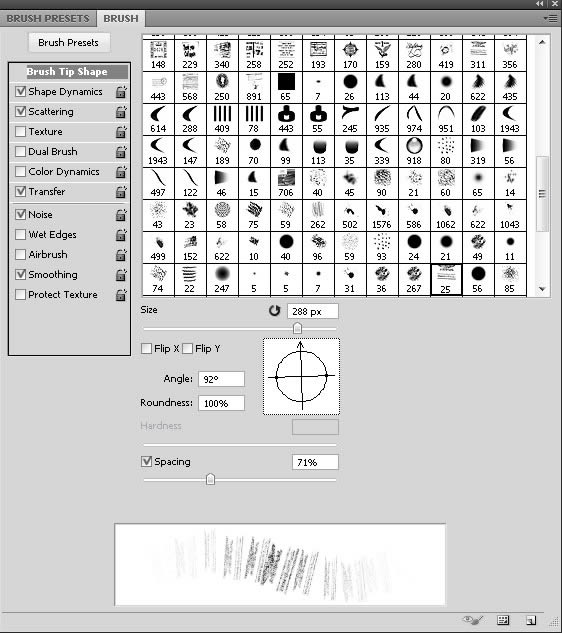
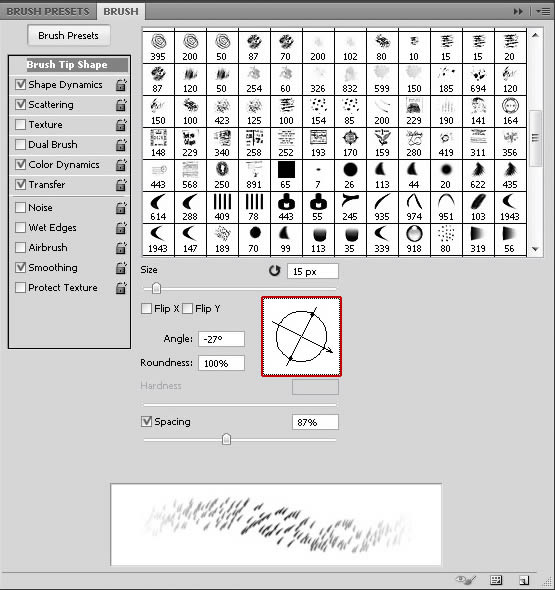
To detail the lips and give them a more interesting texture, prepare a brush that allows us to make a quickly base to then make the final effect. First select or make a simple shape. We just need a shape that creates irregular parallel lines. Then select with Rectangular Marquee Tool (M) and copy (CMD/CTRL + C), then go to Edit > Define Brush Preset …
Then I set the brush as below.

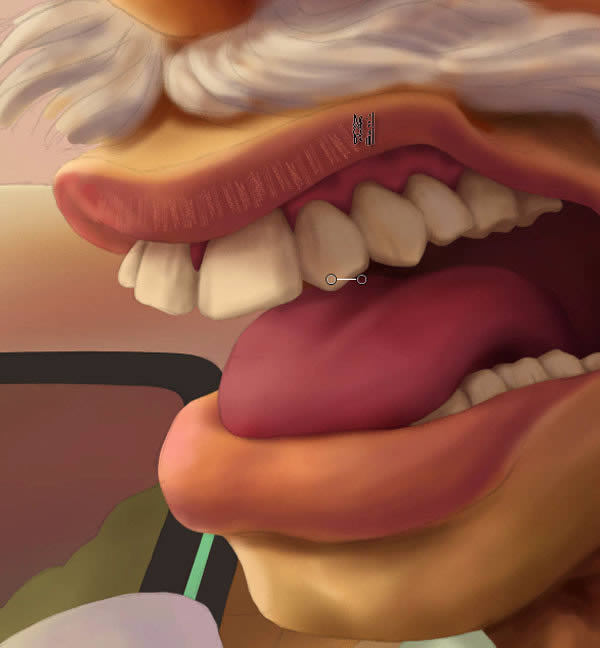
Step 3
I pick a color from lips and paint it following the shape of the lip, if necessary, change the brush orientation as more fits you. We change the color according to what we need, with lighter colors and darker than the lip base.

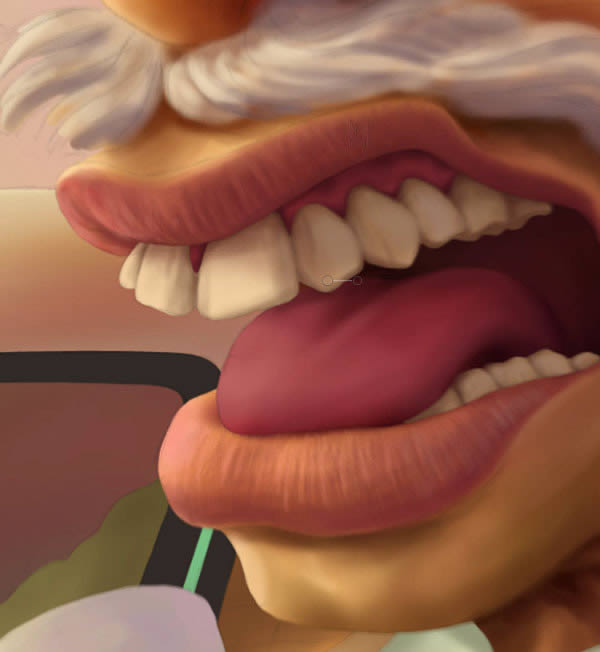
Step 4
With a Normal Brush, retouch, exaggerating the volumes that subtly suggests base our texture, trying to generate small volumes in line with the light source.
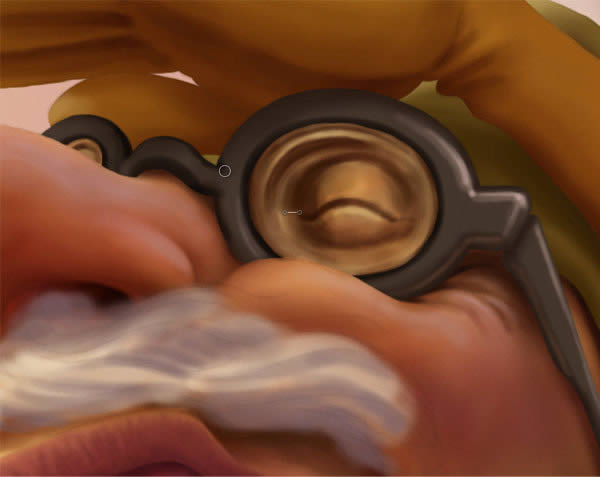
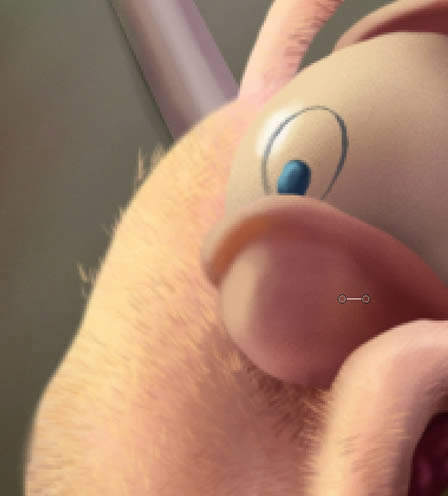
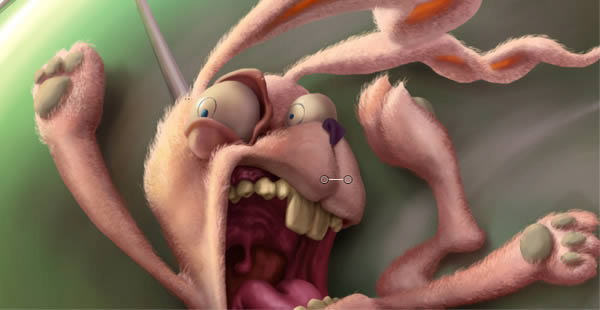
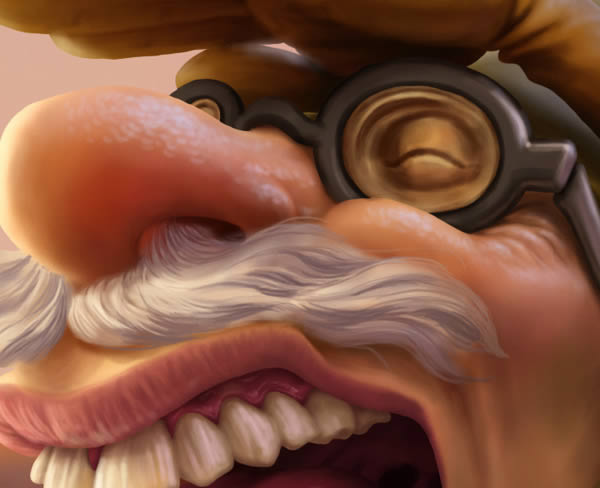
Step 5
Now we will detail the eye. This is behind the thick glass and therefore we’ll make it flatter and contrasted, with lines that follow the shape of the frame and without saturating the color, as if the glass neutralizes the color of the skin. It’s really good to always paint the elements and their surroundings to integrate these, so here we also give volume and contrast to the glass frame.
Step 6
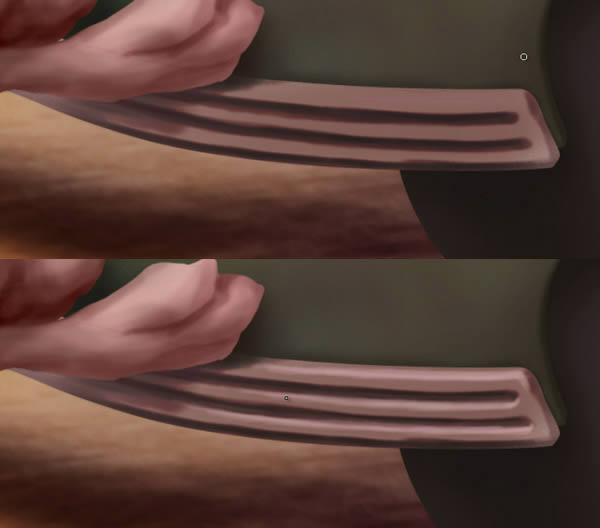
Following with adjacent objects, paint the dark areas of the glove and let conforming and modeling details and smaller forms that give credibility, as wrinkles.
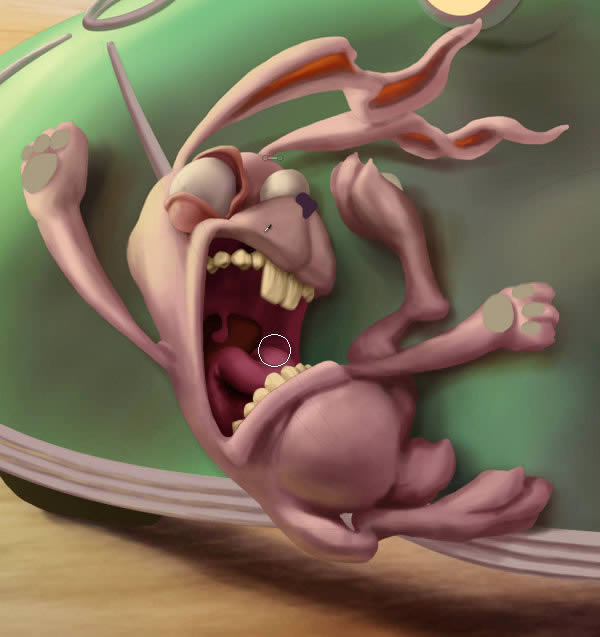
Step 7
Go back to the nose and give greater intensity to color to create the effect of transparency, as it hasn’t bone, flesh light passes through more easily, creating a glow or subsurface scattering effect, more even if it is a light source strong, or at least that is the feeling we want to give.

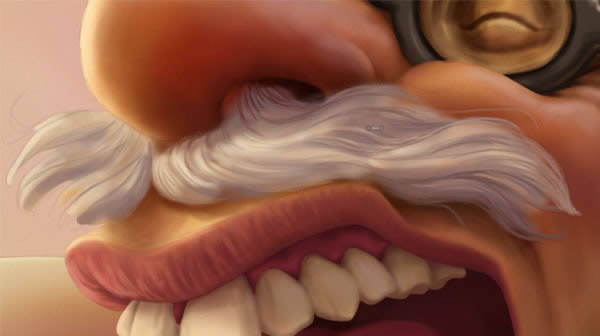
Step 8
It is the turn of his mustache. Here we use a fine brush to create the hair texture base. But our main concern now is to model the overall volume, so we do not care to finish it for now.

Step 9
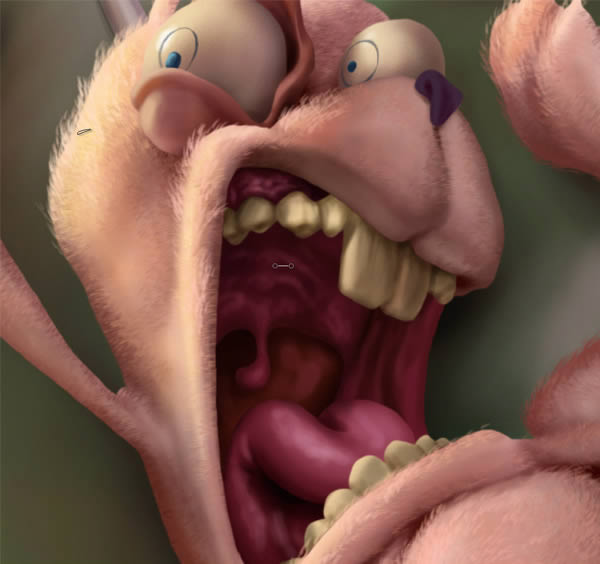
The teeth, model it with lights and contaminate with other colors, we can give some color transparency effect.
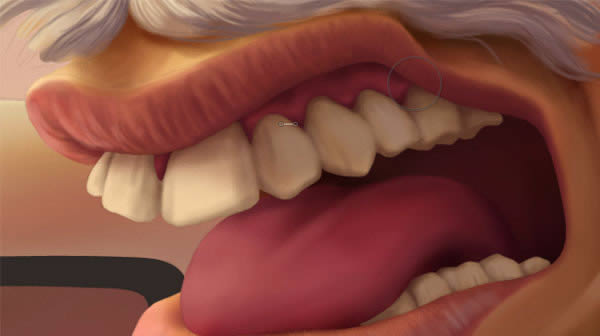


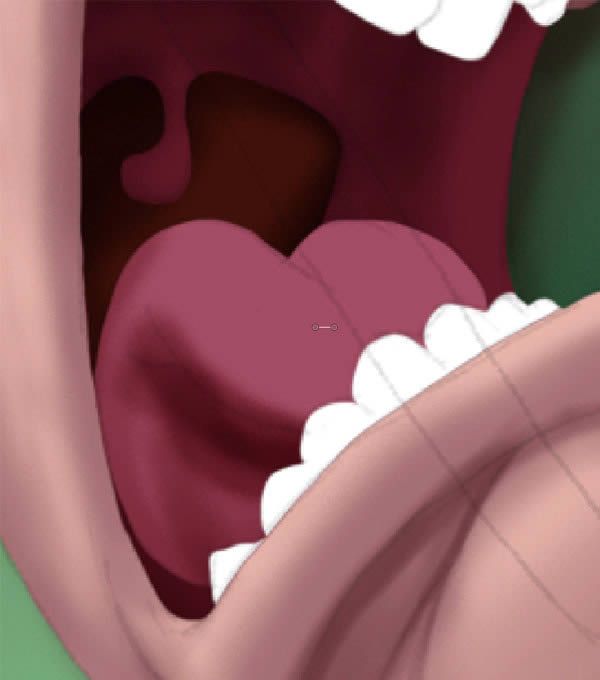
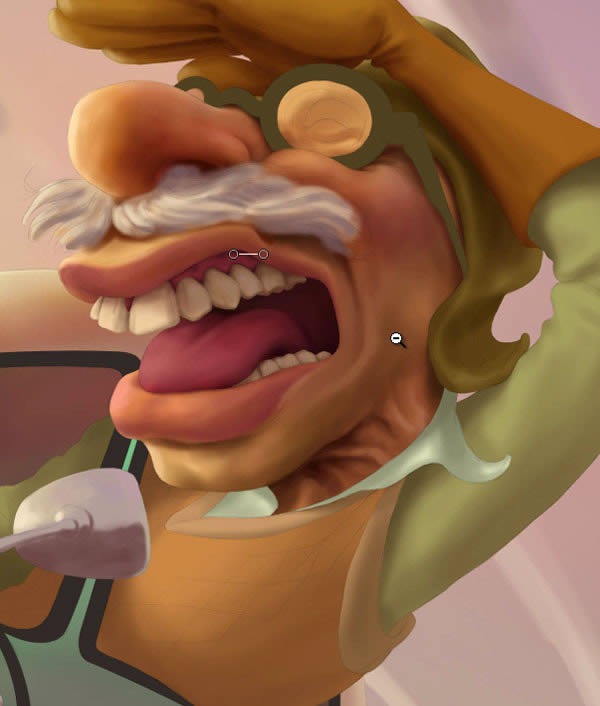
Step 10
Darken the inside of the mouth and give some light on the tongue.
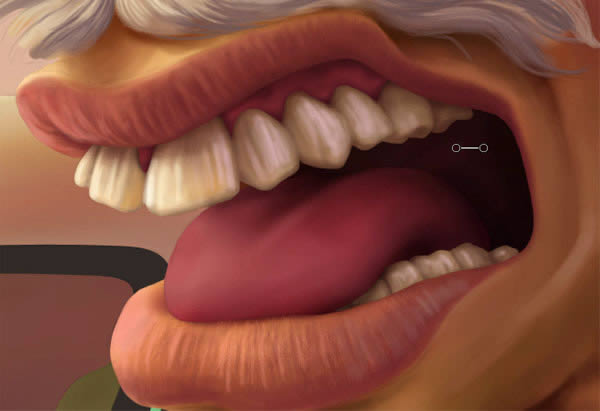

Step 11
The light reaching the tongue also paints a subsurface scattering effect with a more intense pink color.
Step 12
Now add the reflection of light from the sky. Paint with a mid sized brush generating the texture of the tongue in a very smooth way. Also add detail inside the mouth.
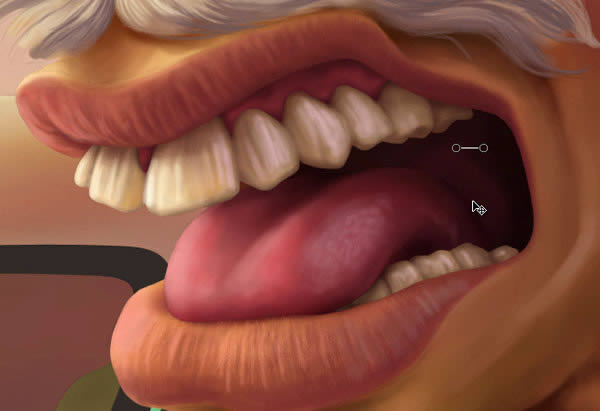

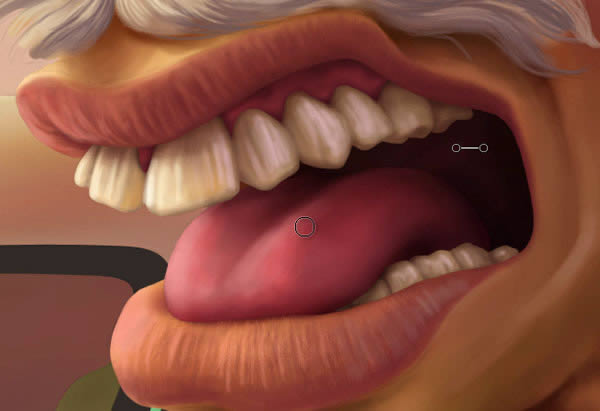
Step 13
With a fine, soft pink brush and slightly desaturated, paint reflections on gums following the contour, for the highest part of the volume and also in the more sunken, teeth also generate a reflection on the edge of the gum. Also increase the light from left in lips.
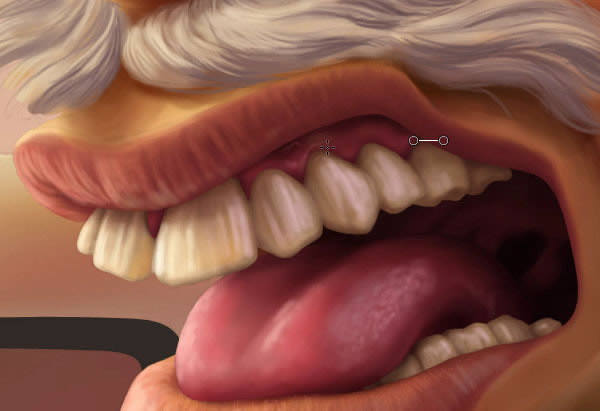
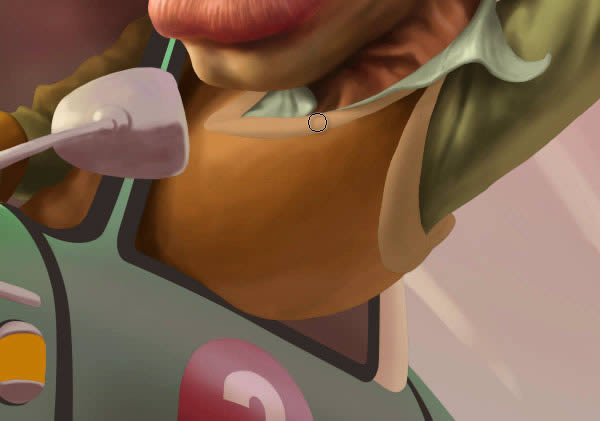
Step 14
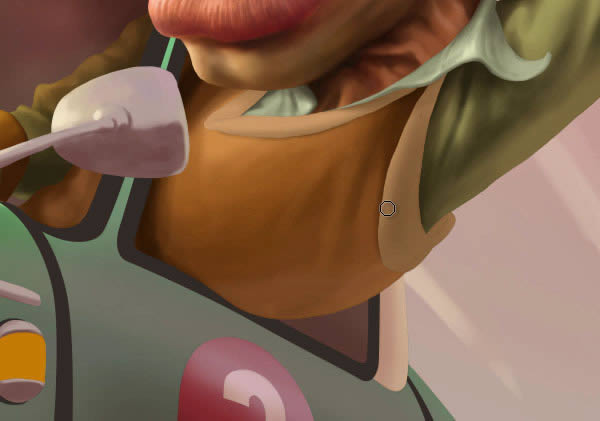
Continue now with the shirt collar and then with the hat and its details. We modeled the subtle folds that are generated here, first with a darker color, and then illuminate with a color contaminated with the color of the sky, accentuating some edges of the light to simulate a subtly brilliant texture. Remark also the projection of the shadow on the skin.
Step 15
Always keep constant attention to the overall effect we are achieving, so we look away constantly evaluating the full image, and defining how we will progress with the painting.
Step 16
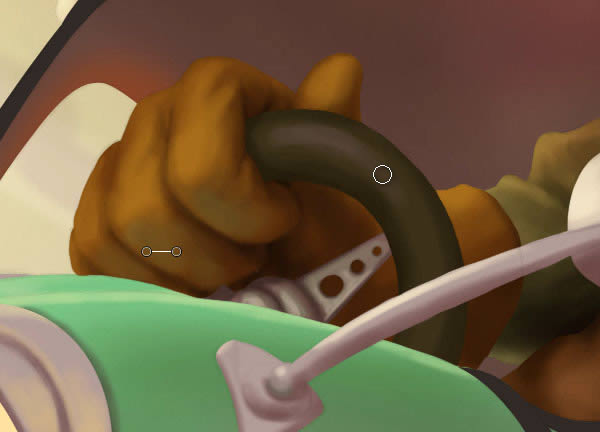
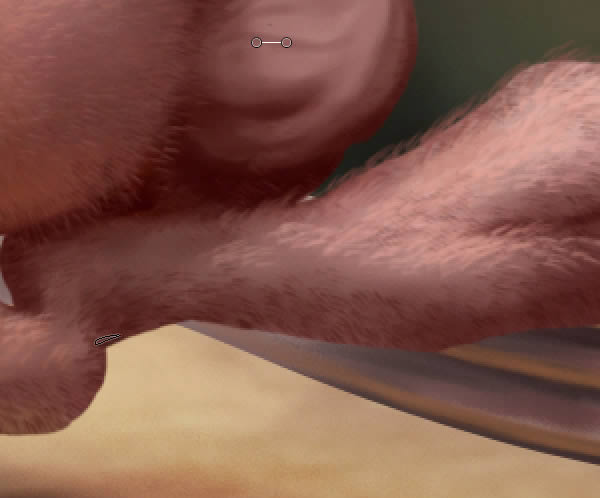
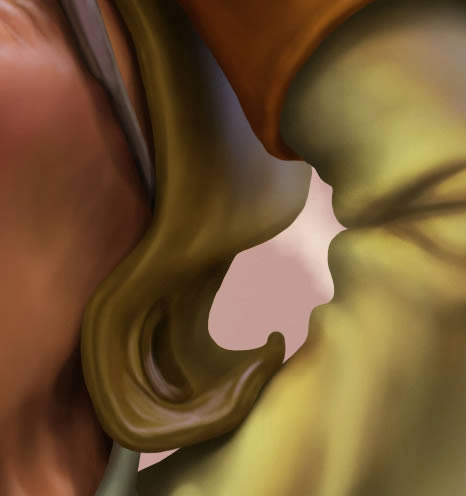
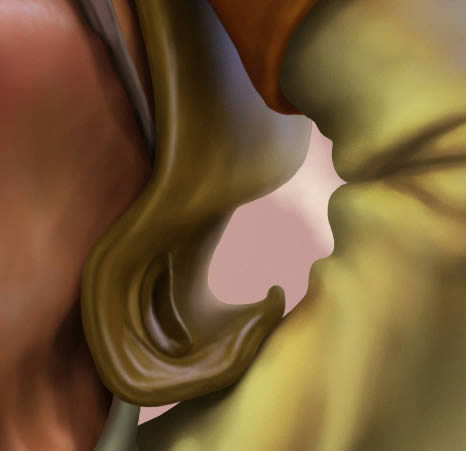
We continue with the arms, first his left arm. Model the wrinkles and define smaller and then larger volumes. Finally, contrast more with a darker tone.
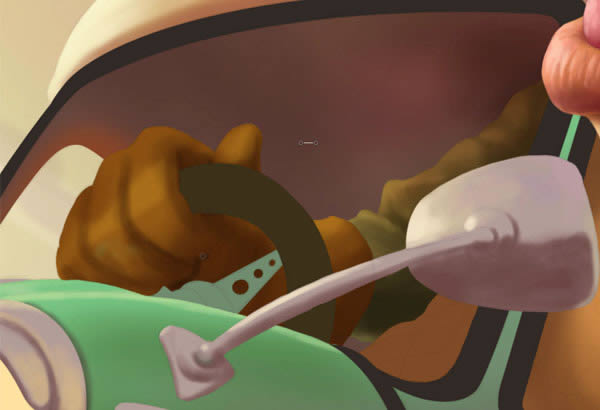
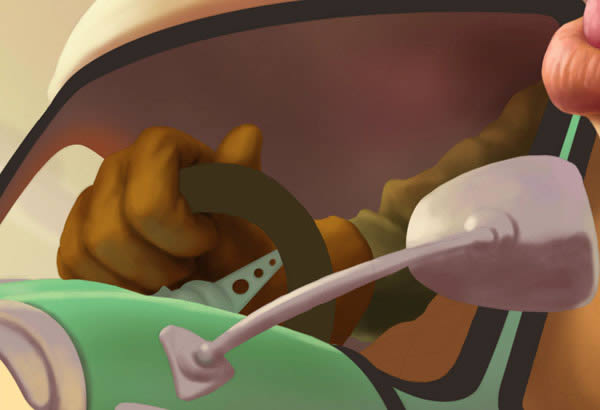
Step 17
Paint his right arm inside the car, and then the glove, we contrast the tones a lot.
Step 18
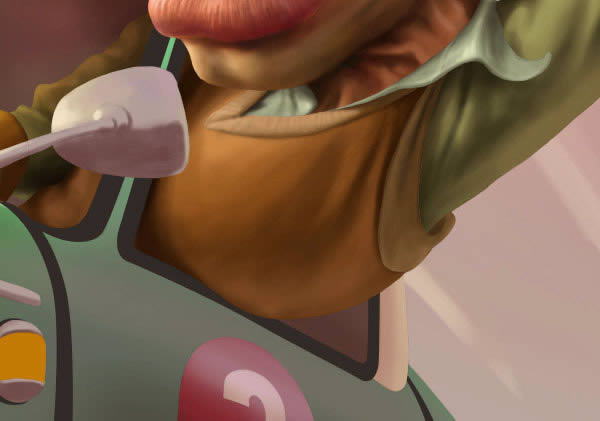
Now add volume to the vest with its edge, adding subtle wrinkles, and contrast the shirt collar.
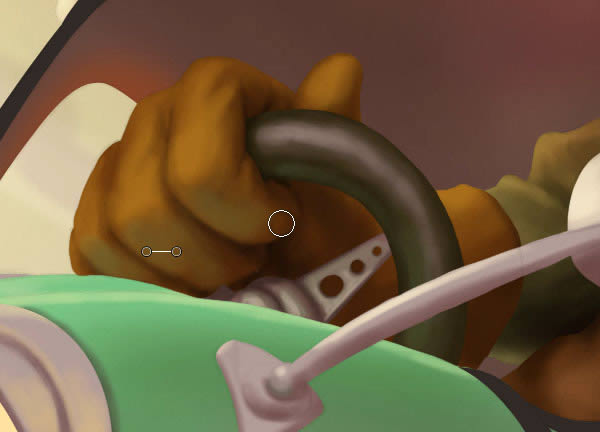
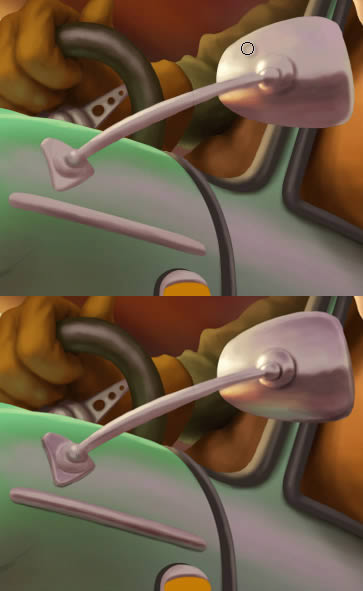
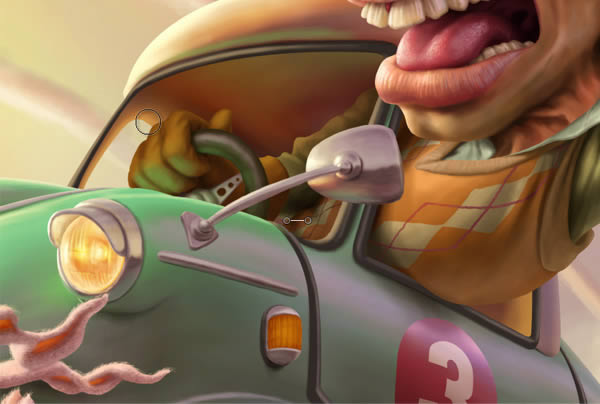
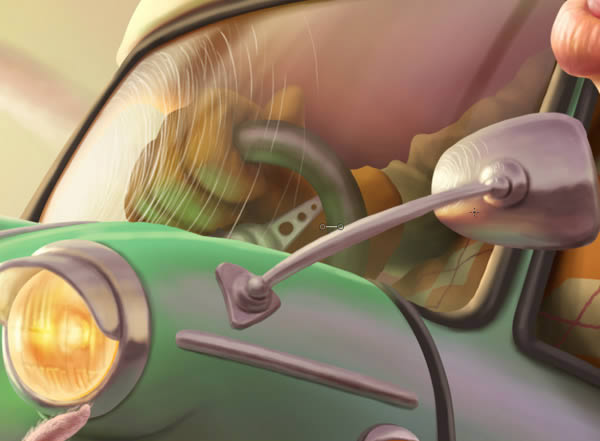
Step 19
Back to the steering wheel and paint chrome stands and edge reflecting the colors of the sky and the chassis of the car.
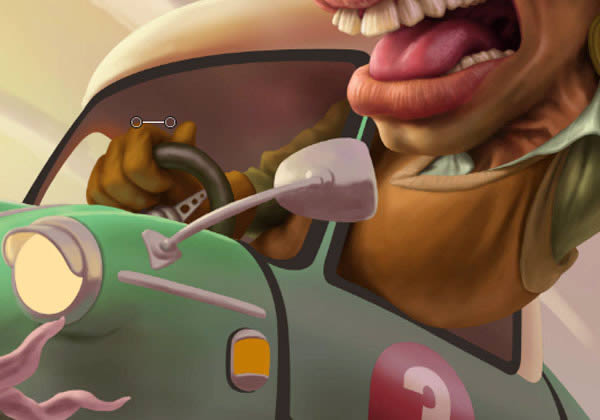
Step 20
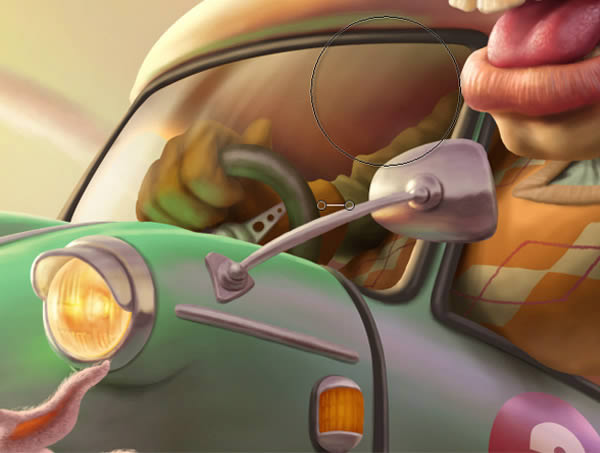
Inside the car the light comes through the window creating a glow and projecting colors on the ceiling, supposedly than bounce off the character.

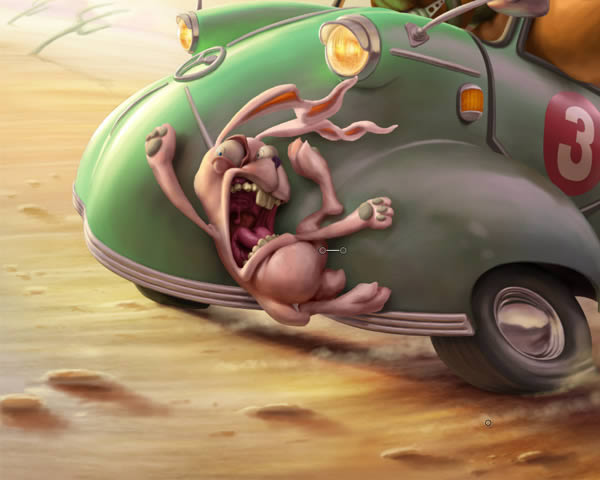
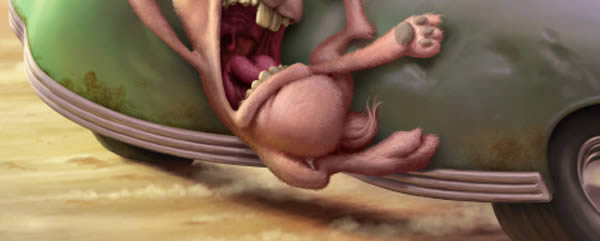
Step 21
We continue with the rabbit and its overall volume increasing the contrast, modeling. Adjust the light can be quite complex because of the position of these, and we want to create the effect that is very attached to the car, but we do not want to flatten the volume of the body.
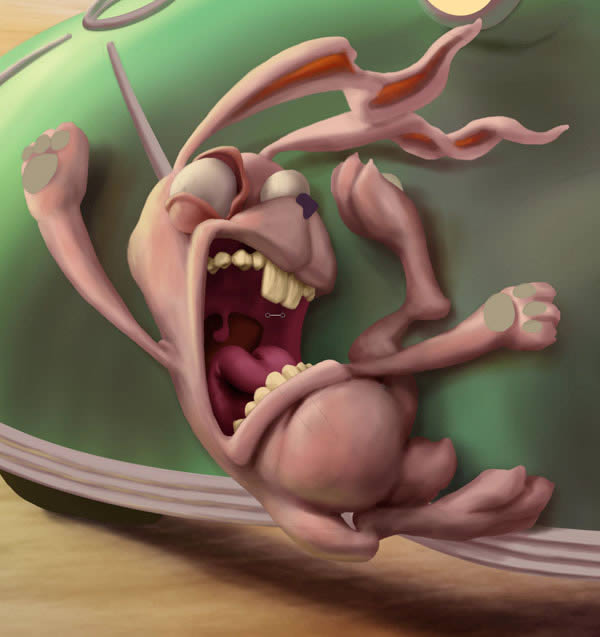
Step 22
Paint using a Brush in Multiply Blend mode with an orange color as the ground, contrasting entire volume, also paint the inside of the mouth defining volumes with enough brightness.
Step 23
We continue adding volume to the rubber edge of windows with a bright color, quite yellow. In the shadow areas, use the color of the sky, more purple.
Step 24
With a very light color, emphasize the light in chrome metals, using the Brush tool in Overlay Blend mode, painting in this way we get many shades.
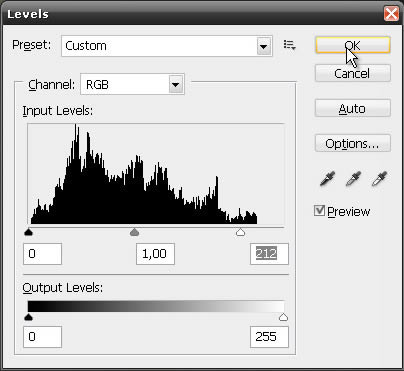
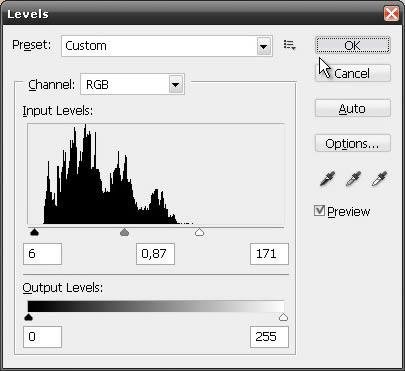
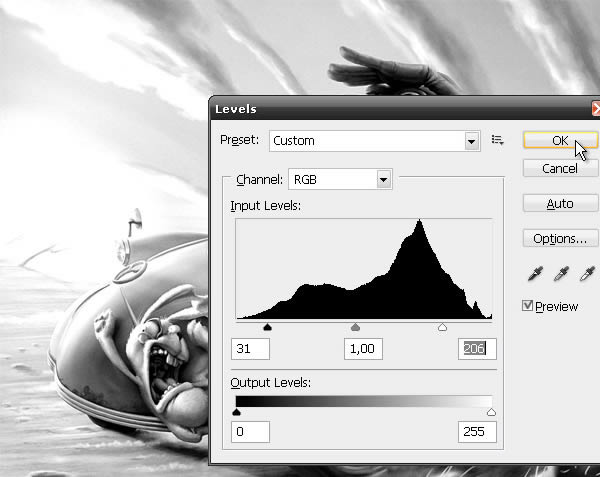
Step 25
At this point, we consider that our elements have lost a lot of light, an alternative is to change the levels. We’re going to Image > Adjustments > Levels … and adjust as we see fit. In this case, we light the rabbit a little, but also the main character with all its elements, in the same way, layer by layer.

Step 26
Now the chassis of the car needs to be touched by the light of heaven in the shadow parts. Using the color purple, illuminate areas that reflect more light. Also hinted irregularities as dents near the rabbit, and witch the rabbit may have caused.
Step 27
Go back to the metal chrome and contrast a bit more, obscuring certain edges, we project some shadows, but also paint the colors they are close, than must to be reflected.
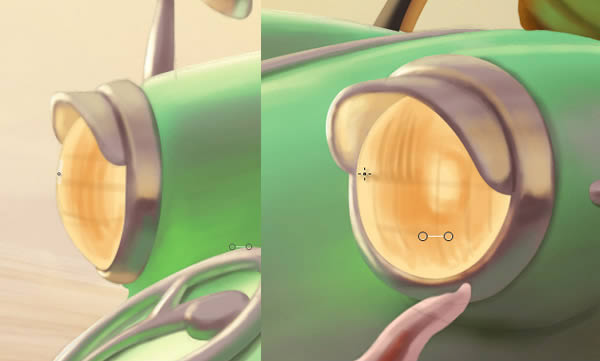
Step 28
In the car lights, first, hinted the effect of the glass with vertical and horizontal lines in a convex shape, then paint the shadows and the light bulb on.
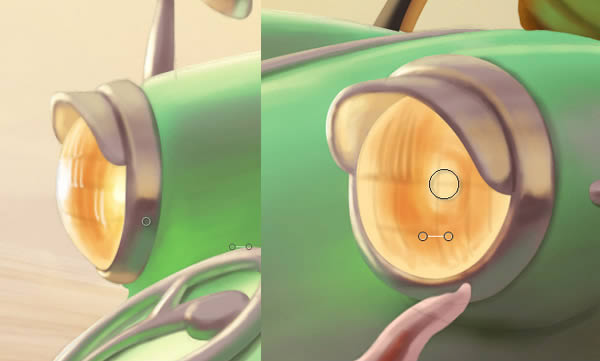
Step 29
Then increase contrast and define a darker and saturated color, and also added some strong brightness which affects the texture of lines too.
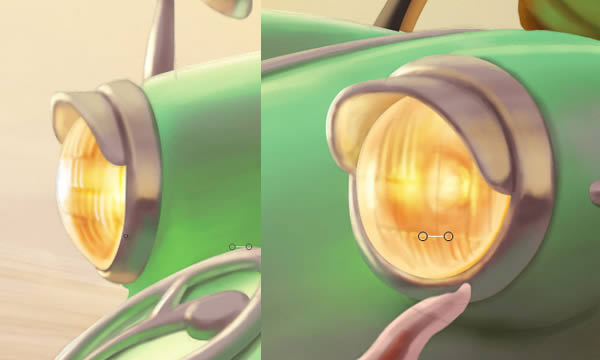
Step 30
With a Brush in Overlay Blend mode and a bright color, incorporate a luminous effect and more shades.
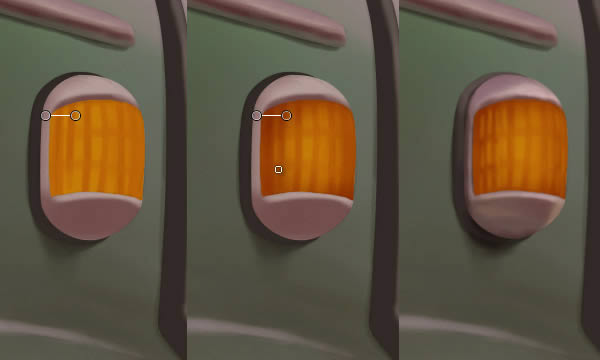
Step 31
Now we detail the flashing light, very simple, just integrating well with the surrounding light.
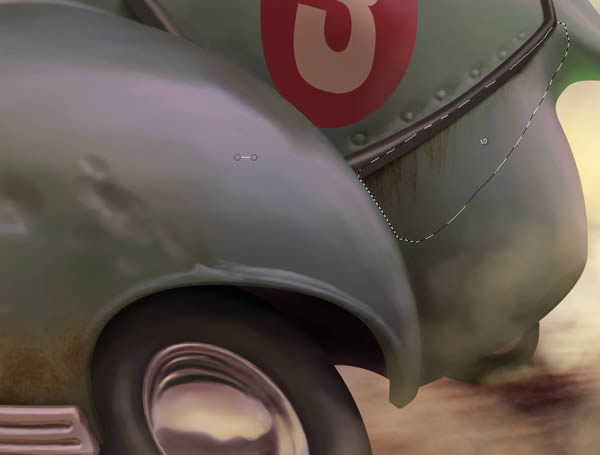
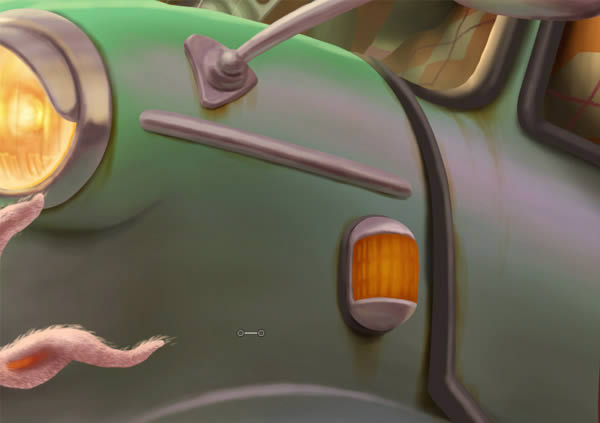
Step 32
The side number of the car just requires a bit more shine because of its texture, like a brighter coat of paint. Just ensure that the character casts some shadows in this.
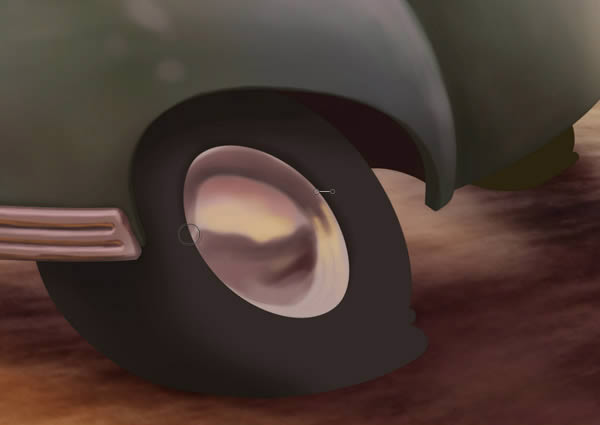
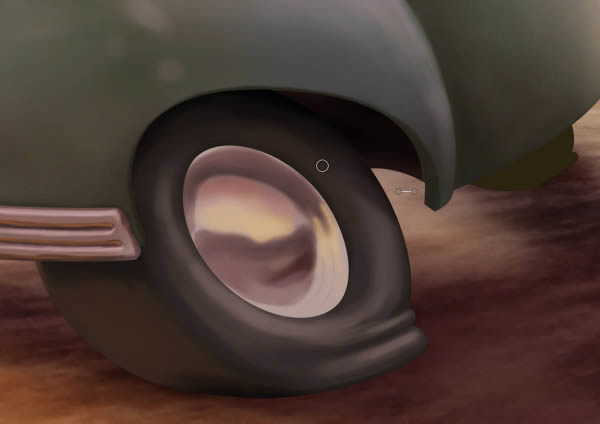
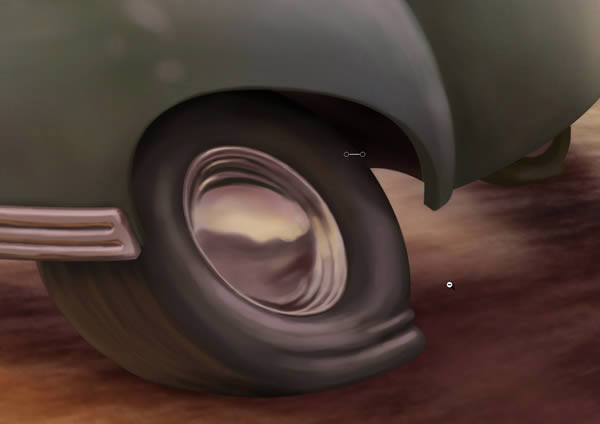
Step 33
The wheels must have the same purple light from the right, and receive on the left side the warm light from the ground. We let the tire-tread indefinite to give the sensation of speed. Define the chrome wheel-cover with dark colors because it is in a context of more darkness.
Step 34
Use the Brush in Overlay Blend mode, paint the clouds with a really smooth brush, but not too big, defining a little more what was already hinted, without adding much detail, only loosely defined and contrasting, so that sunlight feels strong.
Step 35
It is the turn of the horizon, shining a light so pretty and try not to define too the mountains, neither by contrast or by shape. I paint with a purple color not too saturated.

Step 36
On the ground, hint the form of small stones blurred by speed, define its position and shape, and then contrast.
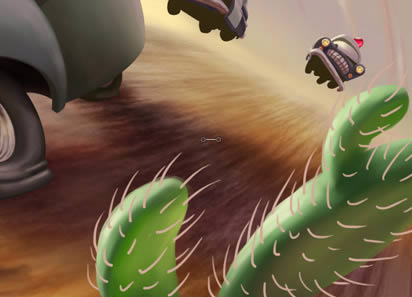
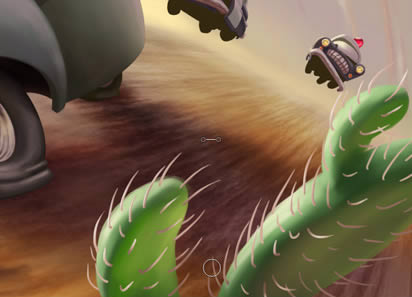
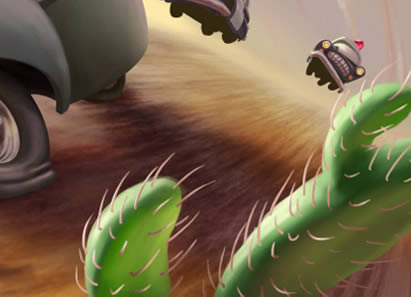
8. Cactus
Step 1
Add some cactus in the foreground and further back to seat more our composition and to create more diagonals that give more sense of speed.
Step 2
Make sure that the cactus in foreground receives enough light, and we define it with bright colors.
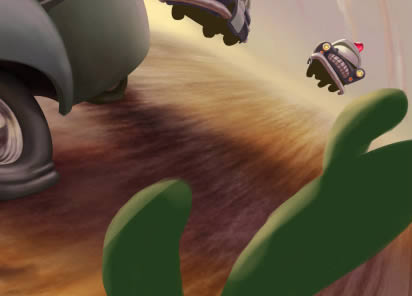
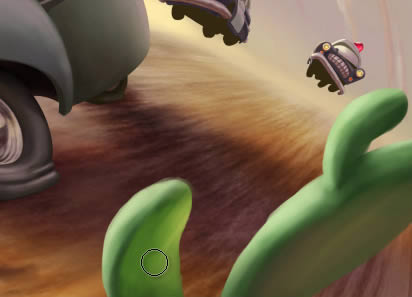
Step 3
Light bounces in the same plant and is illuminate by the leaf over. So too further back leaf receives the light from the ground.
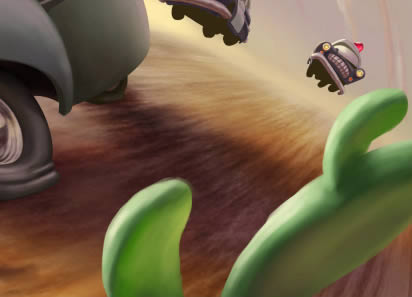
Step 4
Draw thorns, the tips go in backward direction following the effect of velocity. We use a neutral purple color. Then integrate them with lights and shadows.

9. Dust
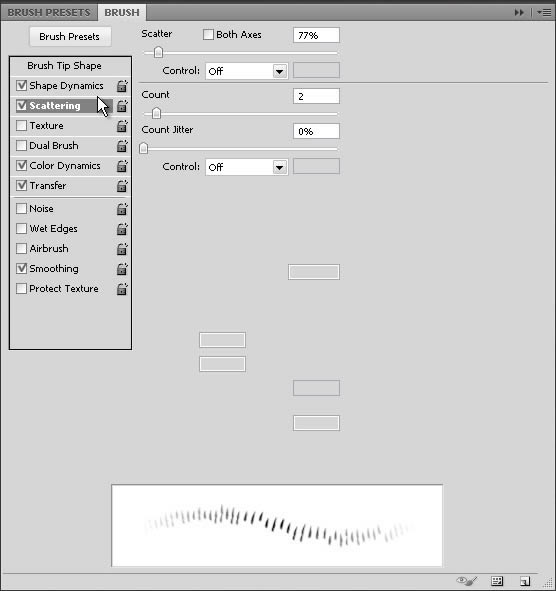
Step 1
Select or generate a simple Brush, pretty blurred and with some scattering and noise, and we start first with a color fairly clear. We start from the base of the wheel, from the most compact until the most diffuse.
Step 2
Continue with back of the car with very bright color because here the dust is directly exposed to sunlight.
Step 3
And then to give more depth to the effect of dust, with a darker color, paint some dust in shadows that contrast with the illuminated dust behind.
Step 4
To enhance the effect of velocity, add a bit of dust that comes from some points a little ahead and down the car, as it own vibration generate this.
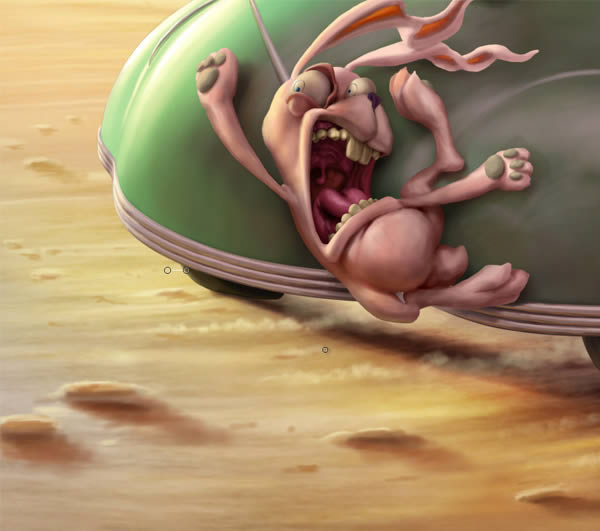
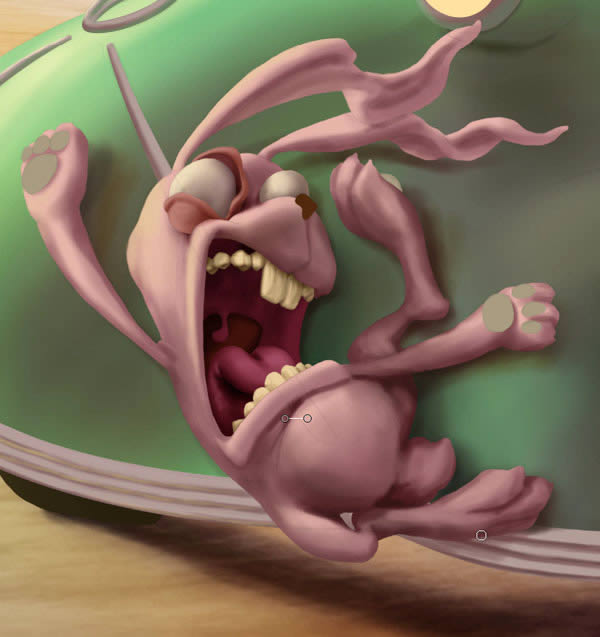
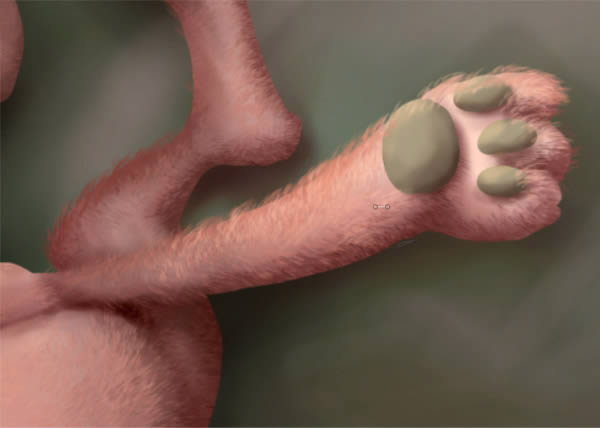
10. Rabbit Texture
Step 1
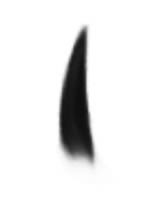
To paint the rabbit fur make a new layer above the base layer of the rabbit. We will configure a brush, starting from a brush with the shape of a hair we have drawn.
Step 2
Now paint following the shape of the rabbit, trying to make it look volumetric. Pick the skin colors and paint trying to make a subtle difference of color. In clearer areas, paint with a color slightly darker, and the darker parts paint with a slightly lighter color.
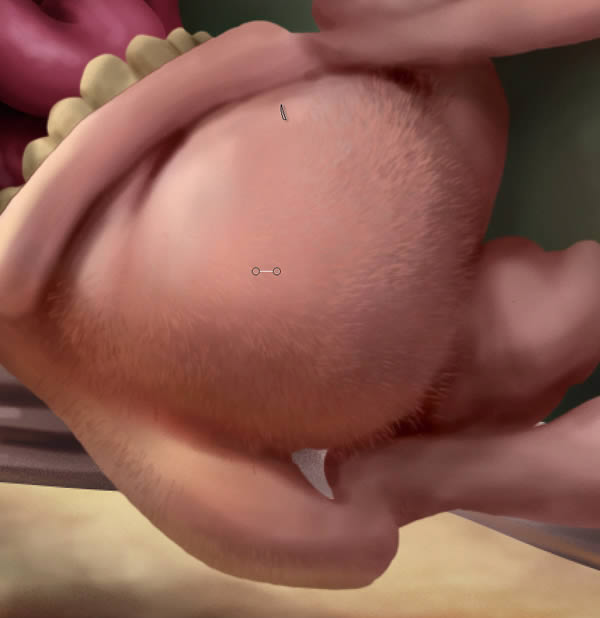


Step 3
In dark areas take advantage of highlighting the hair, without excess in quantity.
Step 4
Now paint the edges. We make a Normal new layer above all layers of the rabbit. Decrease the scattering intensity of the brush and paint the edge to make it look soft and irregular.
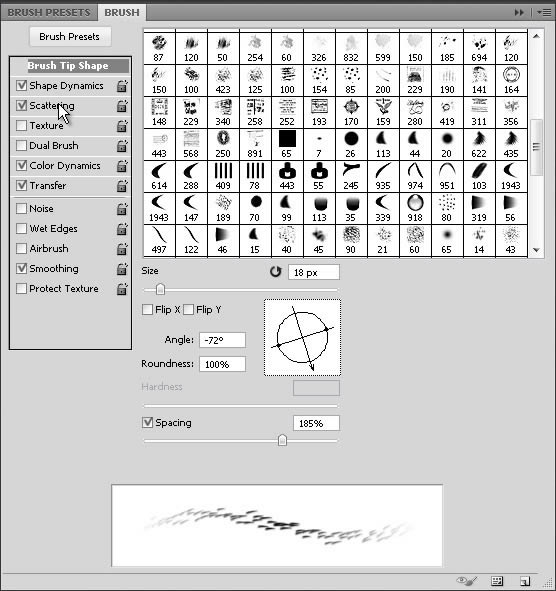
Step 5
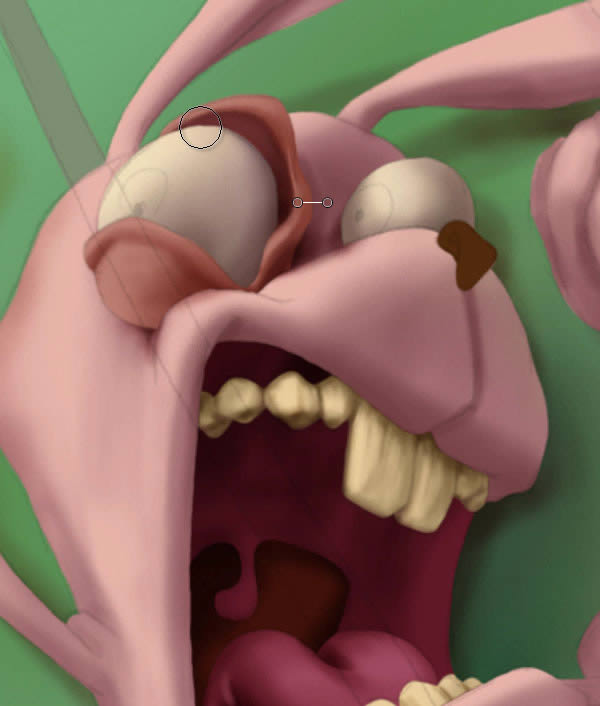
We pause a moment the hair painting to go to the eyes and give a little more light to these, because by enlightened the hair, we can see that they need much more light. Use Levels (CMD/CTRL + L) and set the required light.
Step 6
We return to the hair and give the finishing touches with a pretty thin brush, painting longest hairs at certain specific places, such as the base of the ears, on the tip of the legs and elsewhere, to give it a more natural look to the fur.
Step 7
With the same brush can give definition to the tail, drawing hairs even longer.
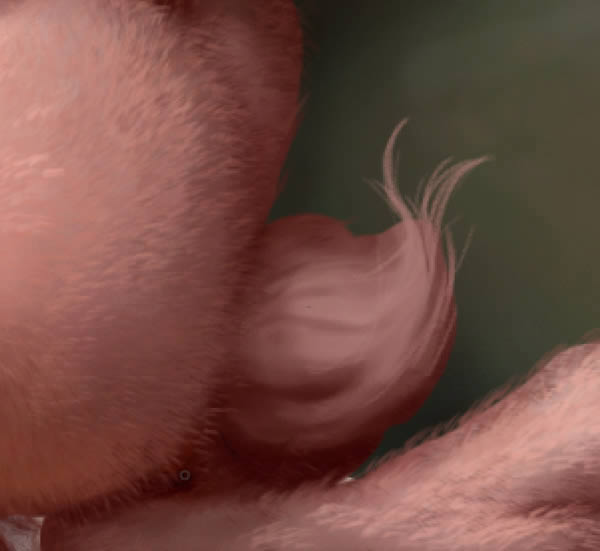
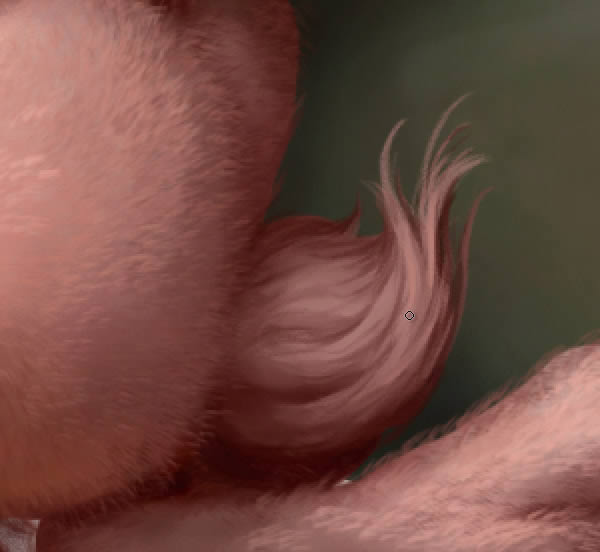
Step 8
Finally apply a little purple-blue color of the sky, in the eyes and in the fur.

11. Final Details
Step 1
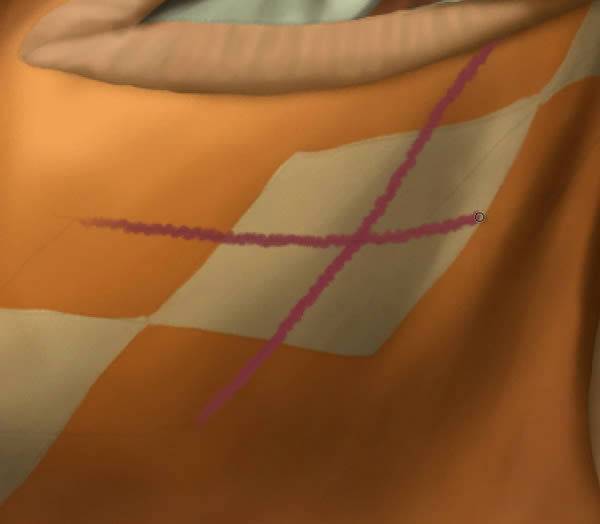
To make the color details of the vest, make a layer over the layer containing the vest. Draw the shape of the design to use it as a mask. Hide the layer and make selection (CMD/CTRL + click) on the layer.
Now, in the layer of the vest, copy this selection to use the volume and paint. We’re going to Layer > New > Layer via Cut, or CMD/CTRL + Shift + J, and paste (CMD/CTRL + V). Then adjust Levels (CMD/CTRL + L) to lighten the tone a bit.

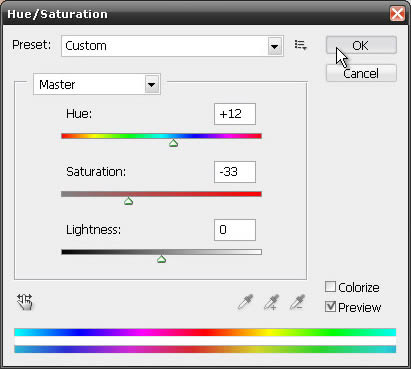
Step 2
Adjust the color with Hue/Saturation (CMD/CTRL + U)
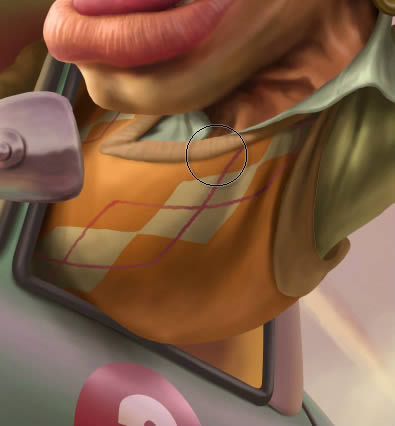
Step 3
With a more organic brush on a new layer, draw the line detail. Finally, lock transparent pixels of the layer.
Step 4
Then integrate painting the lights and shadows of the line.
Step 5
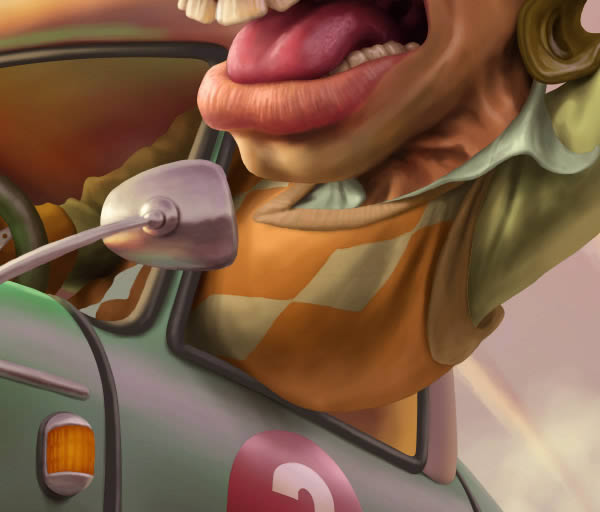
Continue with the color and contrast settings of our character. Illuminate the glove, hat and elbow with the light of heaven. We added some orange tones in the arm. More contrasted also in the armpit area.

Step 6
In the nose apply a blue glow with a pores texture. Also with the same color, illuminate the cheek and wrinkles.
Step 7
In some places we need than the light exceeds the edges of character, making it less defined.
Step 8
In the mustache will finish it with more contrast, defining more the texture and adding stronger lights.
Step 9
The interior of the car still needs more light. With the brush in Overlay Blend Mode, paint the edge of the window on the left and the right corner, which receive direct sunlight.
Step 10
To paint the windshield, make a new layer above the layer with the inside parts of the car, select the entire area and mask the layer. Then paint with the yellow light of the sun and also with a little color purple sky.
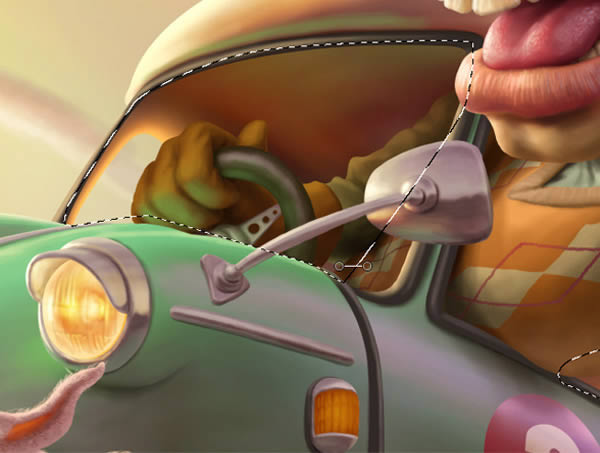
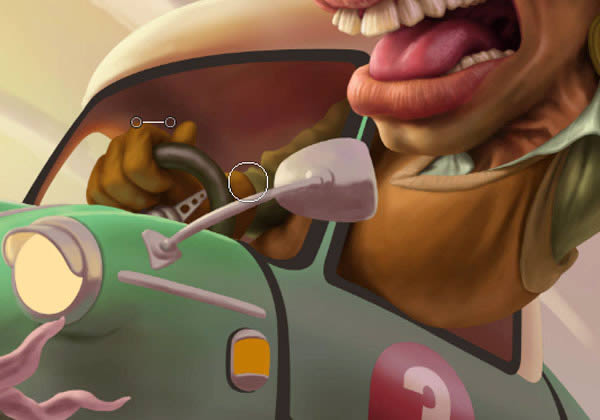
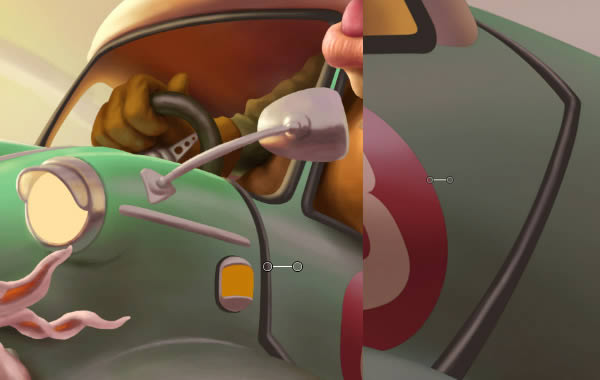
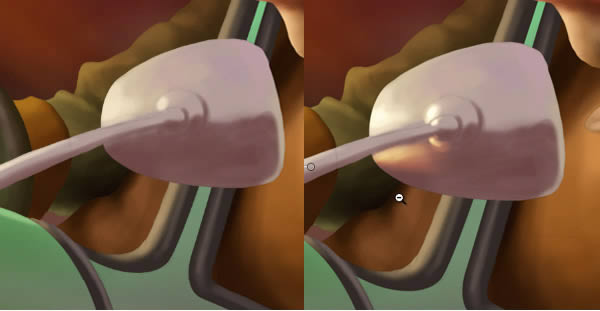
Step 11
With a fine Brush, make concentric lines to simulate the effect of glass texture, and the same in the mirror.
Step 12
Add some rivets on the door of the car, define more the dents and give a small volume in the clay-cap contour.
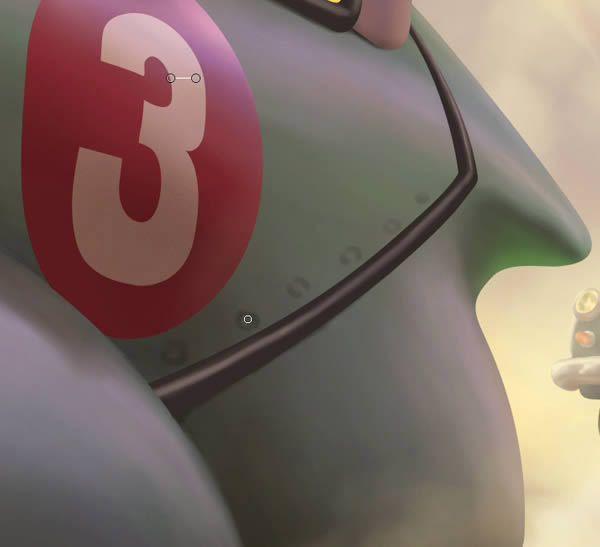

Step 13
Now add a little rust. With a brush type “hairy paintbrush” in Multiply blend mode, and a yellow color, suggest some blasting pint where appropriate and especially at the edges, as well as on the rivets. Selected parts where necessary, highlighting the parts of the car as the door.

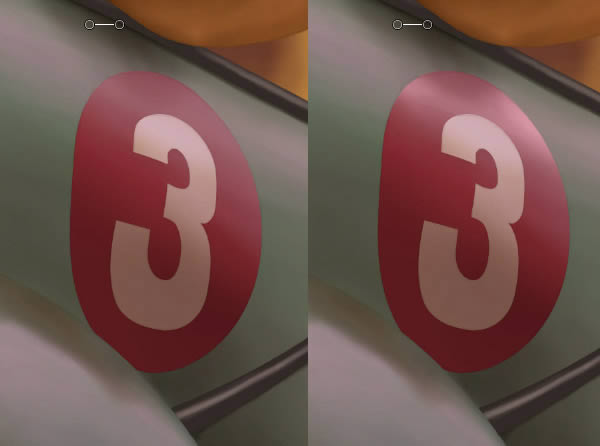
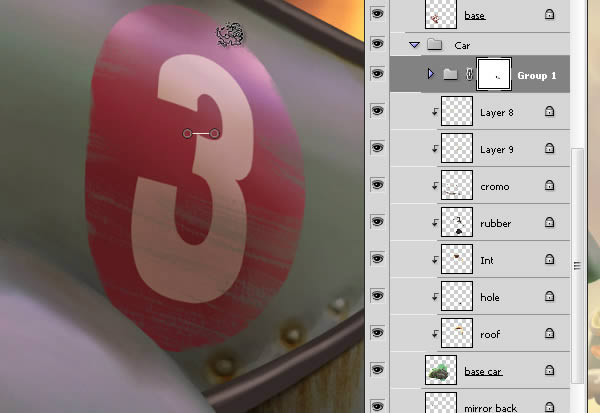
Step 14
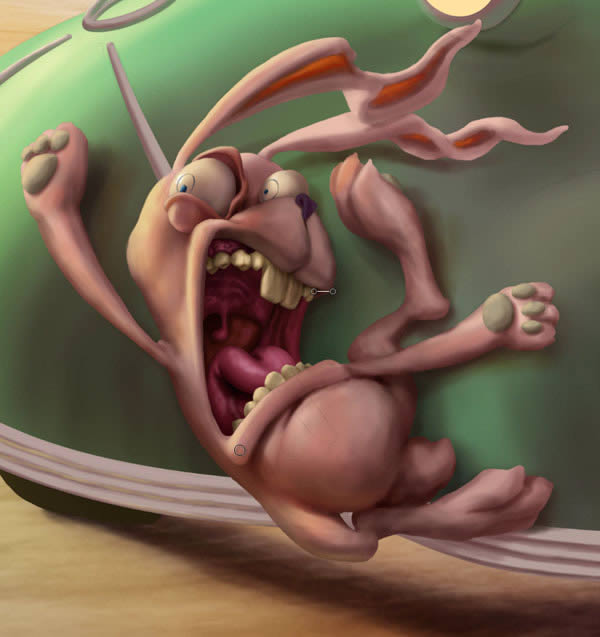
To add the finishing touches, give it a scraping effect at the number of the car. Select the layer of number “3″ and the layer of red circle, group them (CMD/CTRL + G) and then make a Layer Mask by pressing the bottom of the layers palette, Add layer mask.
Step 15
Using the same Brush with which we paint the rust, painting on the mask with irregular horizontal lines, as if the paint was scratched.
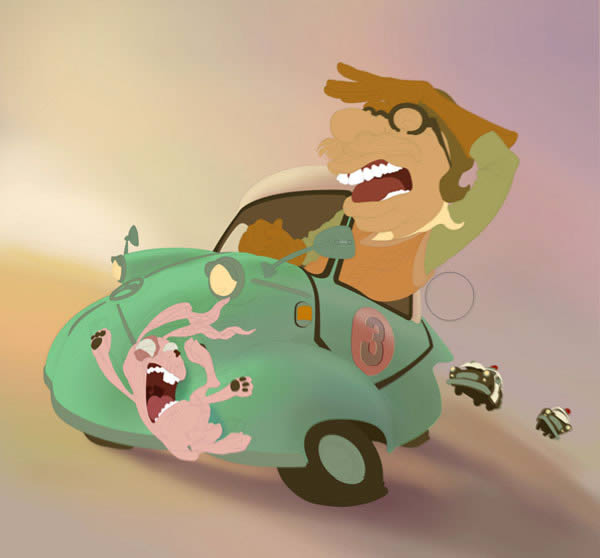
Step 16
We can freely consider all adjustments necessary to integrate the elements to each other and the light in each of them. But at this point we can say that the image is finished. But…
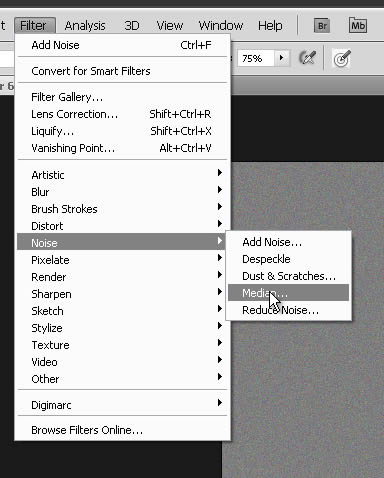
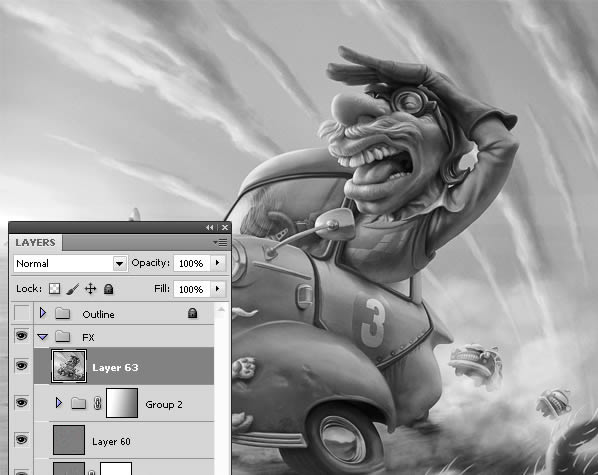
12. Noise
We could leave the illustration as it is, but now we use some tricks to give it a more organic texture, enhancing the details and the general definition and give a little more drama.
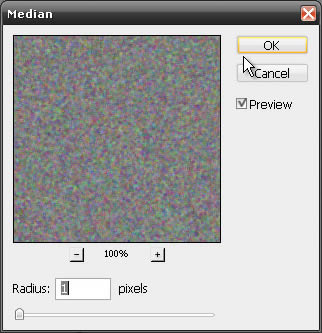
Step 1
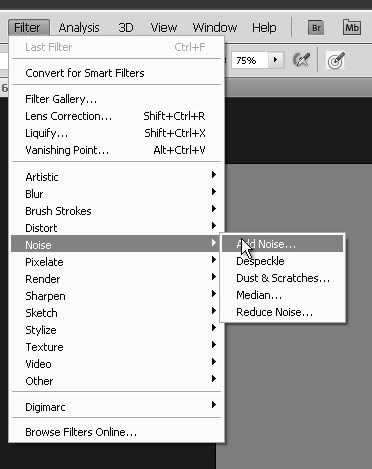
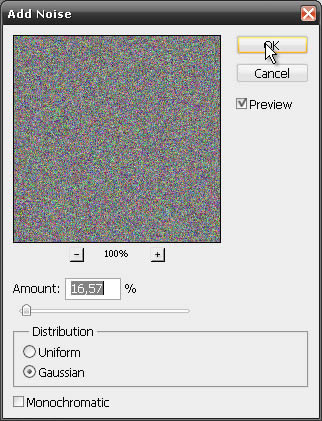
Create a new layer and fill it with a neutral gray. We’re going to Filter > Noise > Add Noise … and add some moderate noise. Then go to Filter > Noise > Median … and use the minimum radius for a subtle blur.
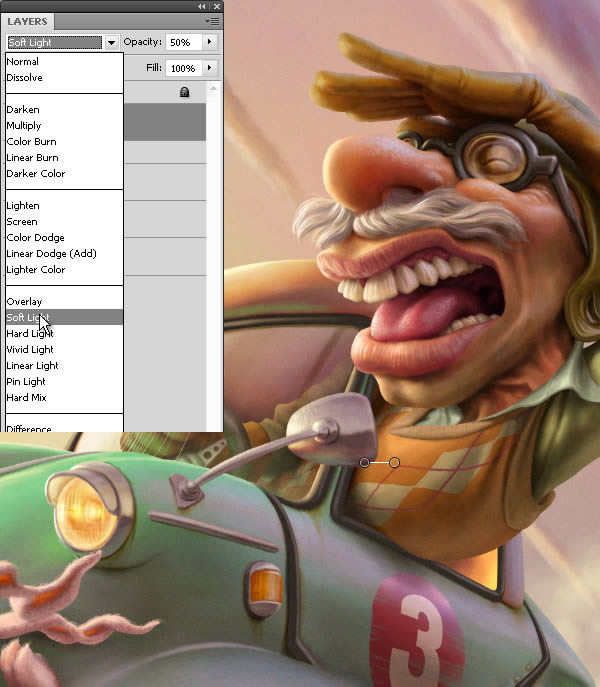
Step 2
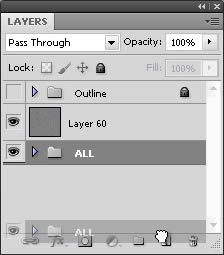
Now change the Layer Blend Mode to Soft Light and the opacity of the layer. Thus we get finishing with a more irregular and organic overall texture, more closer to painting.
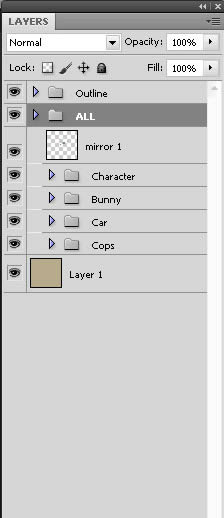
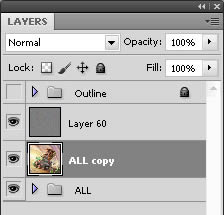
Step 3
Group all layers in a folder (CMD/CTRL + g), we call it “ALL”, make a copy dragging it to the Create a New Layer icon, and then merge it (CMD/CTRL + E)
13. Definition
Step 1
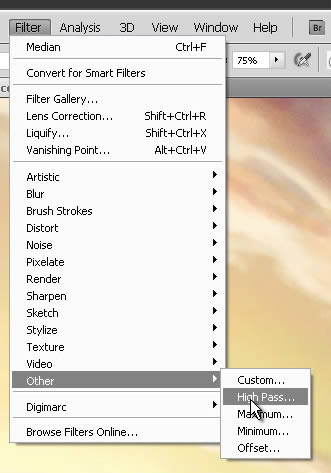
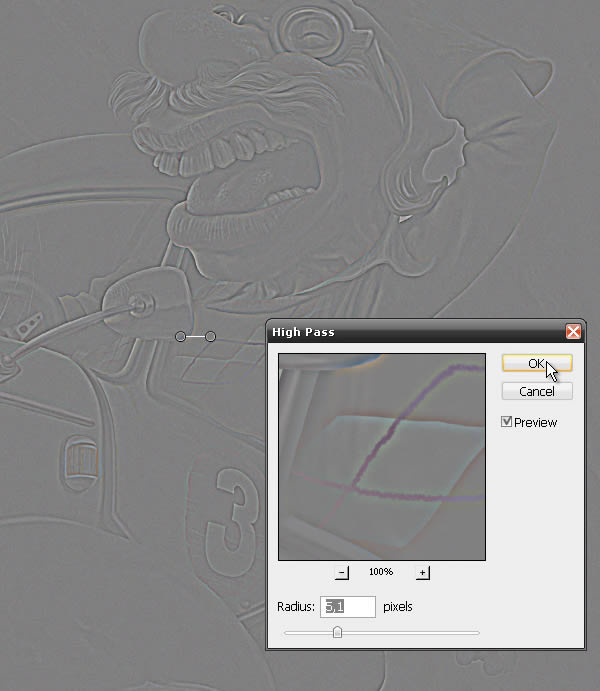
Now go to Filter > Other > High Pass … and give it a subtle radius.
Step 2
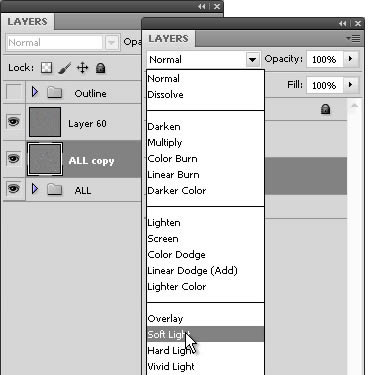
Set the Layer Blend Mode in Soft Light
13. Rays of Light
Add light rays coming from the sun.
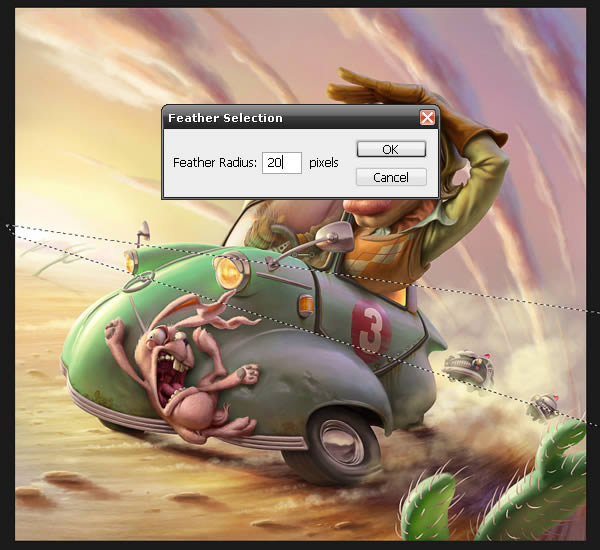
Step 1
Create a new layer and with the lasso tool, make a selection shaped like a ray of light. Apply a blur to the selection, go to Select > Modify > Feather… and define a range of 20 pixels. Then fill it with Alt + Backspace.
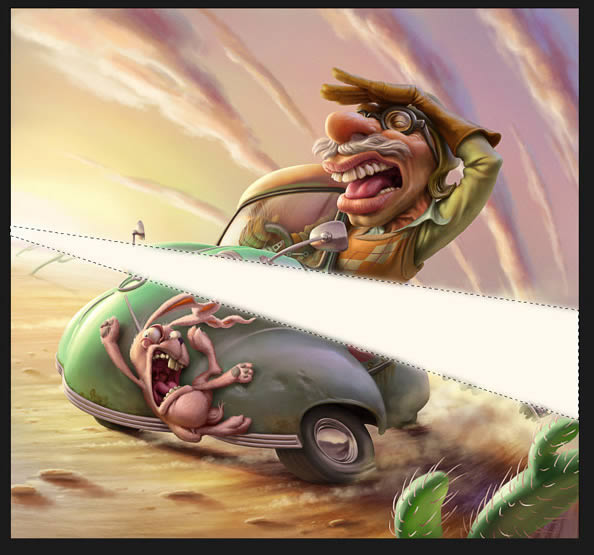
Step 2
Change the Layer Blend Mode to Overlay, then down the opacity of the layer to 30% and duplicate it. Then transform it with CMD/CTRL + T, distort the shape maintaining the position of the left of the sun. Repeated several times to make more rays with different distortions and intensity.

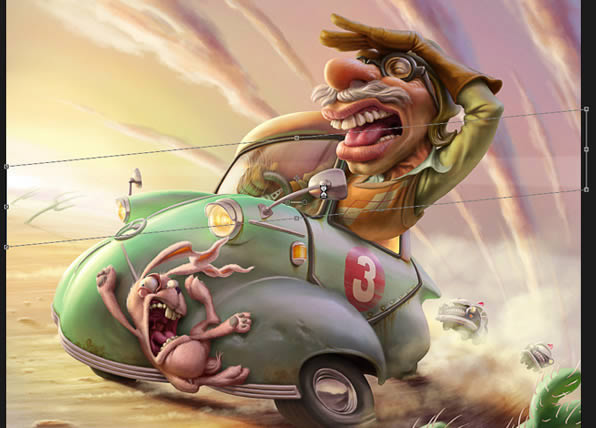
Step 3
Then group all the layers of the light rays and add a Layer mask.
Step 4
With the Gradient tool and over the mask apply a gradient from left to right.

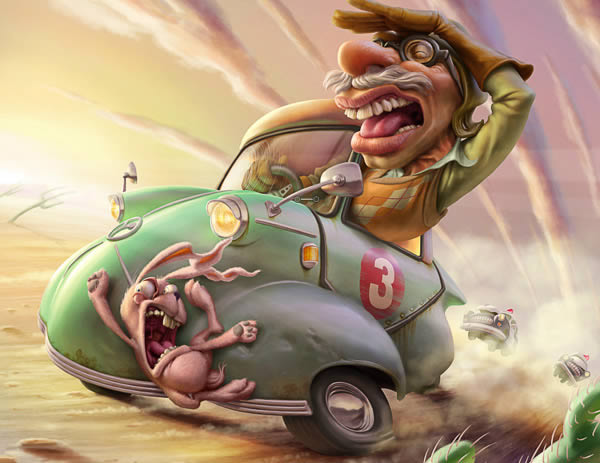
The result is subtle but that’s the idea, integrating the elements much more with the use of light.
14. Glow and Contrast
Finally, a bit of drama to the image.
Step 1
Make a copy of the entire image, select all with CMD/CTRL + A and make a copy attached, going to Edit > Copy Merged + C, or CMD/CTRL + Shift + C. Then paste CMD/CTRL + V above all layer.
Now desaturate the layer CMD/CTRL + Shift + U
Step 2
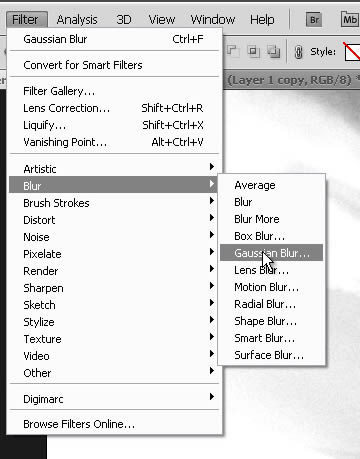
Increases contrast enough, and apply a blur Filter > Blur > Gaussian Blur …
Step 3
Change the Layer Blend Mode to Overlay and the opacity of the layer to discretion.
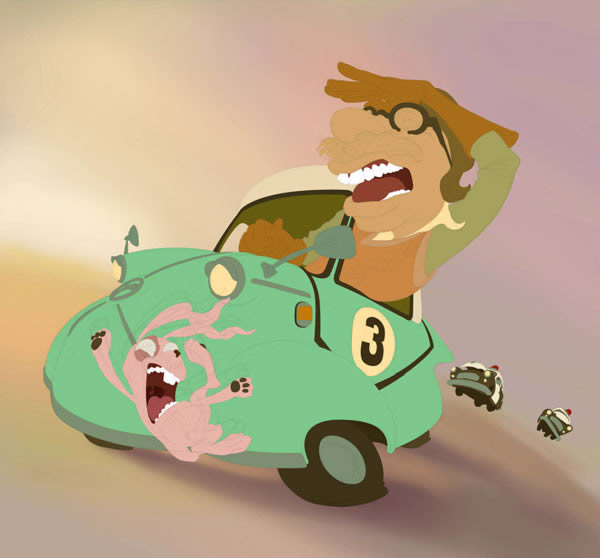
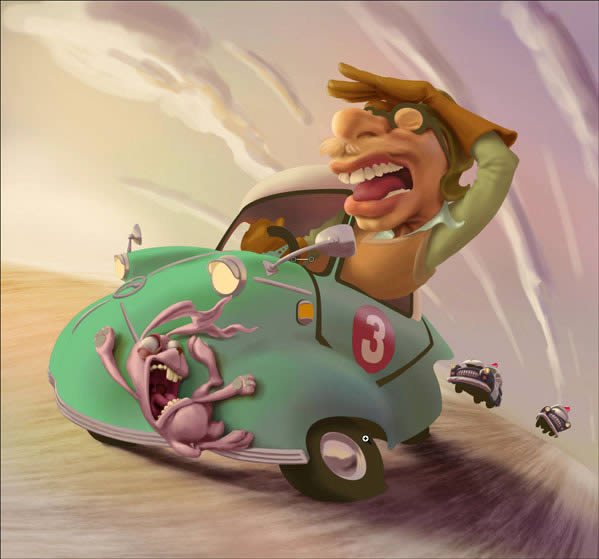
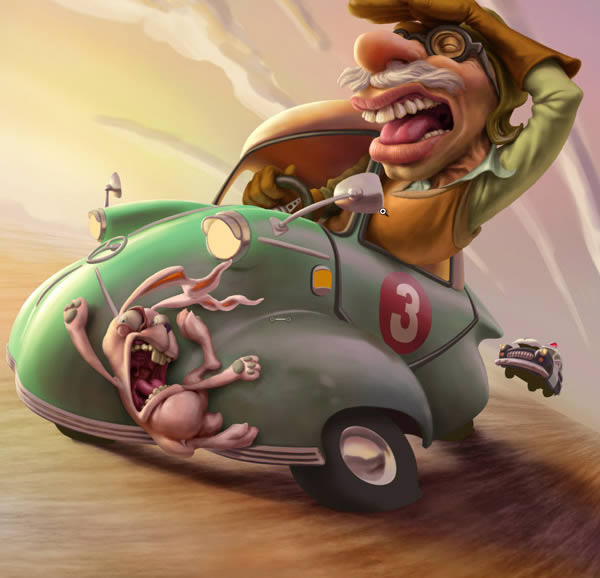
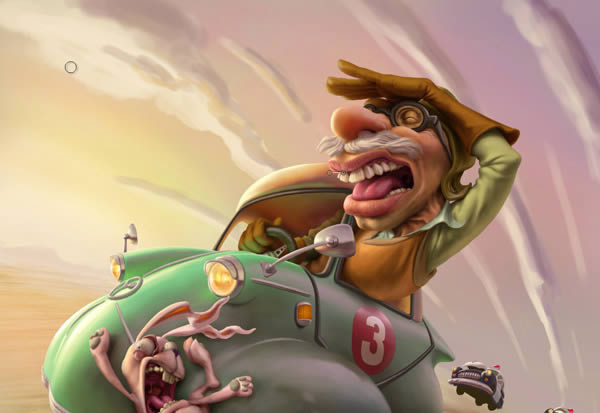
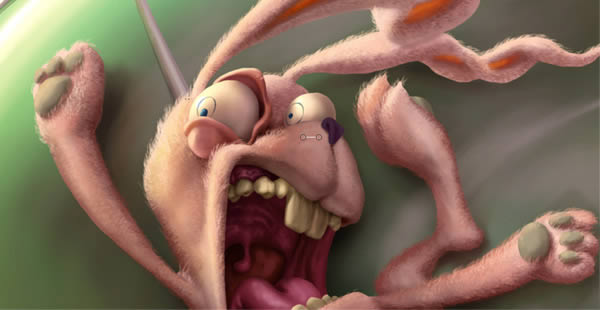
Conclusion
In this tutorial, we showed you how to create a high impact caricature illustration in Photoshop using many advanced techniques. In the process, we showed you how to set up your document, draw your lines, block in your colors, and how to add the details. The result is a stunning piece of digital art. We hope that you enjoyed this tutorial and can use the techniques explained in this tutorial to help further your own digital art.
