
To help users integrate their photos to their blogs and websites, Instagram has released a public Application Programming Interface (API).
It is a seamless software-to-software interface which specifies how some software components should interact with each other without user involvement during the passing of information.
If you are not a developer, this might scare you and you might think that integrating Instagram photos and videos on your WordPress site is a rocket science.
Worry no more. This article will serve as a guide for both beginners and advance WordPress users on how you can integrate Instagram to the WordPress site using the Enjoy Instagram WordPress plugin.
Resource You Need to Complete This Tutorial
- WordPress Installation
- Enjoy Instagram Plugin
- Time and Patience
STEP 1 – Installing the Enjoy Instagram WordPress Plugin
To start off, install the Enjoy Instagram Plugin. To do this go to Plugins ->Add New and search for “Enjoy Instagram” WordPress plugin.
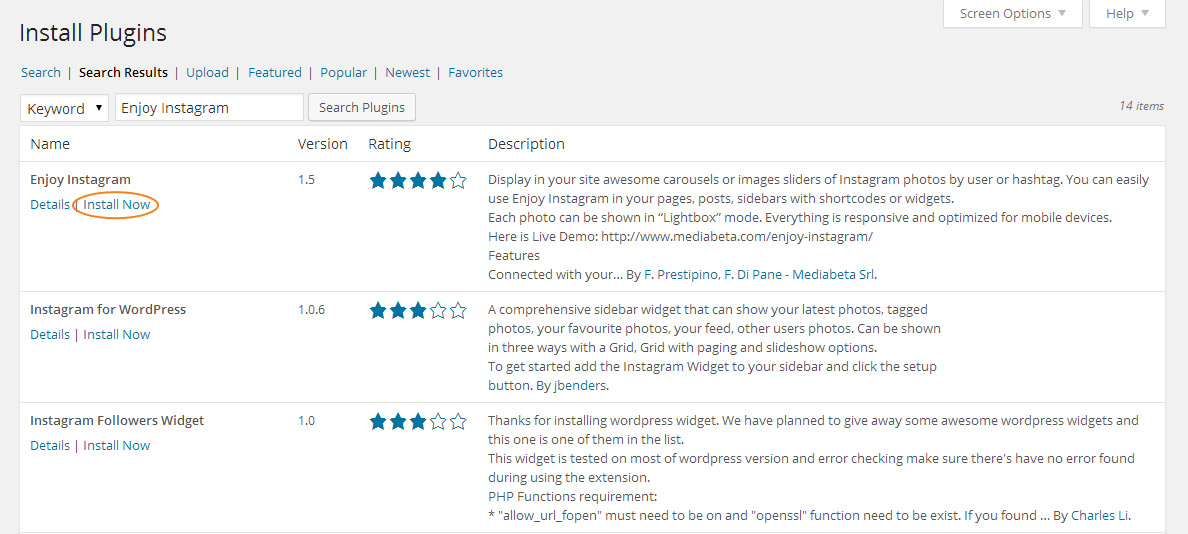
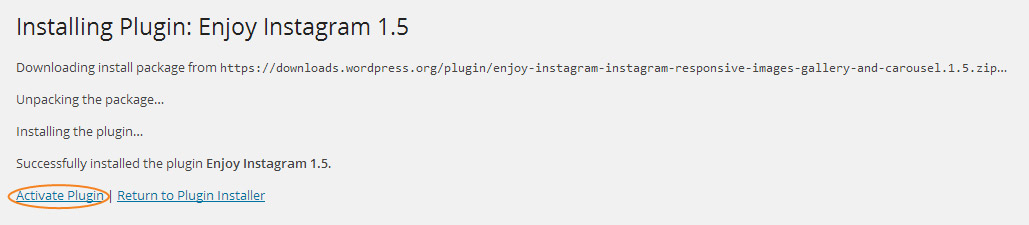
Next, click the “Install” button and afterwards the “Activate” button to activate the plugin.
STEP 2 – Registering Application Using Instagram API
Now that you already installed the “Enjoy Instagram” plugin, register a new application on Instagram to be able to use its API.
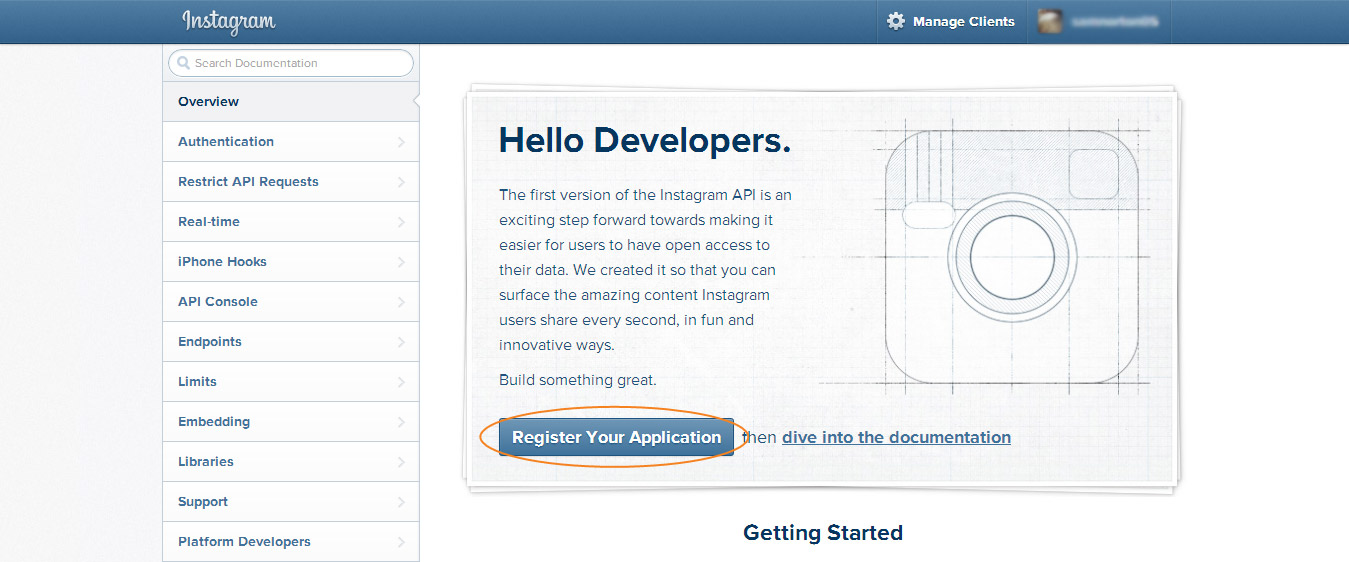
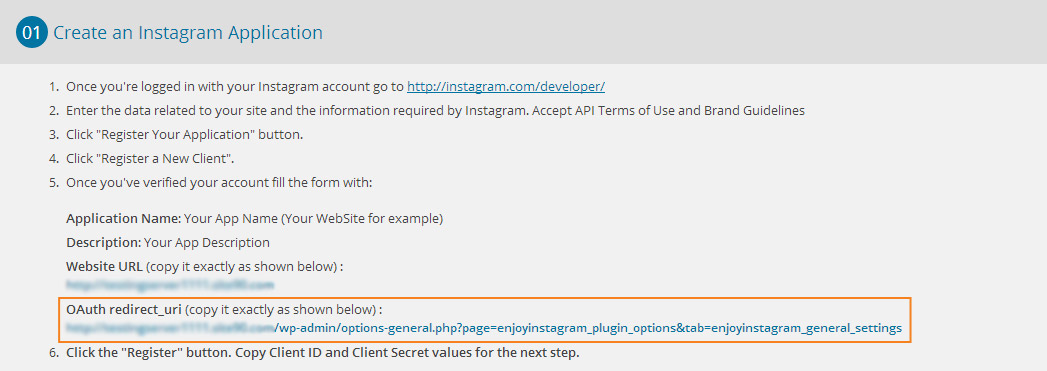
To do this, first login to your Instagram account and then go to this URL: http://instagram.com/developer/

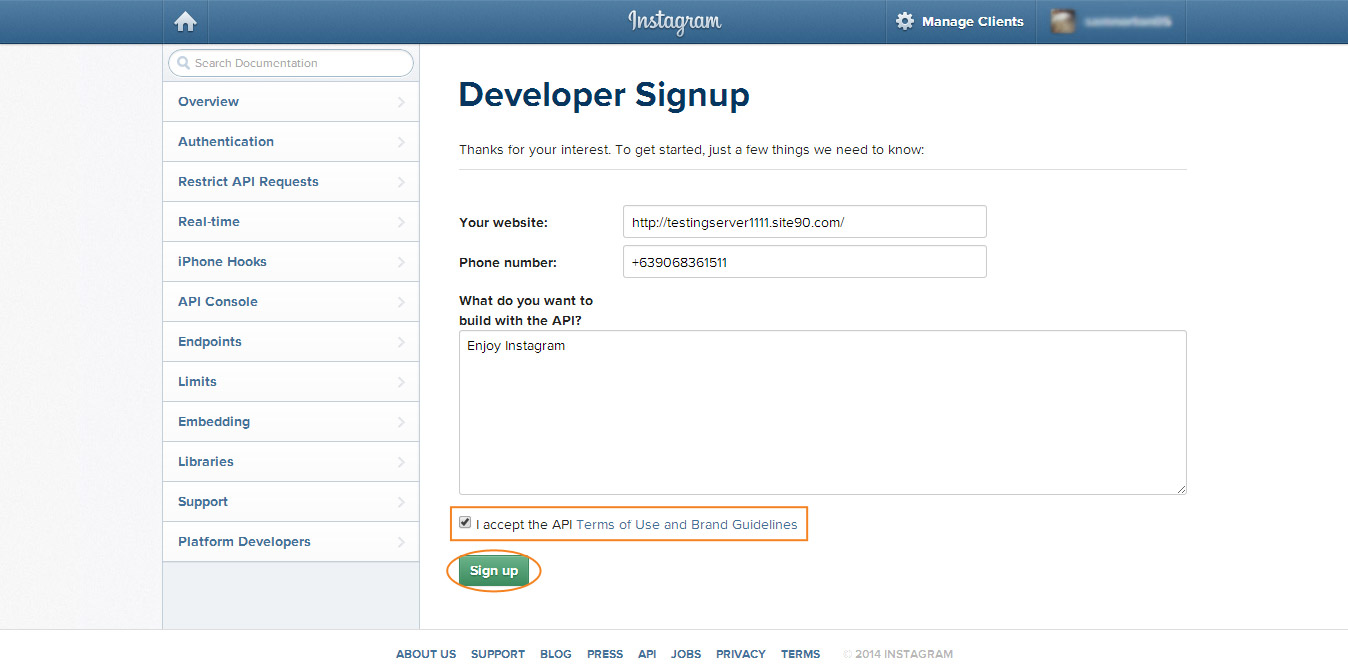
Next, click the “Register Your Application” button. You will be prompted to the “Developer Signup” screen.
Now go ahead and fill up the fields with your WordPress site domain, your phone number and your reason for creating the API.
Don’t forget to accept API Terms of Use and Brand Guidelines by clicking on the check box below the fields before clicking on the “Sign Up” button.
STEP 3 – Registering a New Client
Now that you have registered your API, create a new client to get the API Client ID and Client Secret ID.
To do this go ahead and access this URL again: http://instagram.com/developer/
Click on “Register Your Application” button again.
Next, click on the “Register a New Client” button on the top right side of the screen.
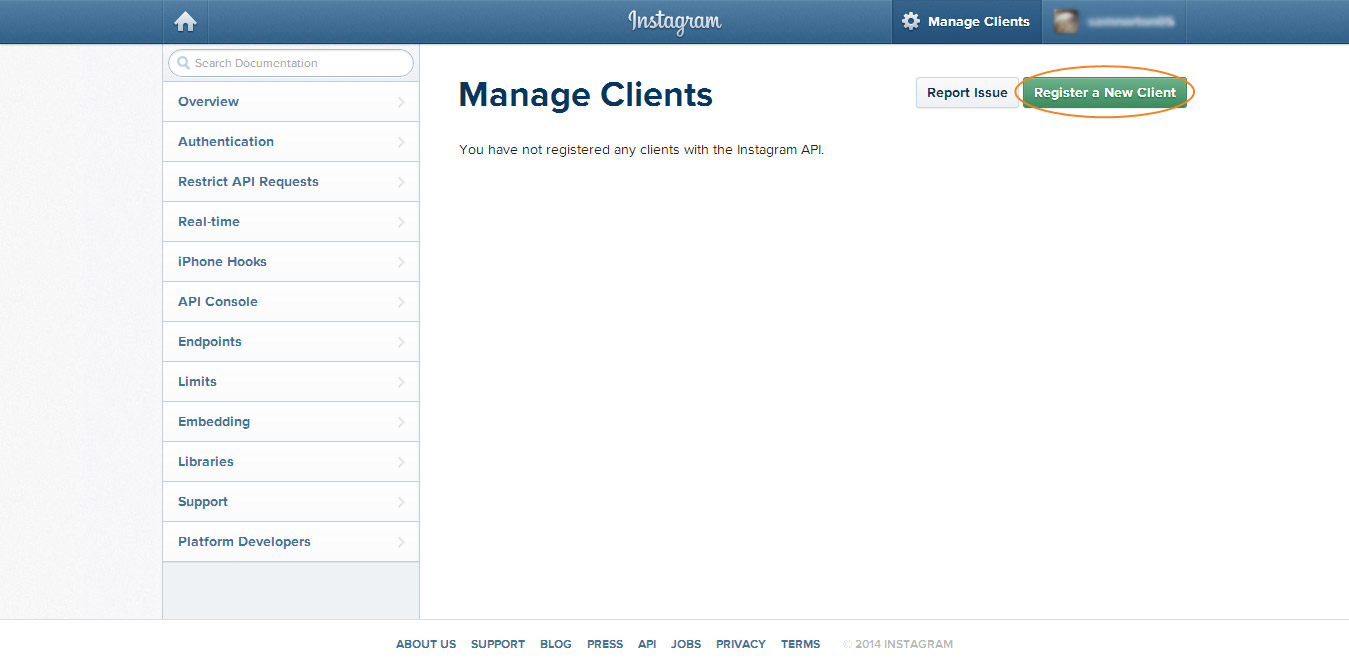
You will be prompted with the “Register a New Client ID” screen. Fill up the form needed to continue and enter the Captcha details before clicking the “Register” button.

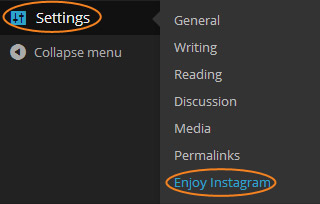
Note: You can get the OAuth redirect_uri by going into the plugin settings page on your WordPress Admin panel.
To do this, just go to Settings->Enjoy Instagram and you can copy the OAuth redirect_uri provided for your site.
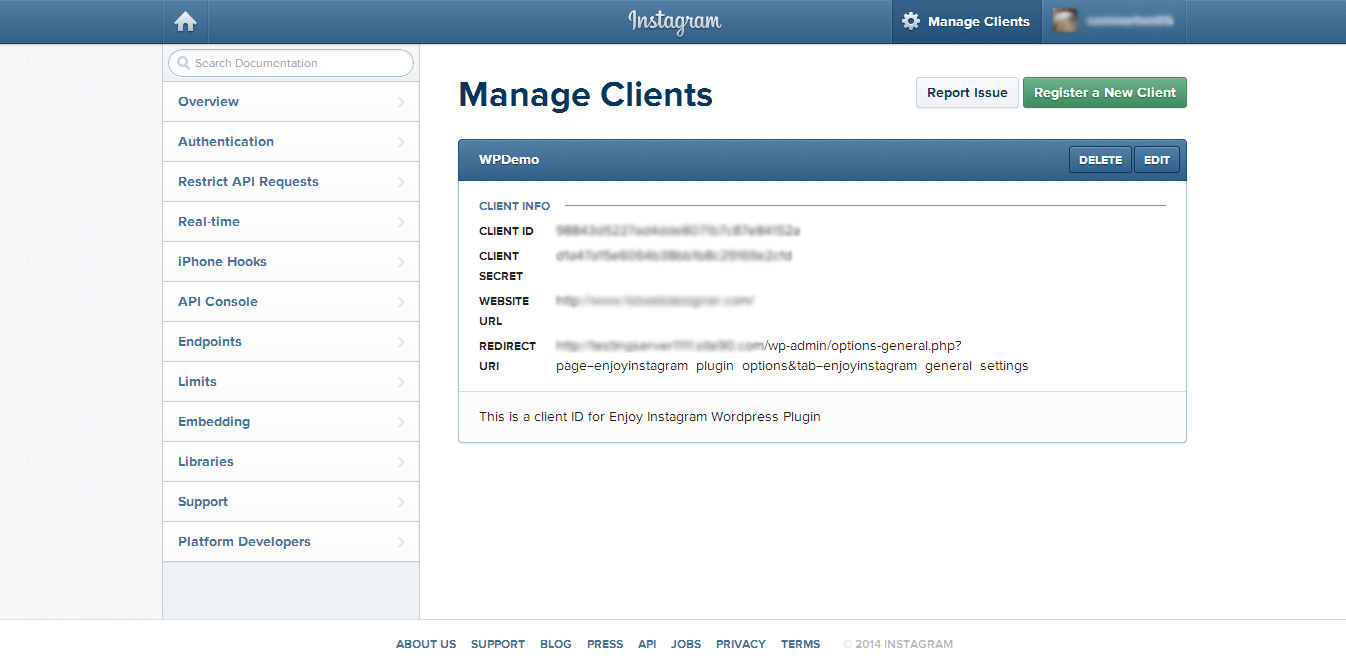
After clicking the button, you’ll be redirected to the “Manage Clients” page which will contain your Client ID and Client Secret ID for your WordPress Site.
STEP 4 – Copying Client ID and Client Secret ID to the WP Site
Now that you have already gotten both Client ID and Client Secret ID, it’s time to paste then on the Enjoy Instagram settings page.
To do this, from the “Manage Client” page on Instagram, copy the Client ID and Client Secret ID and paste it to the form where it says “Enter your Client ID and Client Secret ID”.
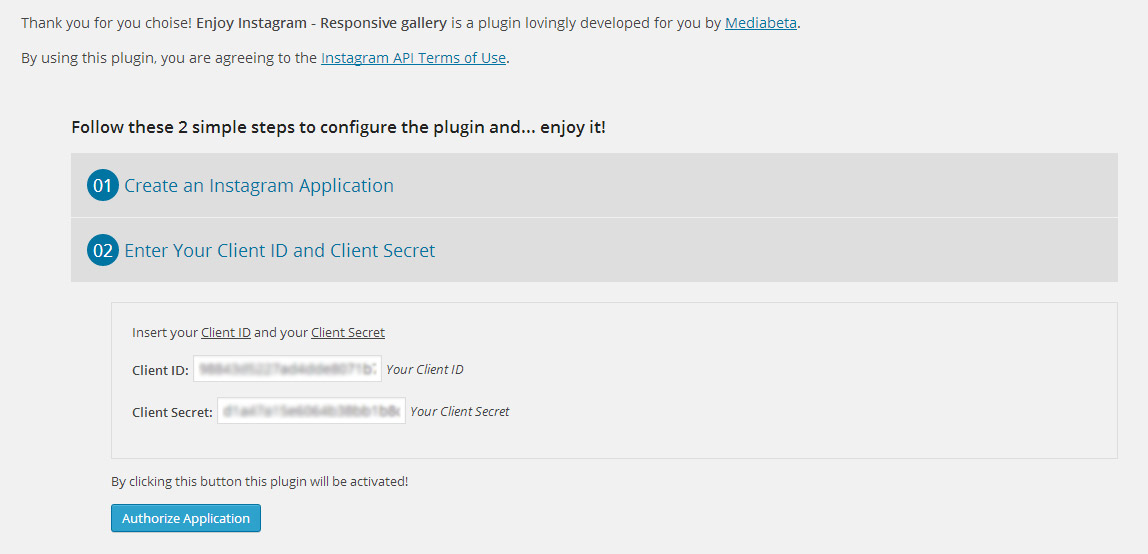
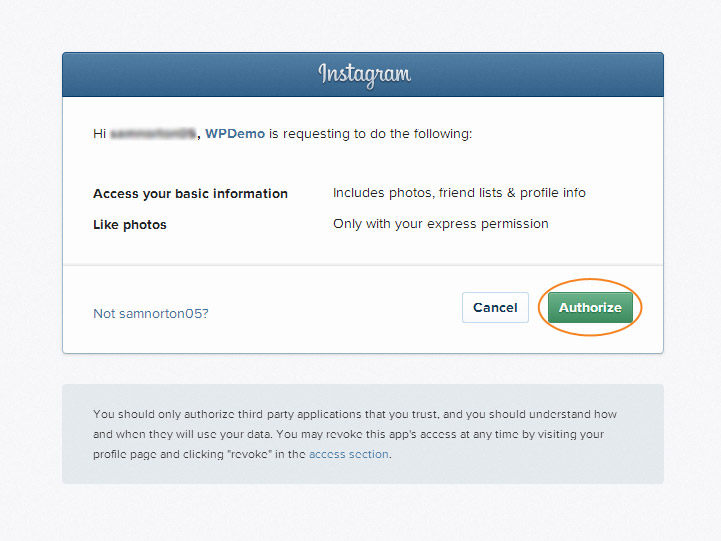
Finally click the “Authorize Application” button to save it. You will be redirected to the Instagram’s API access request page. Click “Authorize” button to continue.
After all these steps, you will be then redirected on the plugins success page on your WordPress site, indicating that your Instagram profile has been successfully integrated.

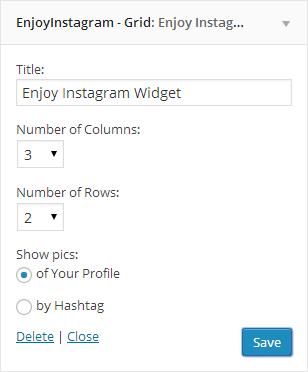
STEP 5 – Creating Widgets to Display Instagram Photos on the WP Site
OK, great! You’ve successfully configured the API for Instagram. The next thing to do is display the Instagram photos on the sidebar with the use of widgets.
To do this, go to Appearance ->Widgets. Add the “Enjoy Instagram Grid Widgets” on the main sidebar and configure it to your preferred settings.
Now, if you are going to check on the front page, you’ll see that your Instagram’s photos are already displaying on the sidebar of your site.

Additional Option: Displaying Instagram Photos via Hashtags
If you prefer to display photos using hashtags instead of your own photos, you can navigate on the Enjoy Instagram settings page under “Settings” tab. Just click on the hashtag radio button and enter the hashtag you prefer.
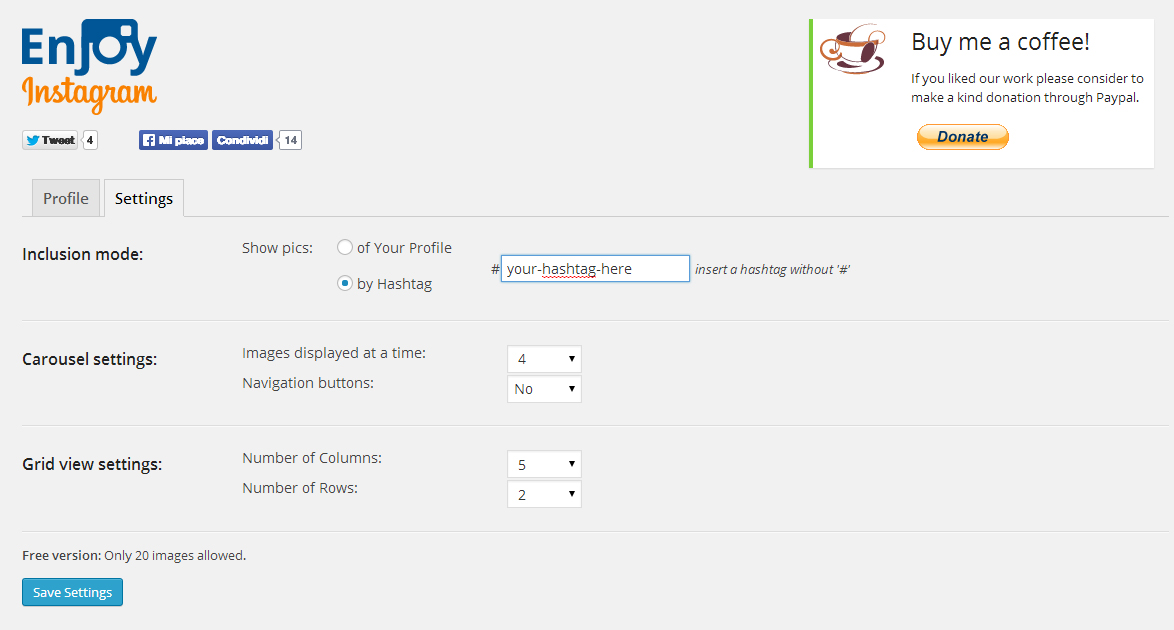
Note: Don’t forget also to click on the hashtag radio button on the the “Enjoy Instagram Grid Widgets” when adding it on the sidebar.
Conclusion
Enjoy Instagram is a flexible Instagram plugin that lets you display your images in a grid or a carousel. What is more great about this plugin, aside from the hashtag additional option, it is also optimized for mobile devices which offers touch support to mobile users .
What tools do you use to easily display Instagram images on your website? Let us know in the comments section below.