
Tutorial Assets
The following assets were used during the production of this tutorial.
- Cliff-01
- Cliff-02
- Jungle-01
- Jungle-02
- Jungle-03
- Jungle-04
- Jungle-05
- Jungle-06
- Jungle-07
- Lake-01
- Man-01
- Mountain-01
- Mountain-02
- Mountain-03
- Panorama-01
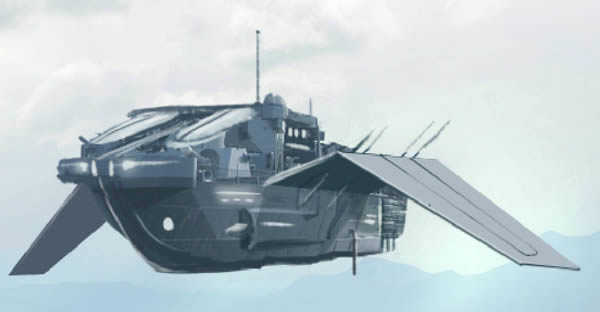
- Ship
- Tree-01
- Tree-02
- Tree-03
- Water-01
- Ground-01
- Jungle-08
- Mountain-04
- Mountain-05
- Mountain-06
- Tropical-foliage-01
- Tropical-foliage-02
- Water-02
- Moss-01
- Ref-sketch
1. Setting the Bases
Step 1
Let’s create a new file with following settings.

Step 2
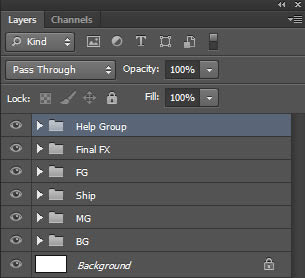
Create the following groups. I’ll refer as those during the whole tutorial.
Step 3
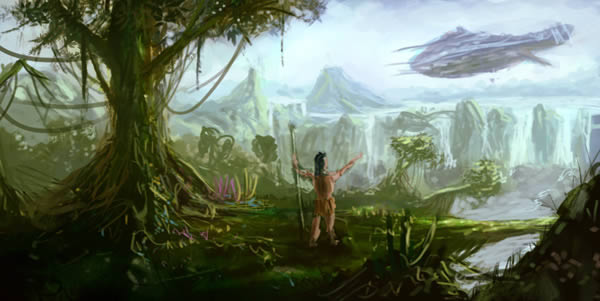
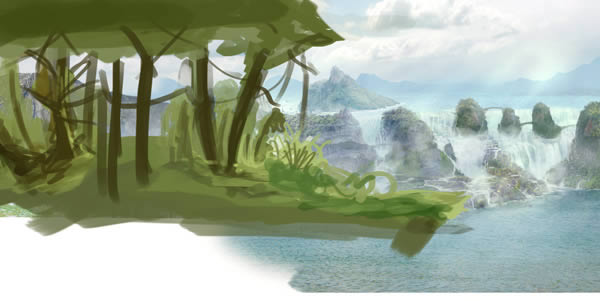
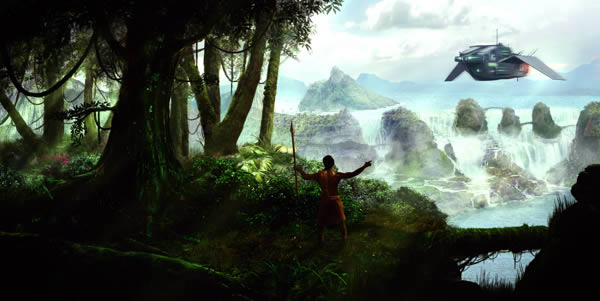
Import the ref-sketch asset and place it in the Help Group.
Step 4
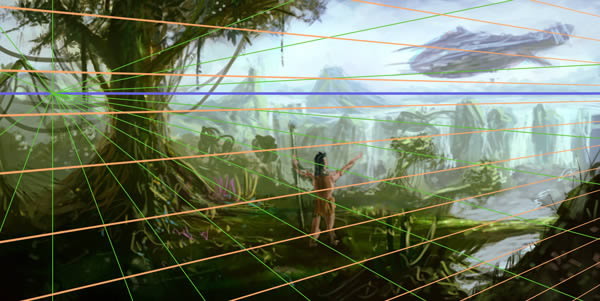
With the Line Tool (U), draw some perspective lines as shown below. You can create a layer per point. Place those layers in a group called Persp, which is under the Help Group. Set that group’s opacity to about 40%. We turn it on and off whenever we need to check the perspective.
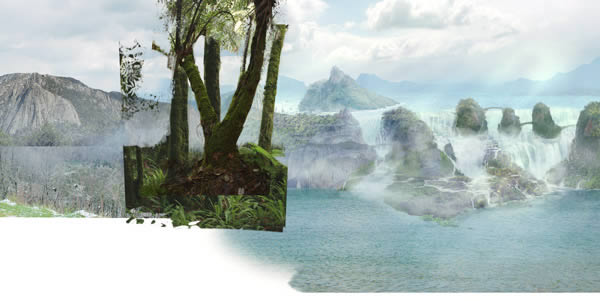
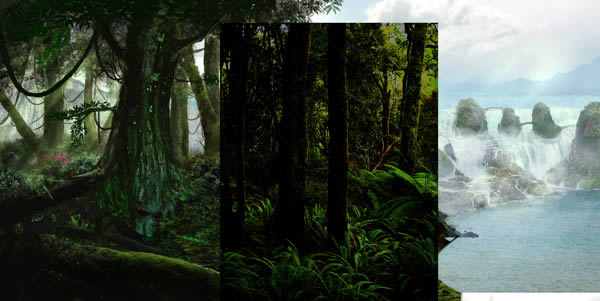
2. The Background (BG)
Step 1
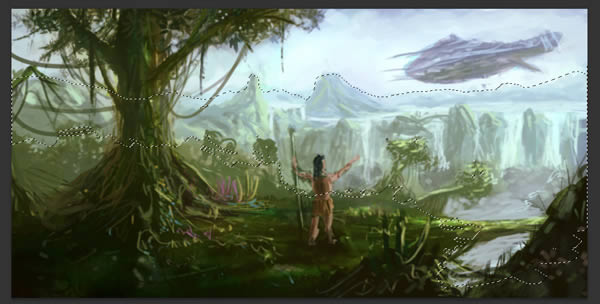
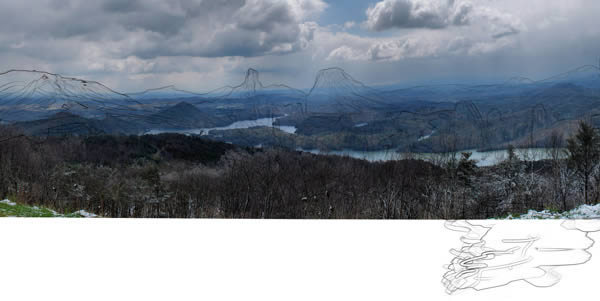
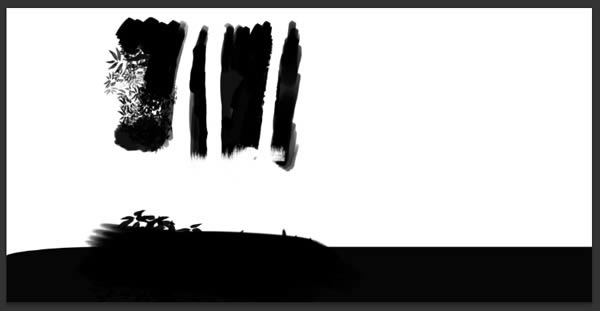
Select roughly the background from the Ref Sketch and duplicate it (Command/Ctrl + J). Rename it to BG Ref and place it under the BG group.
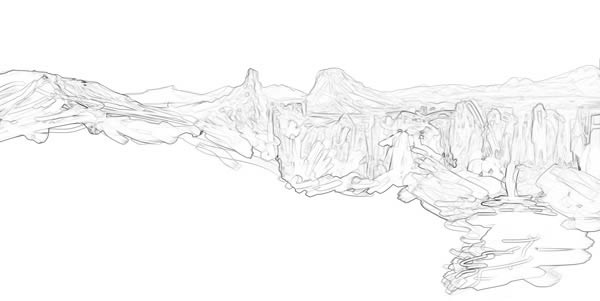
Now, with the Brush Tool (B), clean the BG Ref such as it is below. Duplicate it (Command/Ctrl + J), apply a Filter > Stylize > Find Edges, and change his saturation (Command/Ctrl + U) to -100. Set his Blending mode to Multiply and call it BG Line Ref
Keep those two layers at the top of the BG group. Use them as some references when you import some photos in the canvas. The BG Line Ref in multiply mode is very useful, because you can place the photo while having some reference lines over it.
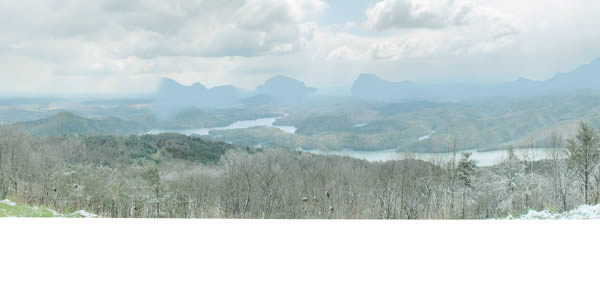
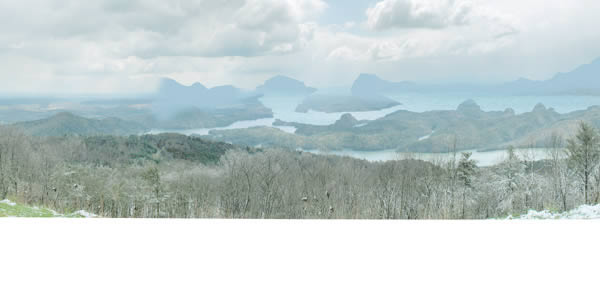
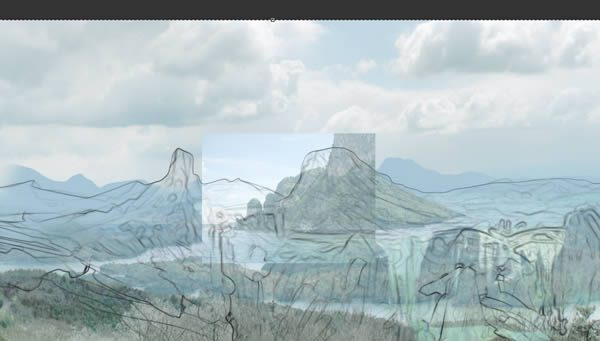
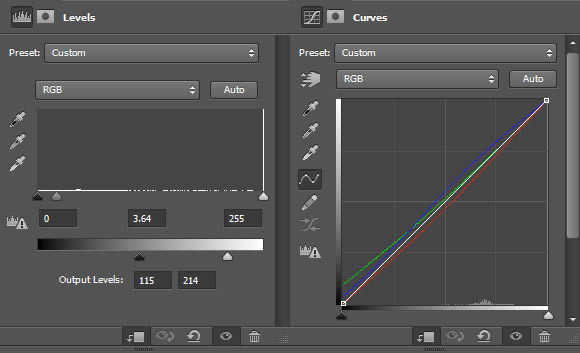
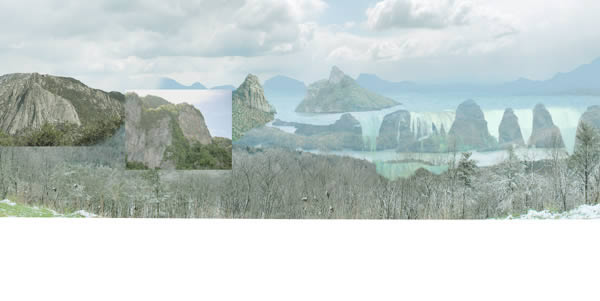
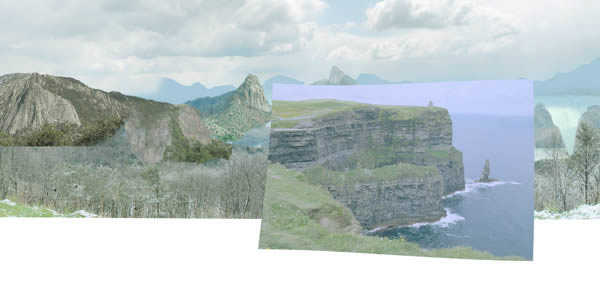
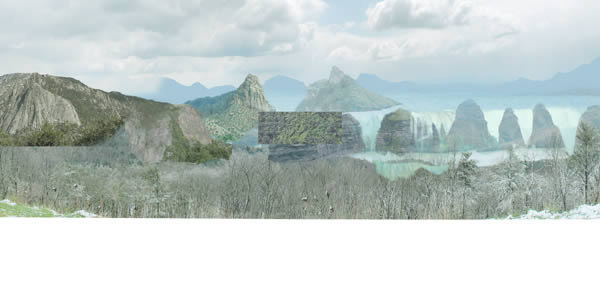
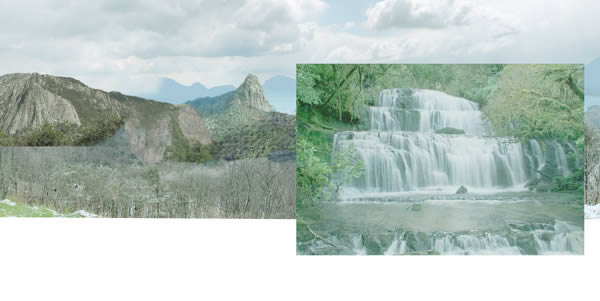
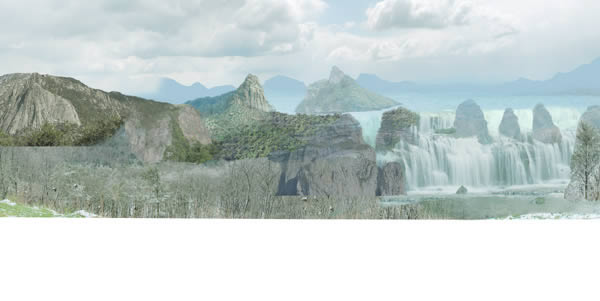
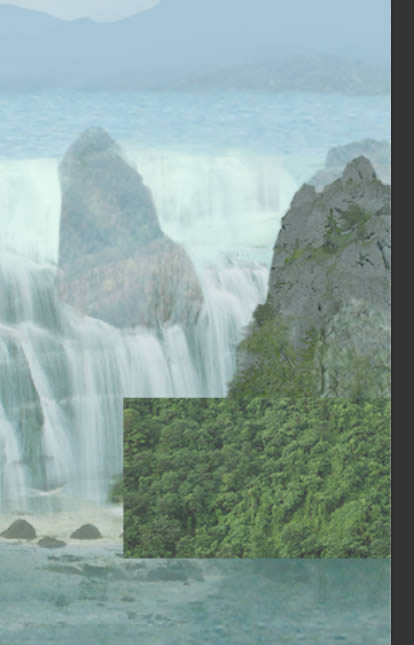
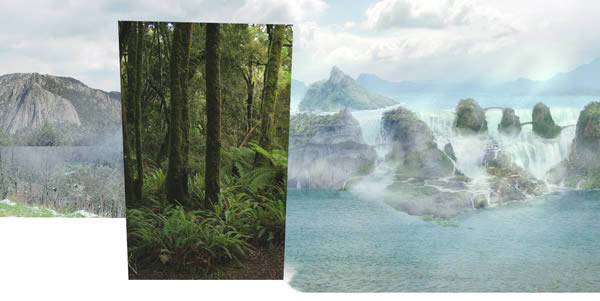
Step 2
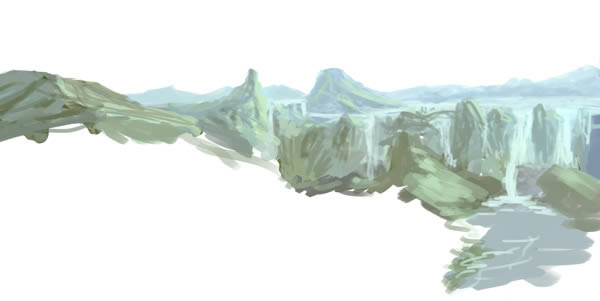
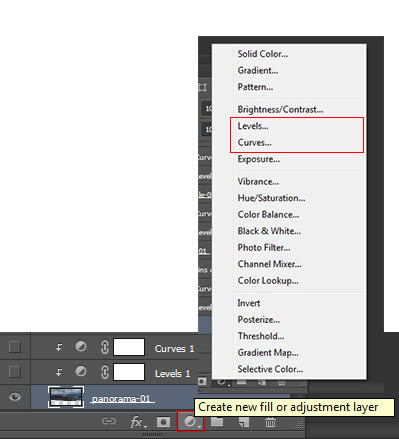
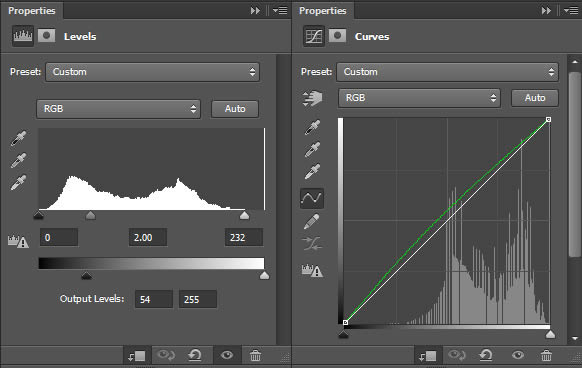
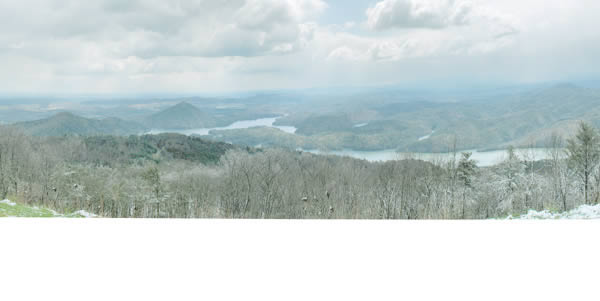
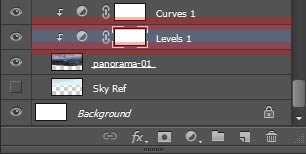
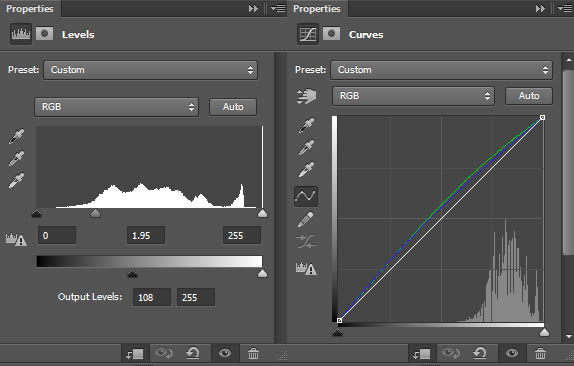
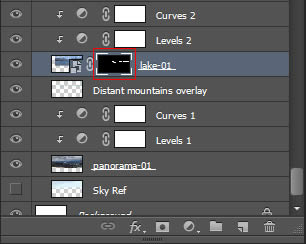
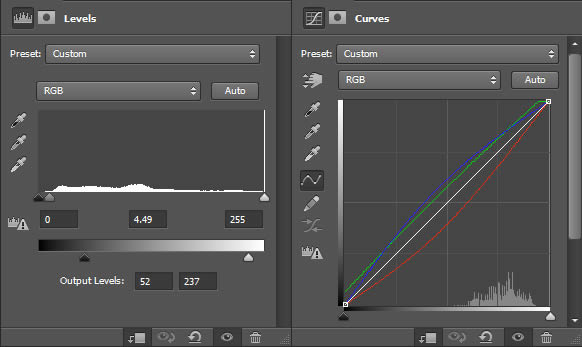
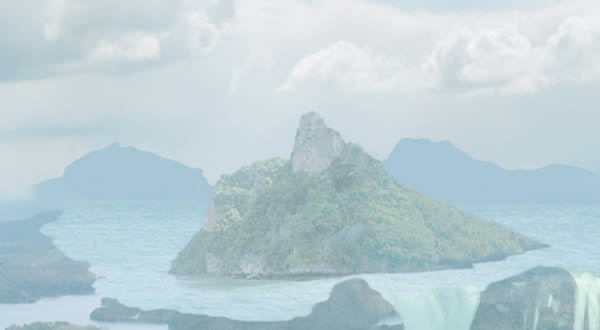
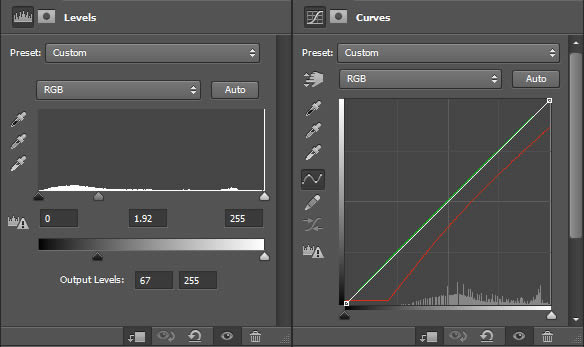
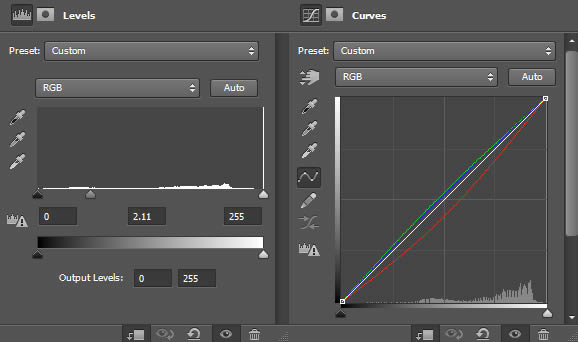
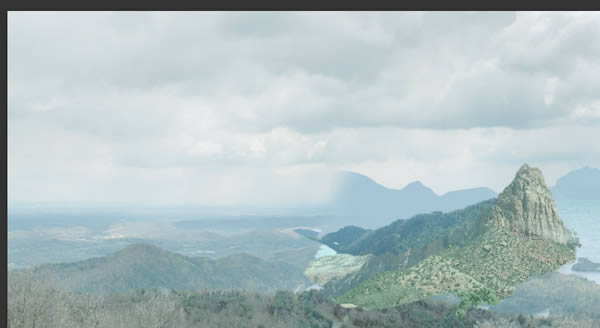
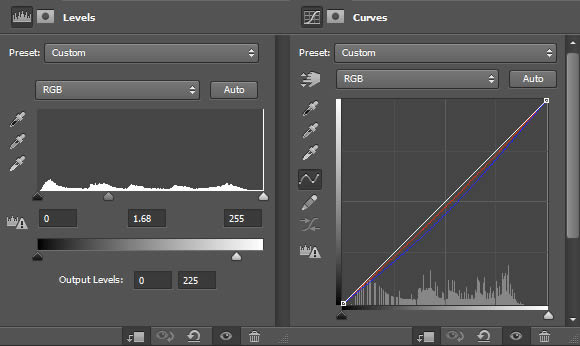
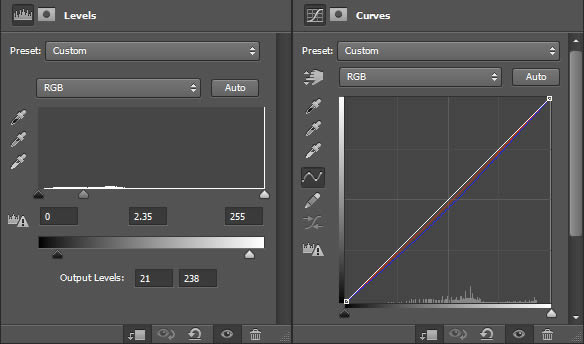
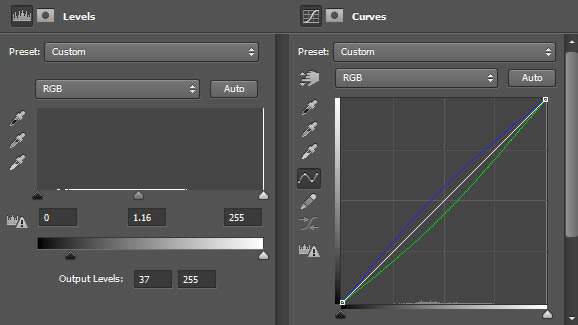
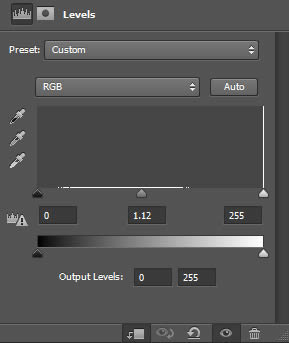
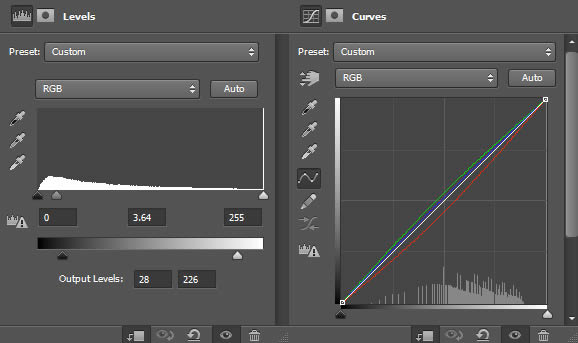
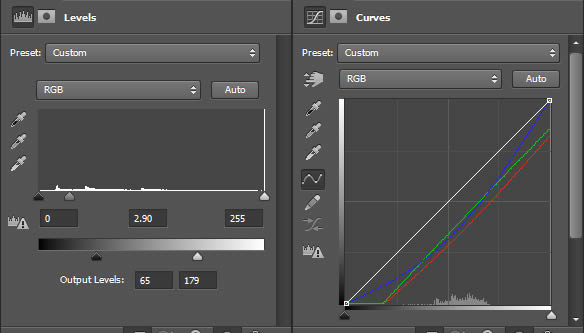
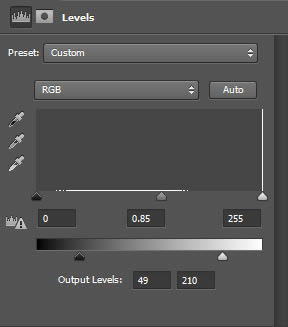
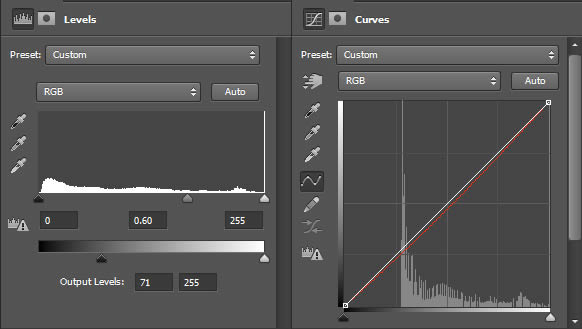
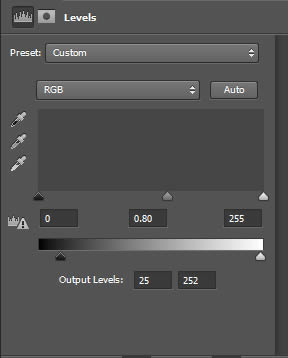
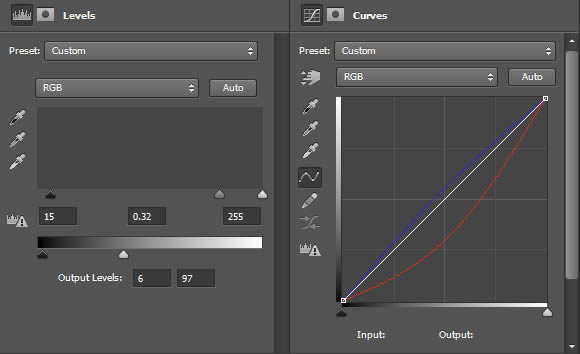
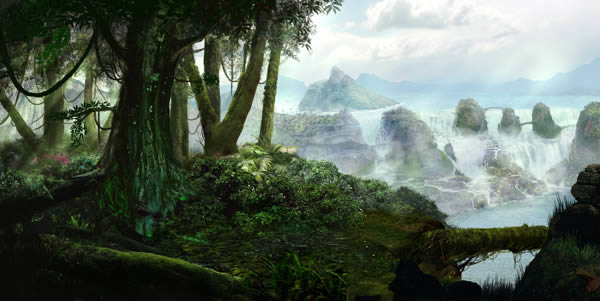
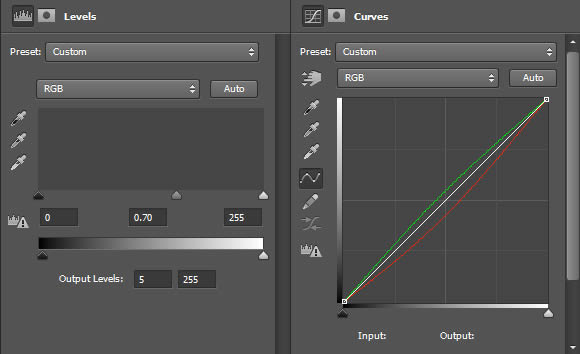
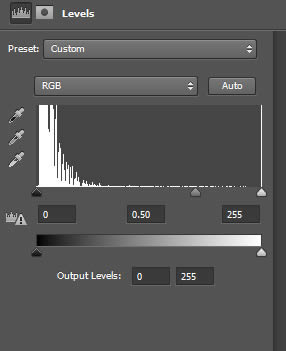
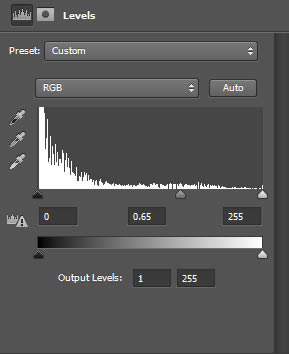
Import panorama-01. Place it as shown below, and create a Levels Adjustment layer and a Curves one, as well. Those Adjustment layers must always be in Clipping Mask.
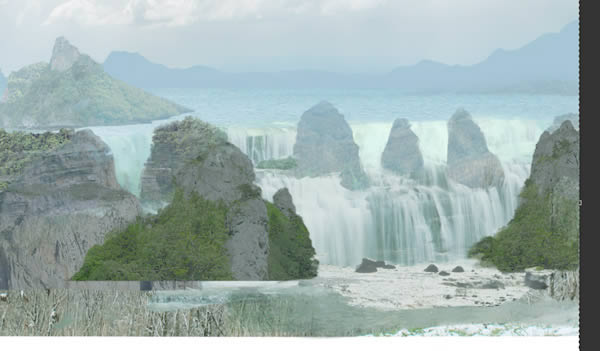
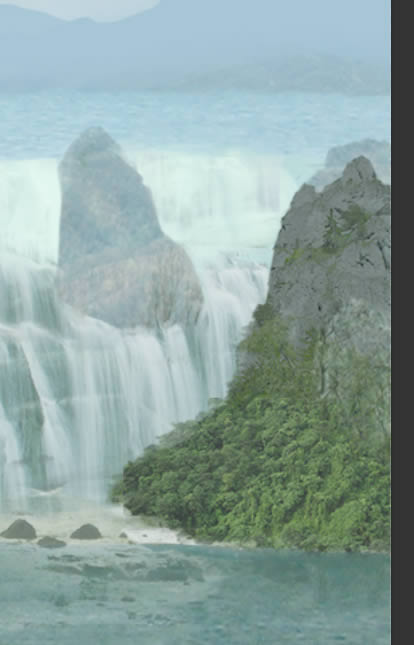
Set those two Adjustment Layers as below.
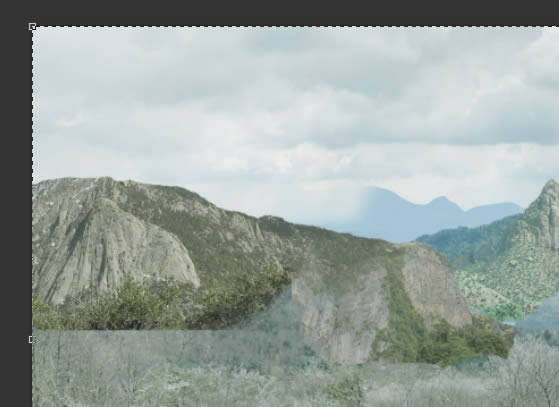
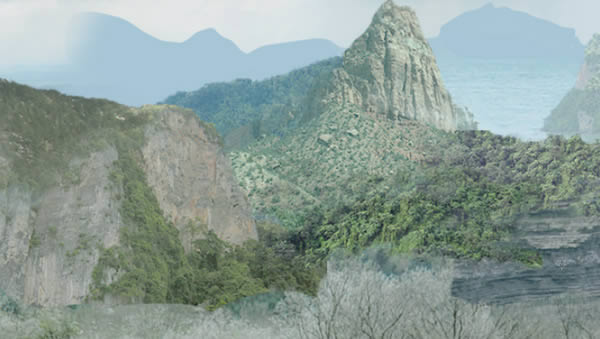
And that’s how it should look.
To create a Clipping Mask, simply Alt + Left Click between two layers. The one at the top will be a Clipping Mask and will use the transparency of the one below therefore.
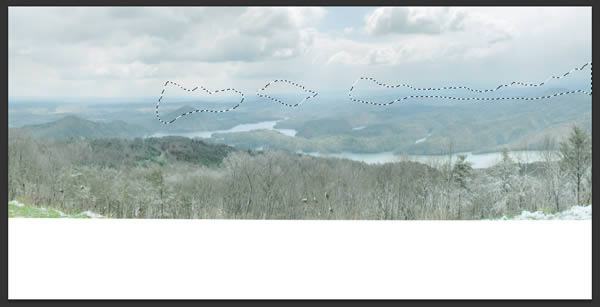
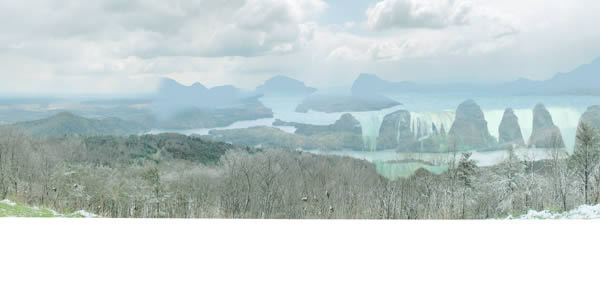
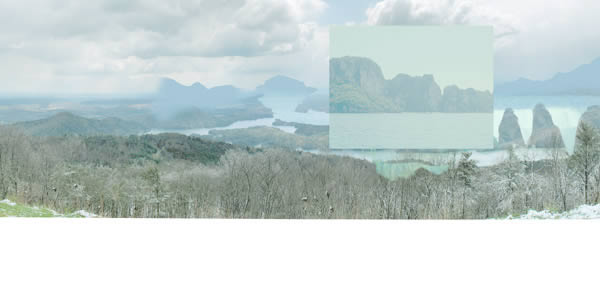
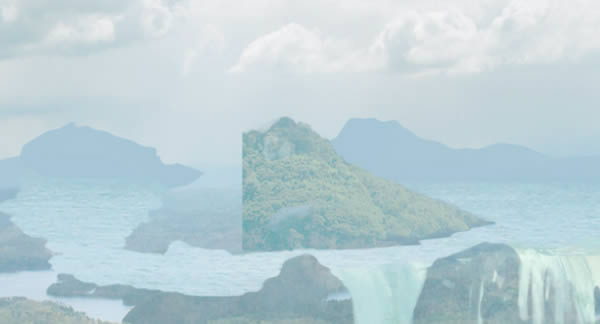
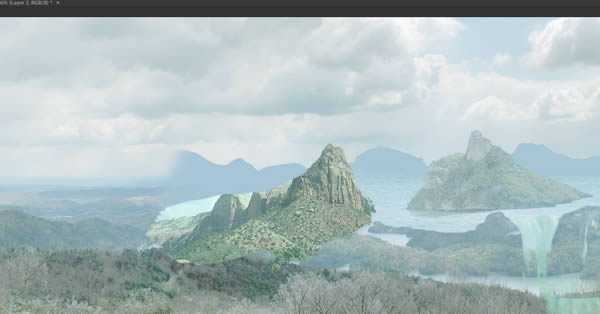
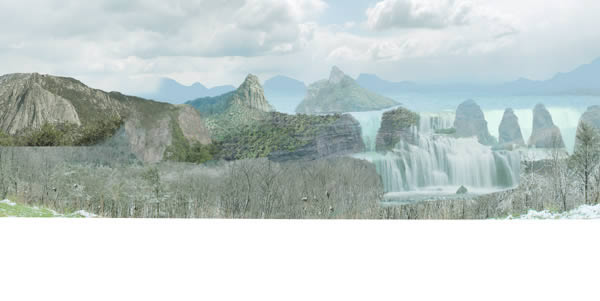
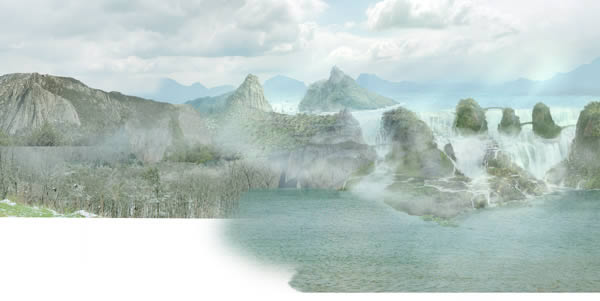
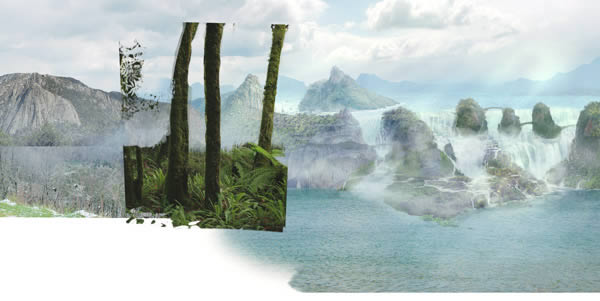
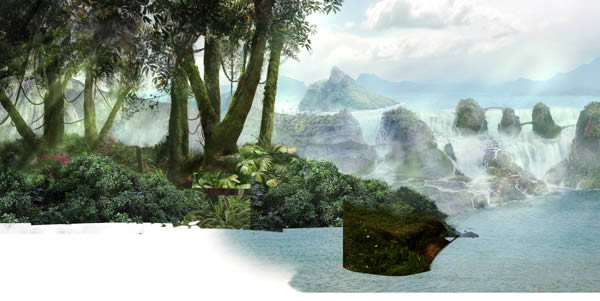
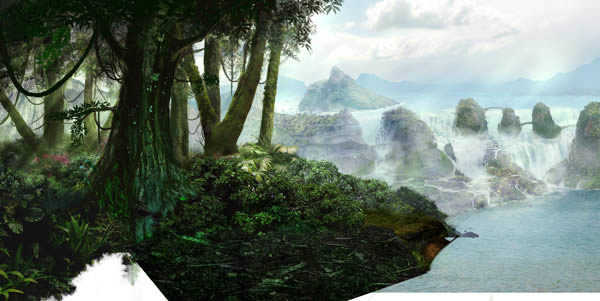
Do a selection such as below to draw some distant mountains. On a new Distant mountains overlay layer, with a light desaturated blue (#a6c8d8), fill the selection (Alt + Del to fill with the foreground color).
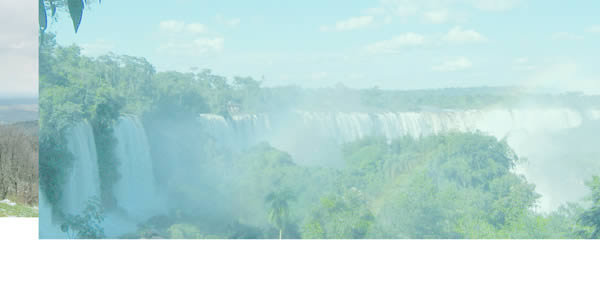
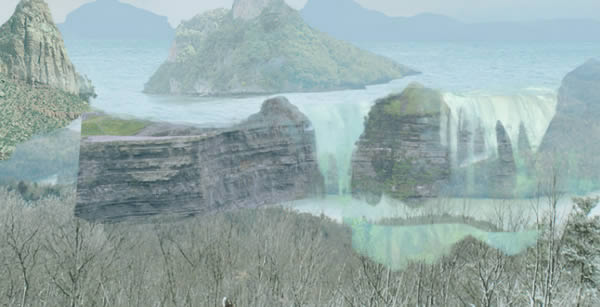
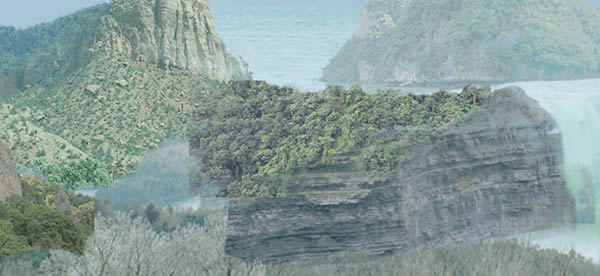
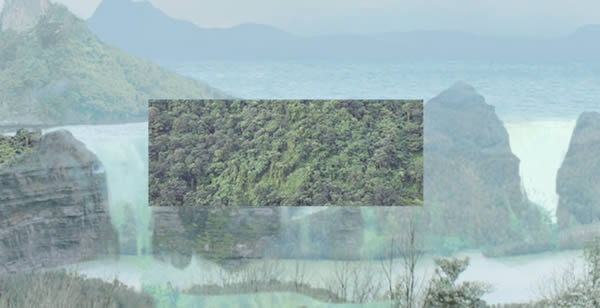
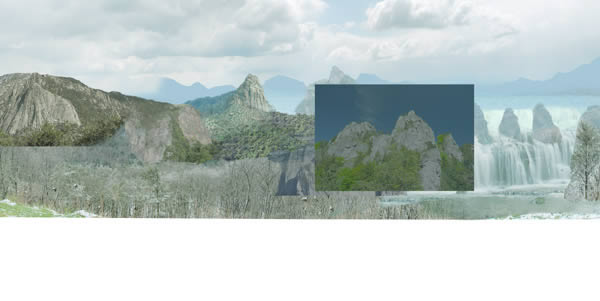
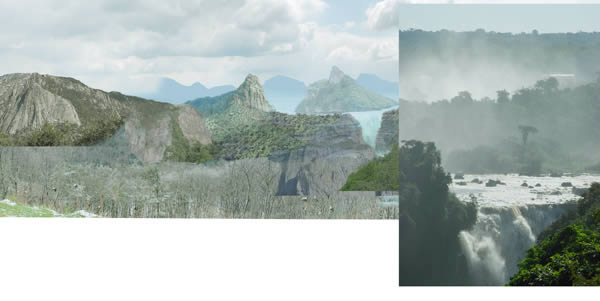
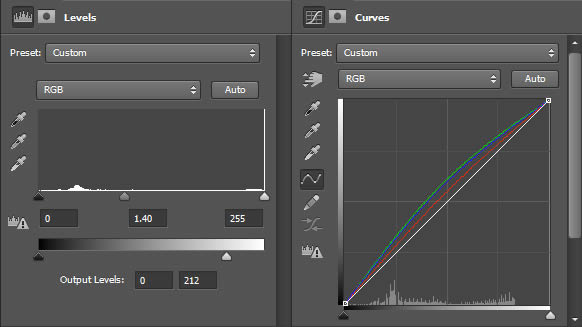
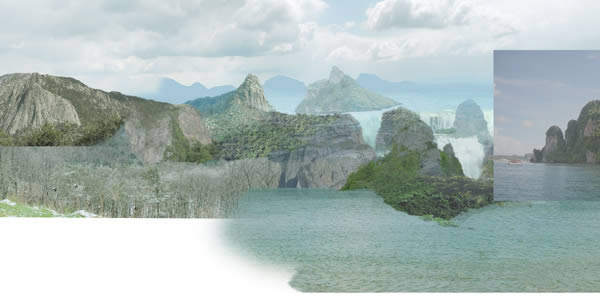
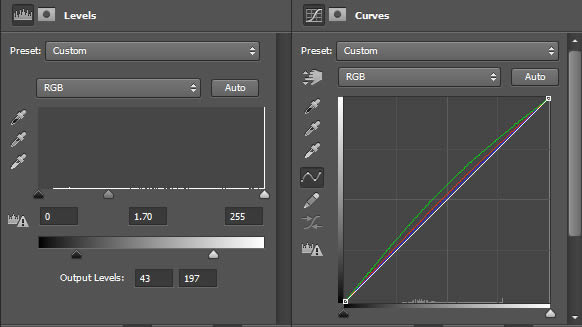
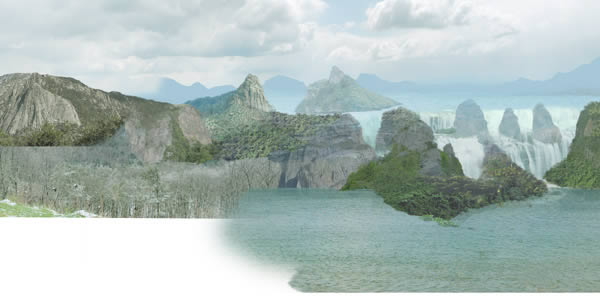
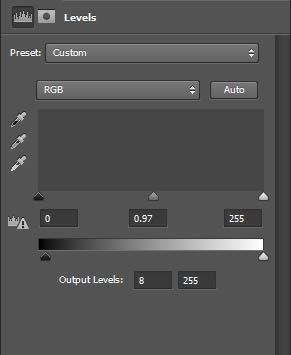
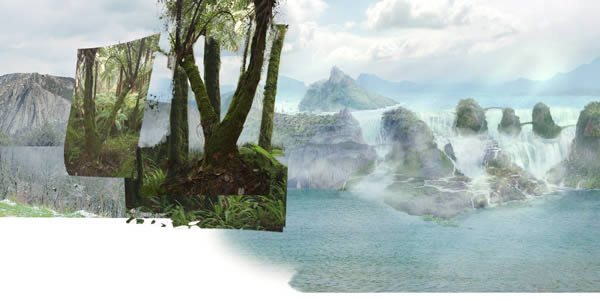
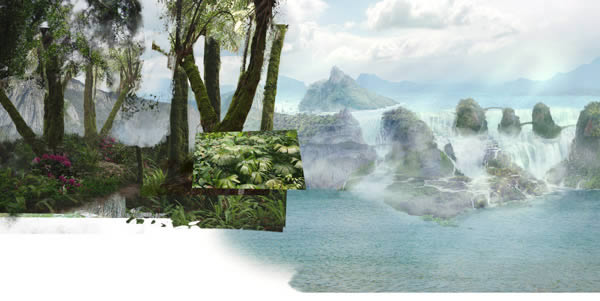
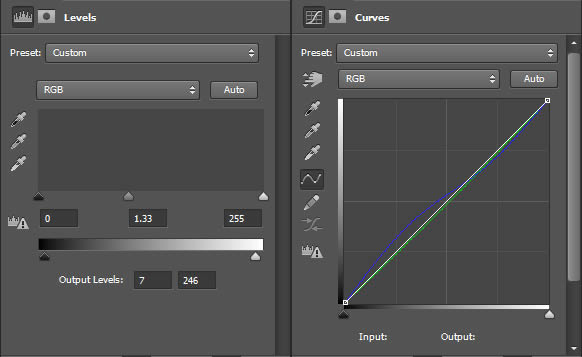
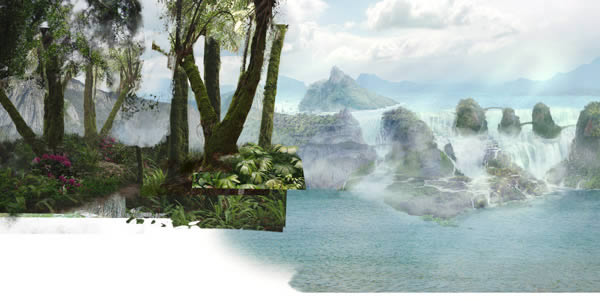
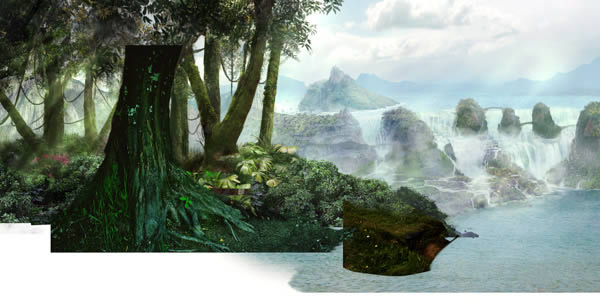
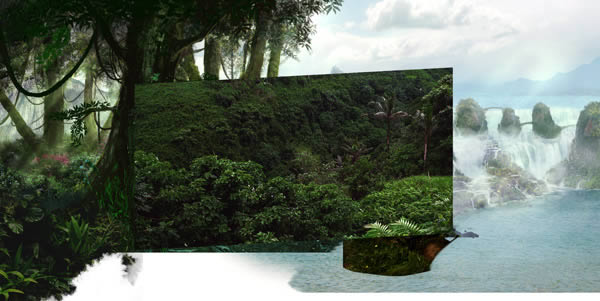
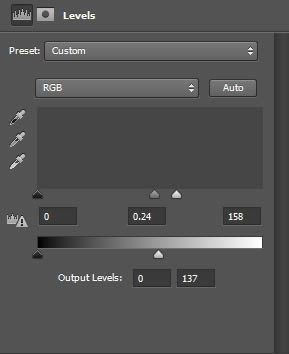
Step 3
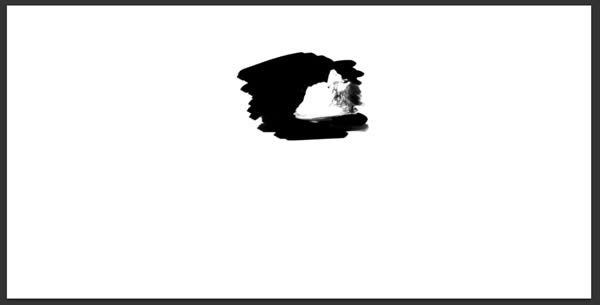
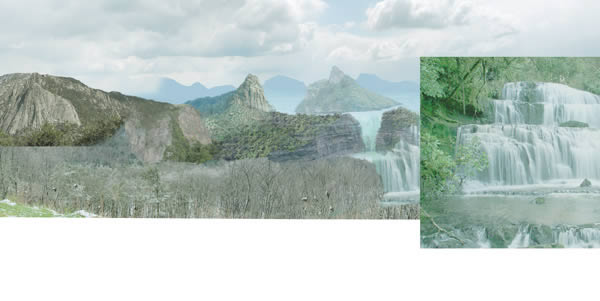
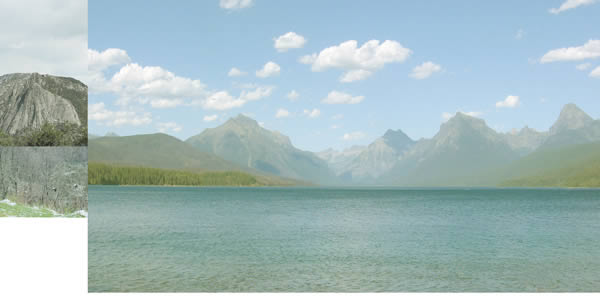
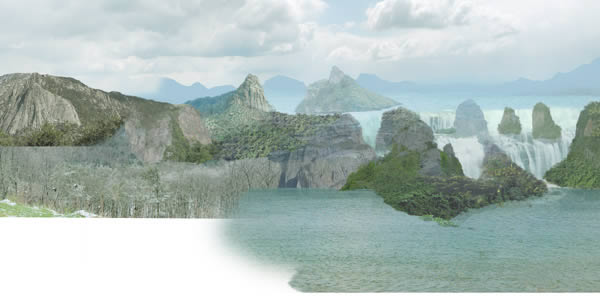
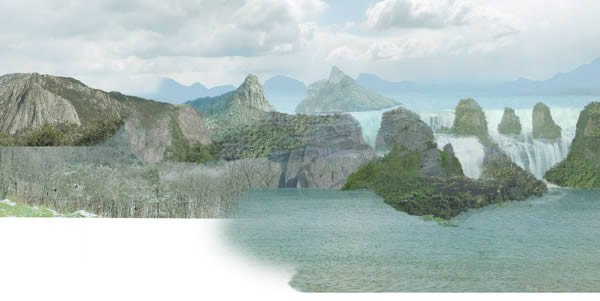
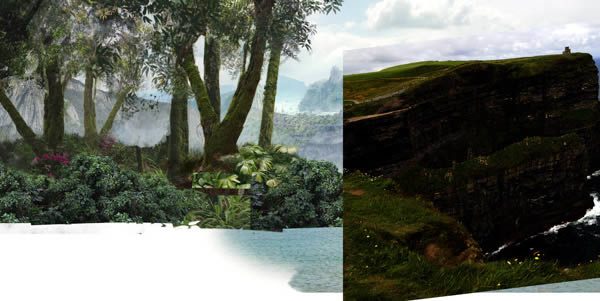
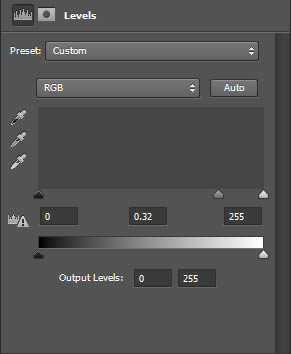
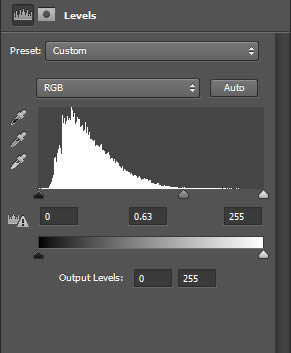
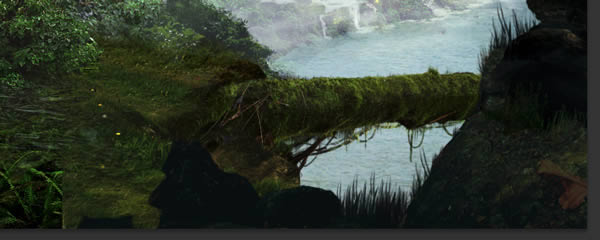
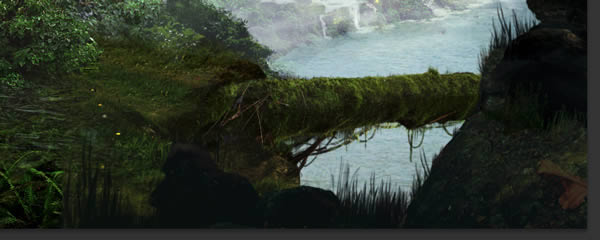
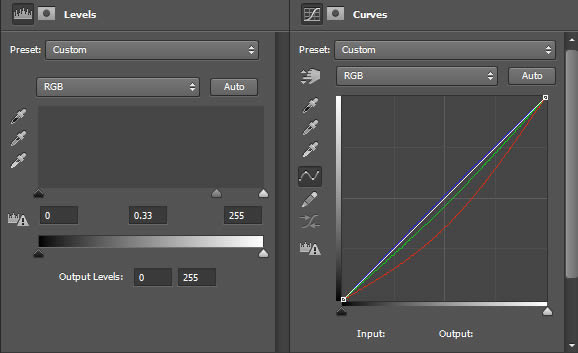
Import lake-01. Place it as below and create a Levels Adjustment layer and a Curves one as well, just as we did previously. Refer to the screenshots for the settings. Please remember very well this step, because this tutorial is about repeating this step until we’re done. There are few other tricks and hand drawing needed, but that’s for detailing and tweaking.
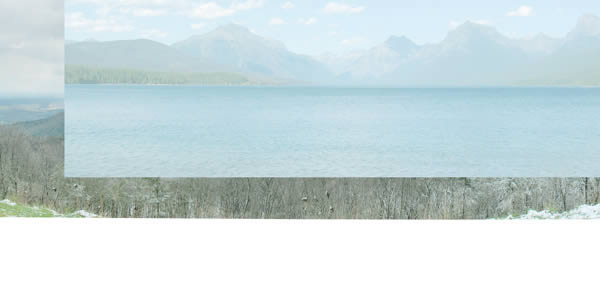
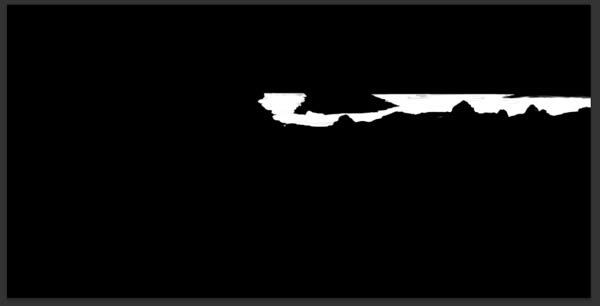
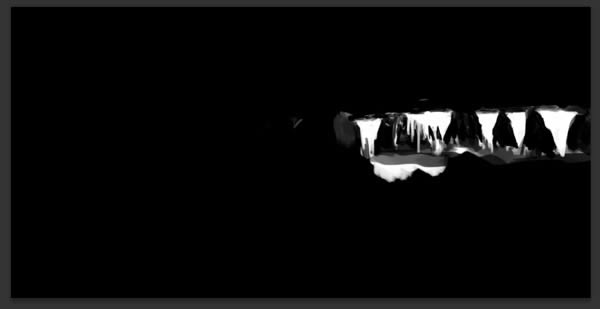
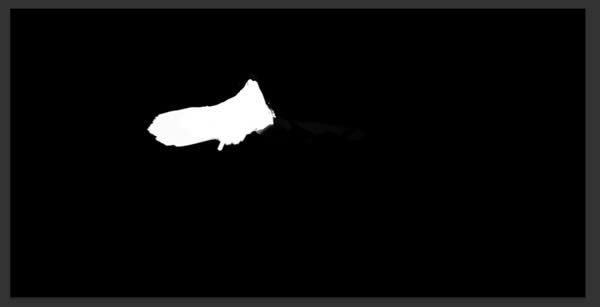
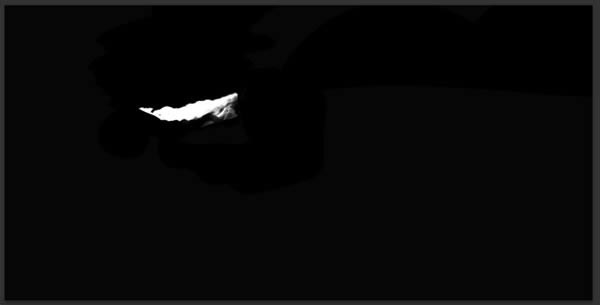
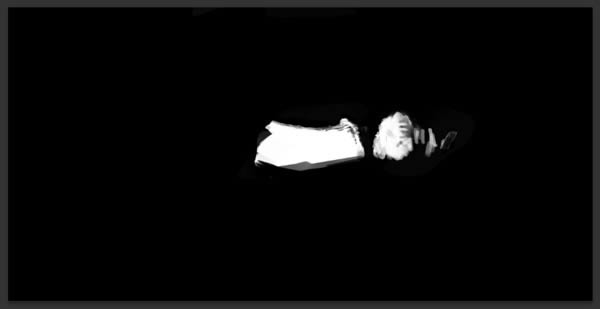
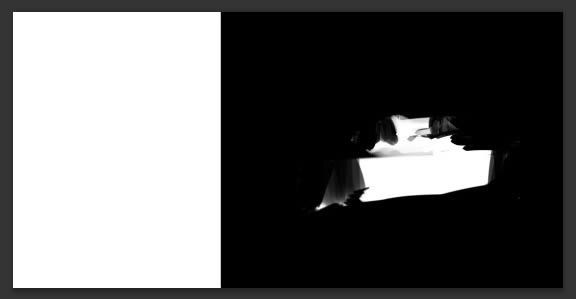
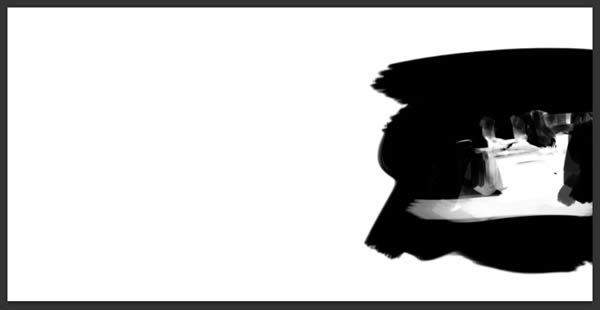
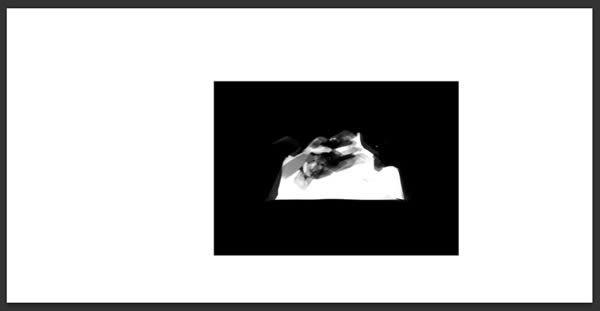
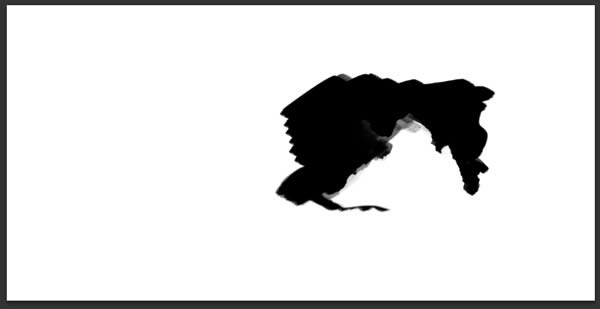
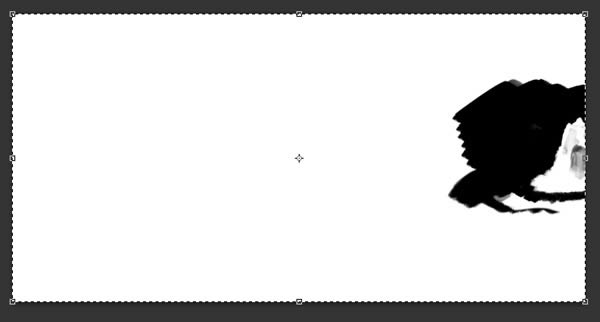
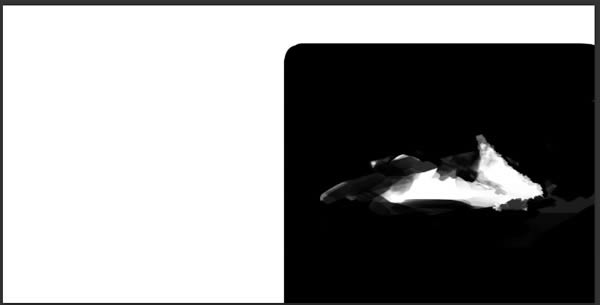
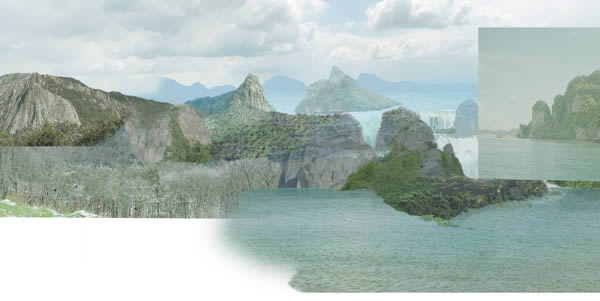
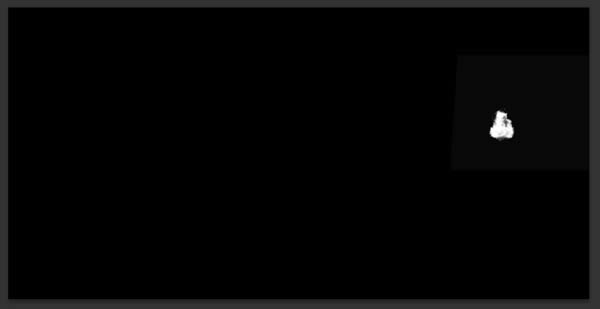
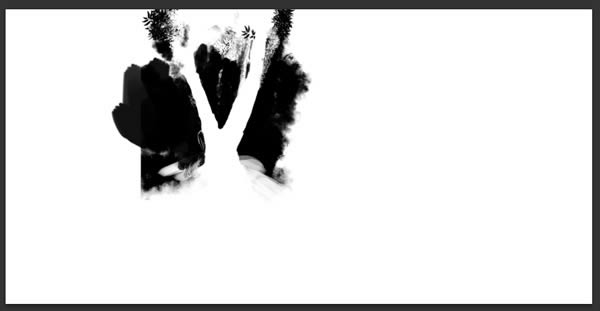
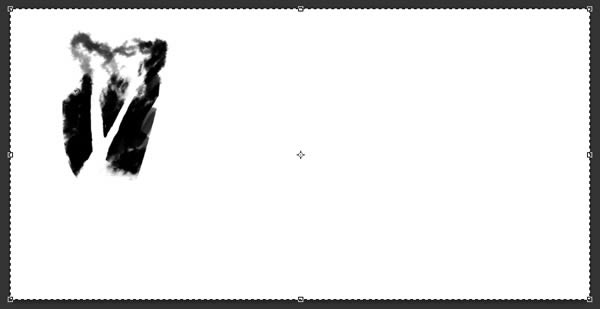
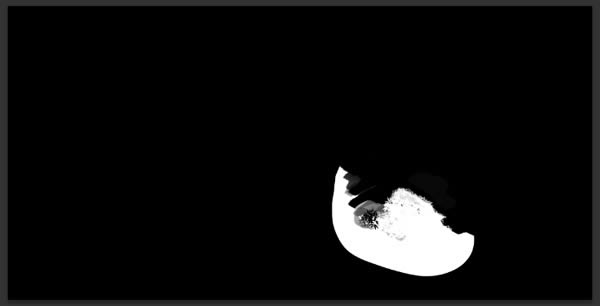
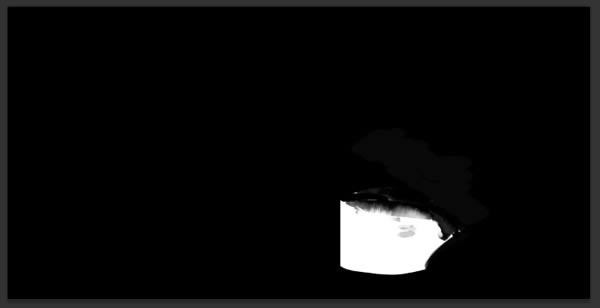
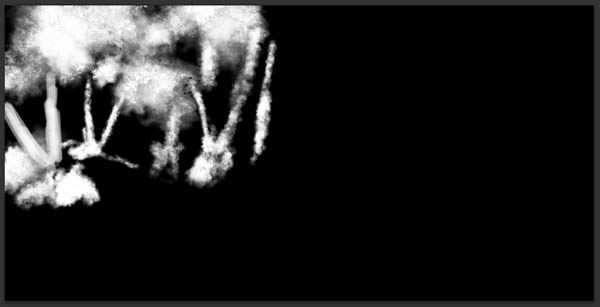
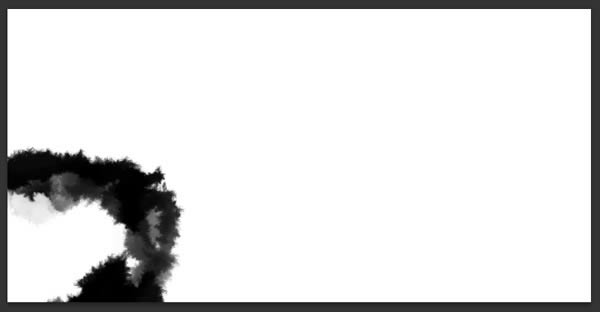
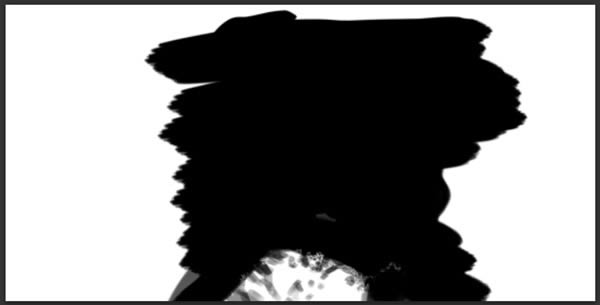
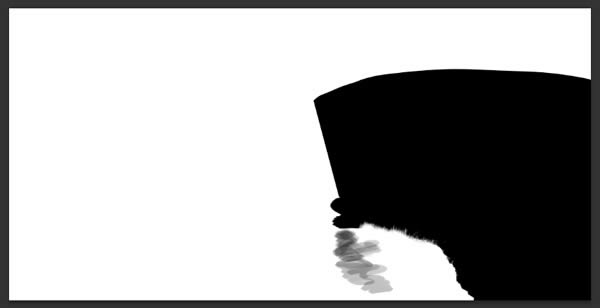
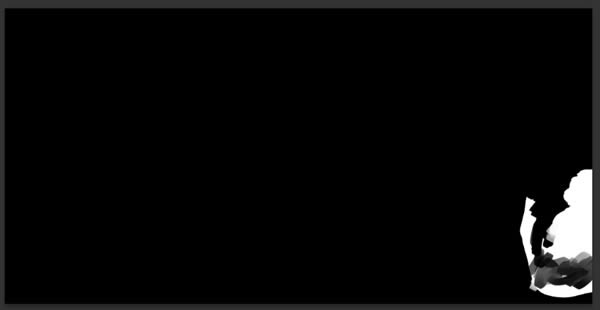
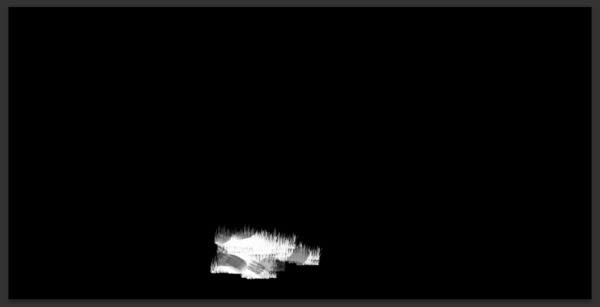
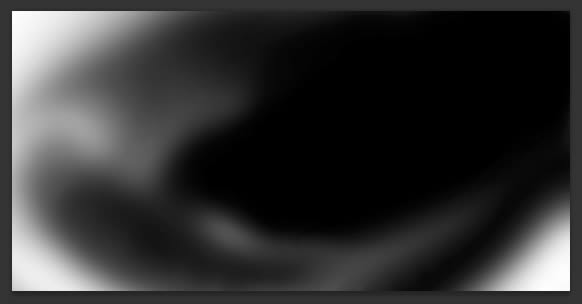
Now, press the Add layer mask button while having the lake-01 layer selected and fill it with black (press D to select black color, then Alt + Del to fill with the foreground color). Make sure you are selecting the layer mask.

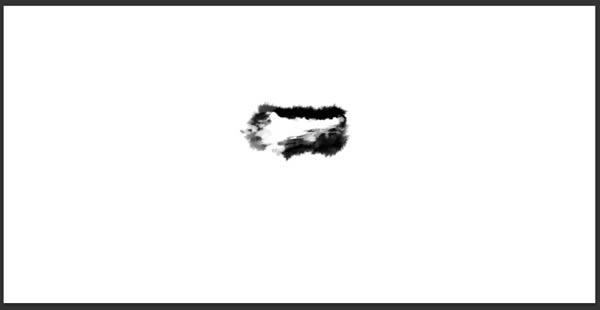
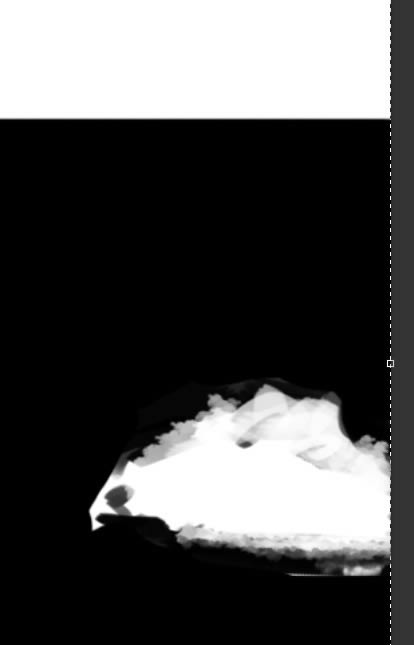
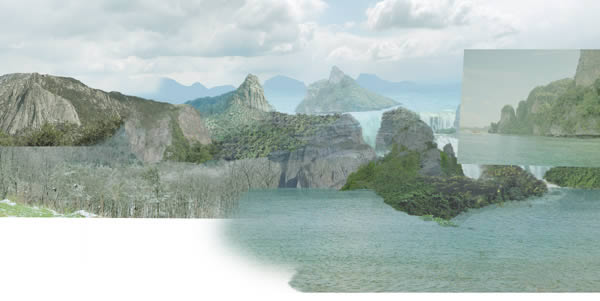
Now we don’t see anything from the lake-01 layer anymore. We have to paint some white on the layer mask in order to be able too see few part of the photo. While still having the layer mask selected, paint few stokes and try to match the picture below.
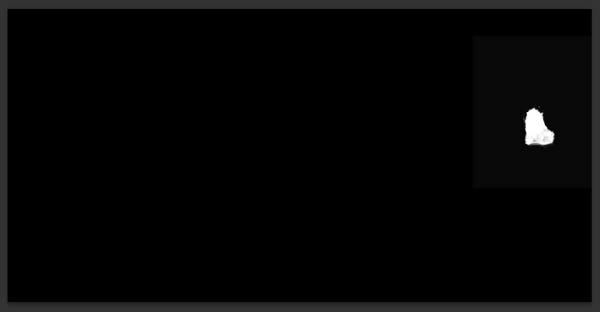
If you press Alt + Left Click on the layer mask, you’ll see an overview of the layer mask. It must look like mine. Do the same command to return to the normal view.
Step 4
Now, pretty much everything is going to be similar to the previous step, which is, to summarize:
- Importing a photo from the asset, placing it.
- Adding a Level Adjustment Layer to match the values. (Set as Clipping mask)
- Adding a Curves Adjustment Layer to match the hues. (Set as Clipping mask)
- Adding a layer mask, filling it with black and painting some white where the photo must be visible.
From now, the tutorial is going to be faster and less precise, since it’s pretty much always the same step, but with different photos and Adjustment Layer settings. We’ll need sometimes few other layers, but I’ll give more precise information when it happens. So, please be sure to understand very well this process.
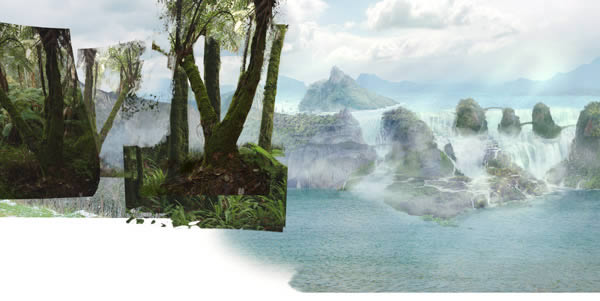
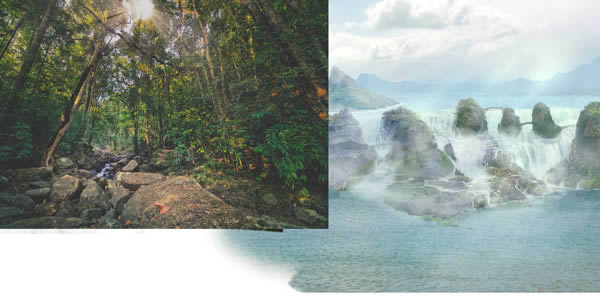
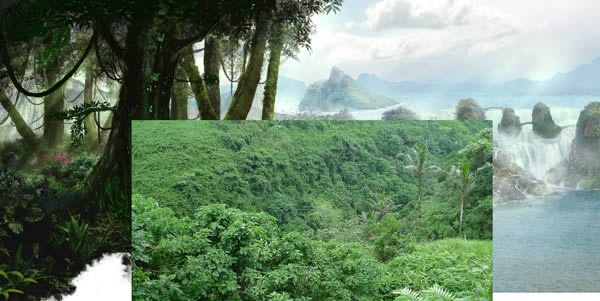
Step 5
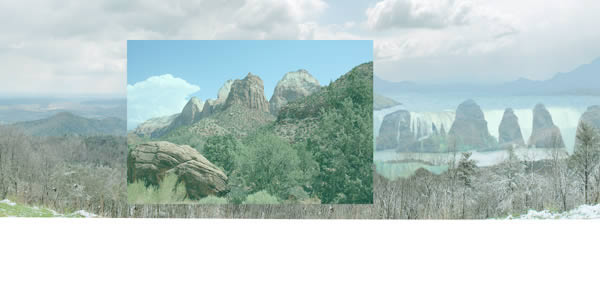
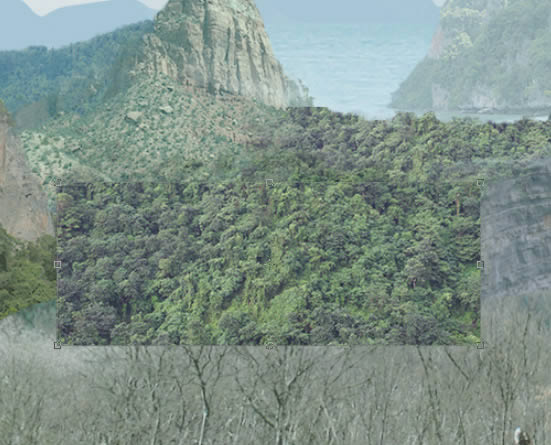
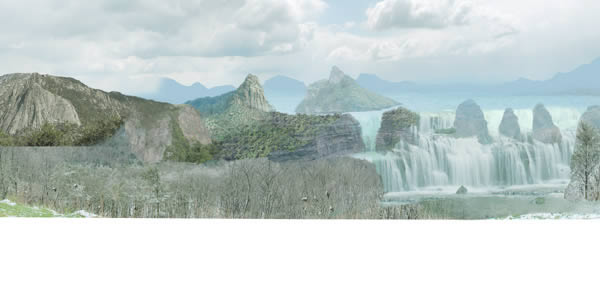
Import jungle-08, and repeat the Step 3 (summarized in the Step 4).

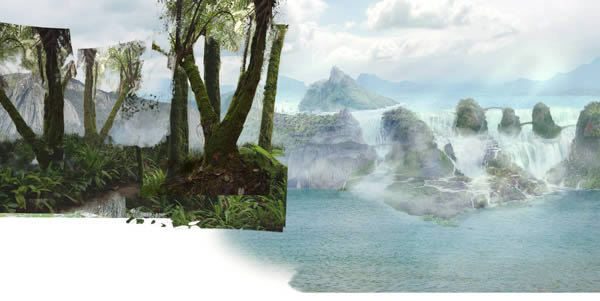
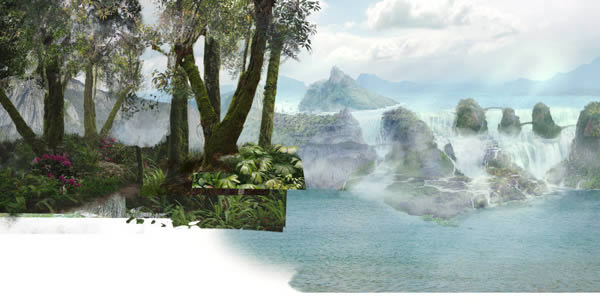
Step 6
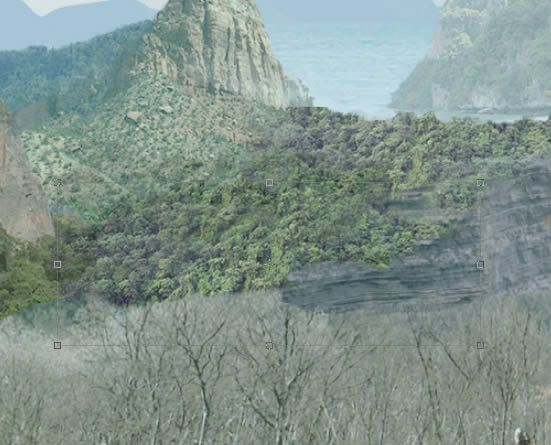
Repeat Step 3 with mountain-06.
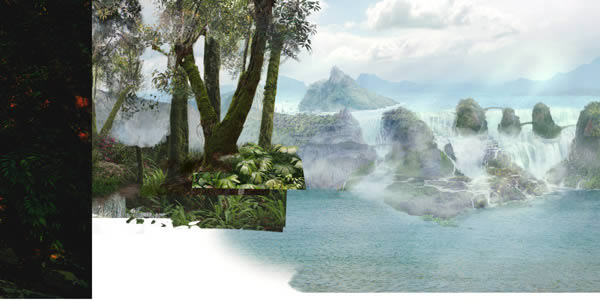
Step 7
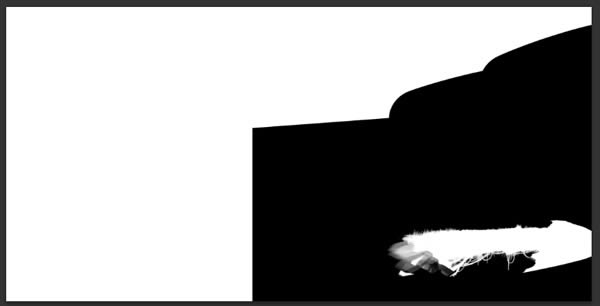
Repeat Step 3 with mountain-05. Add a Color Balance Adjustment Layer in addition to the two usual ones.
The layer mask isn’t black everywhere, because I did a small change in this step: I left everything visible, therefore, in white, and then I drew some black in the layer mask, to hide unwanted parts of the photo.
Step 8
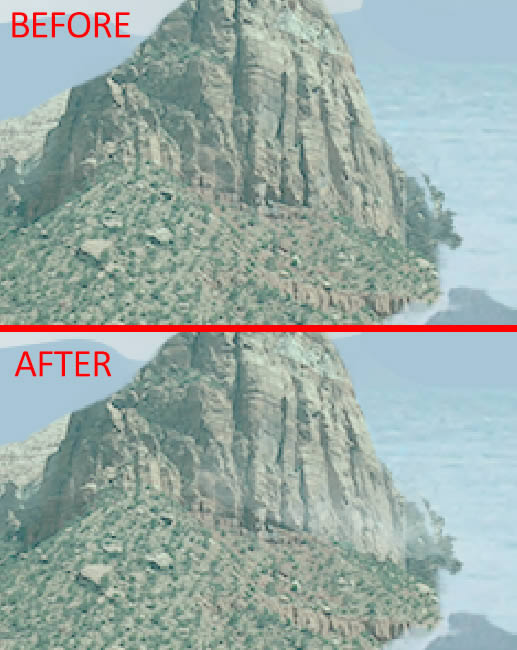
Repeat Step 3 with mountain-03.
Now create a layer called Fog and with a soft low opacity brush, separate a bit better the forest from the mountain, such as below. Use the Lasso Tool (L) to erase precise shape in the fog.
Step 9
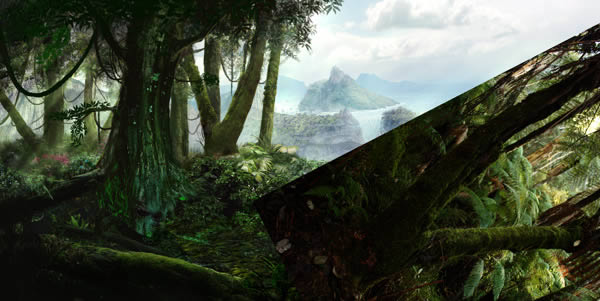
Repeat Step 3 with jungle-02.
Step 10
Repeat Step 3 with mountain-02.


Step 11
Repeat Step 3 with mountain-04.

Step 12
Repeat Step 3 with cliff-02.
Step 13
Repeat Step 3 with jungle-05.
Now duplicate the jungle-05 layer and both Adjustment Layers, move them as below, fill the layer mask with black and paint, with a grunge brush, some tree shapes on the layer mask.
Duplicate those three layers again, place them as below, slightly change the Level Adjustment Layer and repaint the layer mask as shown below.

Now duplicate those three layers again and change it as below.

Step 14
Repeat Step 3 with water-01.
Duplicate the three layers we just created, change the position and the layer mask as shown below.
Step 15
Repeat Step 3 with cliff-01.
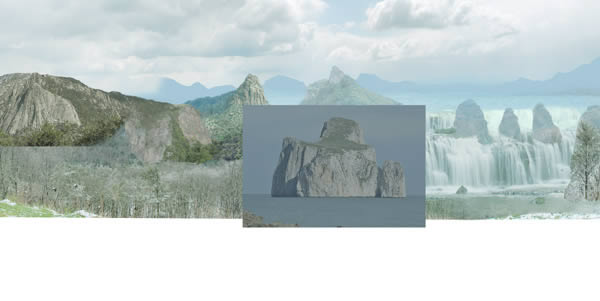

Step 16
Repeat Step 3 with mountain-01.
Duplicate those three last layers and change the position and the layer mask, such as below.
Step 17
Repeat Step 3 with water-02.
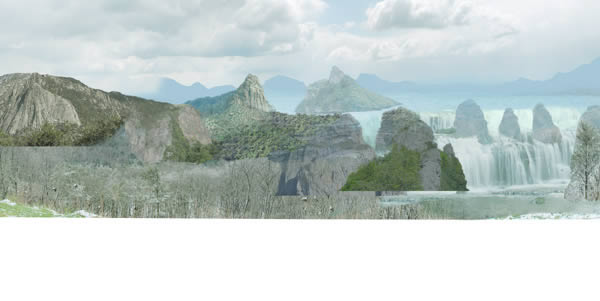
Step 18
Repeat Step 3 with lake-01.

Step 19
Repeat Step 3 with jungle-06. We don’t need a Curves Adjustment Layer for this one.
Step 19
Repeat Step 3 with jungle-07.


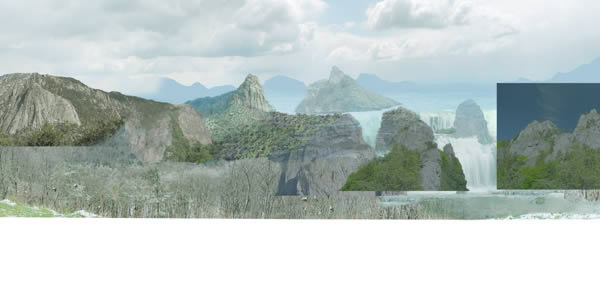
Step 20
Repeat Step 3 with mountain-05.

Duplicate those three last layers, place them as below, change the layer mask and the Levels Adjustment Layer.


Duplicate those three last layers, place them as below and change the layer mask.
Duplicate those three last layers, place them as below and change the layer mask.


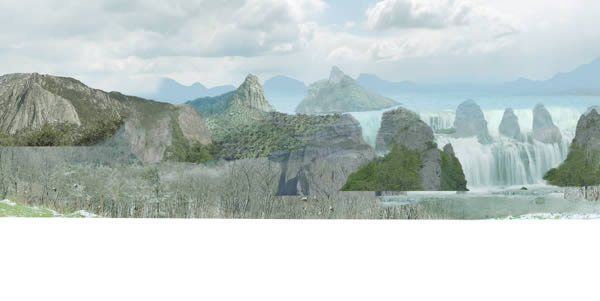
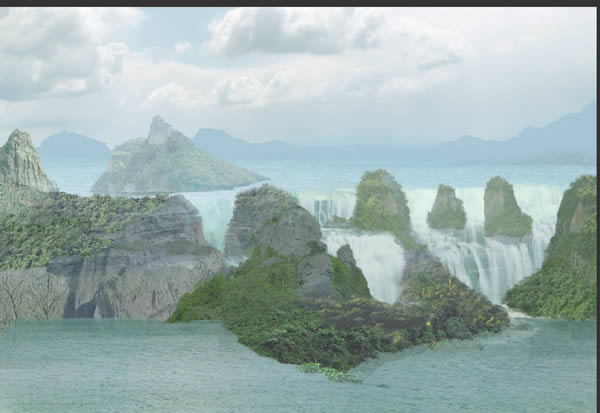
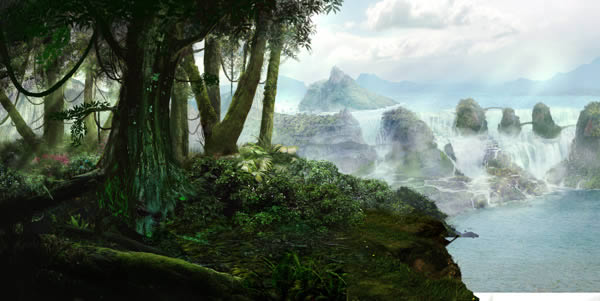
Step 21
Now we’re done with the photos for the background. We need more small details, simply draw them on a new overlay layer with a brush which has some small noise on it.

Step 22
Let’s add some shadow. Create a new Levels Adjustment Layer, set it as below, full the layer mask with black and paint some white where you want the shadow to appear. Refer below.


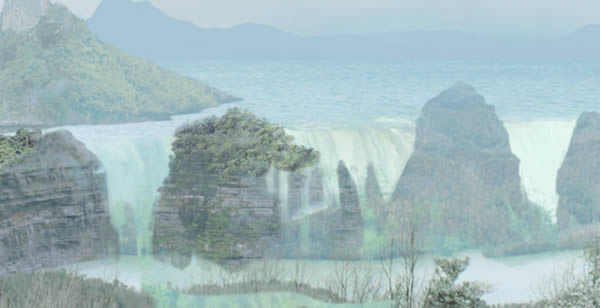
Step 23
Now, on a new Water fog layer, draw some fog generated by the waterfalls.

Step 24
Now, on a new Depth fog layer, draw some fog to separate few layers.

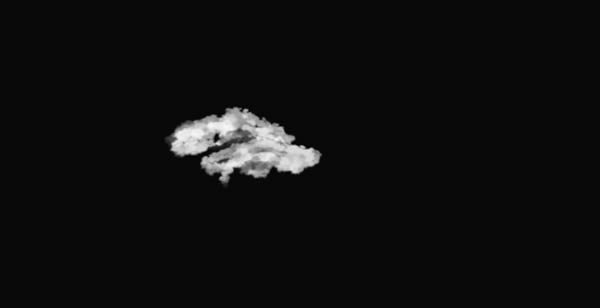
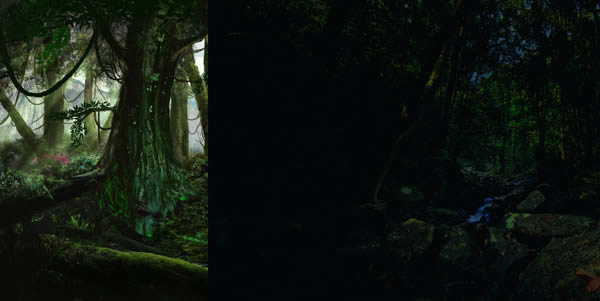
Step 25
Now, on a new Global fog layer, draw some ambient fog, such as shown below. It helps to add depth and to have a bit less contrast than we had before.

Step 26
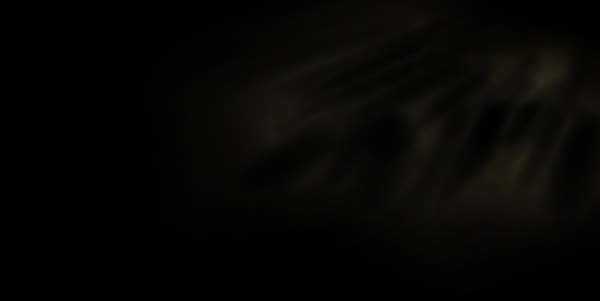
Create a new layer called Ambient light, set the blending mode to Linear Dodge (Add), fill it with black, take a soft brush with 10% opacity, change his mode to Screen, and with a middle brightness full saturated yellow (#827700), paint some rays of light from the right top to the left bottom.
Here is a preview of the layer if you switch his mode back to Normal. As you can see, you don’t need to paint too much. Abusing of this trick will result having a surreal lightning. But having a bit of this adds a very interesting effect.
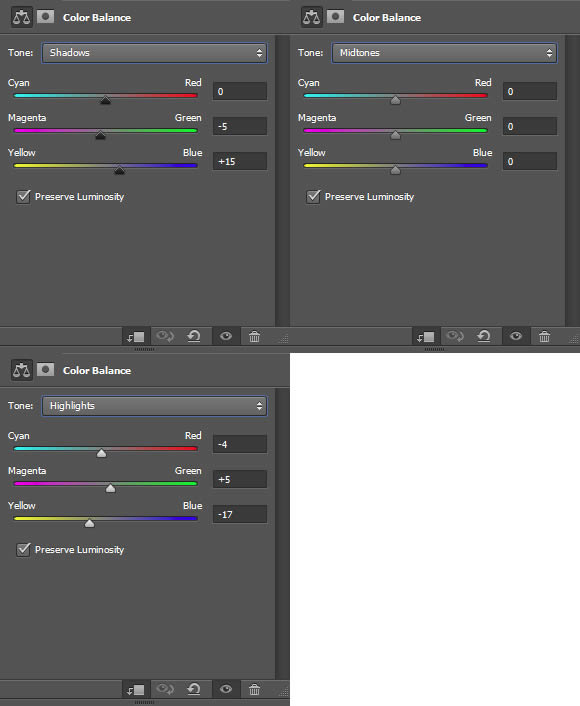
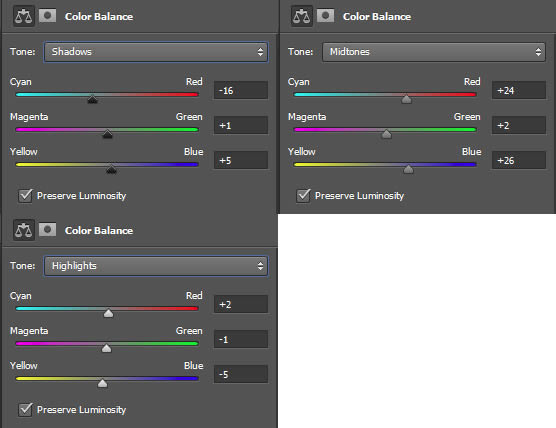
Step 27
Add a new Color Balance Adjustment Layer, and set it as below. We need more blue because of the atmospheric perspective. We need the shadows to be more blueish as well.

Step 28
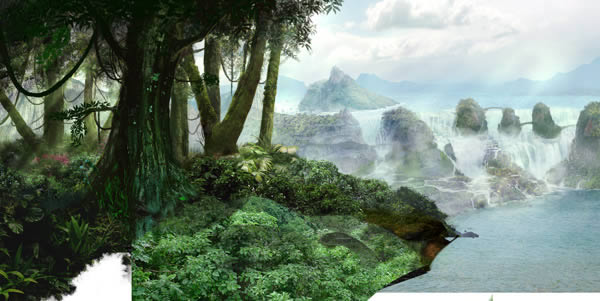
Now Create a new Vibrance Adjustment Layer, set the Vibrance to + 52, and paint some black in the sky and distant mountains, because we don’t want them to be more saturated, due to the atmospheric perspective as well.
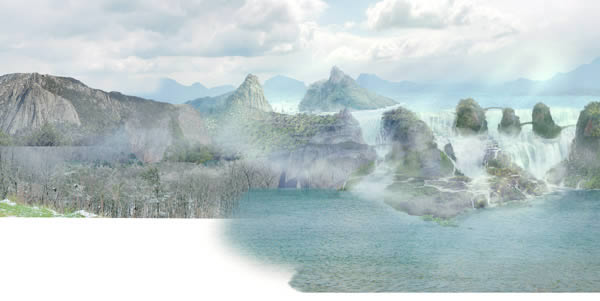

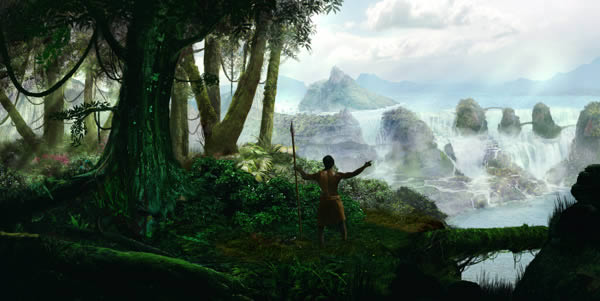
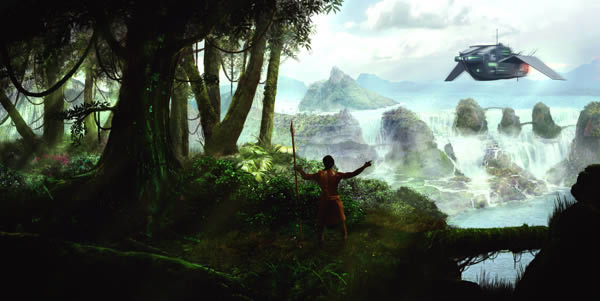
We’re finally done with the background. Let’s move on after a small break maybe.
3. The Midground (MG)
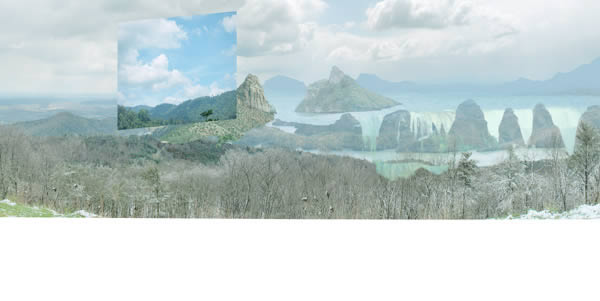
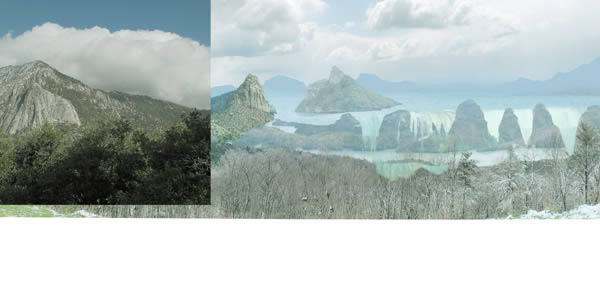
Step 1
As we did for the FG, we create a MG Ref layer based on the sketch. I changed it a bit since I wanted the MG forest to be more dense and more correctly placed in perspective. We might miss a real midground, but it gives that isolated hill’s effect and I find it pretty cool. Close the BG group, and let’s work on the MG one.
Step 2
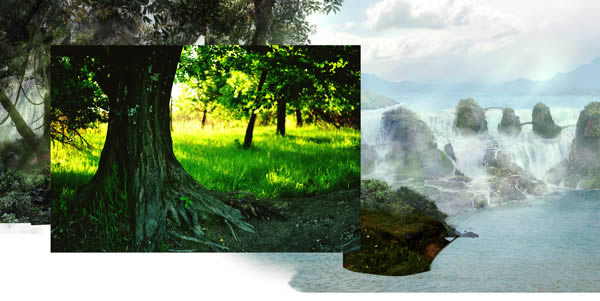
We have less color correction to do for the midground. I’ll give you only necessary settings. If there isn’t any Curves Adjustment Layer settings given, consider there isn’t that correction for the specified step. Let’s start with the tree-03 asset.
Step 3
Repeat the step with the tree-02 asset.

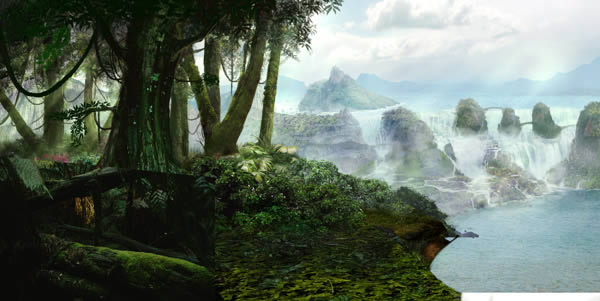
Duplicate those two previous layers, transform (Command/Ctrl + T) them as shown and change the Levels Adjustment Layer and the layer mask.


To separate the layers, create a new overlay layer and draw some dark grass as shown.


Step 4
Duplicate the two first layers we created in the step 3 (tree-02 his Levels Adjustment Layer), place them and change the Levels Adjustment Layer and the layer mask such as shown below.


Step 5
Now let’s move on. Import the asset tropical-foliage-01 and do the usual steps.


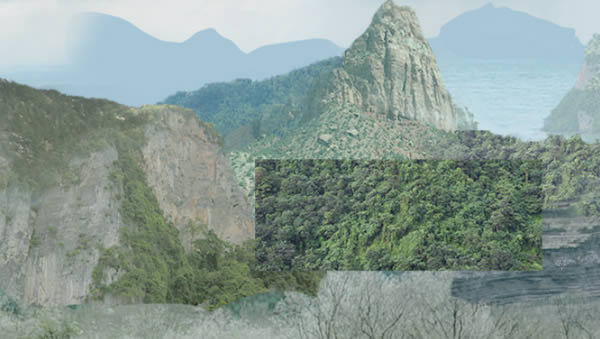
Step 6
Import the asset jungle-03 and do the usual steps.


Step 7
Import the asset tropical-foliage-02 and do the usual steps.

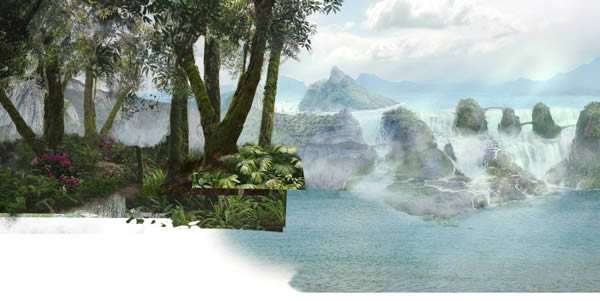
Step 8
Import the asset jungle-01 and do the usual steps. We create some foliage here.


Duplicate the two previous layers, change the position and the Levels Adjustment Layer. Refer below.


Duplicate the two previous layers, change the position and the Levels Adjustment Layer, as shown below. As you can see, you need to add a Curves Adjustment Layer.


Step 9
Import the asset jungle-04 and do the usual steps.


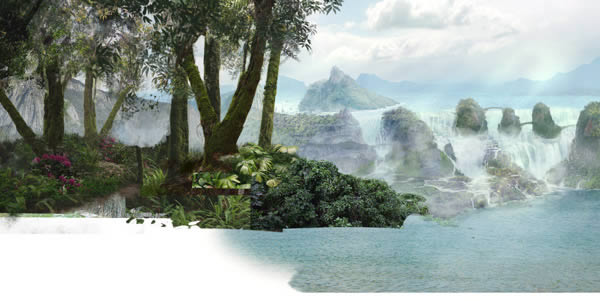

Duplicate the three previously created layers, and place them as shown below.
Duplicate again the three previously created layers, and place them as shown below.

Step 10
Import the asset water-02 and do the usual steps. Add a Hue/Saturation Adjustment Layer.


Step 10
Import the asset cliff-02 and do the usual steps.

Step 11
Okay, now we imported every photo for the MG. Let’s select the MG group, and create a new group called MG as well. We do is in order to be able to use the transparency of that group to do a Levels Adjustment on a Clipping mask applied to that group. Let’s do it, and set the following settings. Fill the layer mask with black and paint some white where you want the shadows to appear.

Step 12
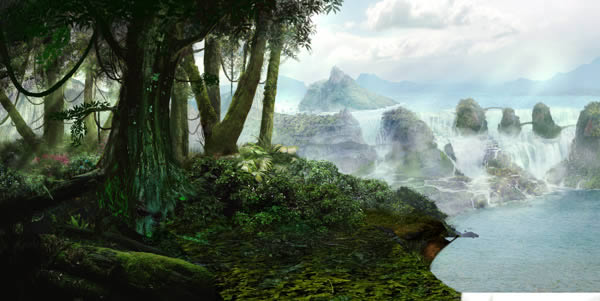
Create a new layer and paint details such as grass, shadow, highlight, etc.

Step 13
Create a new layer called MG Ambient Light, set the blending mode to Linear Dodge (Add), fill it with black, take a soft brush with 10% opacity, change his mode to Screen, and with a middle brightness full saturated yellow-green (#4f8c00), paint some rays of light as shown below, when the mode is set to Normal.

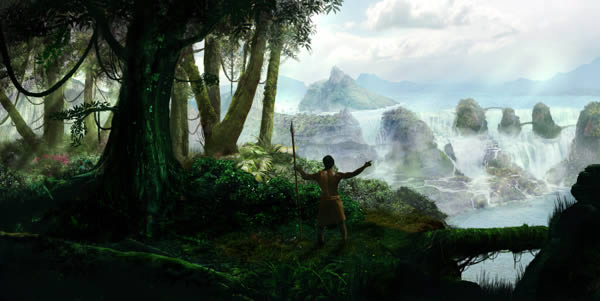
That’s it for the midground. We still have to do the foreground, the ship and the final fx, so, let’s move on.
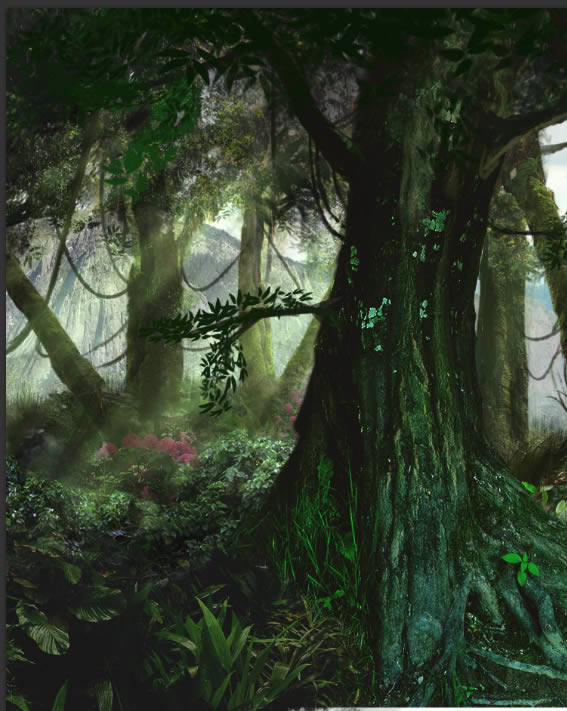
4. The Foreground (FG)
Step 1
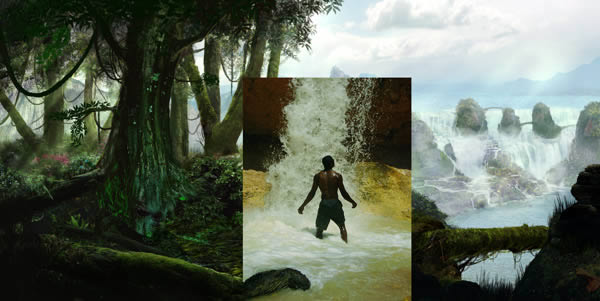
Okay, let’s have a quick preview with a small resketch of the FG. We’ll have a lot to do for this step, because the FG really needs to be well done, precise and nothing is going to hide any parts of it. Let’s get started.
Step 2
Import the asset tree-01 and do the usual steps.


Step 3
Create a Draw overlay layer and draw some branches. We’ll draw a lot more in the foreground, since we really want to have the full control on every foreground’s pixels.

Create a Foliage shape layer and draw some foliage with a custom brush, easily findable on the Internet. Pick a very dark and saturated green such as #031201. Since this area is very dark, we don’t need lots of details to have a realistic render.

Step 4
Import the asset tropical-foliage-01 and do the usual steps. We don’t need any Curves Adjustment Layer for this step.


Step 5
Create a Draw overlay layer and draw some details such as below.

Step 6
Import the asset jungle-04 and do the usual steps. We don’t need any Curves Adjustment Layer for this step.


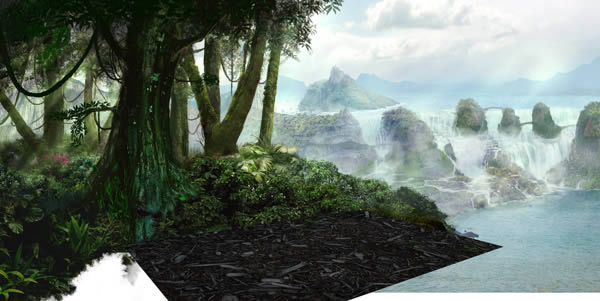
Step 7
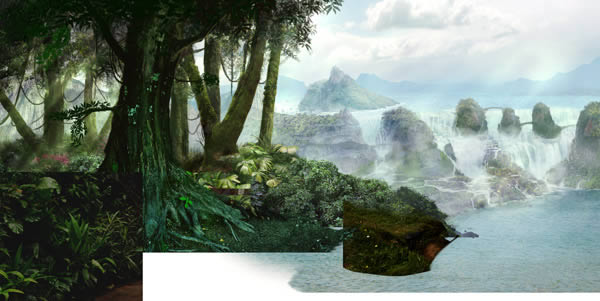
Import the asset ground-01 and do the usual steps. We don’t need any Curves Adjustment Layer for this step.


Step 8
Import the asset jungle-04 and place it as below.
Add a layer mask and remove some parts, such as shown below.

Set the layer’s mode to Overlay.
Step 9
Import the asset moss-01 and place it as below.

Add a layer mask and remove some parts, such as shown below.


Step 10
Import the asset jungle-06 and do the usual steps.

Step 11
Create a Draw overlay layer and draw some details such as below. Use the Clone Stamp Tool (S) if needed.


Step 12
Import the asset tree-03 and do the usual steps. We don’t need Curves Adjustment Layer.

Step 13
Import the asset cliff-02 and do the usual steps.


Step 14
Import the asset tree-02 and do the usual steps. We don’t need Curves Adjustment Layer.


Step 15
Import the asset jungle-01 and do the usual steps.


Step 16
Import the asset mountain-03 and do the usual steps.


Now add a new Level Adjustment Layer, set it as below, fill it with black and paint in white where we want more dark. It was a bit too bright in the shadow area, but we have to keep this brightness in the edges.


Step 17
Create a Draw overlay layer and draw some details such as below.
Step 18
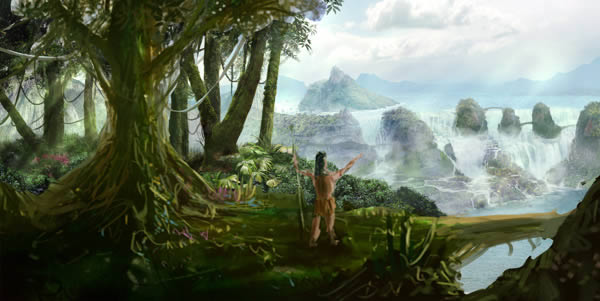
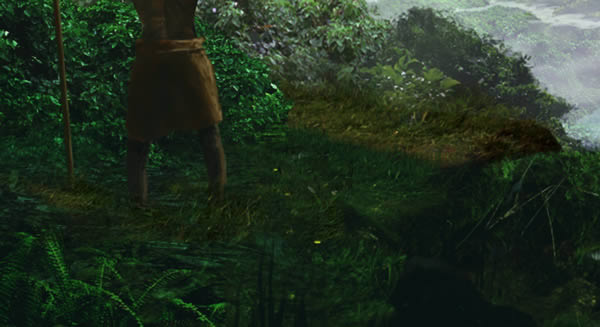
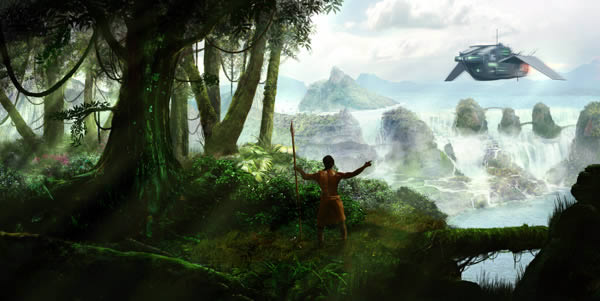
Import the asset man-01 and do the usual steps. Add a Color Balance Adjustment Layer.

Apply the layer mask (you might need to Rasterize layer if imported as a Smart Object) and tweak the arms using the Lasso Tool (L) and some brush strokes. Remove some water on him as well, but it’s a good idea to let some wet and shiny areas, since it’s pretty much a tropical and water world and humidity might be very high there.

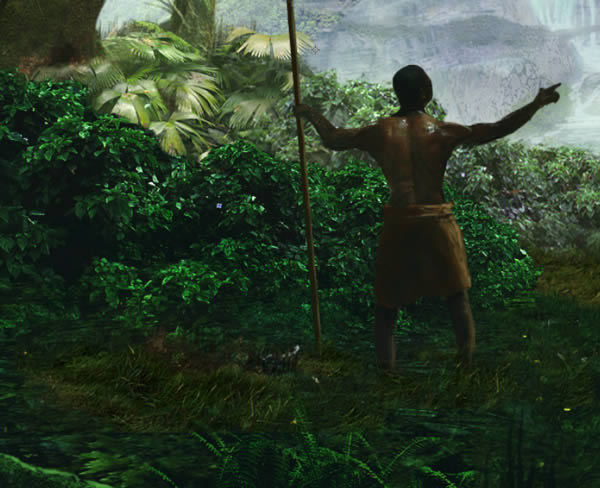
On a layer called Weapon, draw a spear

On a layer called Wear, draw the man’s wear.

Step 19
Let’s add some patches of grass. We have to make the feet disappear well. Hiding everything and using a grass custom brush with white color is a nice way to achieve this. Import the asset cliff-02 and do the usual steps.


Duplicate the three last layers, move it and redraw the layer mask such as below.


Step 20
Create a Draw overlay layer and draw some extra details such as below.

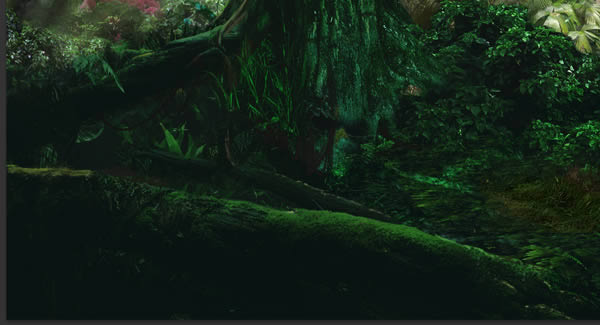
We’re done with the photos for the foreground. Let’s to the final tweaks.
Step 21
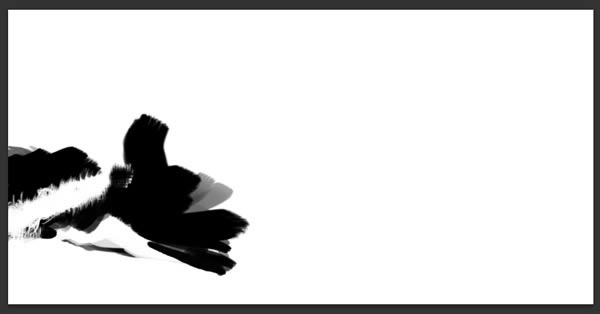
As we did with the MG, Select the FG group, create a new one called the same, and add a Levels Adjustment Layer renamed to Shadows. Set it as Clipping mask to the group. Use following settings, help yourself with the preview of the layer mask. Keep in might that the main light comes from the right side while painting the shadows with a white brush on a black background.

The render in the FG is a bit too green. Add a Color Balance Adjustment Layer set as Clipping mask as well, and use following settings.


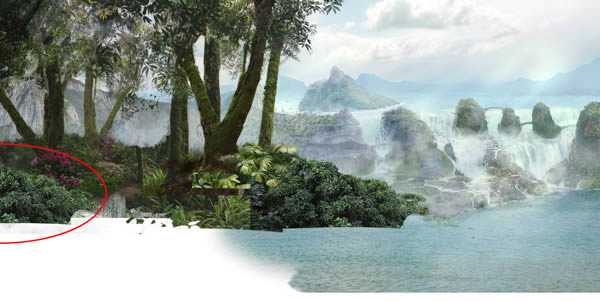
Step 22
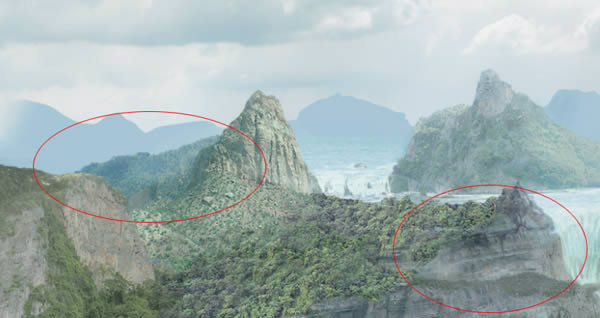
Create a Draw overlay layer and draw some details such as below. Help yourself with the red guide that shows where I draw some extra details.


Step 23
All right, let’s do the Linear Dodge once again. Use this kind of color : #708c00


That’s all for the FG. We did lots of drawing work, but it’s sometime easier to draw a bit than finding some specific references for every small details we want to add. Let’s move on with the aircraft.
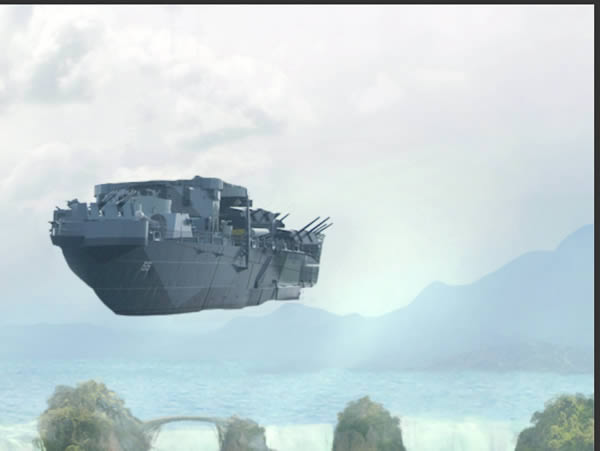
5. The Ship
Step 1
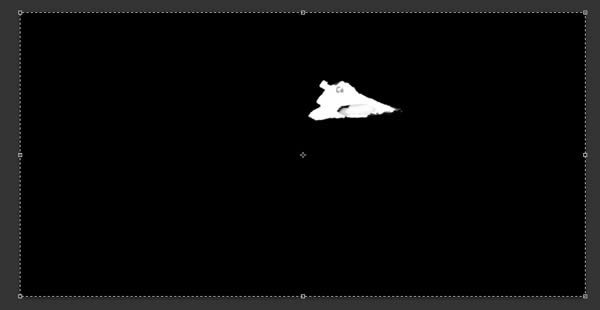
It was hard to find a good reference to draw this. I finally managed to imagine something starting from a battleship. Let’s see how it’s done. Close the FG group, and work on the Ship one from now. Import the ship asset and place it as below. Add the two usual Adjustment Layers, the Levels and Curves ones. Add a layer mask as well, and erease unwanted area to get the same shape.


Step 2
Now with the brush and lasso tool, transform it into a believable aircraft. Since we already have lots of details, you don’t need to have 100% perfect details.
Step 3
Now rename the group to Base ship, select it and create a new Ship group. Select the Base ship one, duplicate it (Command/Ctrl + J) and merge it (Command/Ctrl + E). Apply a Filter > Blur > Motion Blur… with following settings.
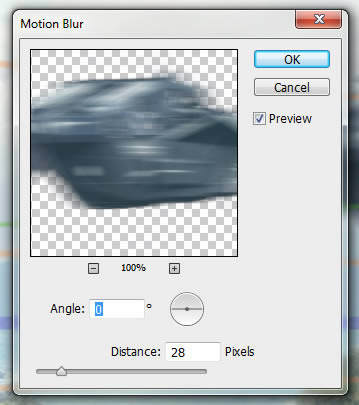
Create a layer mask and erase the front areas of the aircraft with a soft brush.

Step 4
Now let’s do a Ship Lights layer, and do the Linear Dodge trick to add lights (#0f8000), flare and fuel burning effect (#8c1100).


And that’s it for the aircraft. Let’s move on the the final step, the FX.
6. The Final FX
Step 1
Let’s create a new Ambient colors layer. Fill it with black and with a soft brush in a Screen mode, paint something similar to below. Set the layer’s mode to Linear dodge once again. It adds nice variations and a fantasy look. Set the opacity to 50%, because the effect is a bit “too much.”

Step 2
Now we need four Adjustment Layers. Let’s create them. Create a Levels one with following settings. It makes everything a bit darker.

Create a Color Balance one now. I wanted higher blue hue in the depth with it.

Now create a new Levels one, which is going to darken a bit more the FG. Use the sample for the layer mask.
And finally, create a third Levels adjustment with following settings. We want to up a bit the blacks here.
I decided to add two black borders for this work. The idea is to have a nice framing and movie effect. I consider I don’t need any explanation on how to achieve this. Fill it with 100% black.

Conclusion
Thank you for taking the time to complete this tutorial. I hope that you have learned something and will now be able to create some advanced photo manipulations and matte paintings on your own. The process may take a considerable amount of time, but it is worth it. Good luck!
