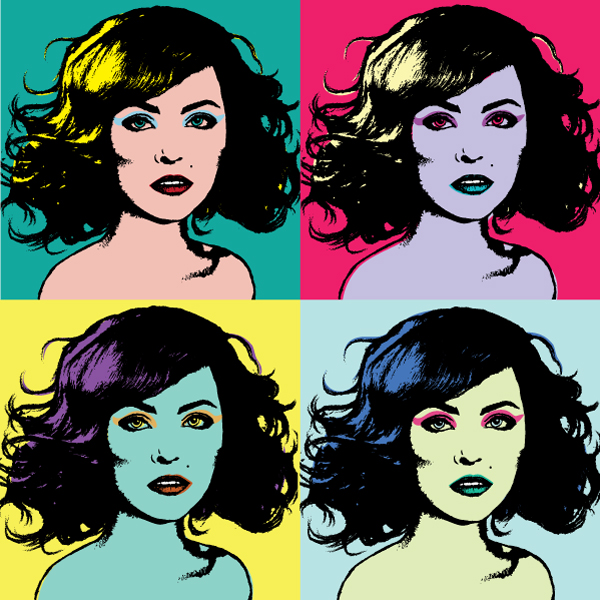
Andy Warhol‘s screen print series of Marilyn Monroe portraits were probably the main reason I was interested in creating vector art. He’s one of my all time favorite artists so creating a set of portraits inspired by his mass produced art was bound to happen at some point! In today’s tutorial I’m going to show you how to create a set of colorful portraits from a stock image base, in a similar style to Warhol’s, using Adobe Illustrator.
Step 1
To start with, I’m going to modify the stock image I’ve purchased from PhotoDune, although you could do the same with your own photo. I’ve opted for this one specifically as it’s a female looking straight to the camera and has wavy hair. I feel it’s a more modern Marilyn Monroe look.
Open your photo of choice in Adobe Photoshop. I’m going to remove some areas of the background. I’ll be using Image Trace in AI CS6 and this may pick up on the darker areas of the photograph, so I’m wanting to remove these areas without removing the key aspects and features of the portrait. Double click on the Magic Wand Tool (W) to access the Refine Edge options. I’m wanting to increase the Feather to 4px so I don’t have any harsh edges.
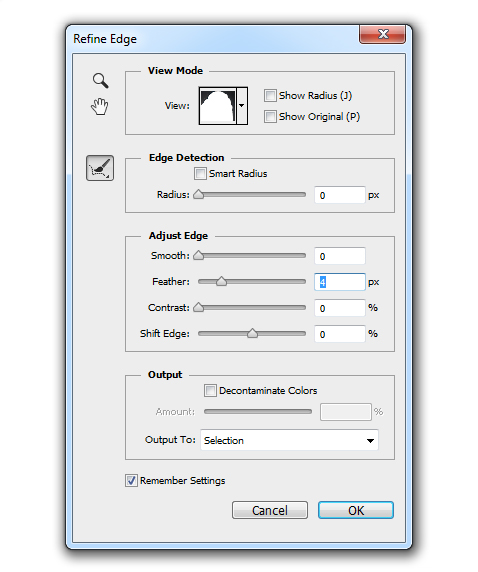
Then select areas around the portraits background and delete them. For around the skin, you may need to reduce the Tolerance so it doesn’t pick up on the skin.

Step 2
Now to modify the contrast of the photo. I tend to do this with Curves (Ctrl + M) and modify the contrast accordingly.
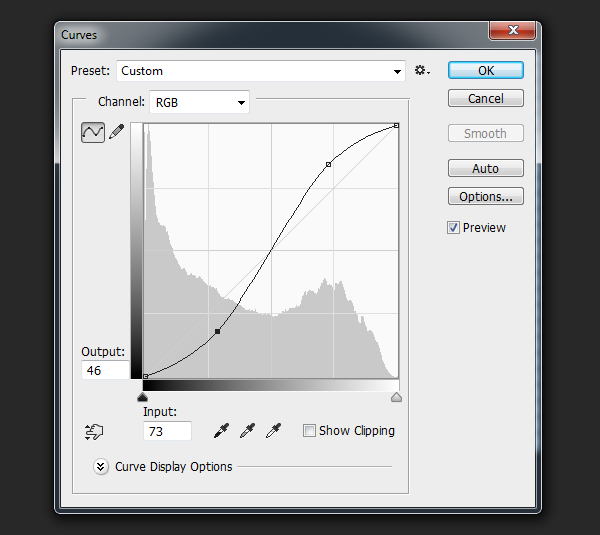
As you can see, this has brought out the highlights in the hair and skin and deepened the shadows. This makes it perfect to pick up with Image Trace. However the eyes, nose and sides of the face are in too deep of shadow.

Step 3
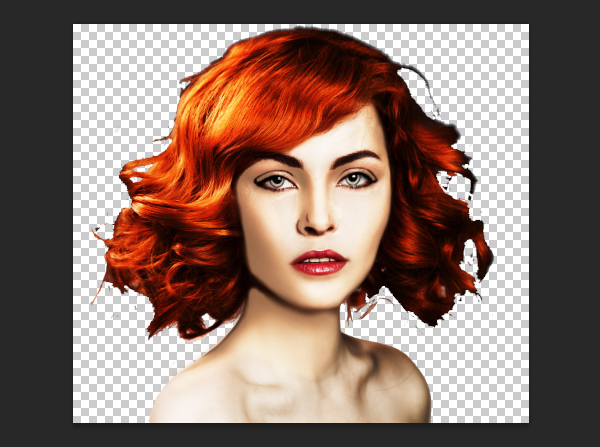
Using the Brush Tool (B), I then cover over areas on a new layer where I think I need to lighten the image.

I then set the Blending Mode to Screen and Opacity to about 75%. Although you may think this is a terrible looking stock image now, it’s only a reference. You’re aiming for the features to be clearly defined. Imagine it in black and white and what key areas you need to be bold. Once you’ve finished, Save for Web and Devices ready to work on in Adobe Illustrator.
Step 4
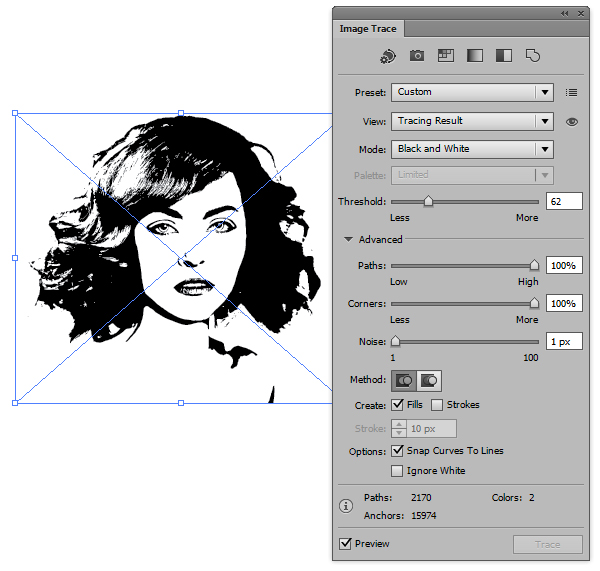
Start a New Adobe Illustrator document and then File > Place your photograph in the center of the canvas. Go to Image Trace (Live Trace in earlier versions of AI) and work in Black and White mode. Depending on the image you’re using, experiment with the Threshold, however the Advanced options should be the same for Paths, Corners and Noise as shown below.
Step 5
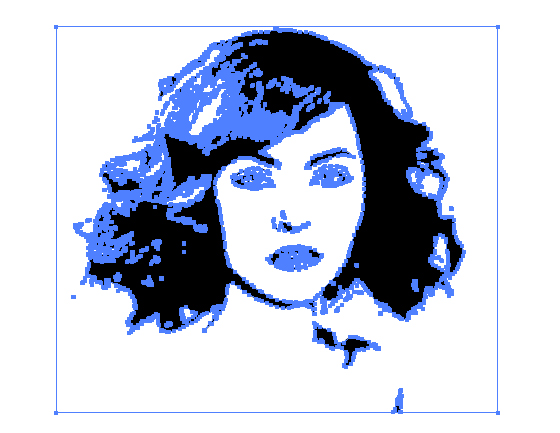
Object > Expand the Image Trace. Using the Direct Selection Tool (A), select one of the white areas of the tracing. Go to Select > Same > Fill Color to select all the white shapes and then delete. You should only be left with black fill shapes.
Step 6
In the original Marilyn Monroe series of portraits, the effects applied are using half tones. So if you look closely at the portraits you can see it’s built up with circles. I’m not wanting to go into a half tone method, but I do want to give a more grungy, messy edge to the tracing. So using the Paintbrush Tool (B) and the “Charcoal – Feather” brush, I’m going to begin adding strokes through out to create this style.
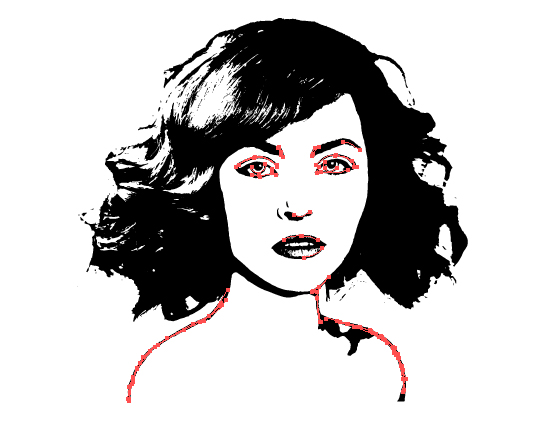
Starting out with 0.5pt Stroke Weight lines around the features and shoulders to help define the areas clearly.
Step 7
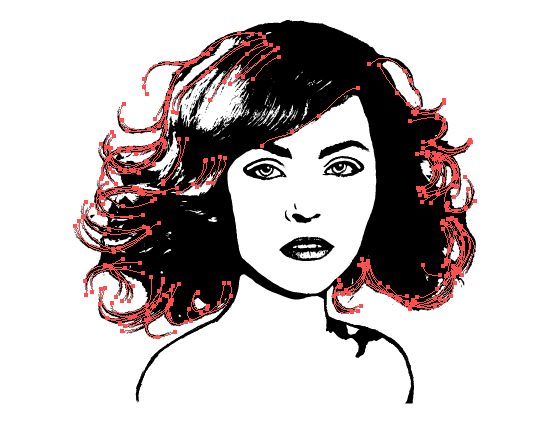
Then with a 1pt Stroke Weight, add curls and strokes around the hair to help create a more glamorous look.
Step 8
Then with 3pt and 4pt Stroke Weights, add lines to create subtle shadows to the side of the face to define the cheekbones and to add texture around the eyelashes.

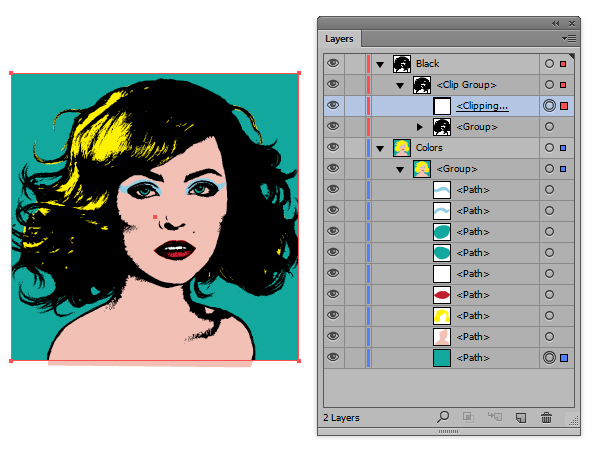
Step 9
Before we begin adding color, organize your layers so your black shapes from the tracing and strokes to add texture and definition are separated from the layers you’ll add color. Once this is done, start by creating a square behind your portrait by using the Rectangle Tool (M) and holding Alt + Shift.
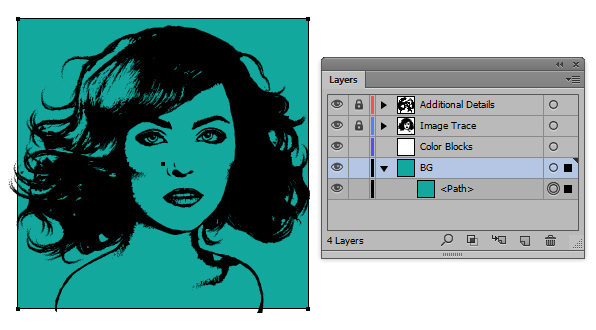
Step 10
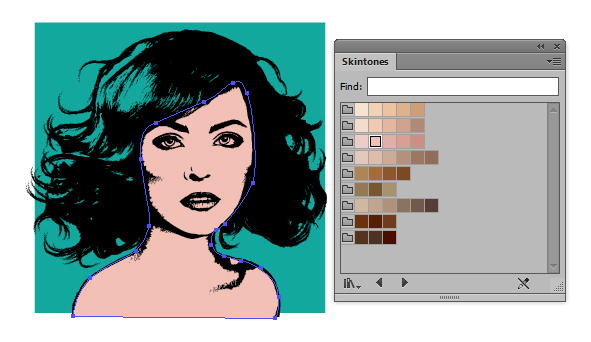
Now use the Pen Tool (P) to begin adding the blocks of color, similar to the more famous Marilyn portrait. We’ll start with the face. I’m going to use a pink hue from the Skintones palette available in Adobe Illustrator. In the Swatches panel go into the drill down menu > Open Swatch Library > Skintones.
Step 11
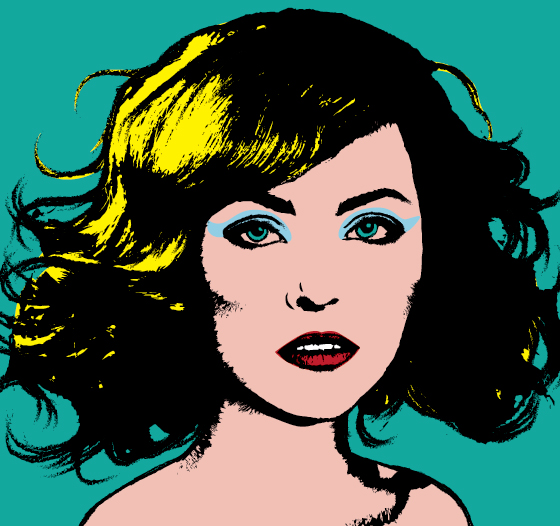
Continue using the Pen Tool (P) to add blocks of color. You don’t need to be precise, so if you’re not 100% comfortable with the Pen Tool (P), you could always opt for the Pencil Tool (N) instead. Try and match the eye color to the background. If you look at the original, the eyes don’t have any white in them, however the teeth do, so try to keep to this.
Step 12
Use the Artboard Tool (Shift + O) to define the artboard. Ensure it’s a square by entering the values along the Control Panel. In this case, I’ll be creating a 575 x 575 pt artboard.

Step 13
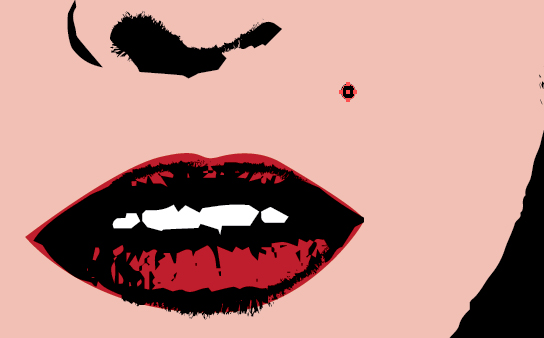
Finish off the portrait by using the Ellipse Tool (L) to add a mole/beautify spot, similar to the one Marilyn has. Fill it with black and place it in the black fill layers.
Go to File > Save for Web and Devices and here we have your first portrait. We’ll be using this as a base to create another three.

Step 14
Now we have the first portrait, we’re going to create another three with different color schemes. The constant through out will be the black lines. Due to there being so many strokes and shapes, it would be memory heavy to duplicate these elements over and over again. The best way to avoid this is by using the shapes to create a Symbol. So first I’m going to make sure the rectangle in the background is exactly 575 x 575pt and then duplicate it. Use this duplicate with the black shapes to create a Clipping Mask (Ctrl + 7). Separate your colors and Group them for ease later on (Ctrl + G).
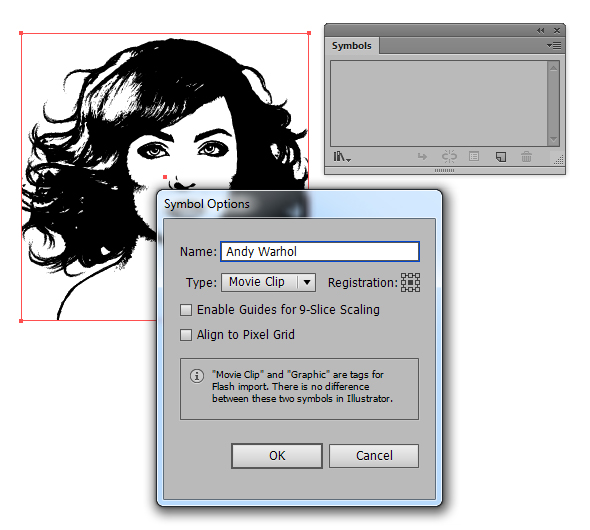
Step 15
With the Clipping Mask group selected, go into the Symbols panel and click New Symbol. Enter in a recognizable name and then click on OK.
Step 16
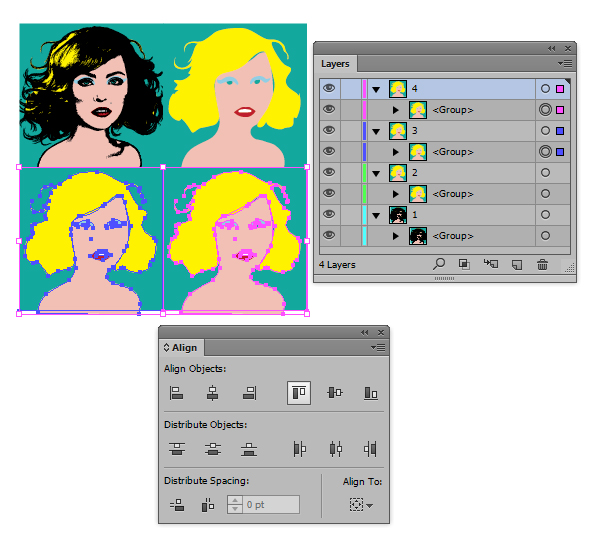
Duplicate the color shape group three times and place them into their own layers. Use the Align panel to ensure they are level with each other as shown below.
Step 17
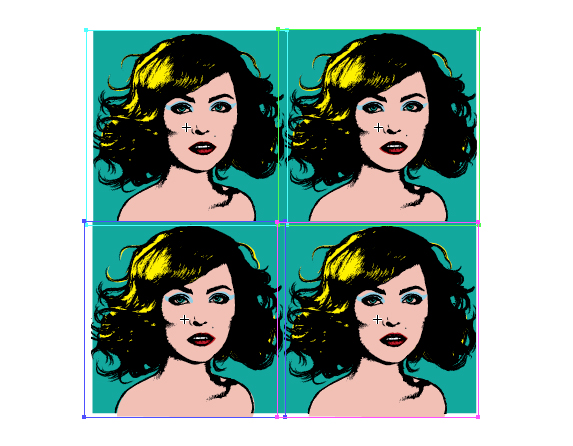
Use the Symbol Sprayer Tool (Shift + S) to begin adding your black fill portraits onto the composition. Use the Selection Tool (V) to move the portraits into place.

Don’t worry if you’ve not lined the black portraits up perfect. Part of the charm of the Marilyn series was that they weren’t all perfect and there was an issue with some of them with misaligned registration. This is when the layers weren’t overlapped correctly. This is often mimicked to create a screen print look in graphic design.
Step 18
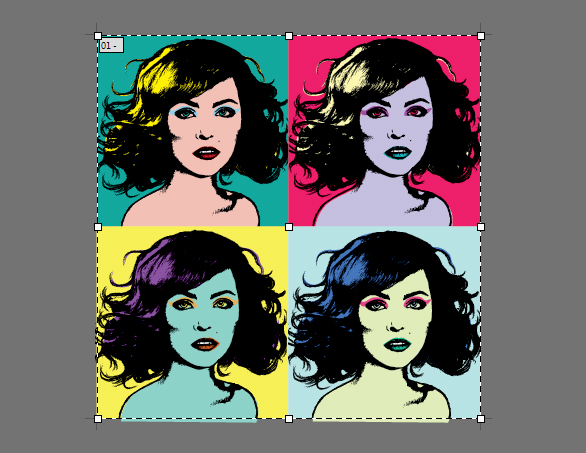
Now that I’ve gotten my four portraits, I’ll need to go in and edit the colors of the three duplicates. To do this, select the group of colored shapes and then go to Recolor Artwork. Go into the Edit tab and rearrange the colors. Tick the Recolor Art to preview the colors you’re playing with.
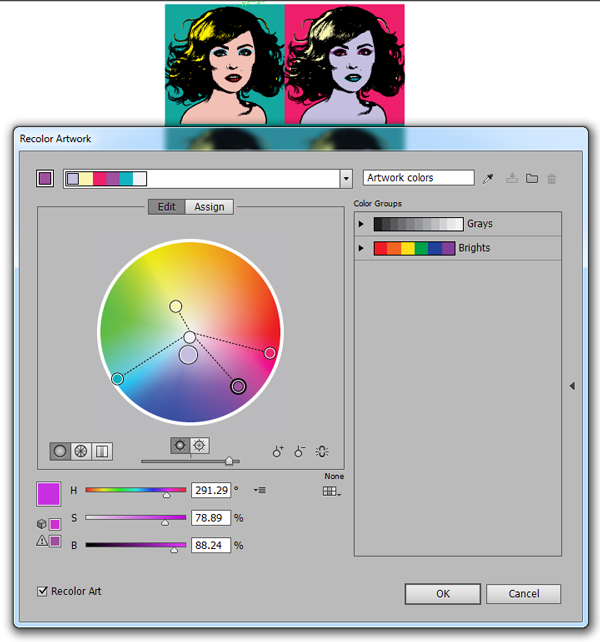
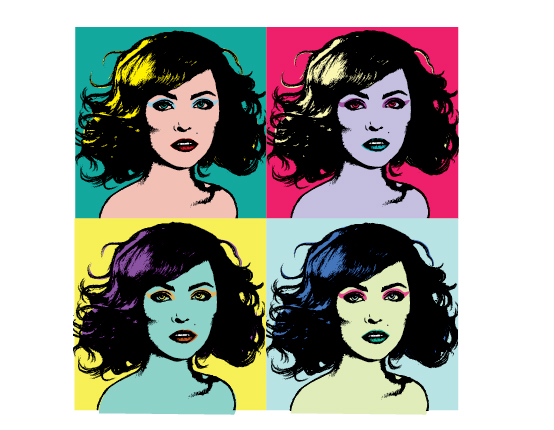
I’ve opted to keep the teeth pale but then I’ve went to town on the other colors. Here are the sets of portraits I have now.
Step 19
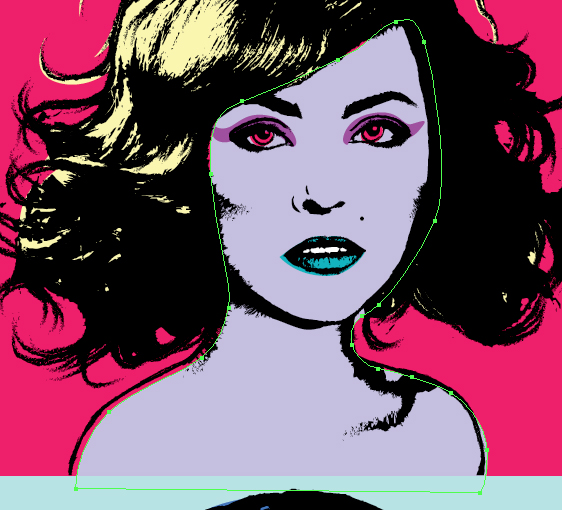
Using the Direct Selection Tool (A), select a colored shape.
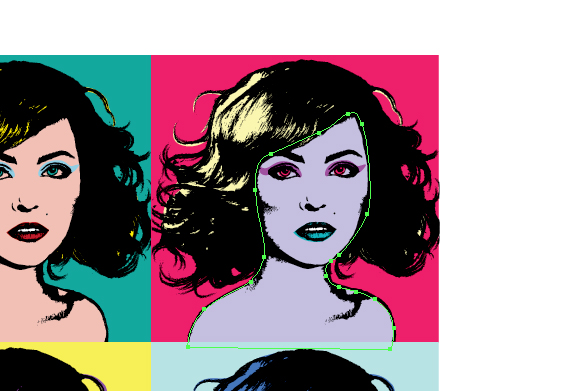
Then nudge it with your keyboard arrow keys to play on the misalignment effect. As fun as it is, don’t go over board with this effect as it may lower the overall quality of the style we’re hoping to achieve.
Step 20
Finally, use the Artboard Tool (Shift + O) to increase the size of your artboard to 1150 x 1150pt and then you’re ready to save it your set of portraits.
Conclusion
I’ve always seen tutorials on how to do this with Photoshop, but never understood why the technique wasn’t applied with Adobe Illustrator. Screen printing and vector go hand in hand! If you like the style of this tutorial, check out more work by the late, great Andy Warhol. His life story is also incredibly inspiring to any would be illustrators, it’s definitely worth a Wiki Adventure or two!
If you’re interested in creating more pop art inspired vector graphics, why not check out this Quick Tip Pop Art screen cast.