
Speed Art Video
Tutorial Assets
To complete the tutorial you will need the following assets. Please download them before you begin. If they are not available, please find alternatives.
- Photo Stock (Photodune.com)
- Texture1 (CGTextures.com)
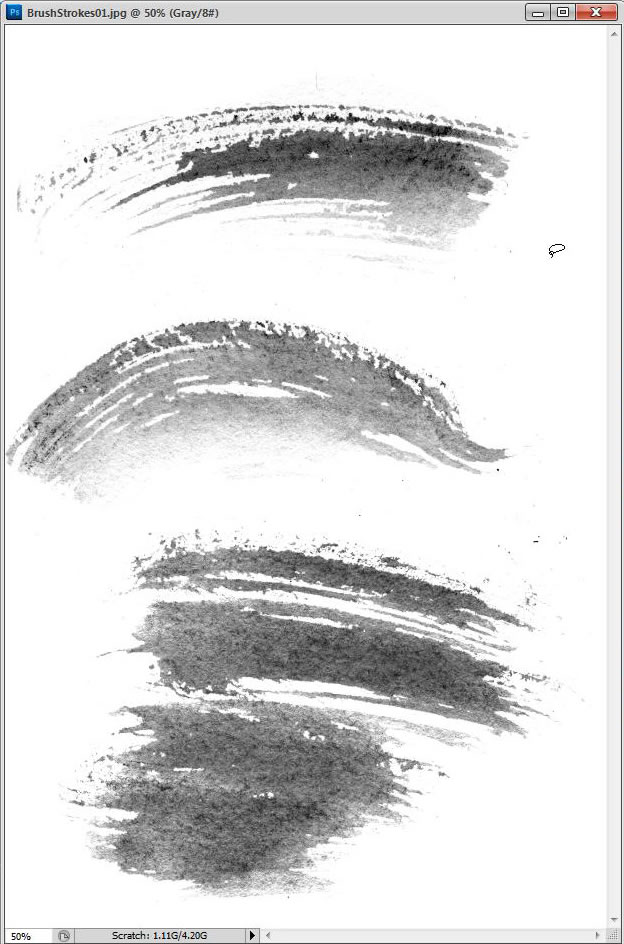
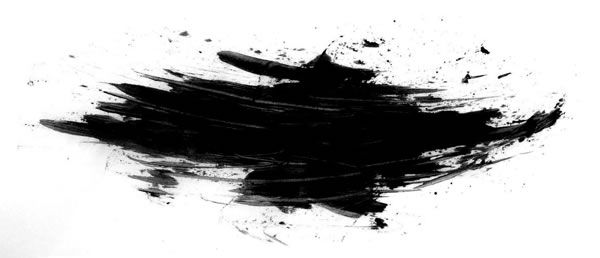
- Brushstrokes01 (CGTextures.com)
- Brushstrokes028 (CGTextures.com)
- DecalsStain0012 (CGTextures.com)
- GrungePaint02 (CGTextures.com)
- GrungeTexture1 (CGTextures.com)
- SplatterSmear01 (CGTextures.com)
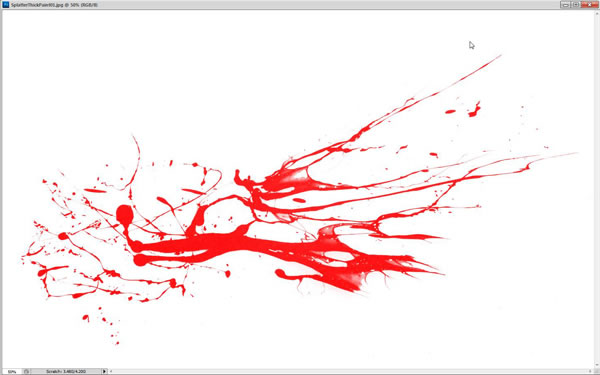
- SplatterThickPaint01 (CGTextures.com)
- SplatterThickPaint03 (CGTextures.com)
- SplatterThickPaint02 (CGTextures.com)
1. Sketching
Step 1
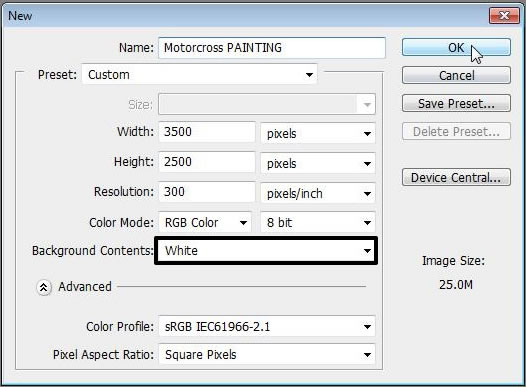
Create a New Document and size it so it is relatively landscape format. Also make sure the Background Contents is set to White.
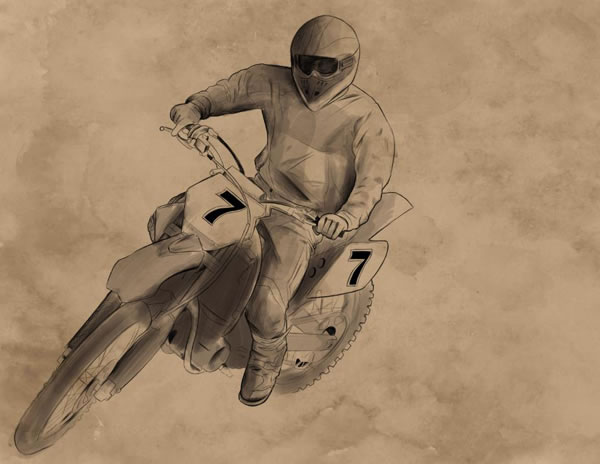
Step 2
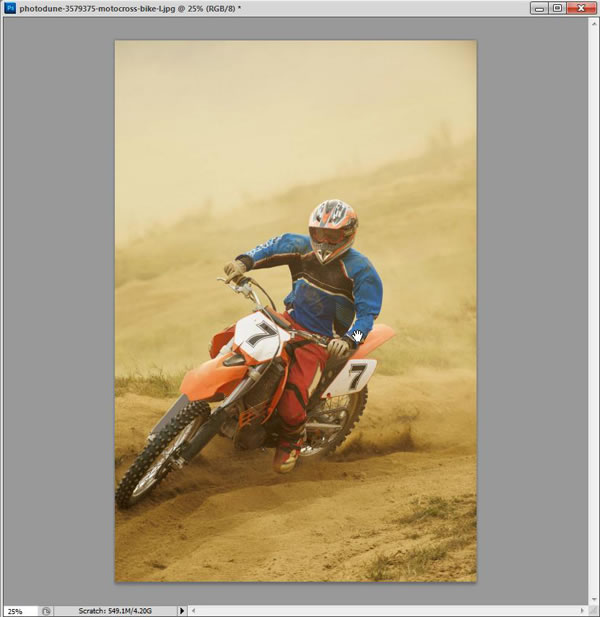
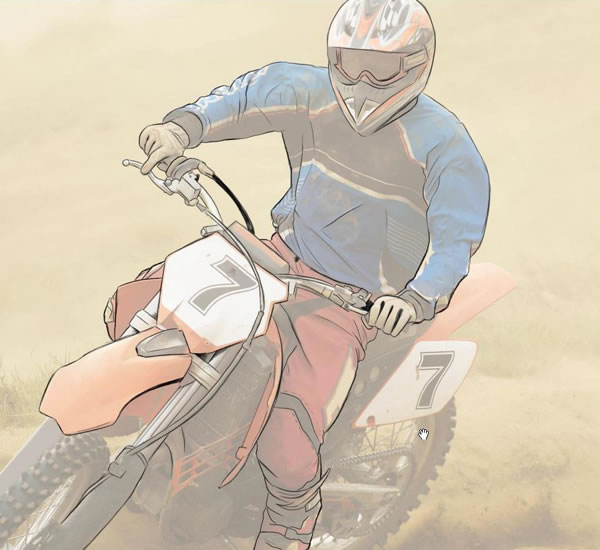
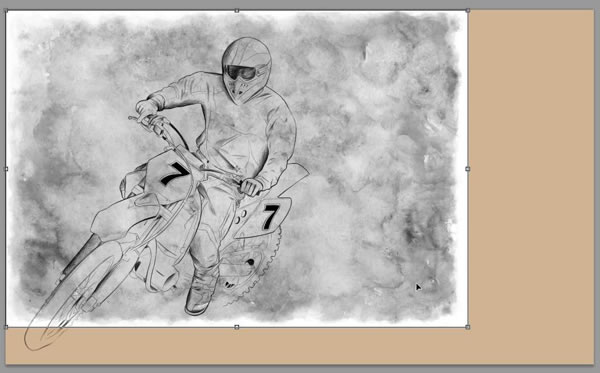
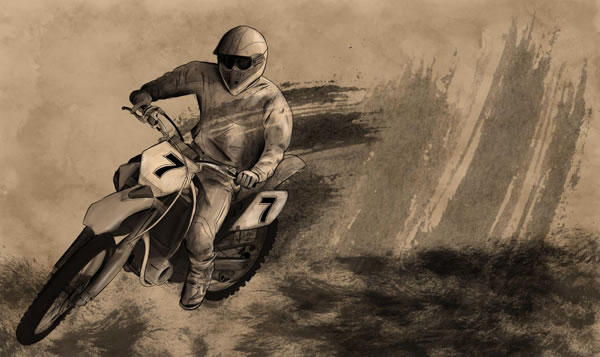
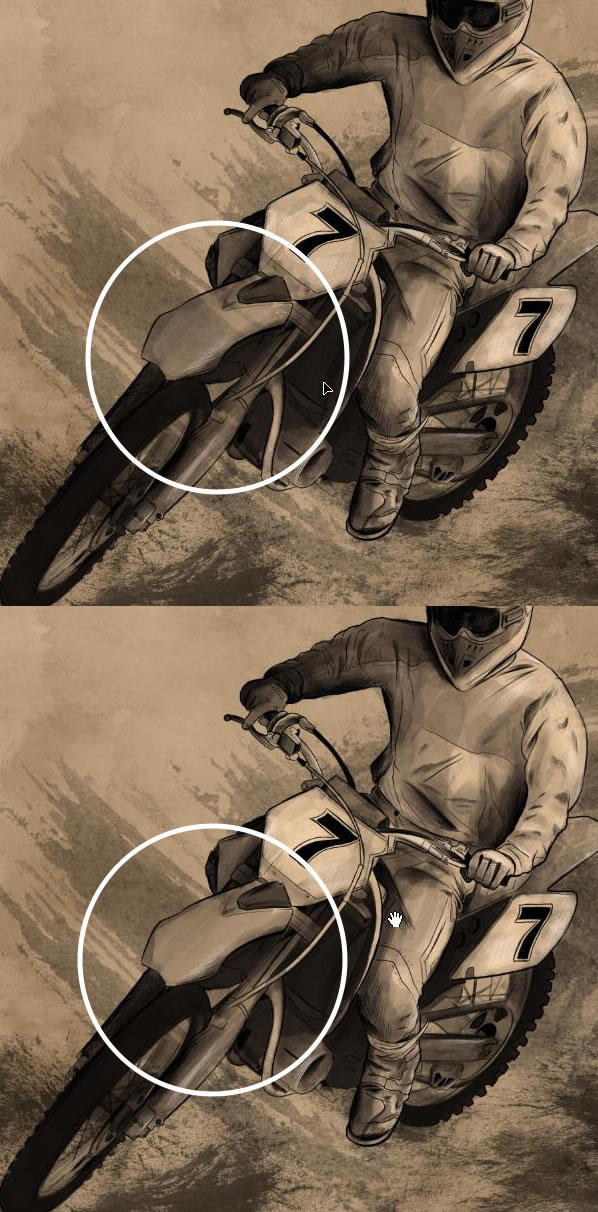
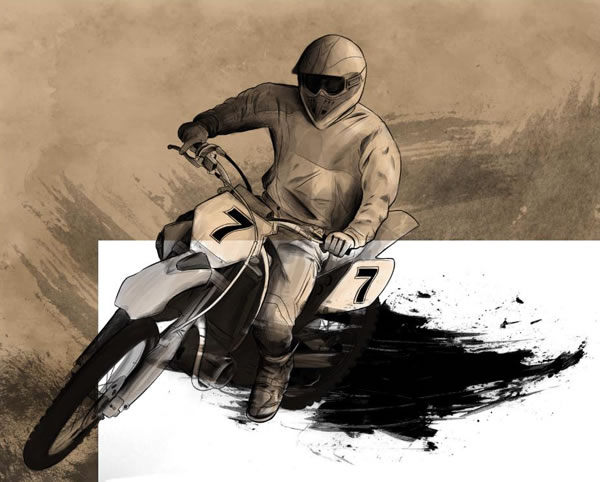
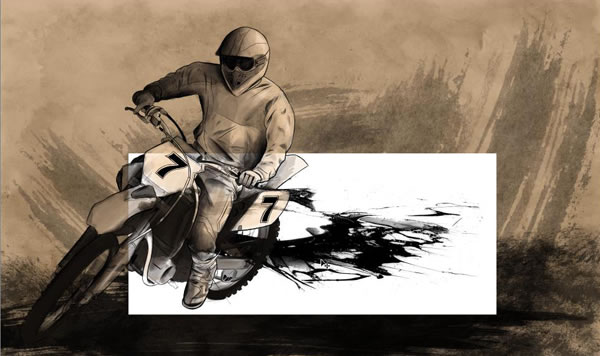
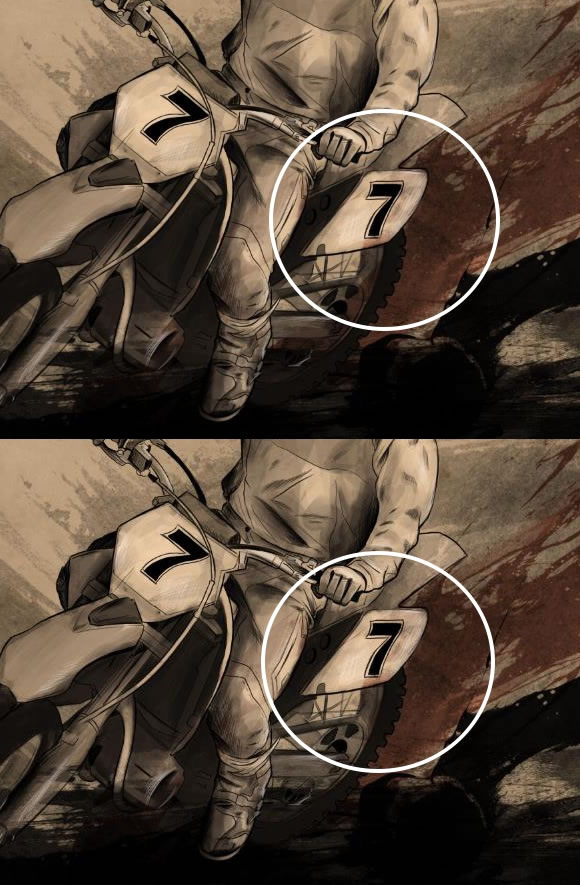
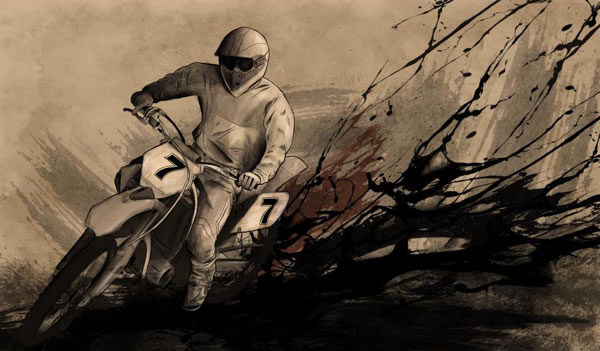
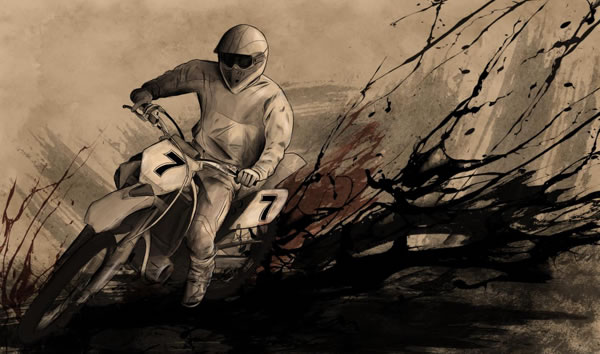
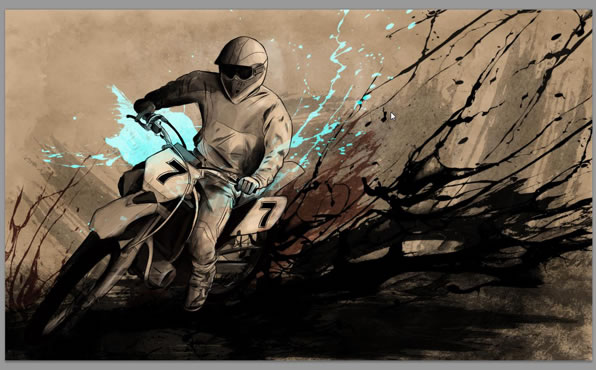
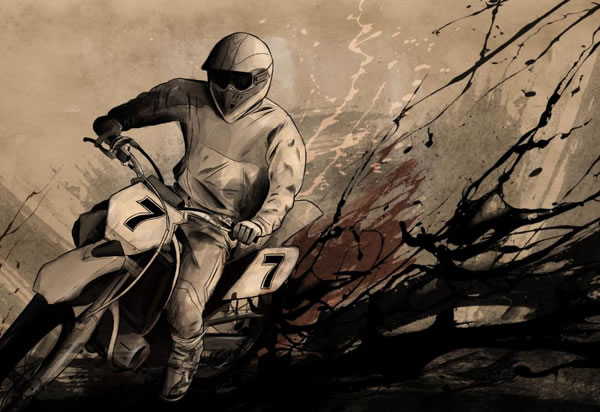
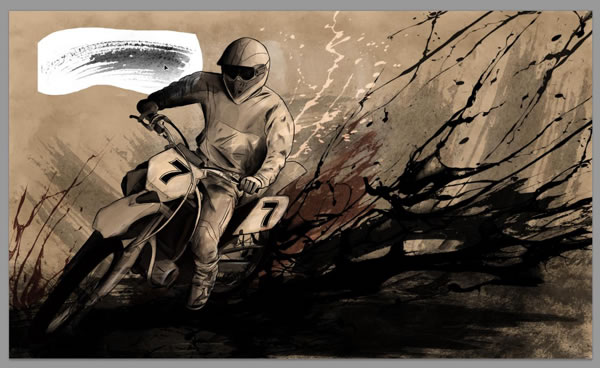
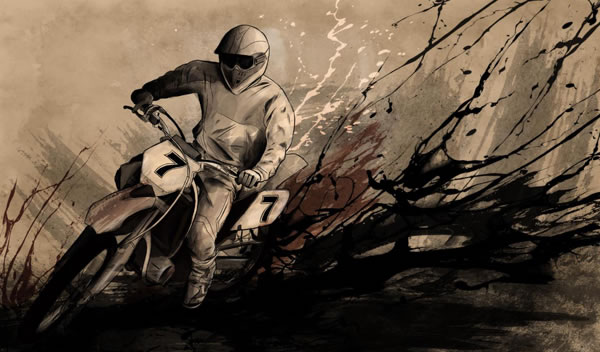
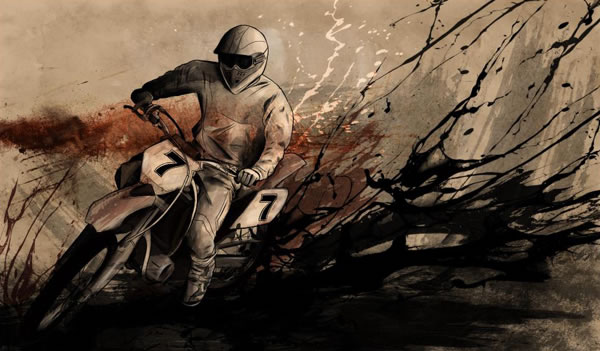
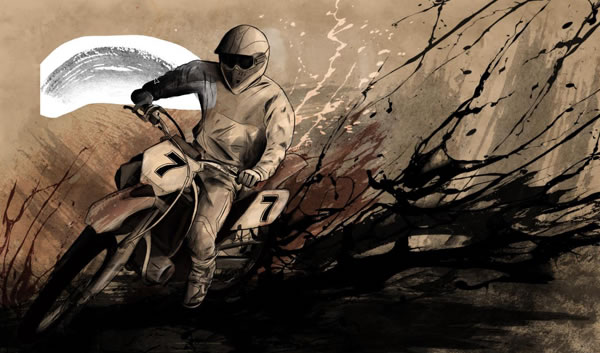
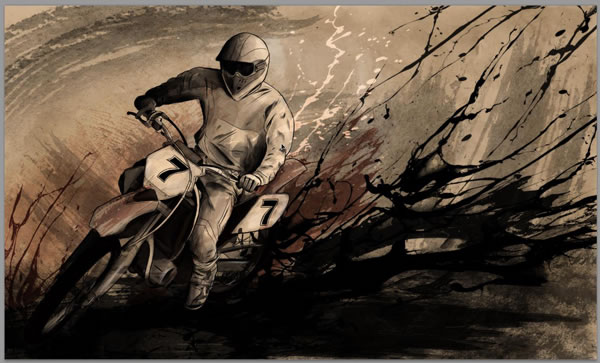
Open the photo (stock image) you wish to illustrate and work with. I have chosen this particular Dirt Bike racer because of the nice angle of the bike and figure.
Step 3
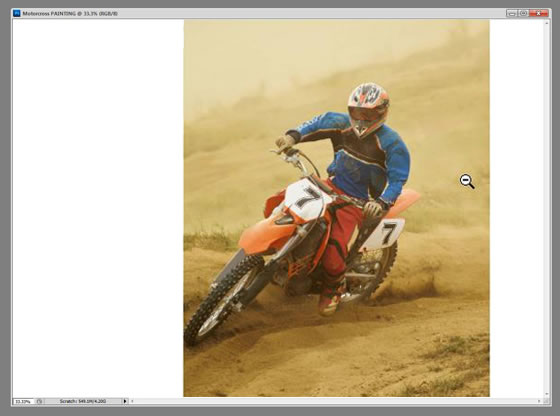
Drag the whole image, and drop it onto your New Document.
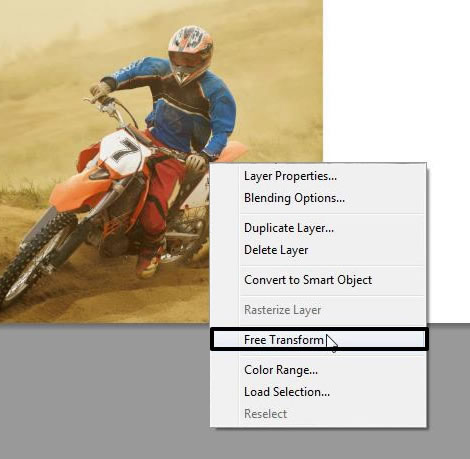
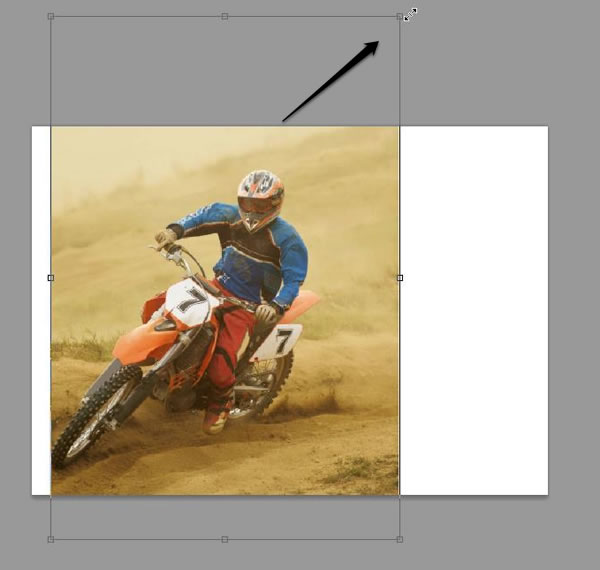
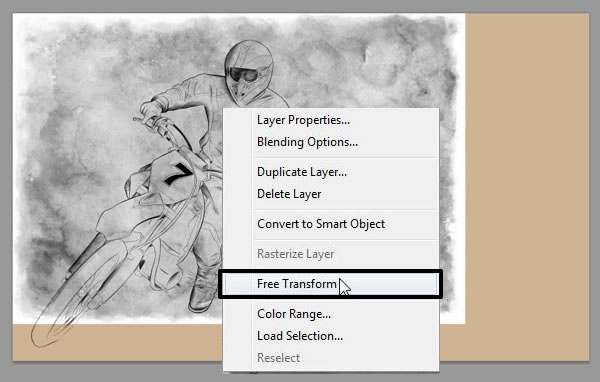
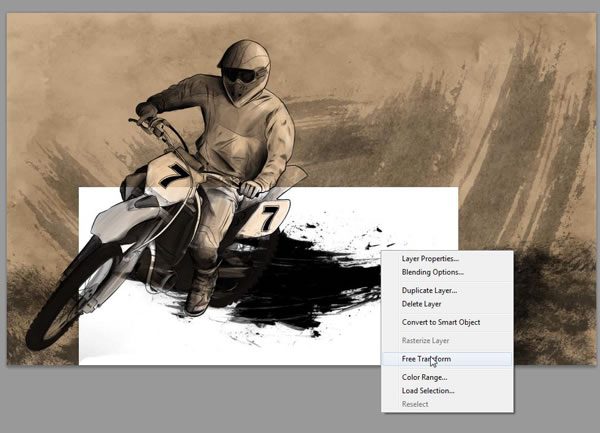
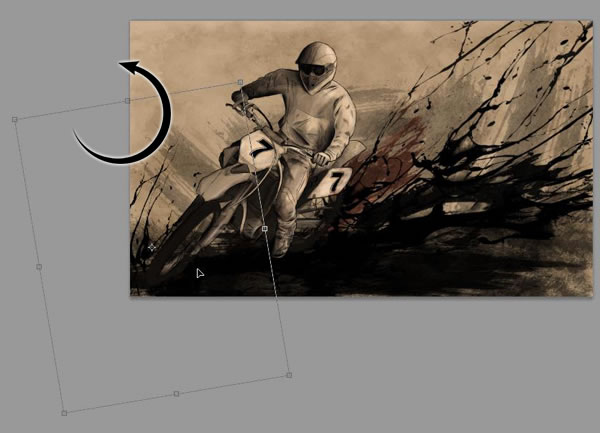
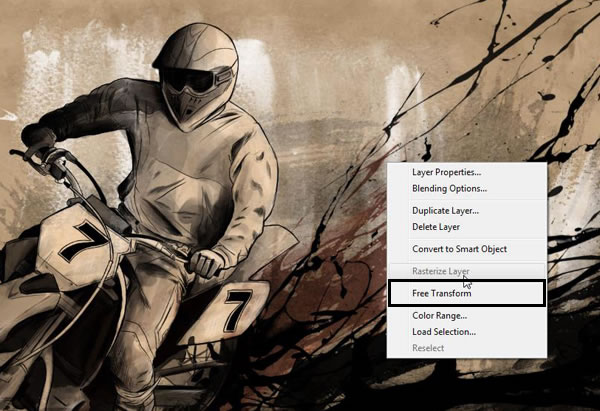
Step 4
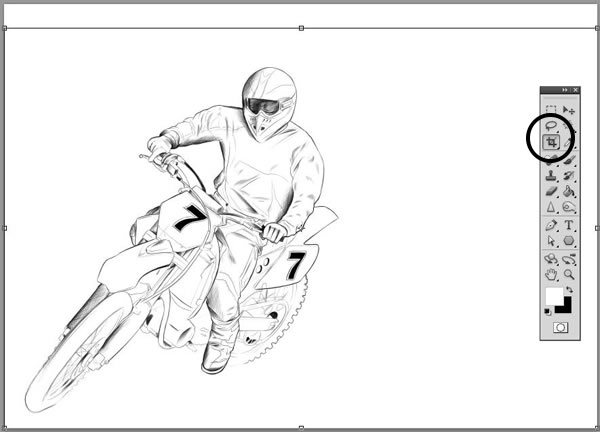
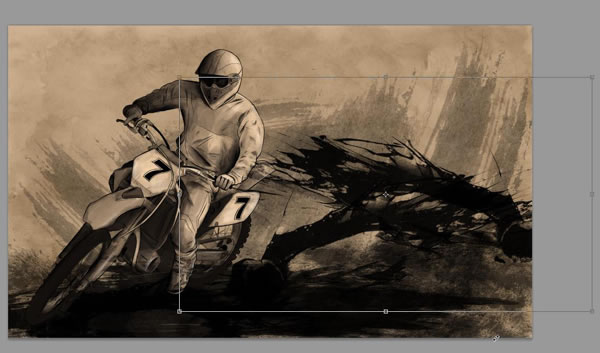
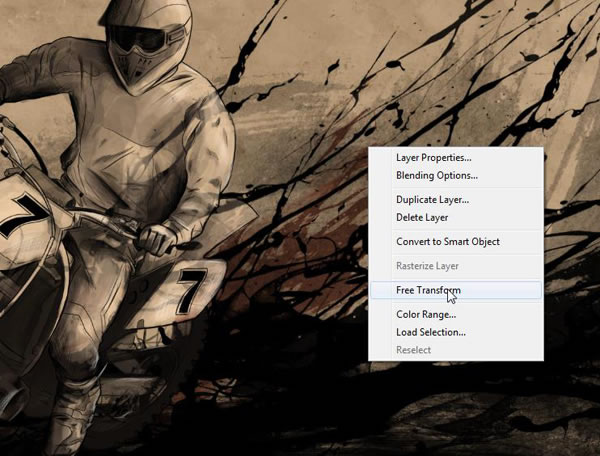
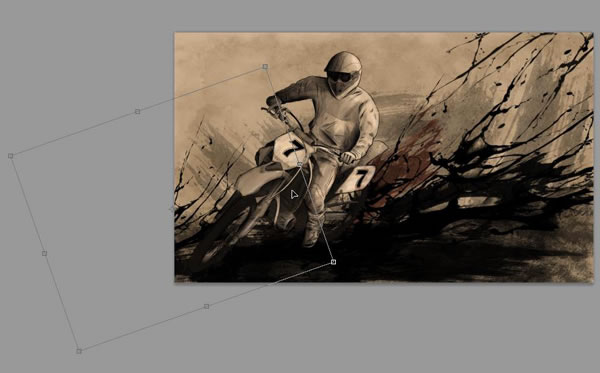
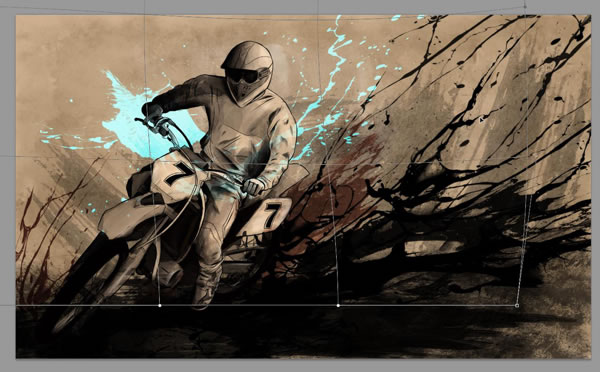
Free Transform to position it into your composition and scale up it a little. Hold the Shift key to keep the image in proportion as you scale it up.
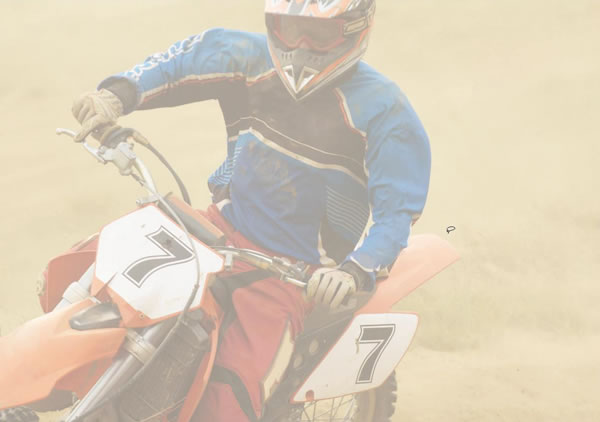
Step 5
Drop the Opacity of the photo layer in the layers window down to 46%.

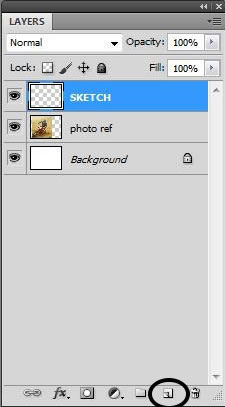
Step 6
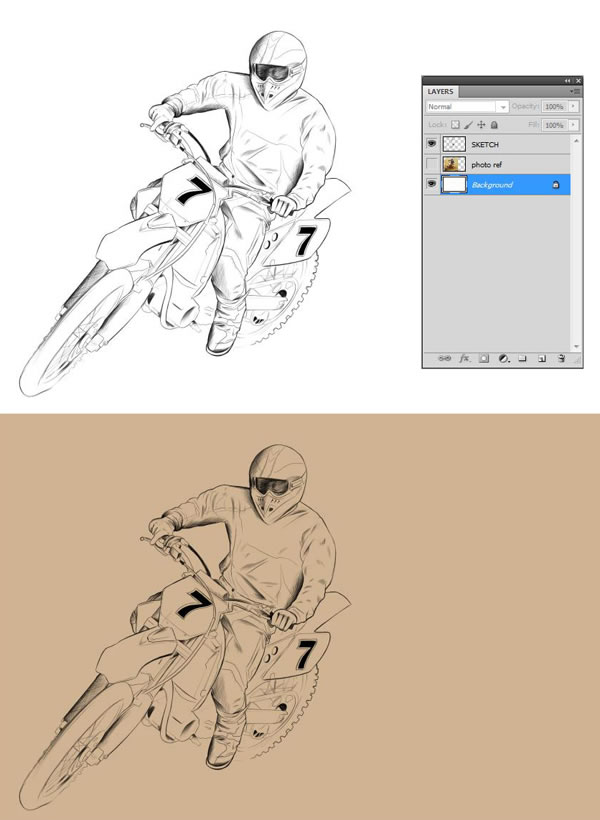
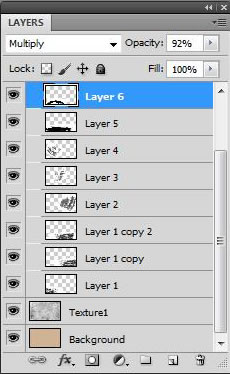
Create a New Layer over your photo layer to use as the sketch over layer, and title the layer: SKETCH.
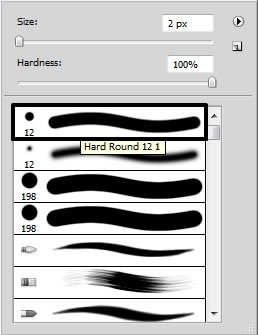
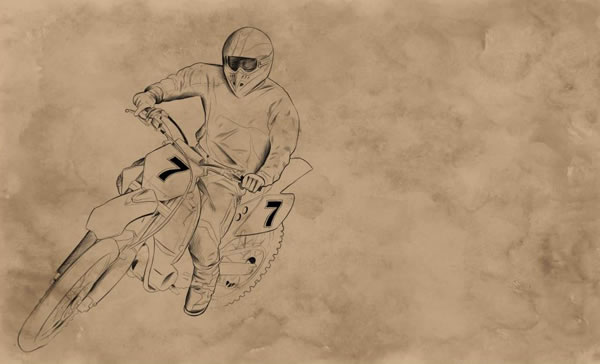
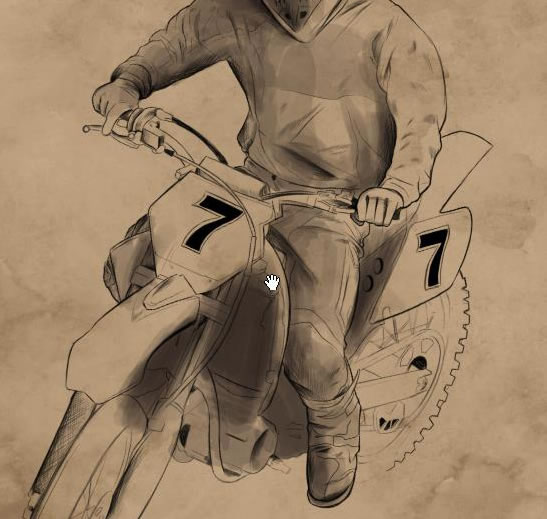
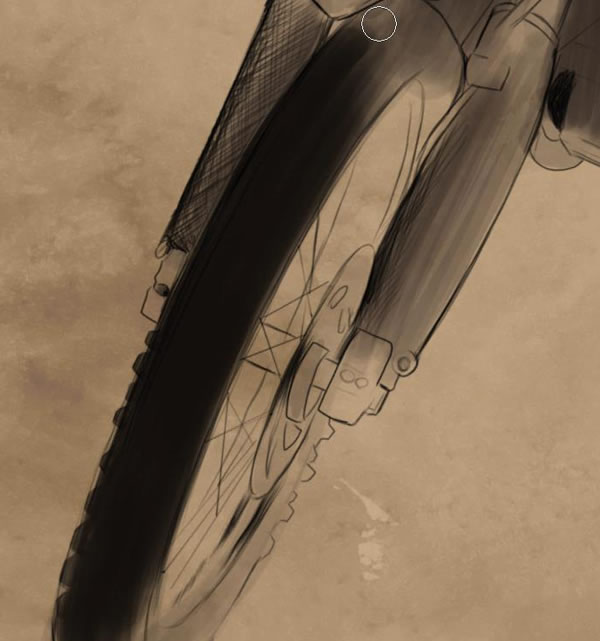
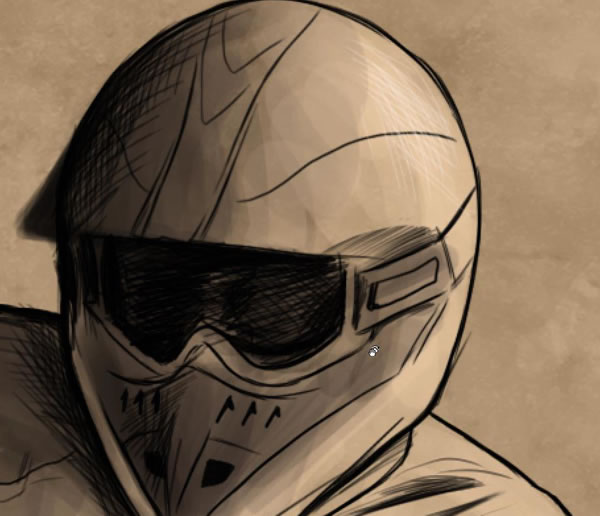
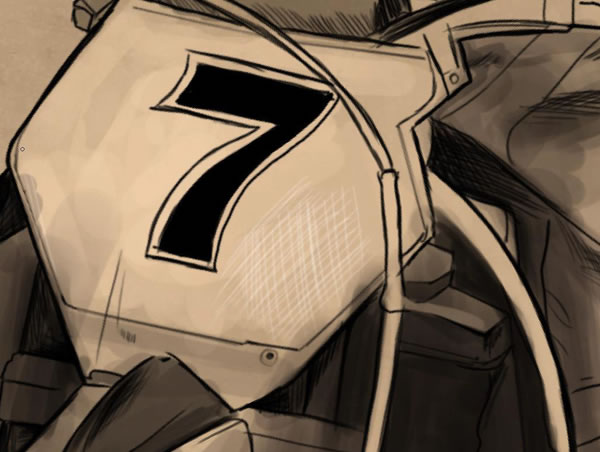
Step 7
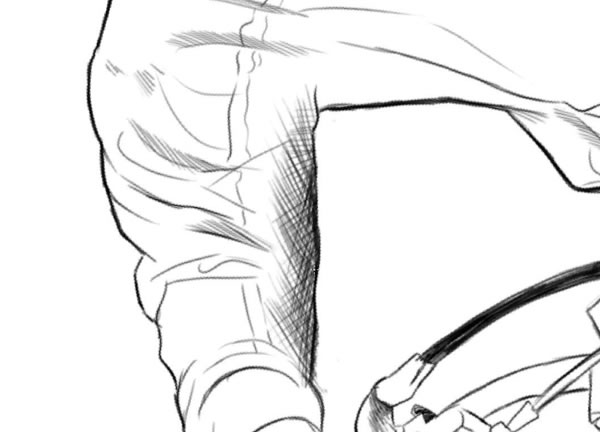
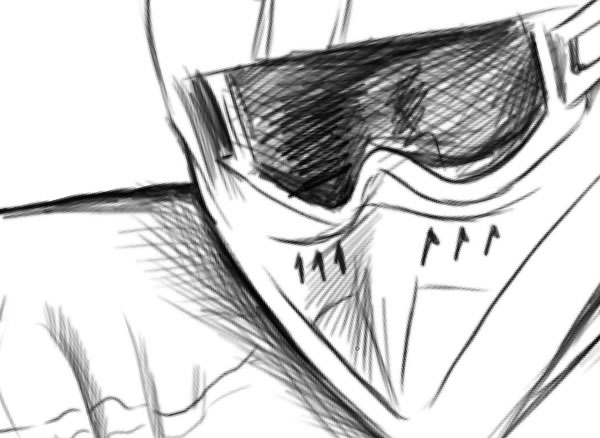
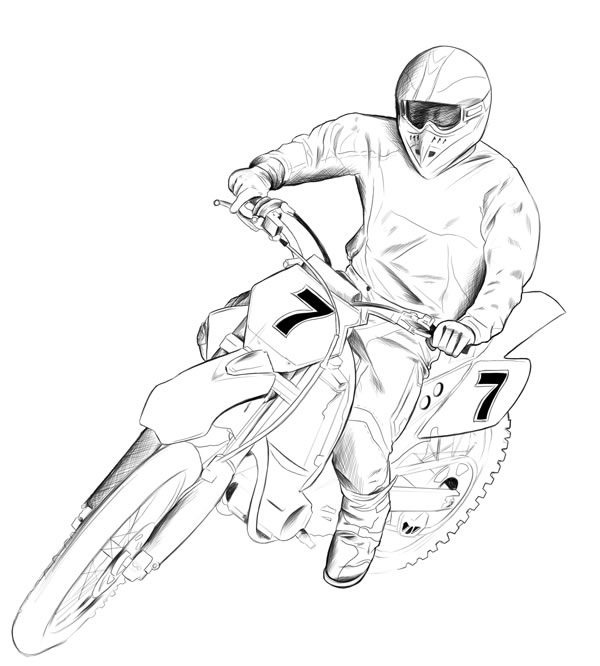
With the default Photoshop Hard Round Brush (it is usually the default brush at the top of the list). Set it to about 2px and begin sketching in the lineart over top of photo with #000000 black. At the moment, it doesn’t have to be too clean and perfect. We are going for a slightly rough and sketchy look. Alternate the stroke width for more variation and movement.
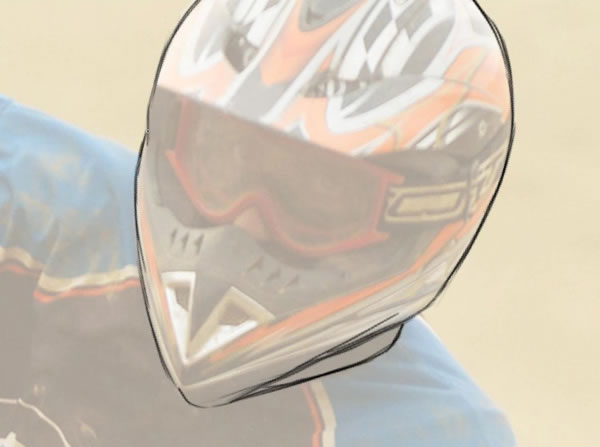
Step 8
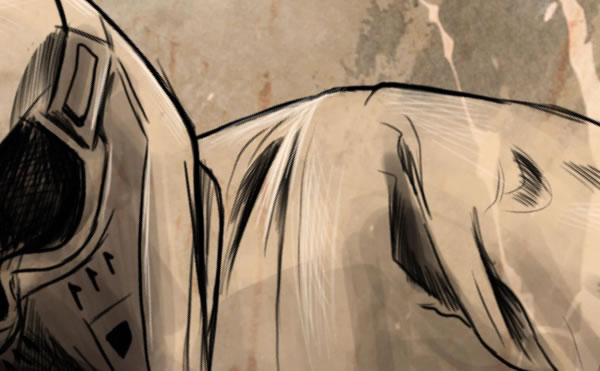
Shade in little areas with a crosshatching technique. Mostly go off the photo reference, but you can also use your best judgement to add in some extra shadows to define some stronger areas and give the shapes a little more dimension.

2. Figure Shading
Step 1
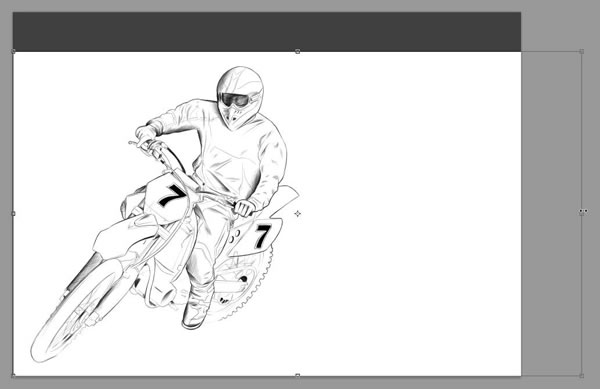
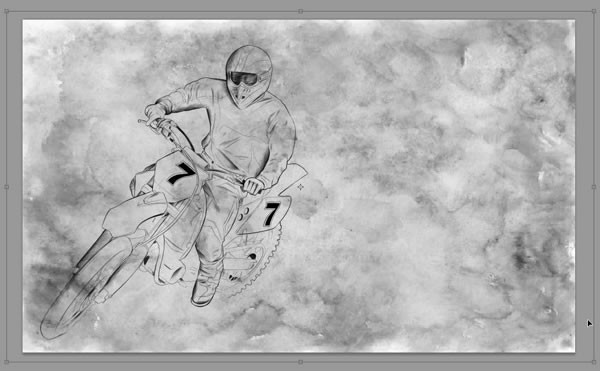
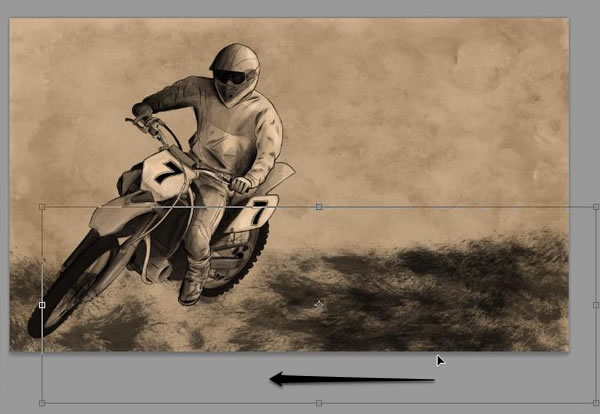
Use the Crop tool (C) to stretch canvas out a little more and make it a bit wider.
Step 2
Fill (G) the Background layer with a light tan color. I have used #d0b391
Step 3
Open up Texture1 stock image, and drag and drop it over your Background layer.
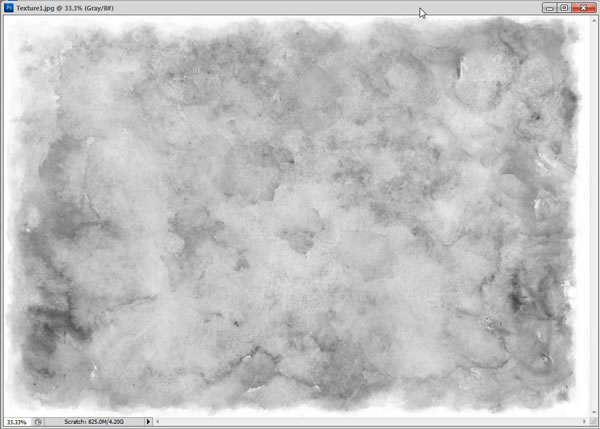
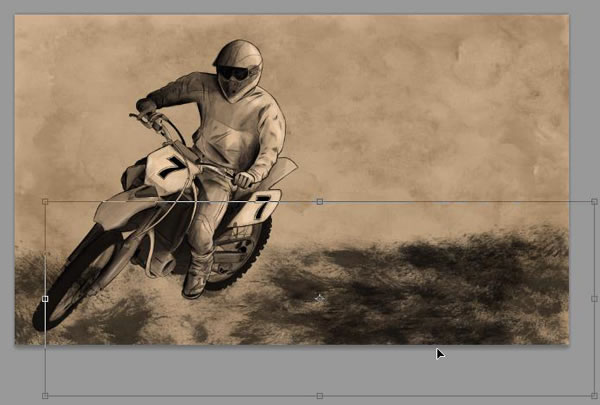
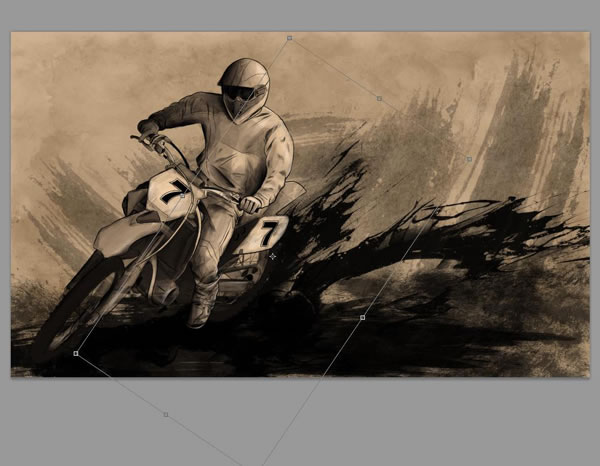
Step 4
Use Free Transform to scale and stretch it to cover the entire canvas.
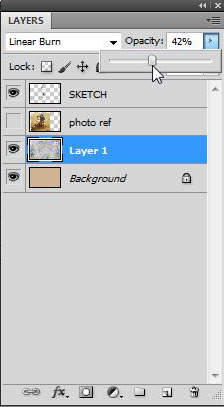
Step 5
Set the Blending Mode on the Layers Panel to Linear Burn.

Step 6
Drop the Opacity down to about 42%.
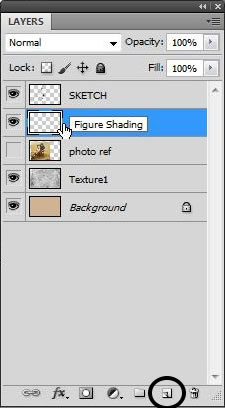
Step 7
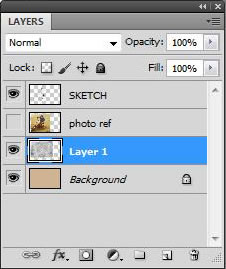
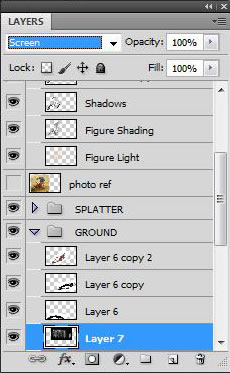
Create New Layer just underneath Sketch layer and title it Figure Shading.
Step 8
Command/Ctrl-Click both the Sketch Layer and Shading layer and group them together (Command/Ctrl-G).
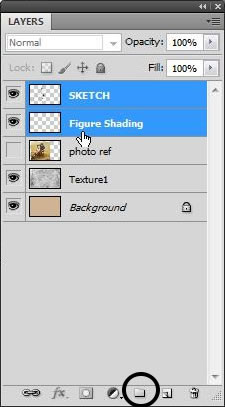
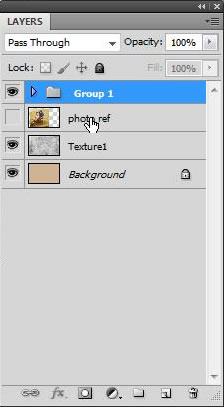
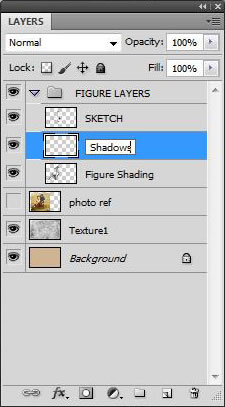
Step 9
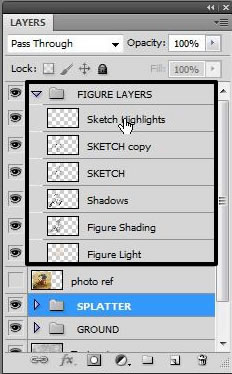
Title the new group FIGURE LAYERS to keep them organized for when you need to return to them easily.

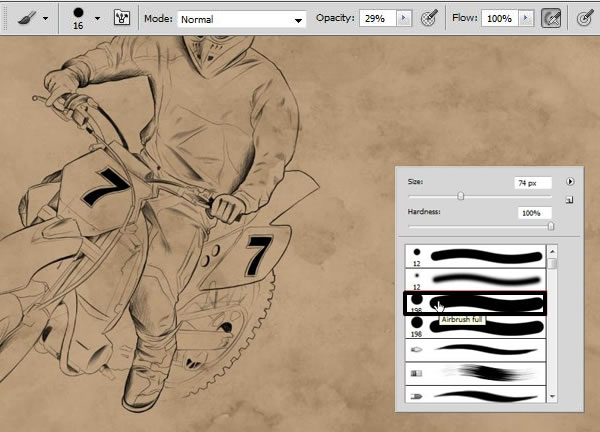
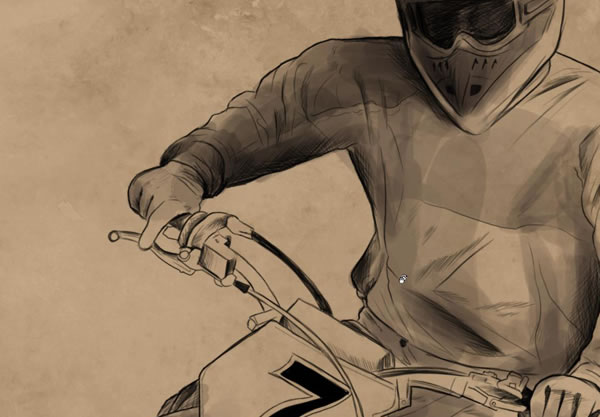
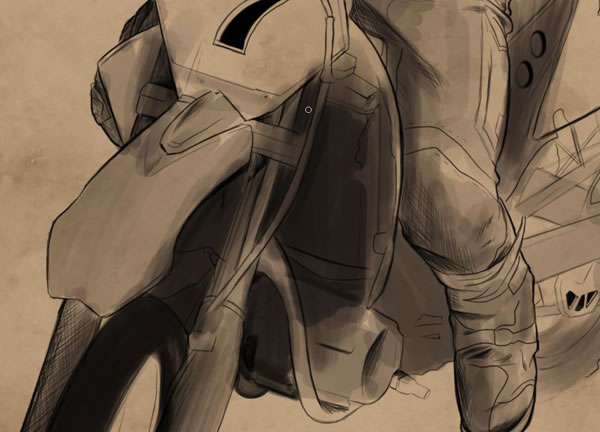
Step 10
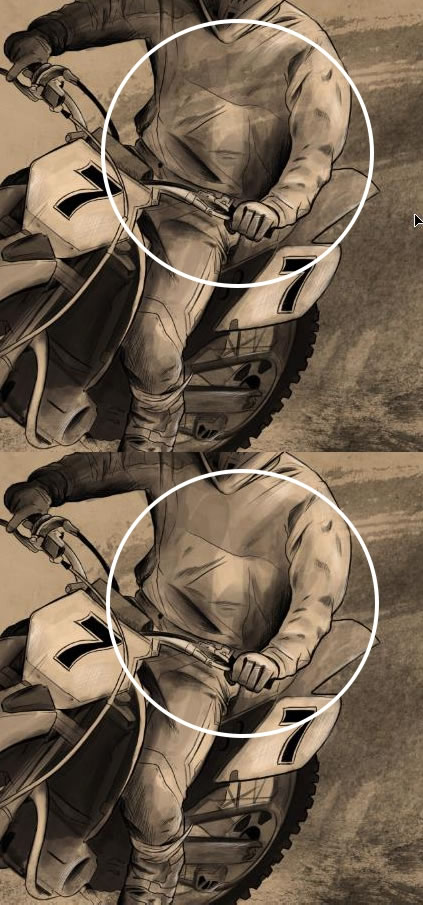
Take the Round Airbrush (Airbrush full), and drop the brush Opacity to about 29%. Lightly paint in some shades on the Figure Shading layer. I used the color #332822
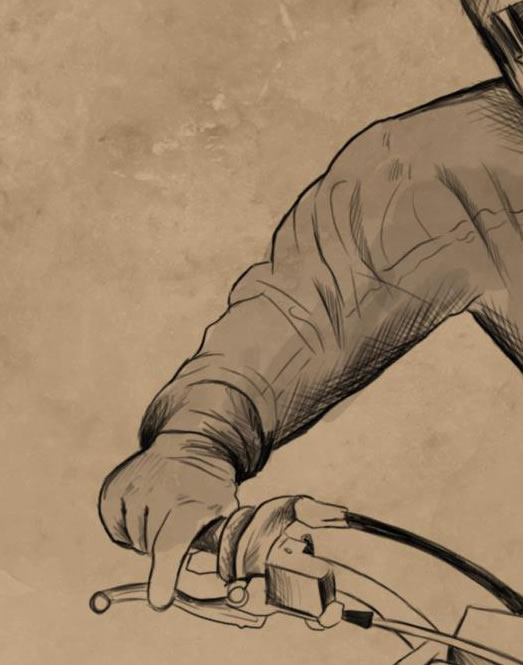
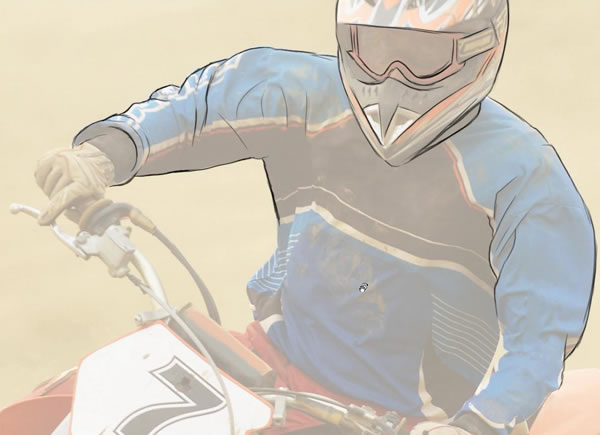
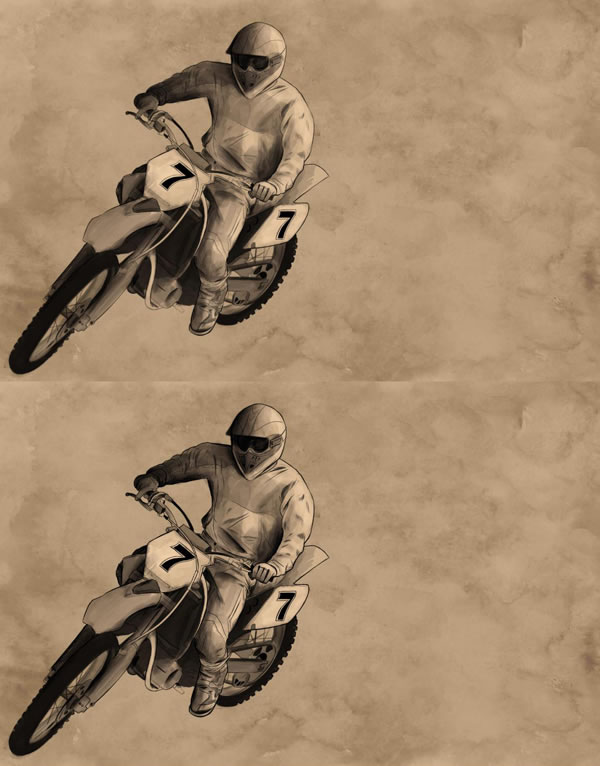
Step 11
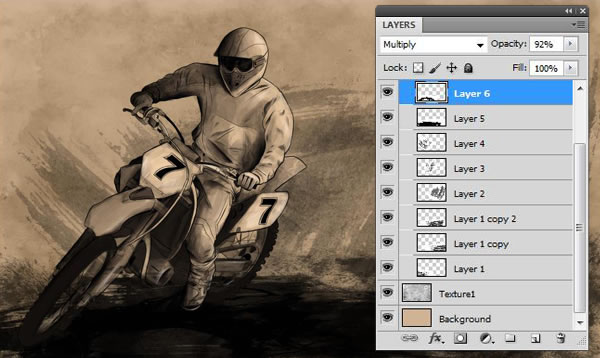
Start painting in some dark tones lightly, beginning with the riders clothing which will bring out his form before moving onto the bike.
Step 12
Create a New Layer and title it Shadows
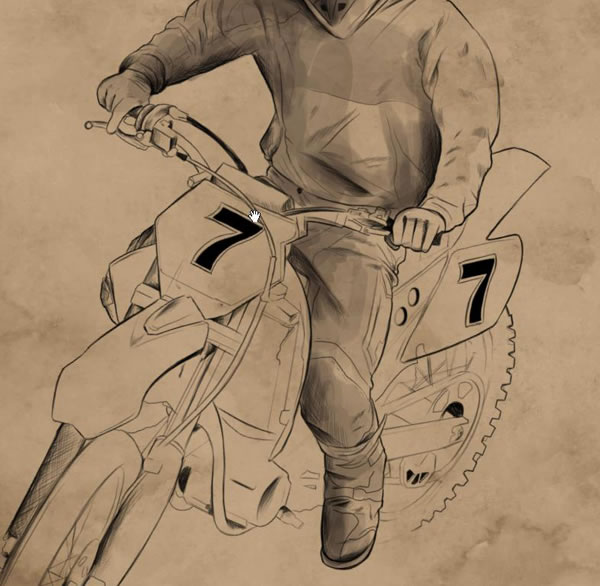
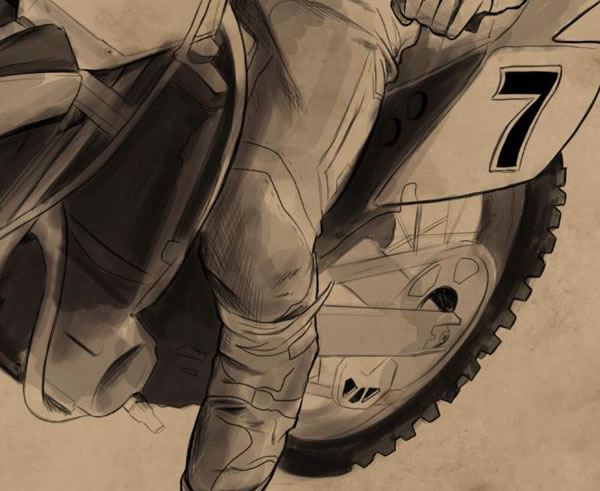
Step 13
Lightly build up the shades to an almost black. I used the color #130f0c.
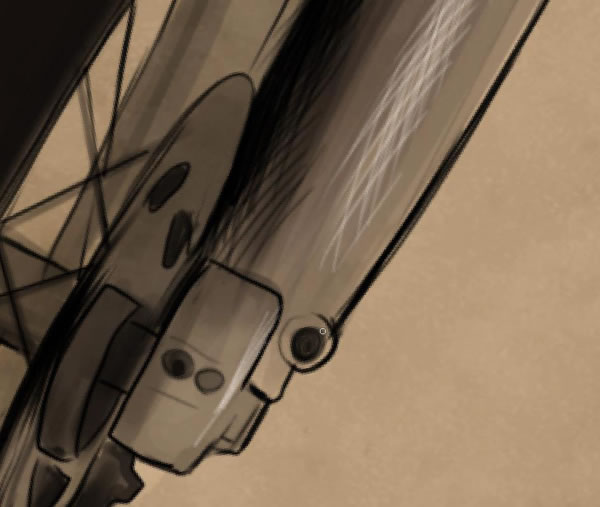
Step 14
Make stronger shapes such as the wheels and inner gears of the bike.
Step 15
Create a New Layer underneath Figure Shading the layer. Title it Figure Light.
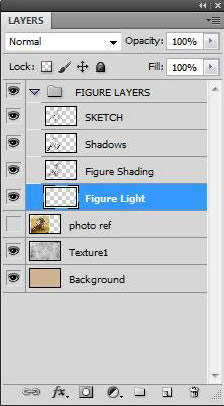
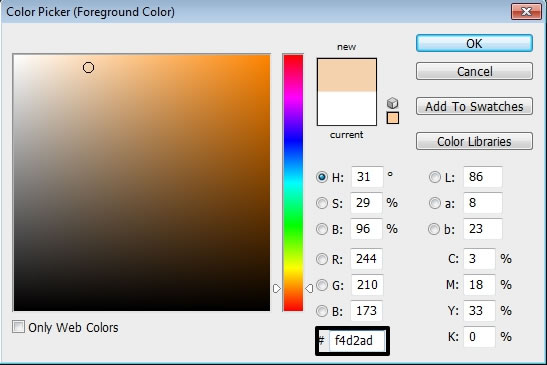
Step 16
Select an off white color. I have used #f4d2adc.
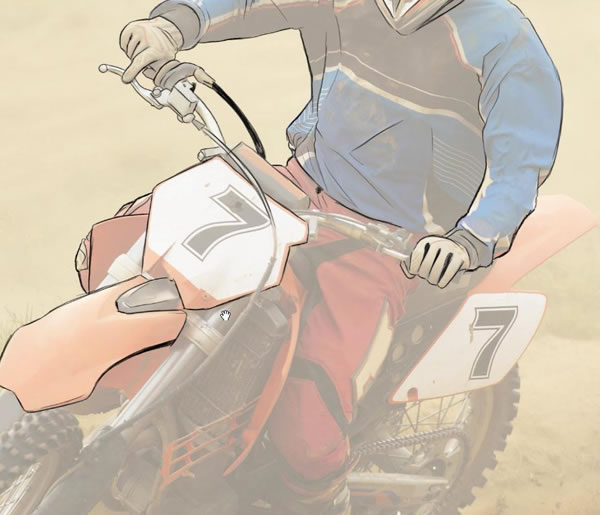
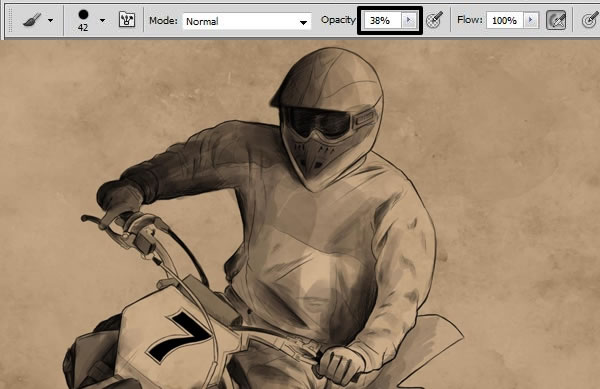
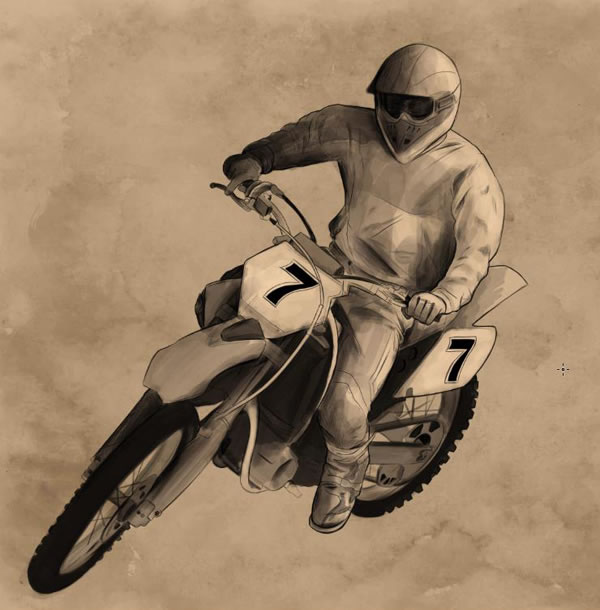
Step 17
Roughly paint in lighter areas with the brush set at a low Opacity. About 38%

Step 18
Duplicate (Command/Ctrl-J) your SKETCH layer (for more visibility and thickness of the sketch lines)
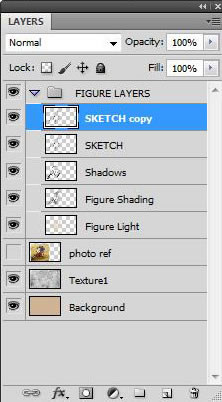
Step 19
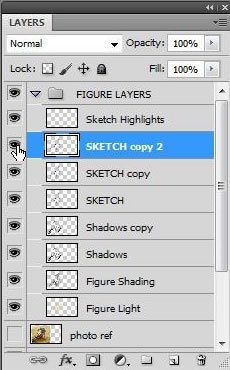
Create a New Layer above the other layers in the FIGURE LAYERS group, and title it Sketch Highlights
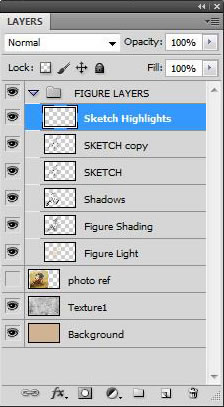
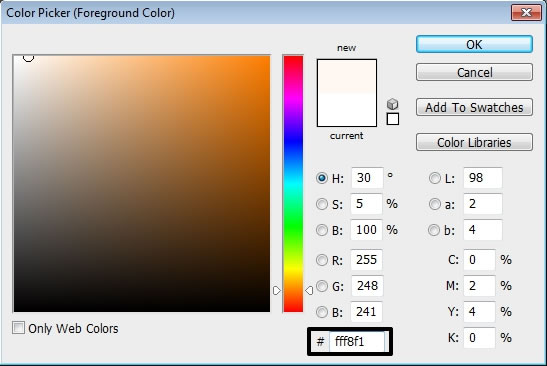
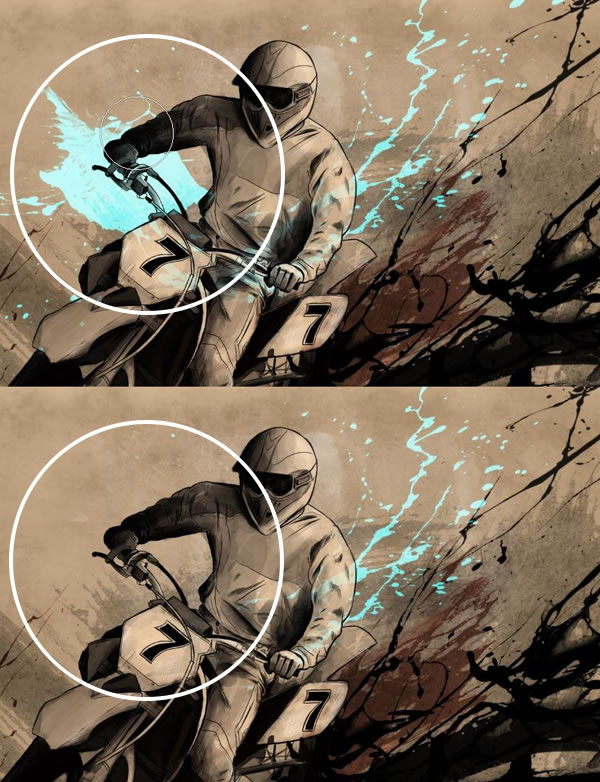
Step 20
Using a lighter shade than before and crosshatch some stronger highlights. I used #fff8f1
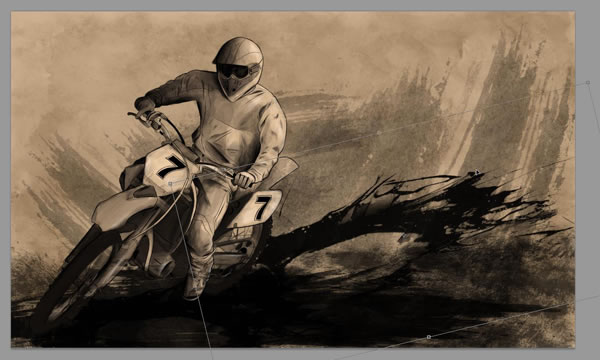
3. Ground & Texture
Step 1
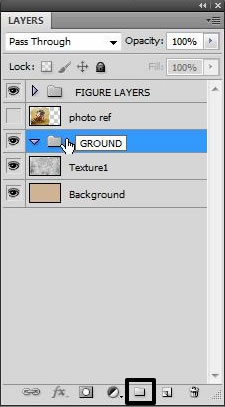
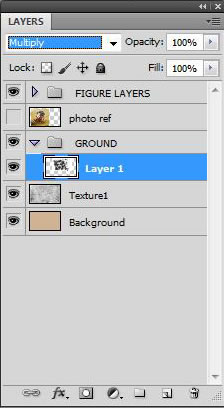
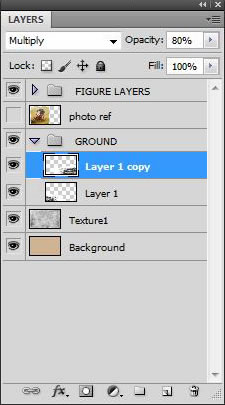
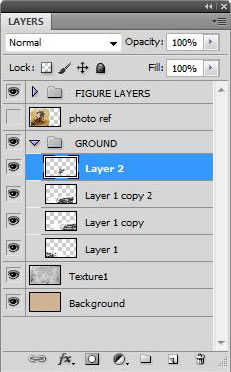
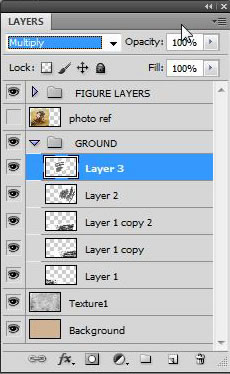
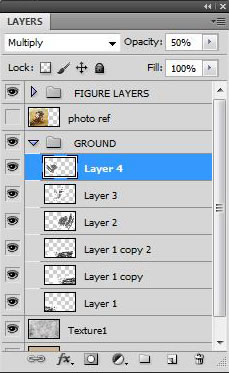
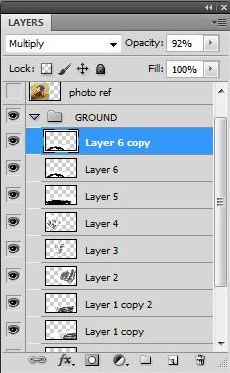
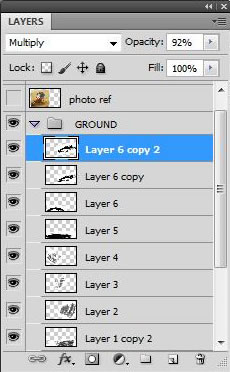
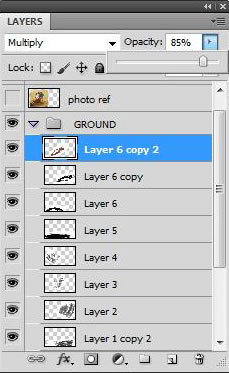
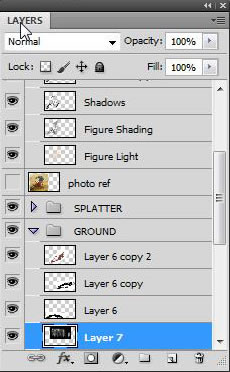
Create a new group above your Background and Texture Layer. Title it GROUND
Step 2
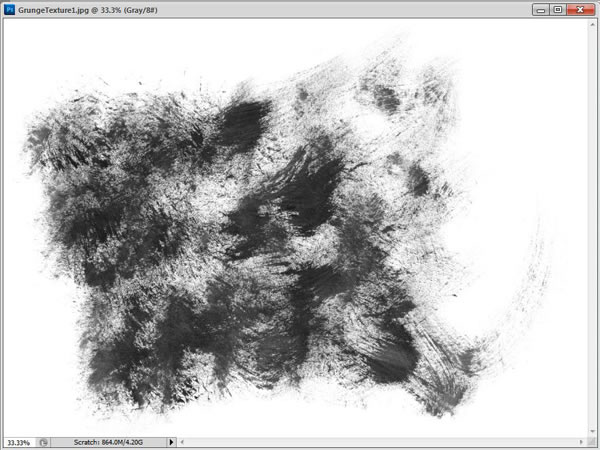
Open up the next stock image; GrungeTexture1
Step 3
Drag and drop it into your newly created GROUND folder.
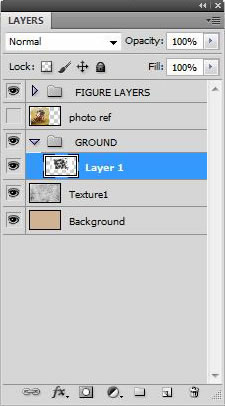
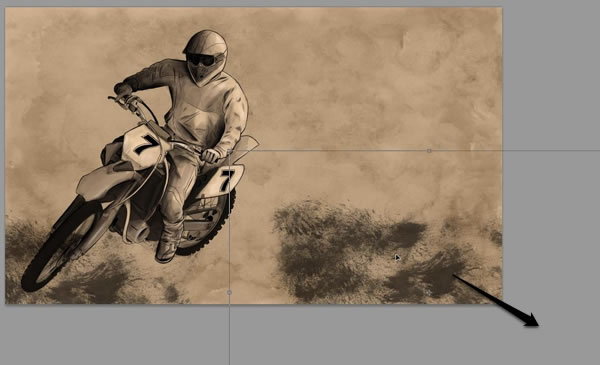
Step 4
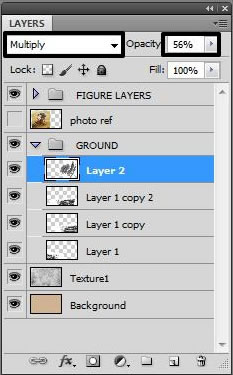
Set the blending mode to Multiply
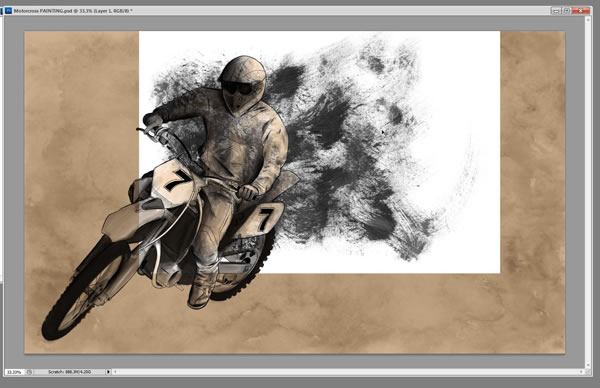
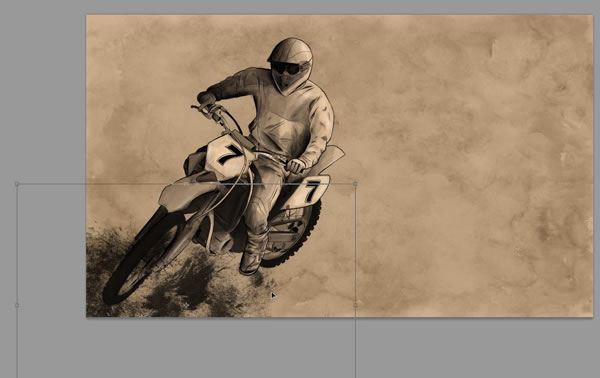
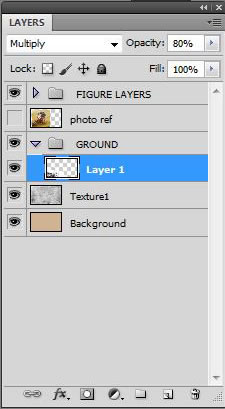
Step 5
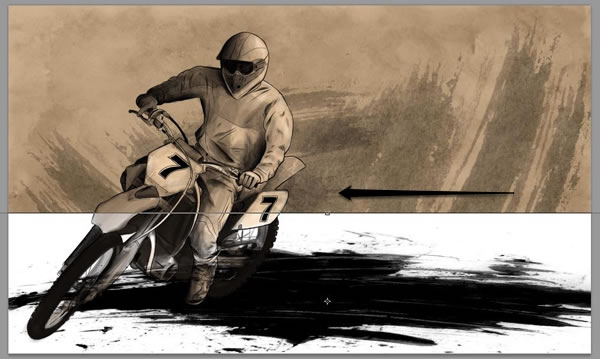
Free Transform and position the texture to the bottom left and drop the Opacity in the layers window to about 80%.
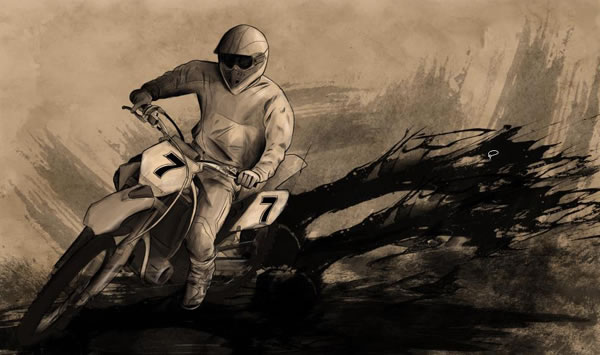
Step 6
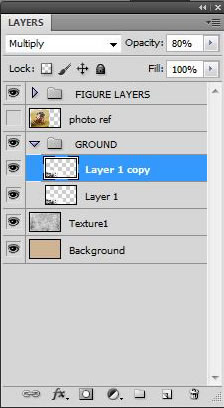
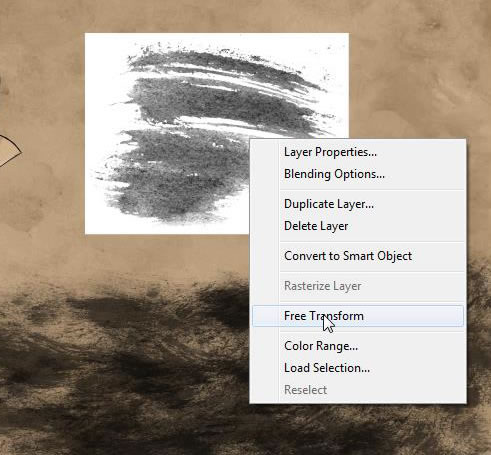
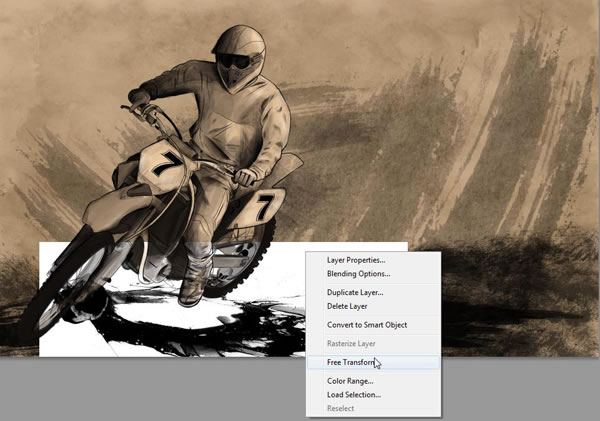
Duplicate the texture layer (Command/Ctrl-J), and drag it to the other corner.
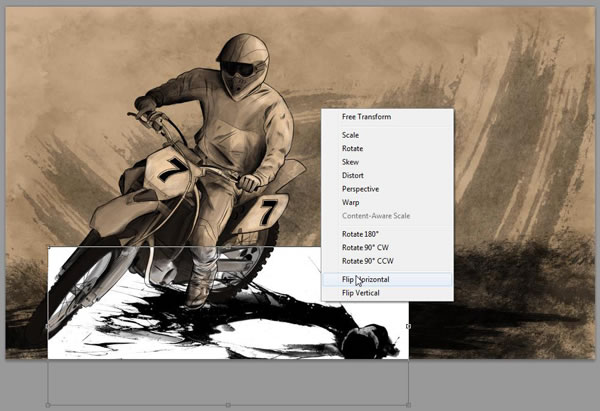
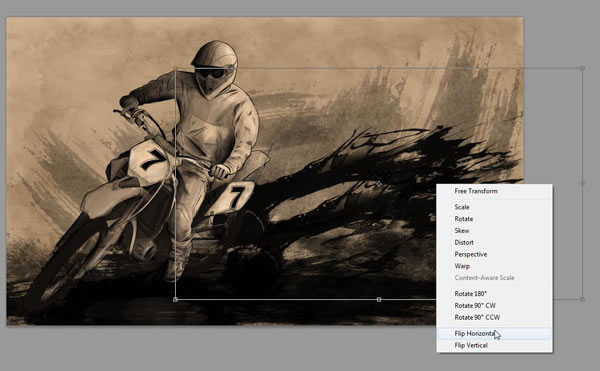
Step 7
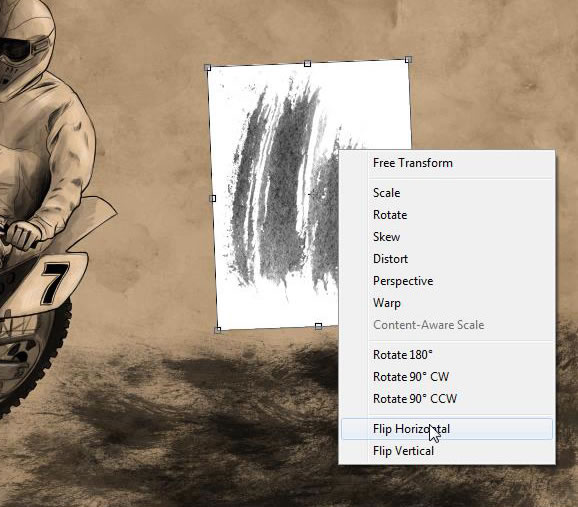
Go to Free Transform > Flip Horizontal…

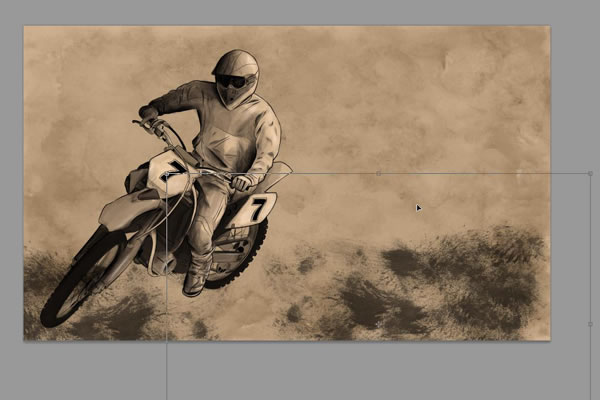
Step 8
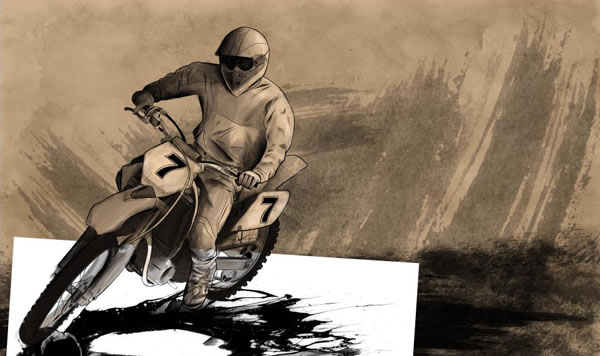
Stretch and position the texture layer to cover some more ground.
Step 9
Hold Command/Ctrl-Alt to duplicate that layer again.
Step 10
Move the layer slightly to the left.
Step 11
Free Transform to stretch the layer as it overlaps the texture underneath.
Step 12
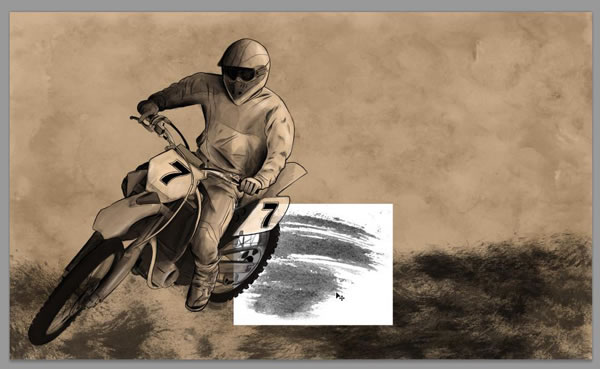
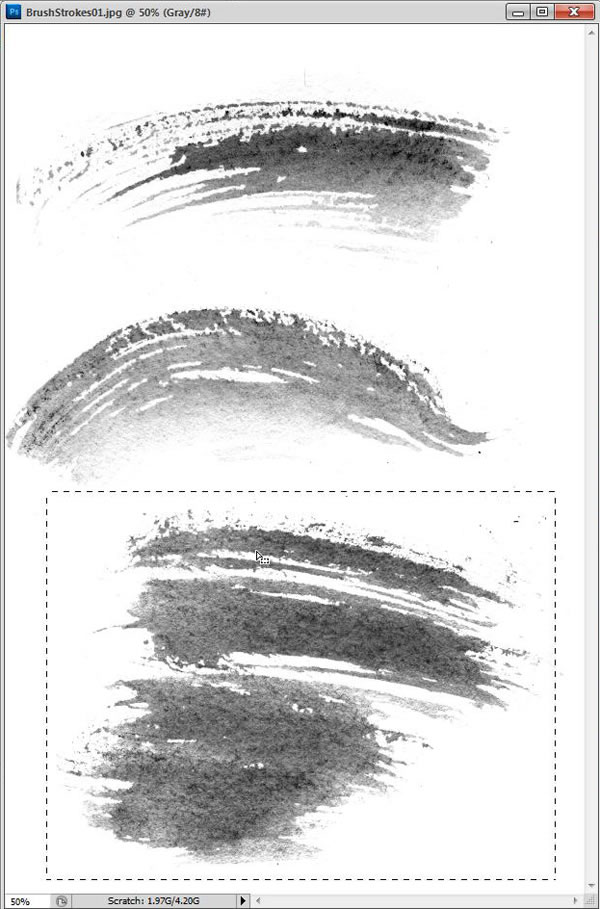
Open up BrushStrokes01 texture file.

Step 13
Make a selection with the Rectangular Marquee Tool (M).
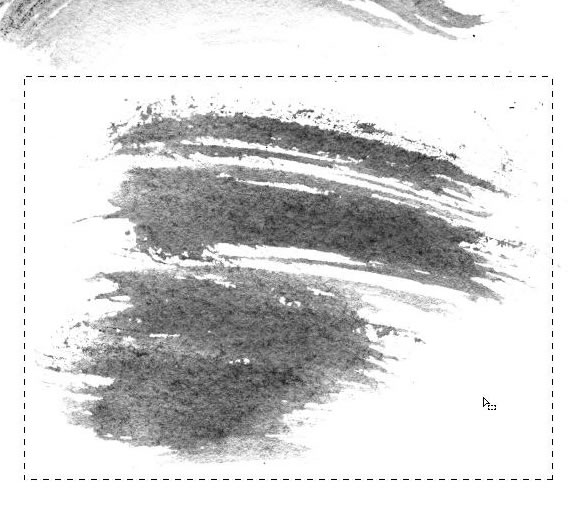
Step 14
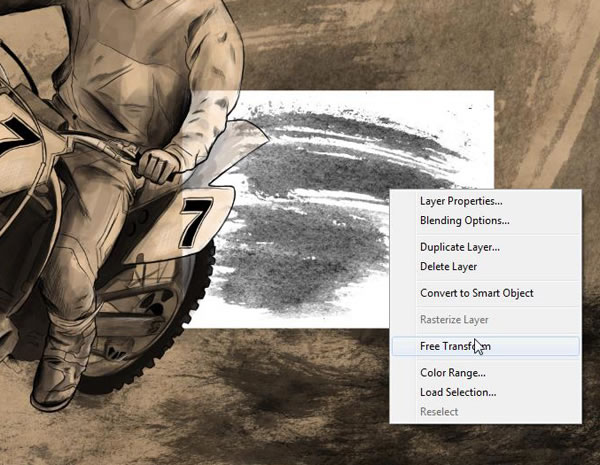
Hold Command/Ctrl, and drag and drop it into GROUND folder once again.
Step 15
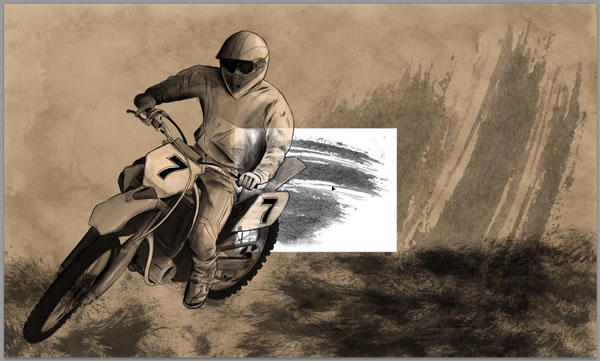
Use Free Transform > Flip Horizontal…
Step 16
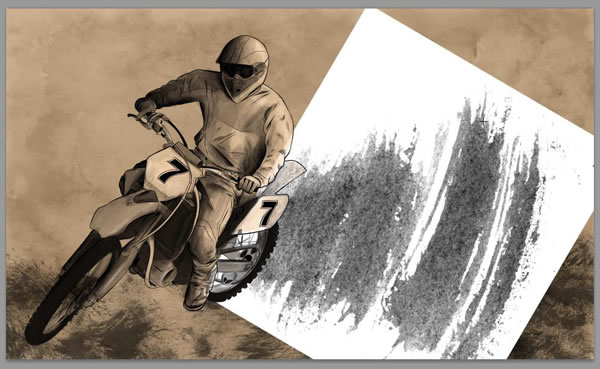
Stretch and skew it to fit to the right of the motorbike rider.
Step 17
Set to Multiply and drop the Opacity to 56%
Step 18
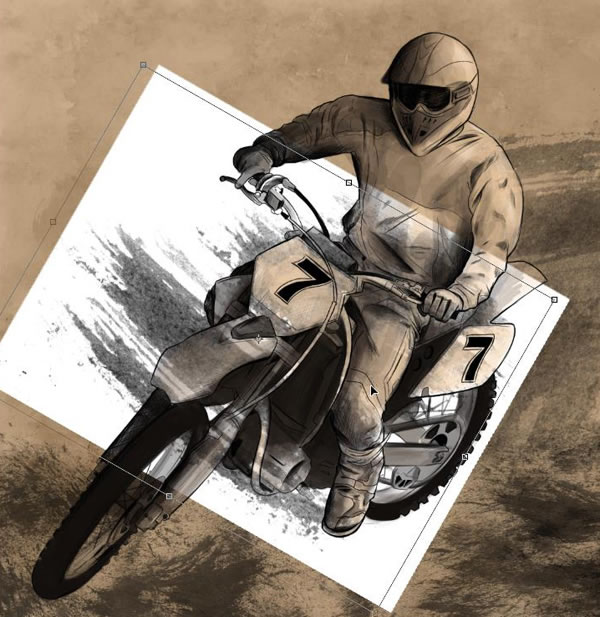
Take the same selection from BrushStrokes01 sample again.
Step 19
Drag and drop it onto your painting.
Step 20
Free Transform and position it behind motorbike rider once more.
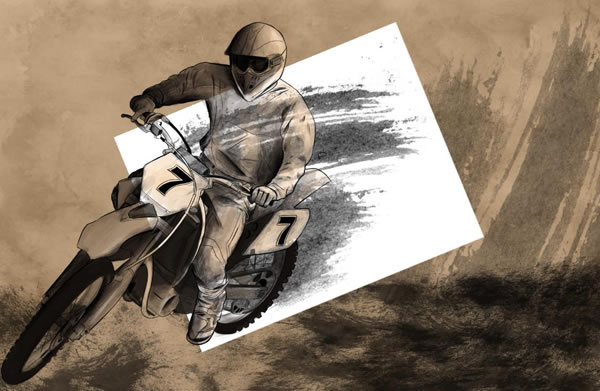
Step 21
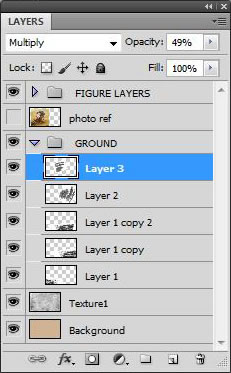
Set to Multiply.
Step 22
Also drop the Opacity to 49%
Step 23
Roughly Erase (E) where it overlaps the motorbike rider.
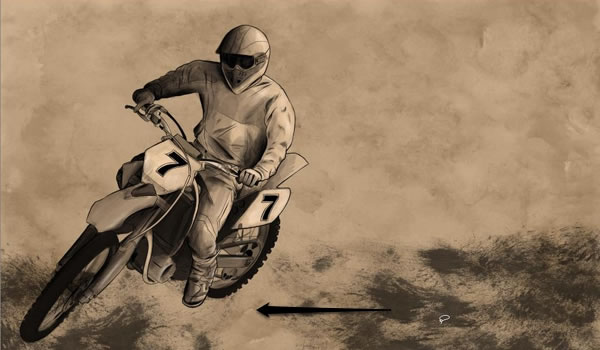
Step 24
Sample BrushStrokes01 one more time and drag it onto your painting.
Step 25
Use Free Transform and rotate it and position it to the left of the motorbike rider this time.
Step 26
Again, set it to Multiply and drop the Opacity down to 50%
Step 27
Erase away where it overlaps the motorbike rider.
Step 28
Open up SplatterSmear01 paint texture.
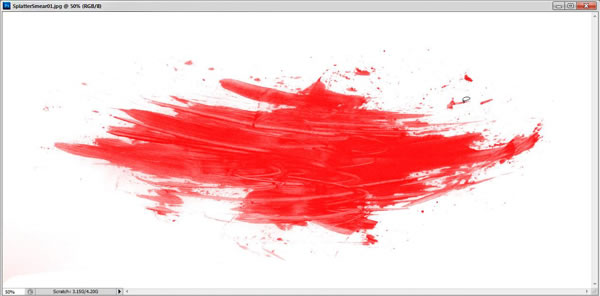
Step 29
Desaturate it (Command/Ctrl-Shift-U).
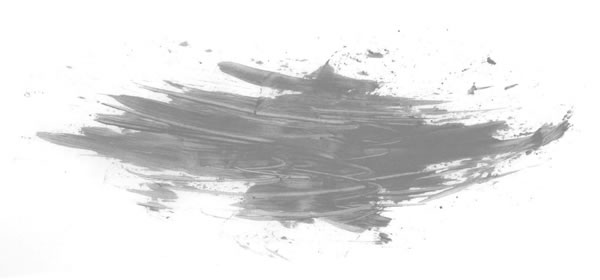
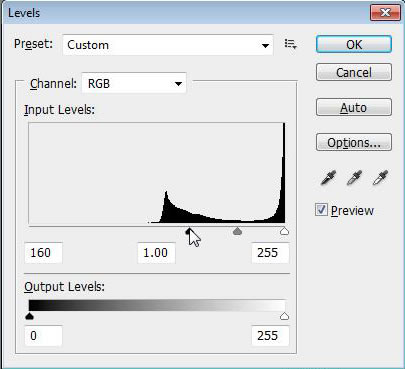
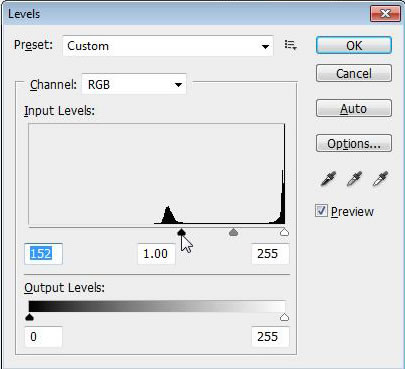
Step 30
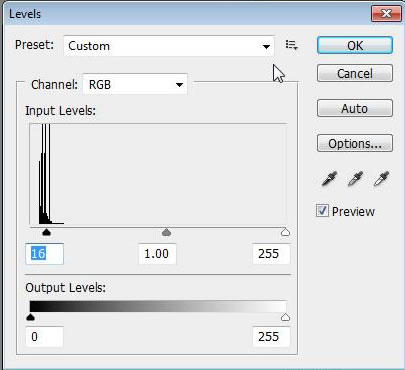
Open up Levels (Command/Ctrl-L) and adjust until all the grey is just about solid black.
Step 31
Drag and drop the whole image onto your painting.
Step 32
Free Transform and angle it clockwise to flip it upside down.
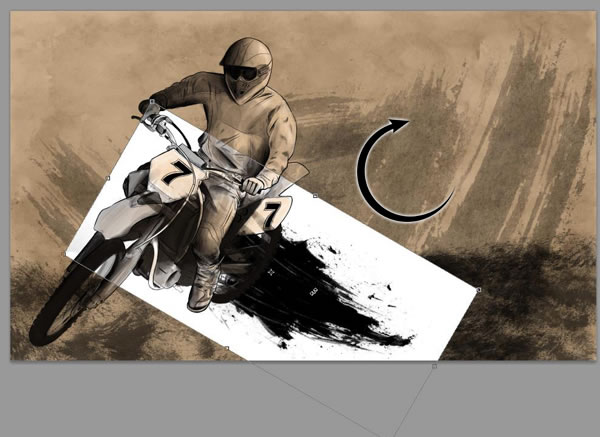
Step 33
Stretch horizontally to fit along the ground.
Step 34
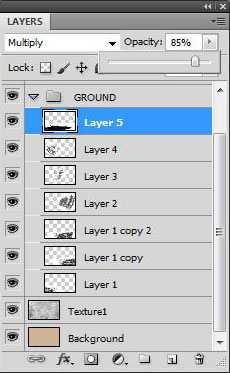
Set to Multiply.
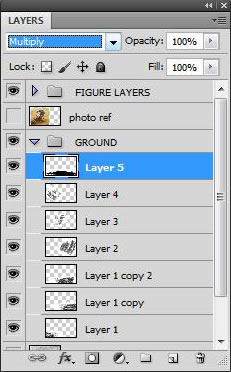
Step 35
Bring the Opacity down to 85%
Step 36
Now open up SplatterThickPaint02 asset.
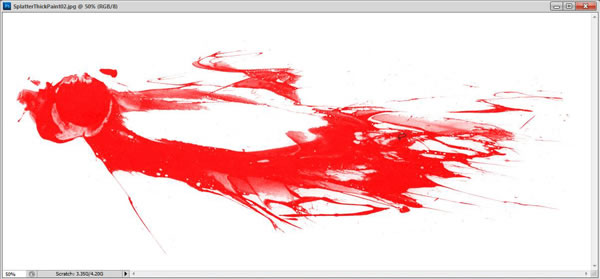
Step 37
Desaturate the image (Command/Ctrl-Shift + U).
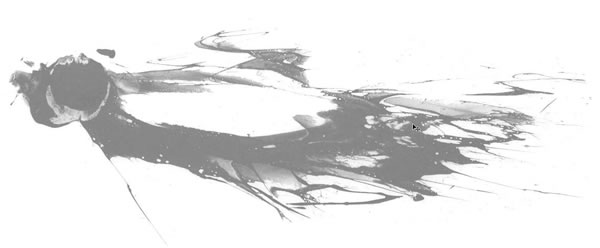
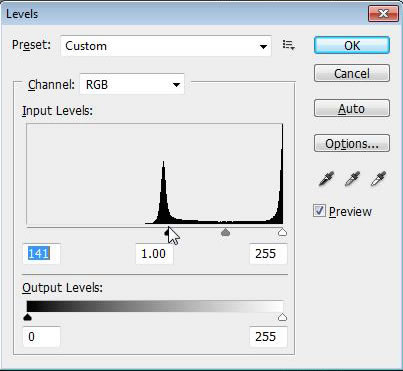
Step 38
Adjust the Levels (Command/Ctrl-L) and bring it down to black.
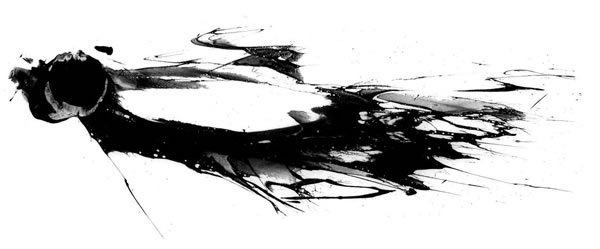
Step 39
Drag and drop it onto your painting.
Step 40
Use Free Transform again.
Step 41
Now Flip Horizontal.
Step 42
Position the layer toward the front wheel of the bike.
Step 43
Set it to Multiply.
Step 44
Drop the Opacity to around 90%
Step 45
Duplicate the layer (Command/Ctrl-J).
Step 46
Move up and position the duplicated layer near the rear wheel.
Step 47
Free Transform and scale it up a little.
Step 48
Duplicate again (Command/Ctrl-J)
Step 49
Free Transform > Flip Horizontal…
Step 50
Position the layer closer to the back wheel this time.
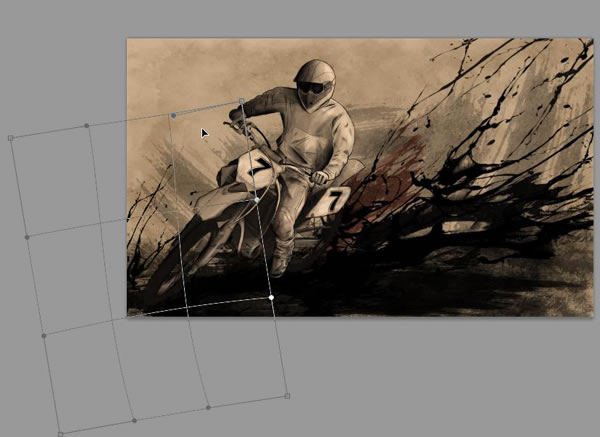
Step 51
Finally, Free Transform one more time, and use Warp to give it some curve.
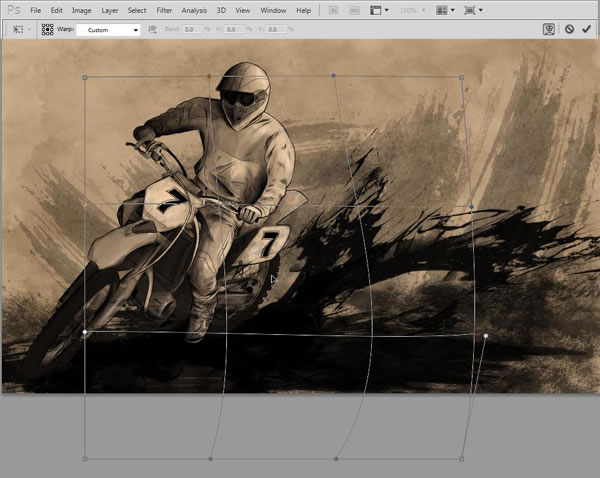
Step 52
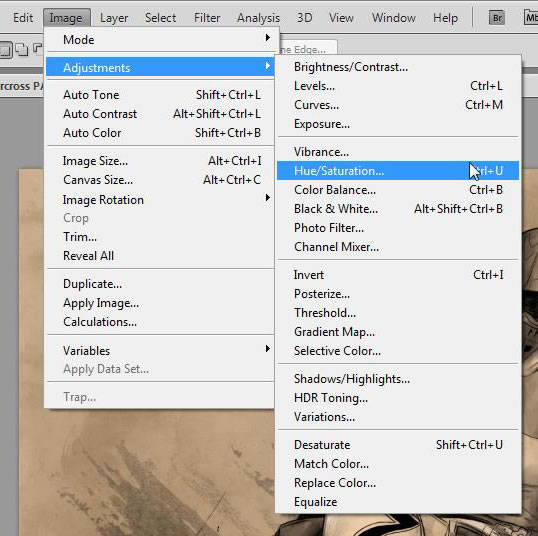
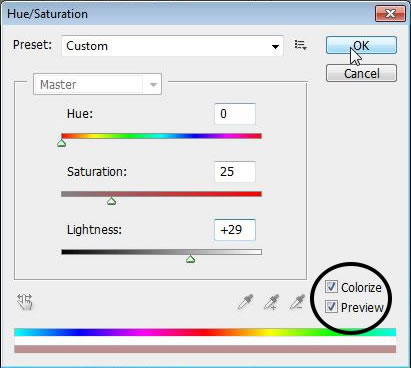
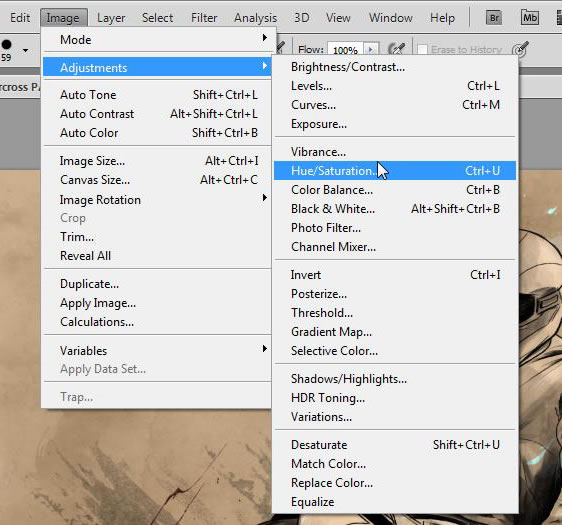
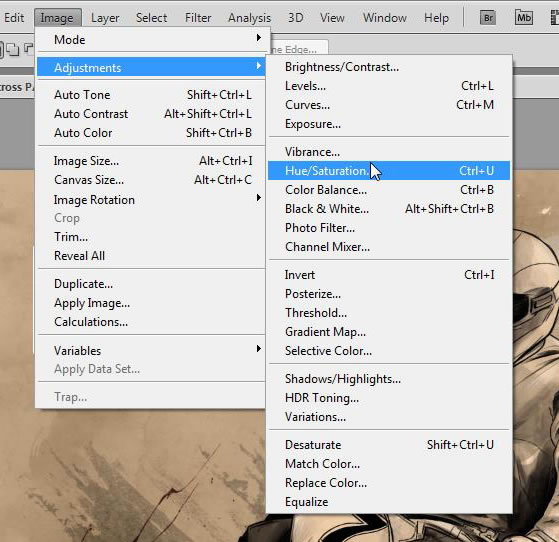
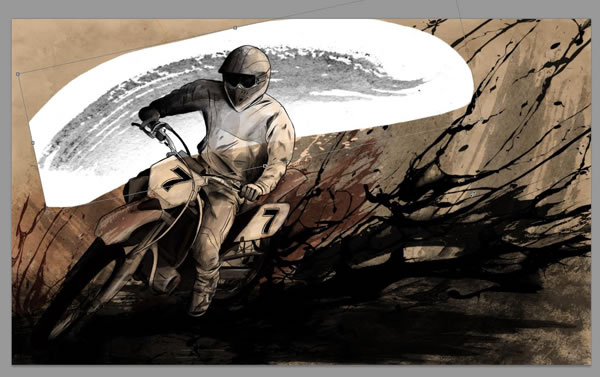
Time to give it some color. Open up the Hue/Saturation menu by going; Image > Adjustments > Hue/Saturation (Command/Ctrl-U)
.
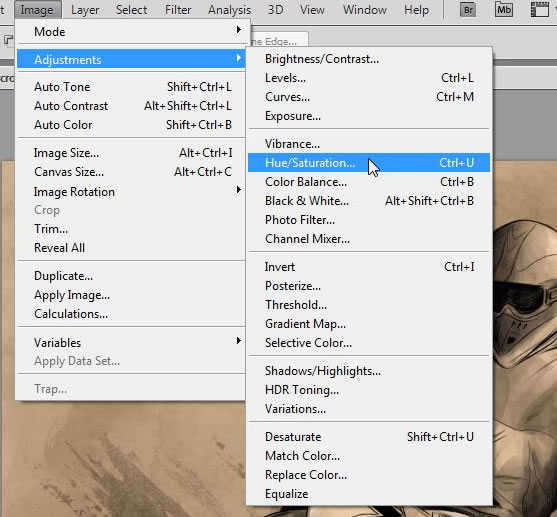
Step 53
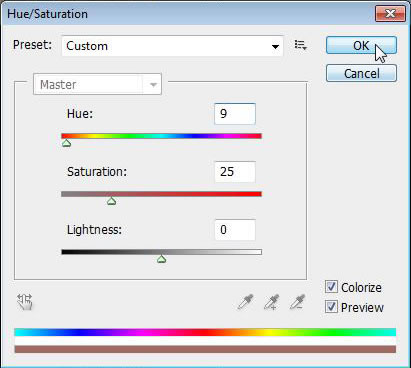
Set it to Colorize in the Hue/Saturation window.
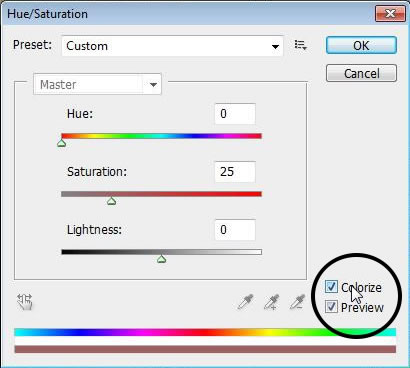
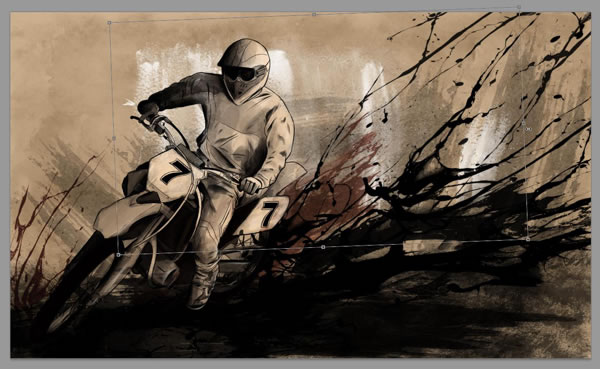
Step 54
With these color settings, give the paint splatter a nice red/brown hue.
Step 55
Drop Opacity down to 85%
Step 56
Finally, erase away where the red overlaps the motorbike rider illustration.
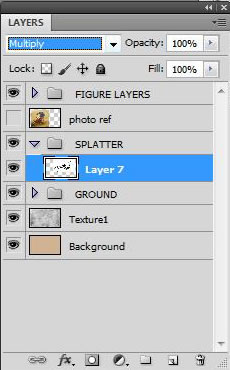
4. Splatter Effects
Step 1
Create a new group over the GROUND folder and title it SPLATTER
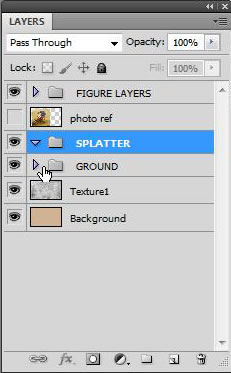
Step 2
Open up stock image Splatter01
Step 3
Desaturate again (Command/Ctrl-Shift + U).
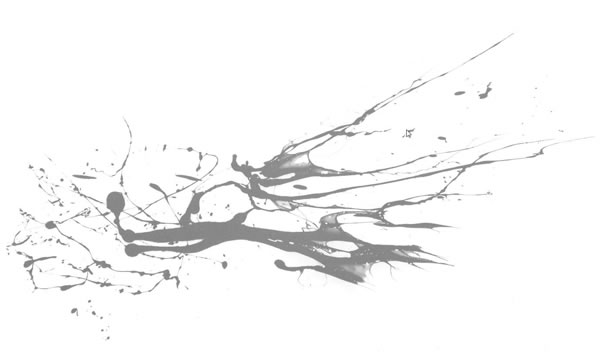
Step 4
Open up the Levels menu (Command/Ctrl-L) and adjust accordingly to strengthen the black.
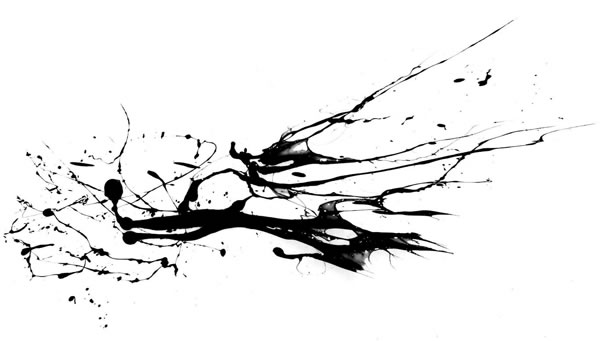
Step 5
Drag and drop the Splatter01 image onto your illustration (within the SPLATTER folder).
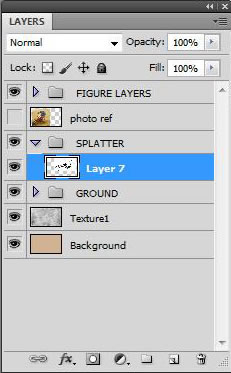
Step 6
Set the layer to Multiply.
Step 7
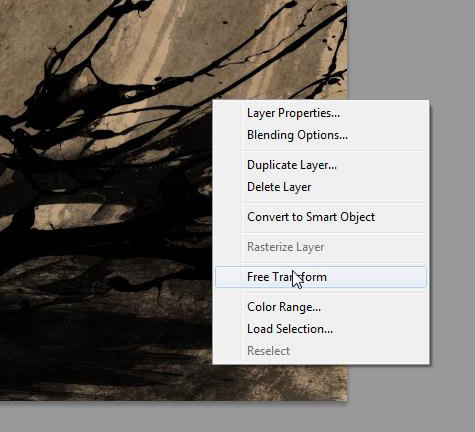
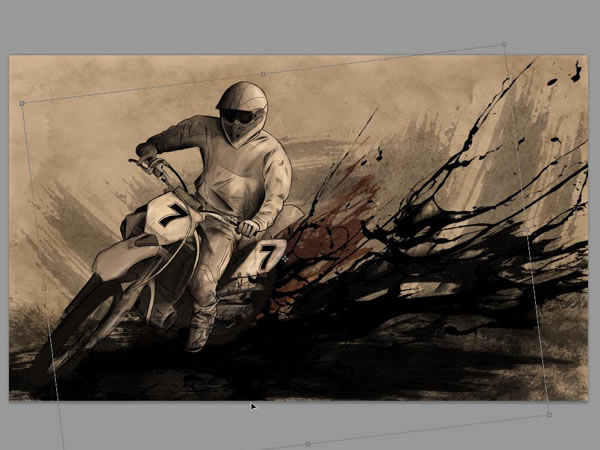
Use Free Transform.

Step 8
Scale it and position behind the back wheel of the bike.
Step 9
Use the Warp Tool and skew it slightly
Step 10
Duplicate the layer (Command/Ctrl-J)
Step 11
Use Free Transform on the new layer. Scale and position it closer to the back wheel.
Step 12
Erase (E) away some areas where the black splatter begins to overlap the illustration again.

Step 13
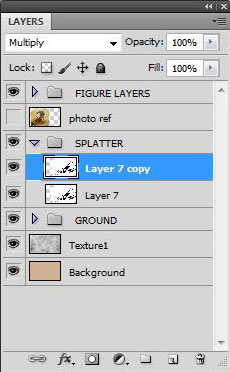
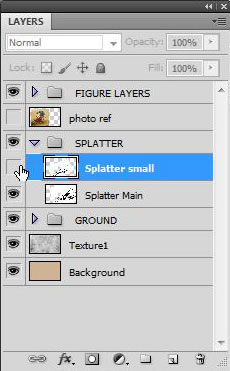
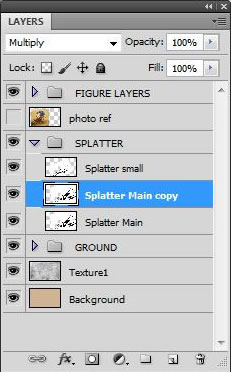
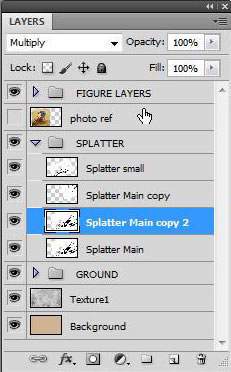
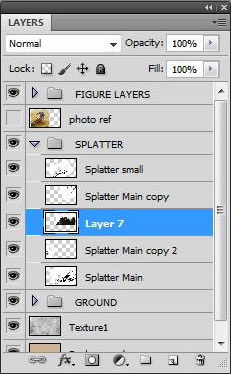
Rename those two Layers: Splatter Main and Splatter Small.
Step 14
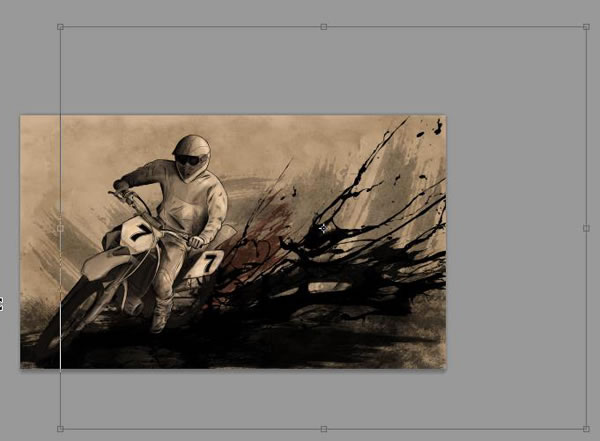
Duplicate the layer Splatter Main (Command/Ctrl-J)
Step 15
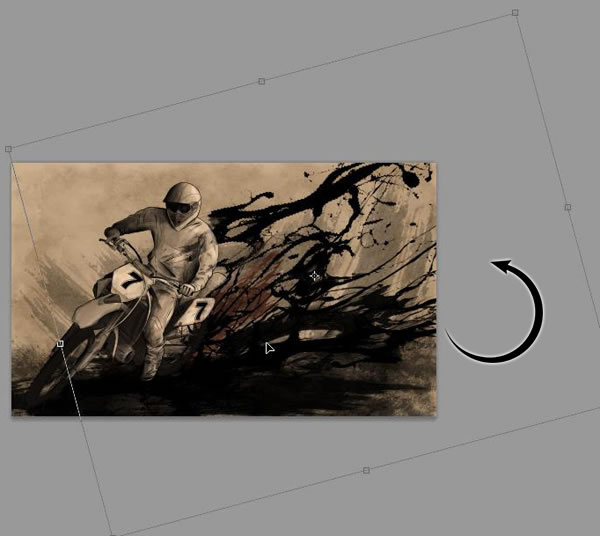
Use Free Transform, and rotate to the left (counter clockwise).
Step 16
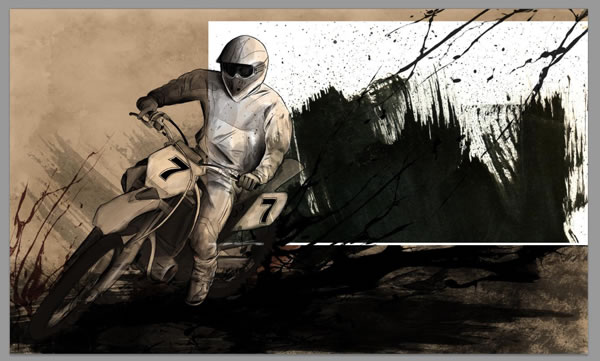
Position the layer towards the top right hand corner and almost out of the image (so just the scattered bits of paint are showing from the edge).
Step 17
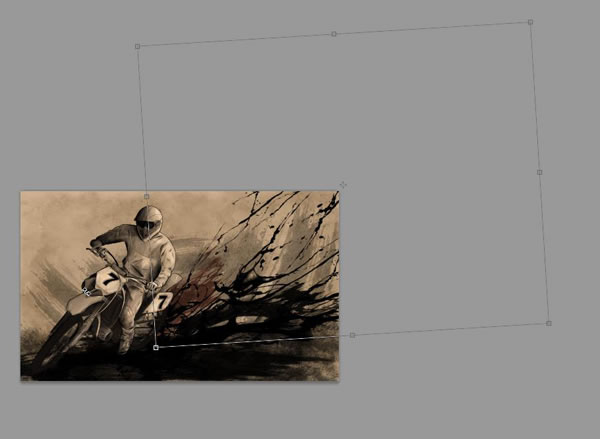
Duplicate (Command/Ctrl-J) your Splatter Main layer once more.
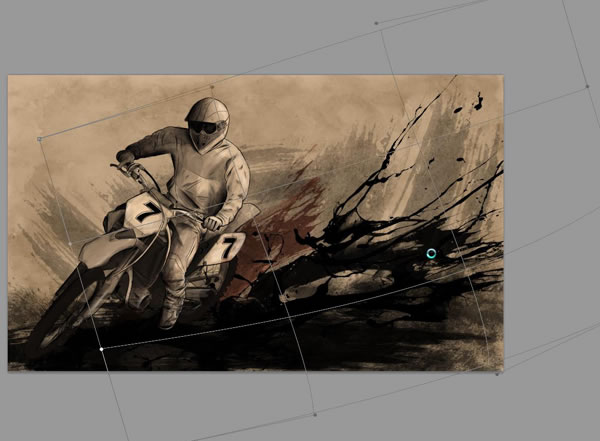
Step 18
Free Transform and scale the new layer and position it down in the bottom left hand corner.
Step 19
Use Free Transform > Flip Horizontal…

Step 20
Rotate it slightly counter clockwise.
Step 21
Warp to give it some curvature.
Step 22
Again, give it some color by going to: Image> Adjustments > Hue/Saturation…
Step 23
Check the Colorize box in the Hue/Saturation window and adjust the colors like so:
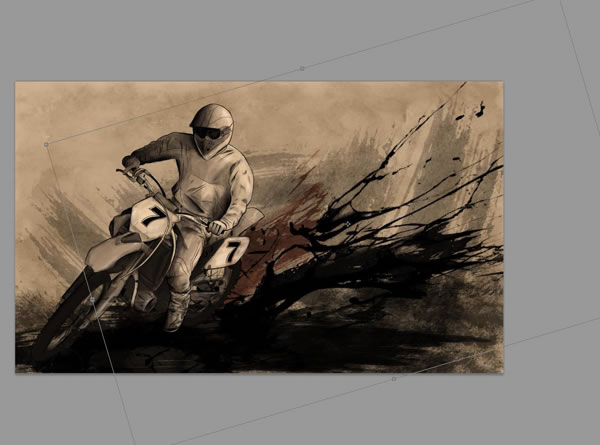
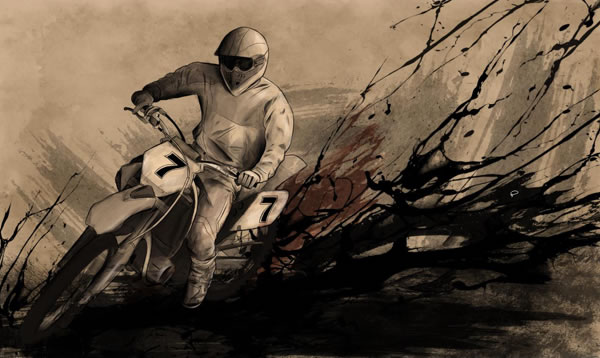
Step 24
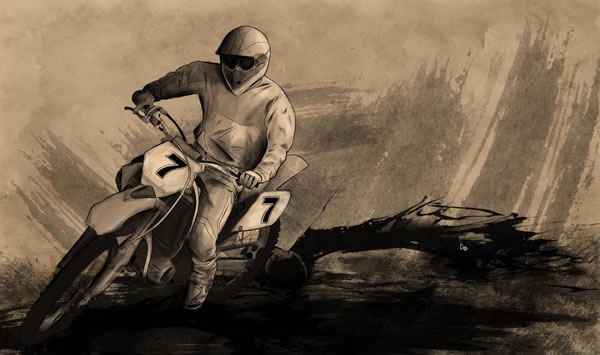
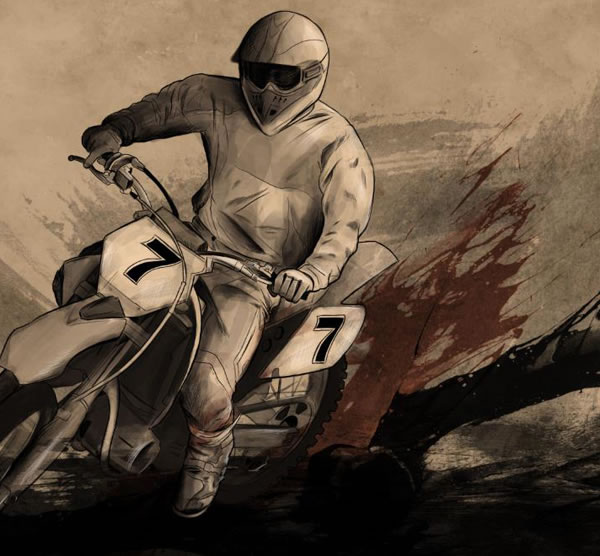
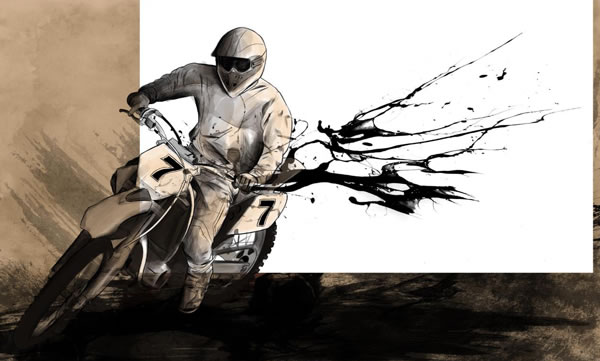
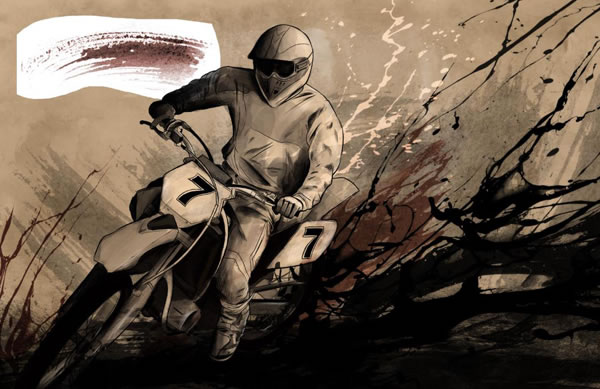
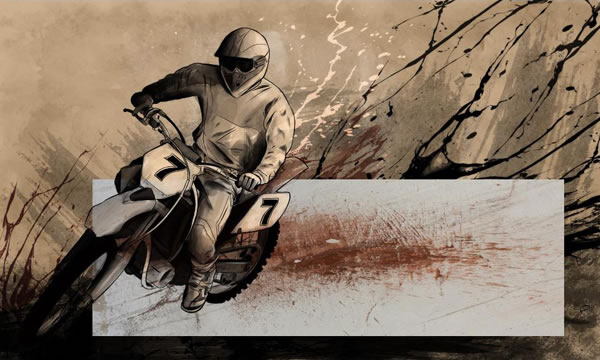
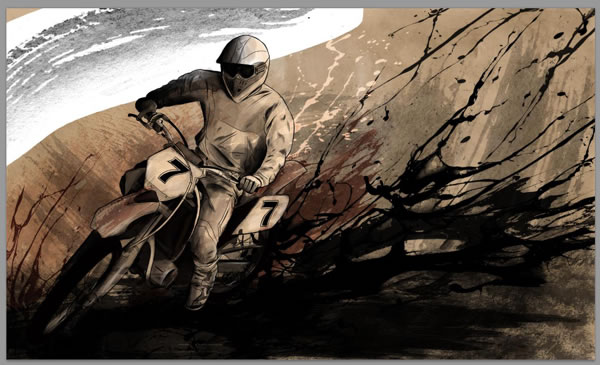
You can see how all the textured and paint splatter layers are beginning to blend together as one and add a certain amount of movement to the picture already. Now we just need to balance out the composition a bit more.
Step 25
Open up the texture GrungePaint02

Step 26
With the Rectangular Marquee selection tool (M), select the top half of the stock.
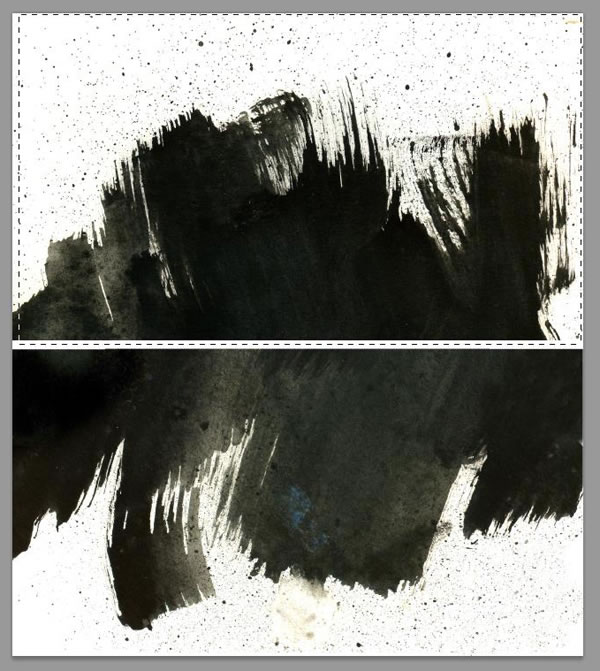
Step 27
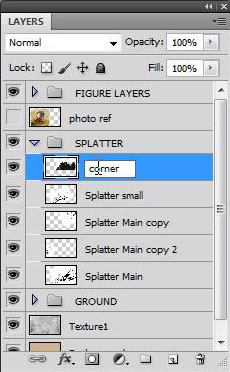
Drag that over to your painting into the SPLATTER folder.
Step 28
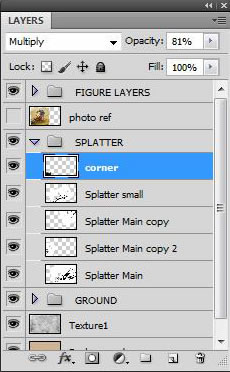
Rename the layer Corner.
Step 29
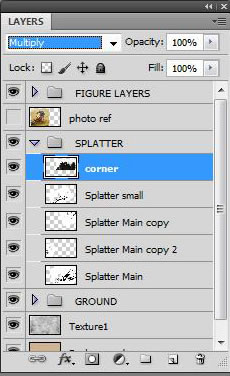
Set it to Multiply.
Step 30
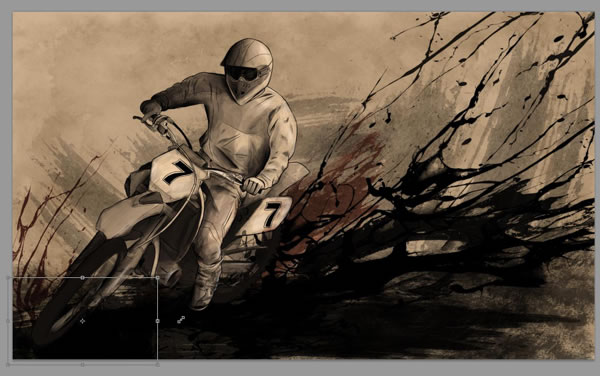
Free Transform and position it down the bottom left hand corner. Scale it relatively smaller.
Step 31
Drop the Opacity down to 81%
5. Illustration Adjustments
Step 1
Return to your FIGURE LAYERS group.
Step 2
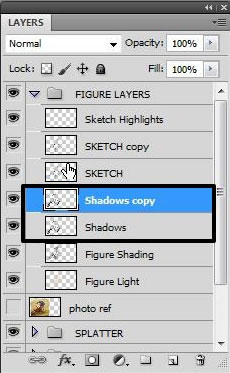
Select the Shadows layer and duplicate it (Command/Ctrl-J)
Step 3
Open up the Levels menu (Command/Ctrl-L) on the Shadows copy layer, and strengthen the black slightly.
Step 4
Also select the Sketch layer and duplicate (Command/Ctrl-J) to make the lines a little stronger too.
Step 5
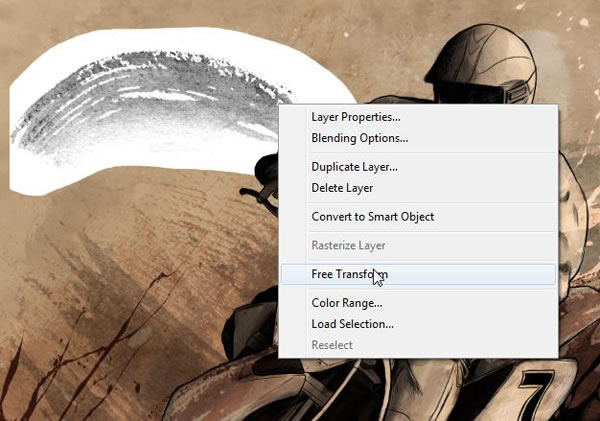
Now open up the texture file BrushStrokes028.jpg
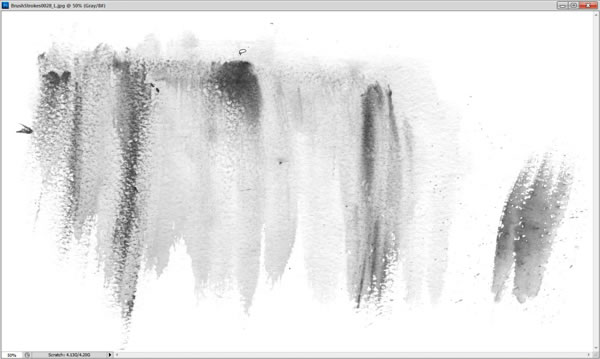
Step 6
Invert the whole image (Command/Ctrl-I)
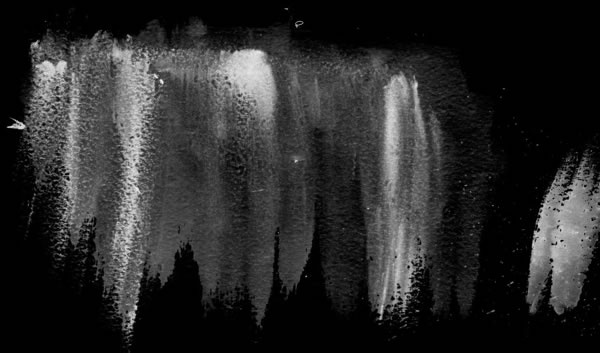
Step 7
Drag it onto your painting and place it within the GROUND group.
Step 8
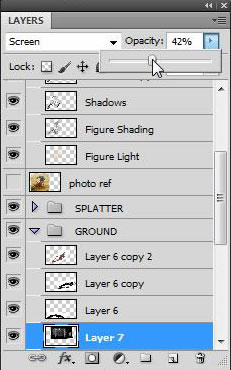
Set the blending mode to Screen.

Step 9
Use Free Transform, and position it just behind the motorbike rider.
Step 10
Drop the Opacity down to 42%
Step 11
Use the Eraser (E) set with a soft edged brush setting, and lightly erase away some of the heavier areas of white.
6. Final Effects
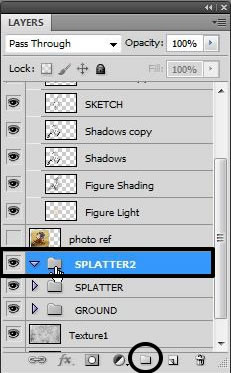
Step 1
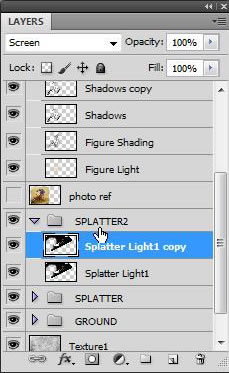
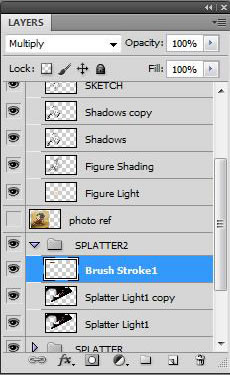
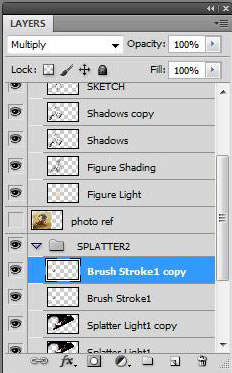
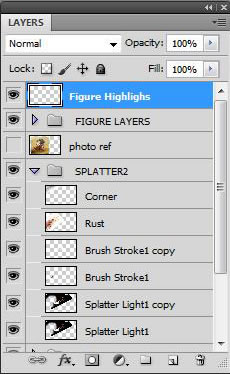
Create a new group above the SPLATTER group, and title it SPLATTER 2. The final effects will go into this folder.
Step 2
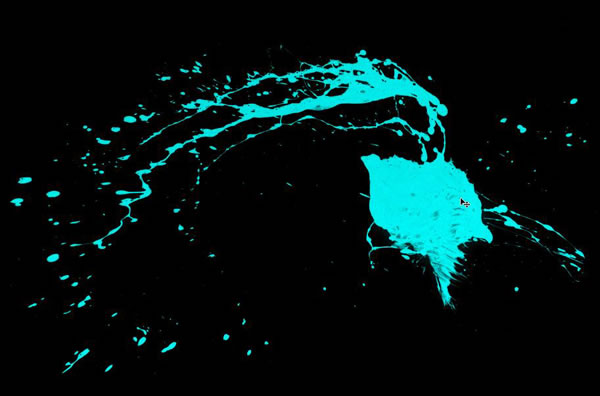
Open up the stock image SplatterThickPaint03
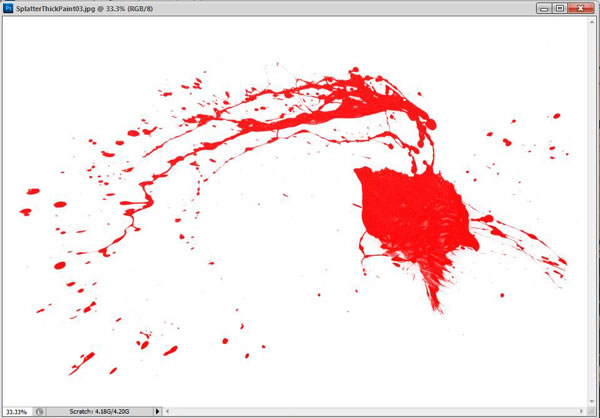
Step 3
Invert the whole image (Command/Ctrl-I)
Step 4
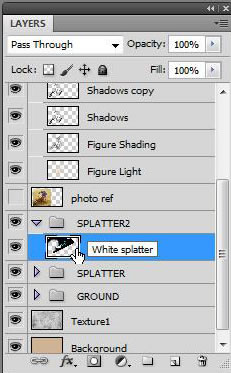
Drag it into your SPLATTER2 group and name the layer White splatter
Step 5
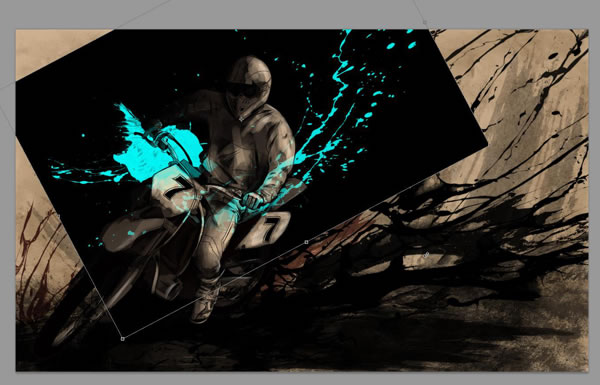
Free Transform and rotate it around clockwise.
Step 6
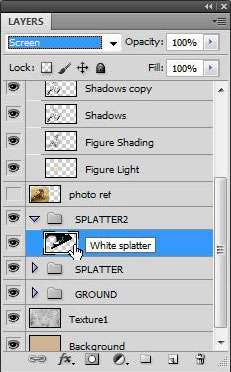
Set the blending mode to Screen.
Step 7
Use Free Transform and Warp it so it sits a little bit nicer.
Step 8
Erase (E) away the section to the left.
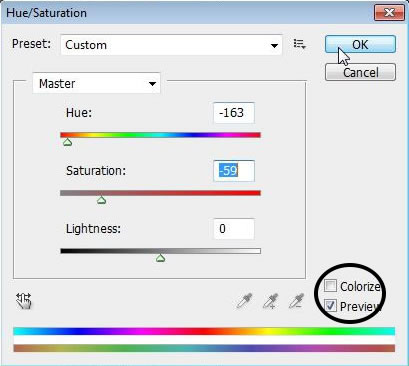
Step 9
Now go to Image > Adjustments > Hue/Saturation (Command/Ctrl-U). Leave the Colorize box unchecked this time. Adjust so the color goes from blue to a softer orange/red.
Step 10
Duplicate the Layer (Command/Ctrl-J) to make it significantly stronger.
Step 11
Open up stock file BrushStrokes01 again.

Step 12
With the Lasso Tool (L), make a selection of the top brush stroke.

Step 13
While holding Command/Ctrl, drag that little selection onto your piece.
Step 14
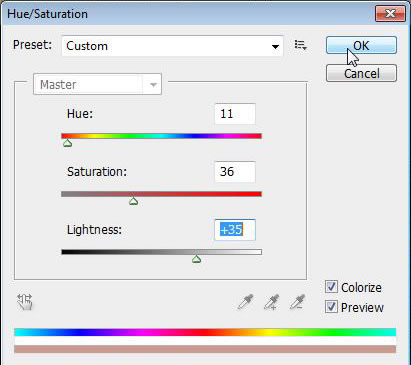
Adjust the color by going to Image > Adjustments > Hue/Saturation (Command/Ctrl-U)
Step 15
Check the Colorize box, and adjust the Hue and Lightness until it becomes a dark red.
Step 16
Set the blending mode to Multiply.
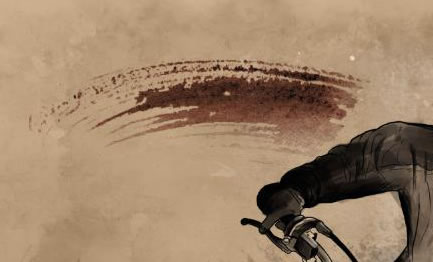
Step 17
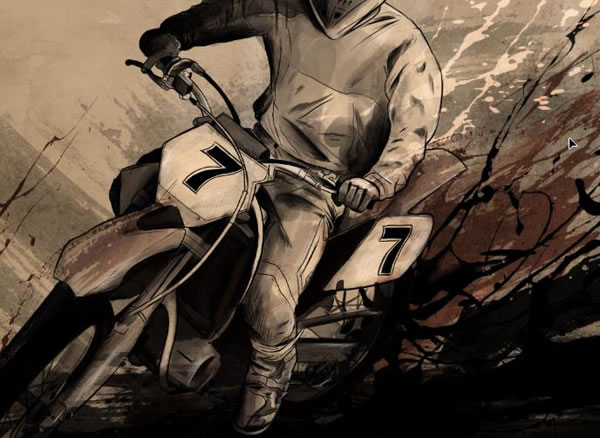
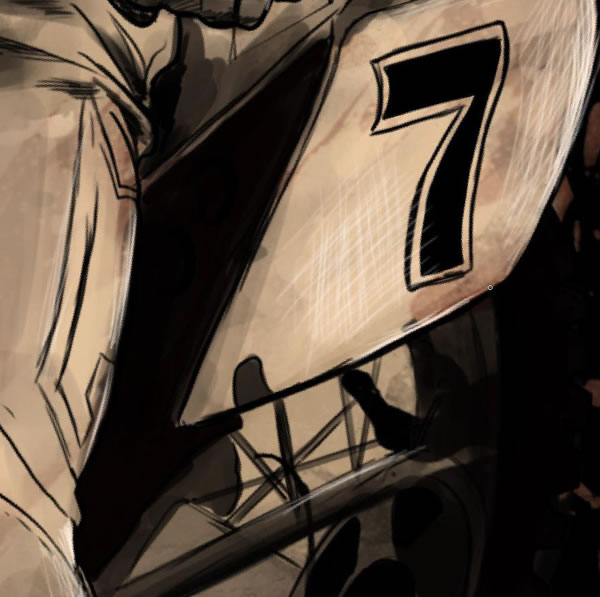
Use Free Transform to position and scale it over the front fender, giving it a literal streak of color.
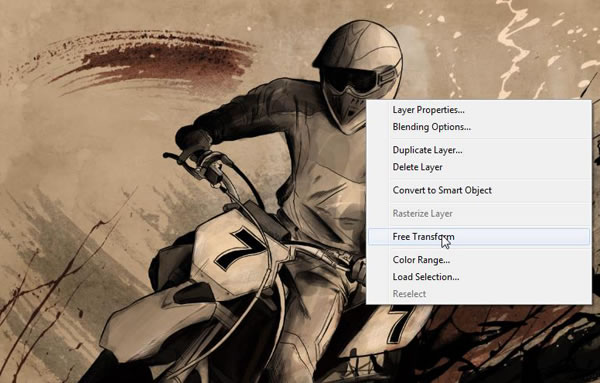
Step 18
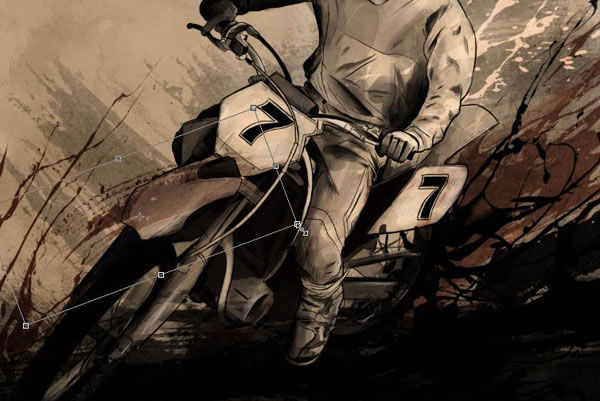
Duplicate the layer (Command/Ctrl-J).
Step 19
Drag the duplicated layer to the rear fender now.
Step 20
Use Free Transform > Flip Horizontal…

Step 21
Scale it to fit over the fender a little better.
Step 22
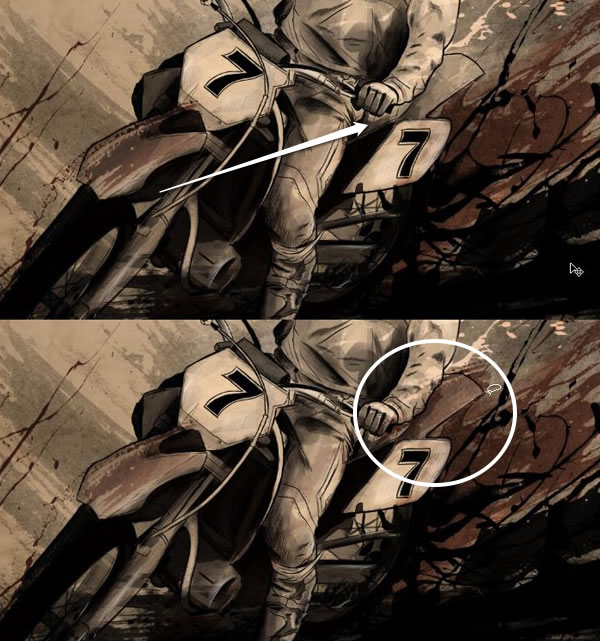
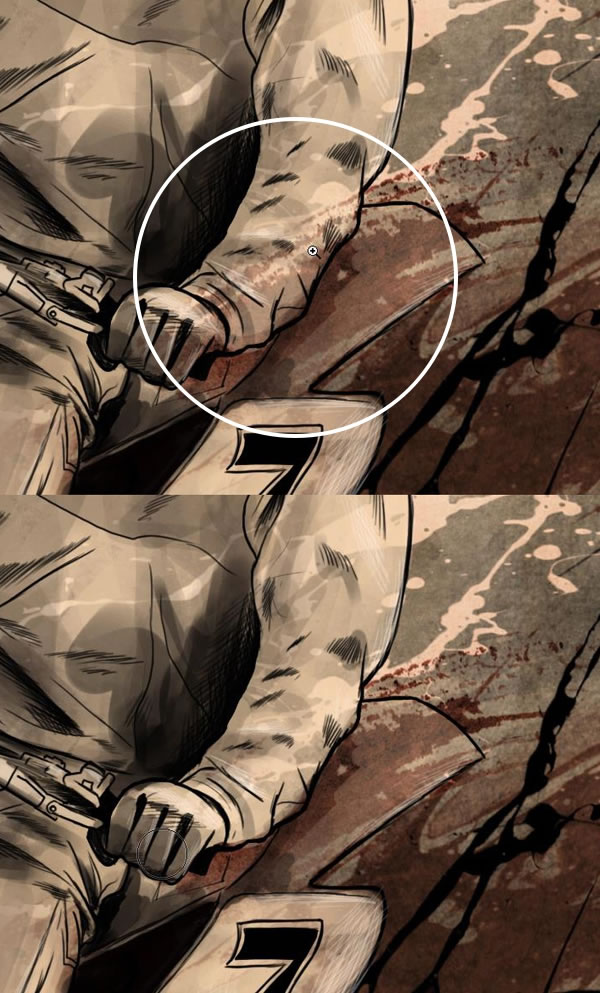
Erase (E) where it overlaps the riders sleeve and hand.
Step 23
Open up texture file DecalsStain0012.
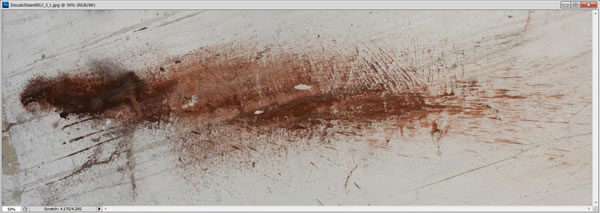
Step 24
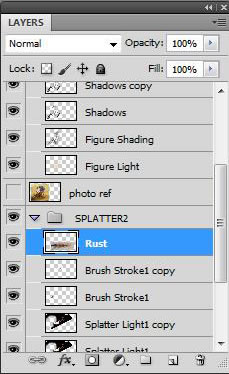
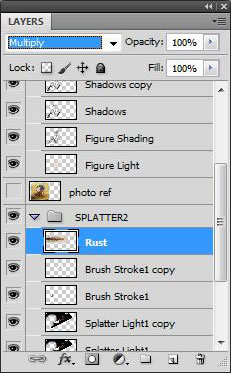
Drag and drop it onto your painting within the SPLATTER2 group.
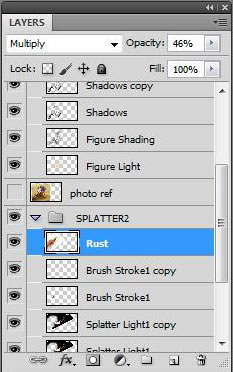
Step 25
Rename the layer to Rust.
Step 26
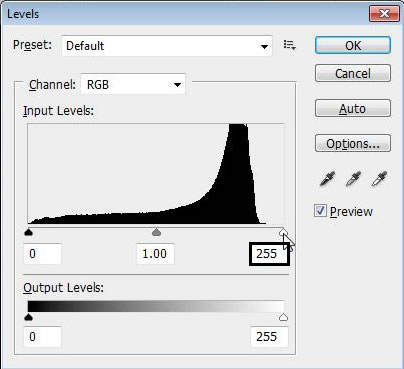
Open up the Levels menu (Command/Ctrl-L), and bring up the whites on the scale
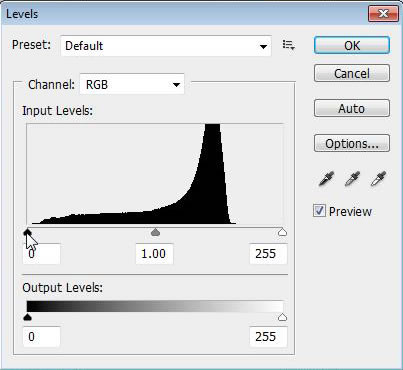
Step 27
Set the Rust layer to Multiply.
Step 28
Adjust the Levels (Command/Ctrl-L) bit more to get rid of the last of the dark outline.
Step 29
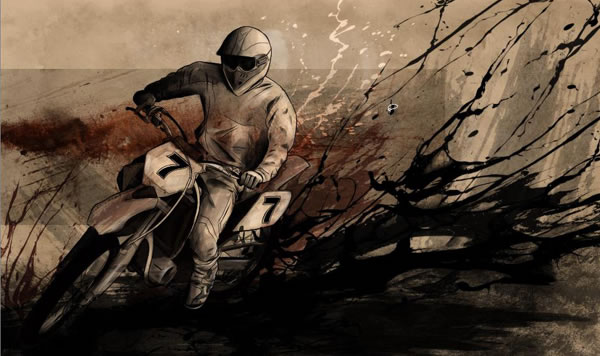
Free Transform and scale it to sit diagonal to the rider.
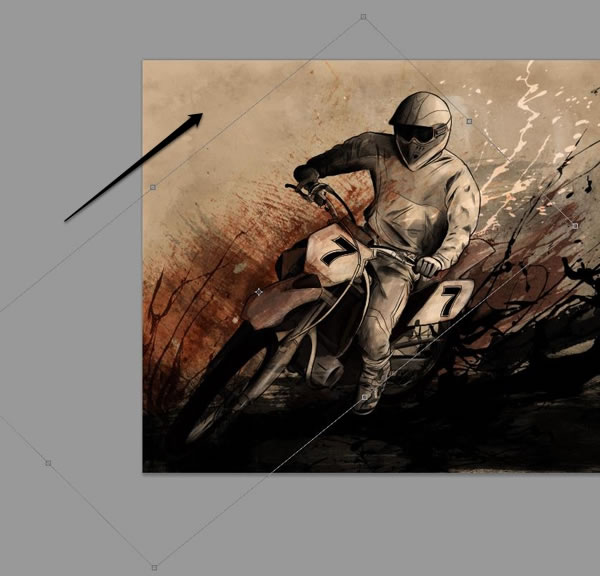
Step 30
Drop the Opacity down to 46%
Step 31
Open up stock file BrushStrokes01 once more, and make a selection with the lasso tool, this time on the second brush stroke.
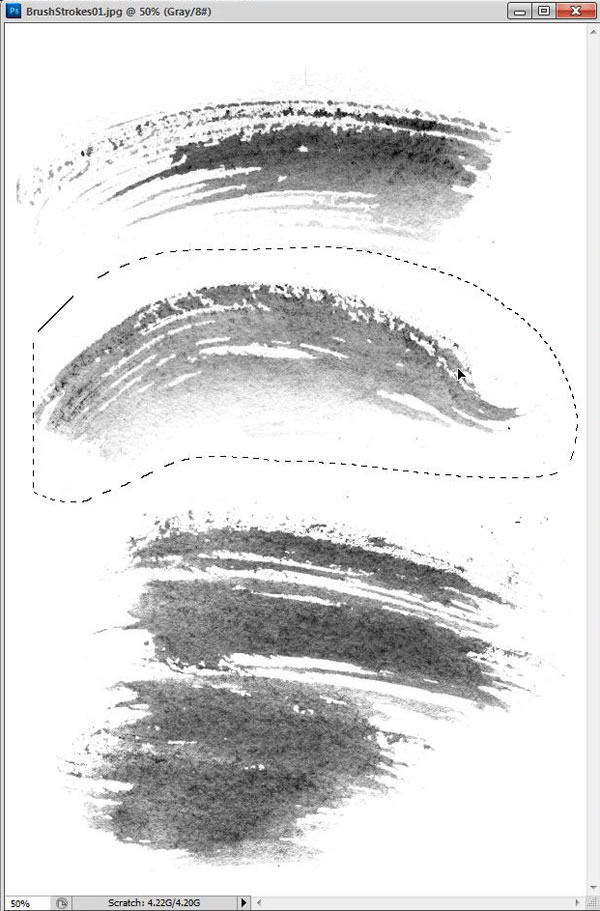
Step 32
Drag that over to your painting.
Step 33
Free Transform and scale/stretch it.
Step 34
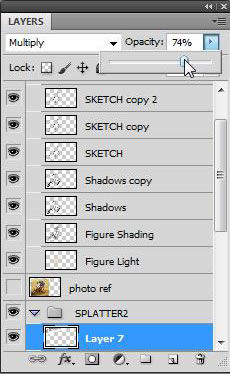
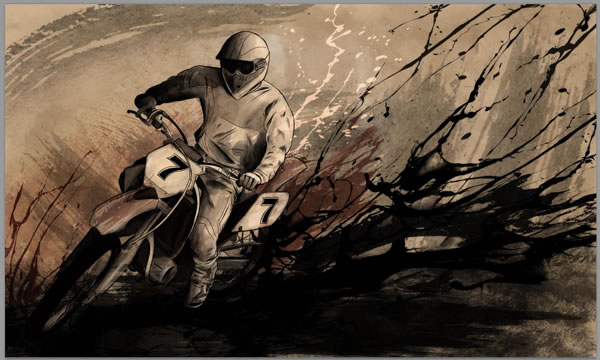
Position it in the upper left hand corner, and set the blending mode to Multiply.
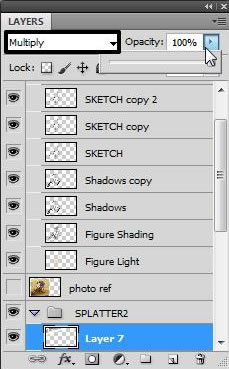
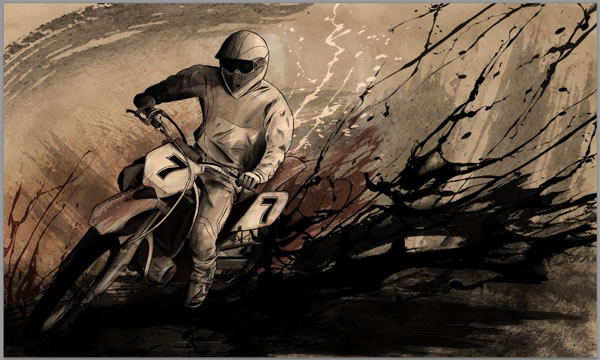
Step 35
Drop the Opacity down to 74%
Step 36
Duplicate the layer (Command/Ctrl-J), and move it closer to the upper left corner behind the last brush stroke texture.
7. Add Highlights
Step 1
Finally, create a New Layer above everything else in the layers window, and title that layer Figure Highlights
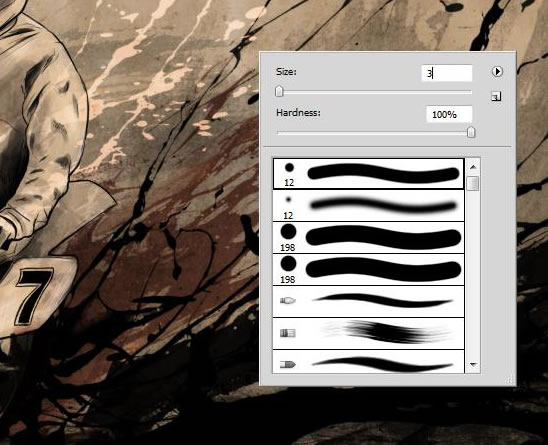
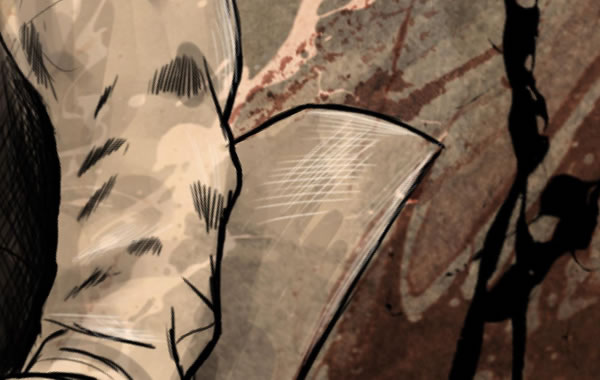
Step 2
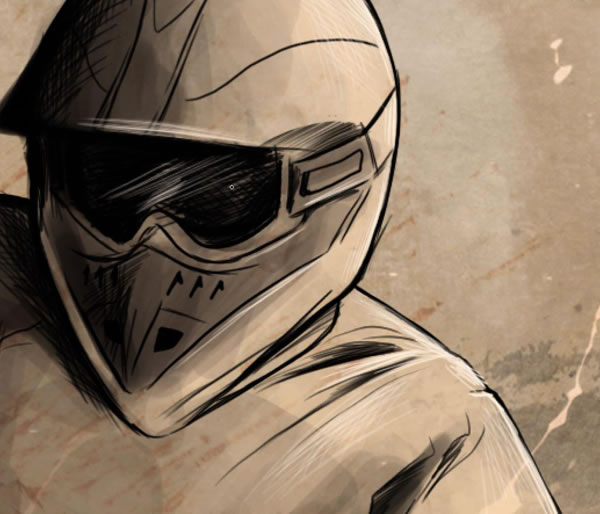
With a Hard Brush (B) set at 2px – 3px, crosshatch in some more highlights with an off white color (#fff0e2). This will bring out the figure and detail a bit more against the textures and effects that were just added.
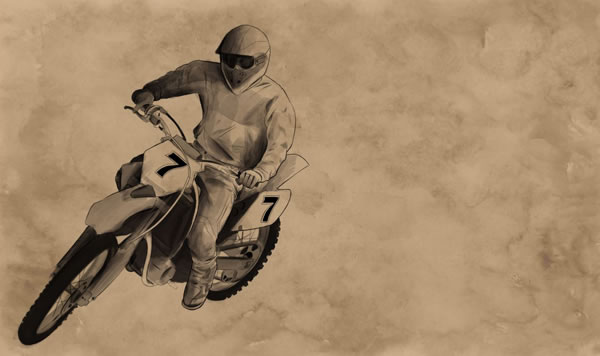
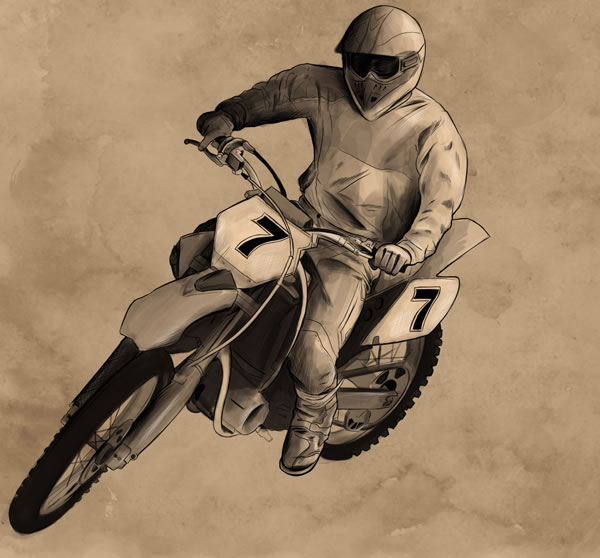
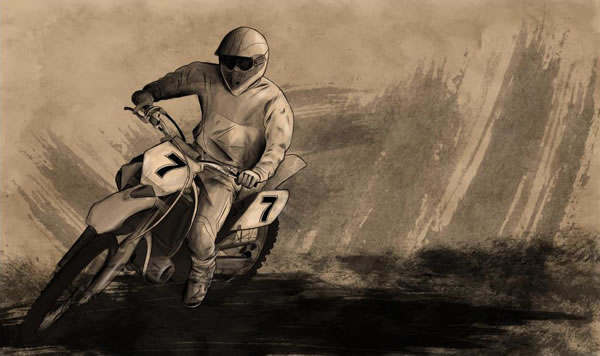
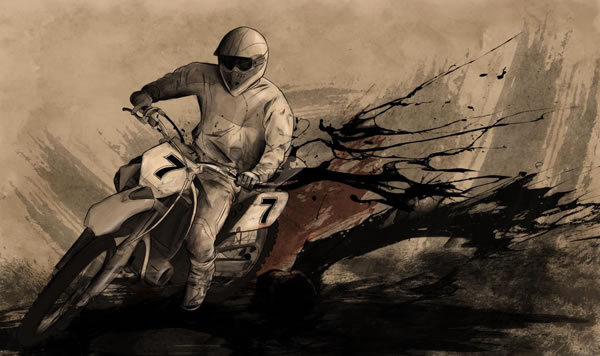
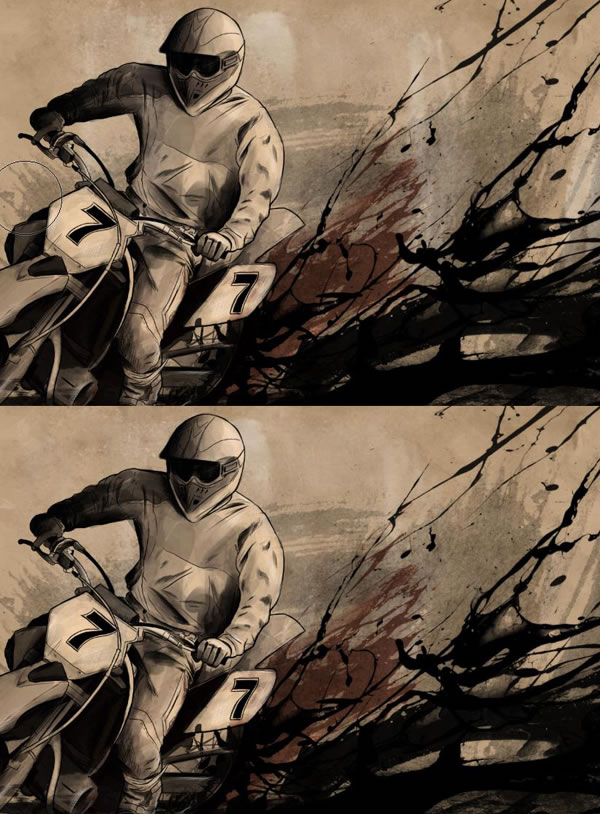
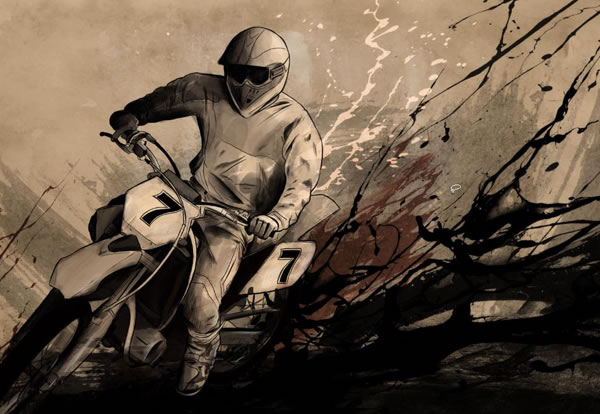
Congratulations! You’re Done.
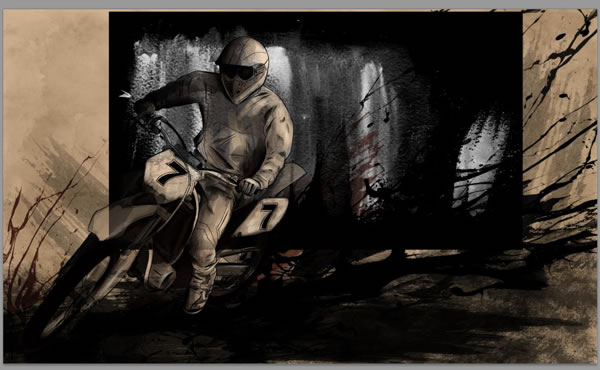
In this tutorial, I have explained how to create an exciting illustration using various stock elements, which imitate the look of a traditional art piece. This is a fun style to experiment with because you can create lots of interesting and eye-catching images with it. I hope that you have learned something from this tutorial and can use the techniques explained to create some fun projects of your own.

![]()